Ruffled Crepe Paper Garland
For this project you will need several items all purchaseable at AC Moore, or even Wal-mart. All in all this project costs less than five dollars, if you already own a sewing machine :)
2 rolls of crepe paper
1 spool of thread
1 sewing machine
scissors
Step One: Prep Work
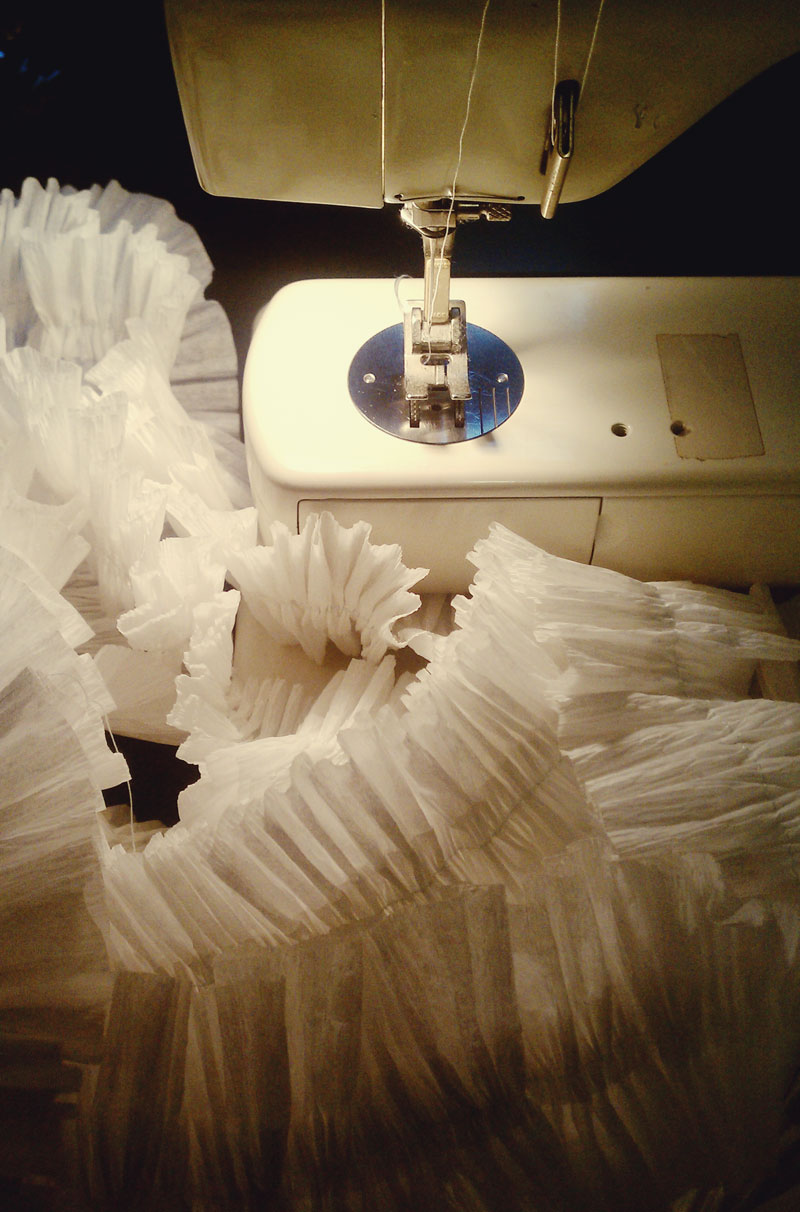
Prepare your sewing machine by threading your bobbin and needle and set your stitch length to it's longest setting, which is usually a five. You will also need to adjust the tension setting to it's highest, usually a 10. If you have an older sewing machine, you may not have the tension setting, don't sweat it. Then take your two rolls of crepe and set them side by side in your lap or where ever you prefer. Make sure you can keep the rolls at a steady unravel. You do not want them to spiral (as crepe paper so loves to do) while you are sewing.
Step Two: Get Your Sew On
Ok so now that you are all set up and ready, take both ends of the crepe paper roll and overlap them slightly. Place them under the foot of the machine and drop the foot down to prepare to sew. Sew a few stiches slowly down the center of the overlapping papers then stop. DO NOT LIFT THE FOOT OR BACKSTITCH. Gently tie the strings at the end of your streamer so that they will not unravel as you continue.
Step Three: Kick It Up A Notch
After you have secured the strings on the end of the streamer, it's time to get down to business. Holding your paper in the overlapping position, guide it through the machine at a quick pace. I found that the quicker I went, the more my paper ruffled. Depending on your machine, you may want to control the thread slightly for more ruffled effect. Do this by holding the thread spool lightly to slow it down while it feeds through the machine. Watch this step here!
Step Four: Fit to Be Tied
Once you have fed all of your crepe through the machine and reach the end, you will need to break your strings and tie them gently just as you did at the beginning of the streamer. That's all folks! You now have a frilly fun ruffled streamer to use as you like!
We used white on white for our streamer garland, but feel free to experiment and use as many colors as you like. This garland can be soft and feminine or loudly screaming paaartay, depending on the colors you chose! Happy sewing!