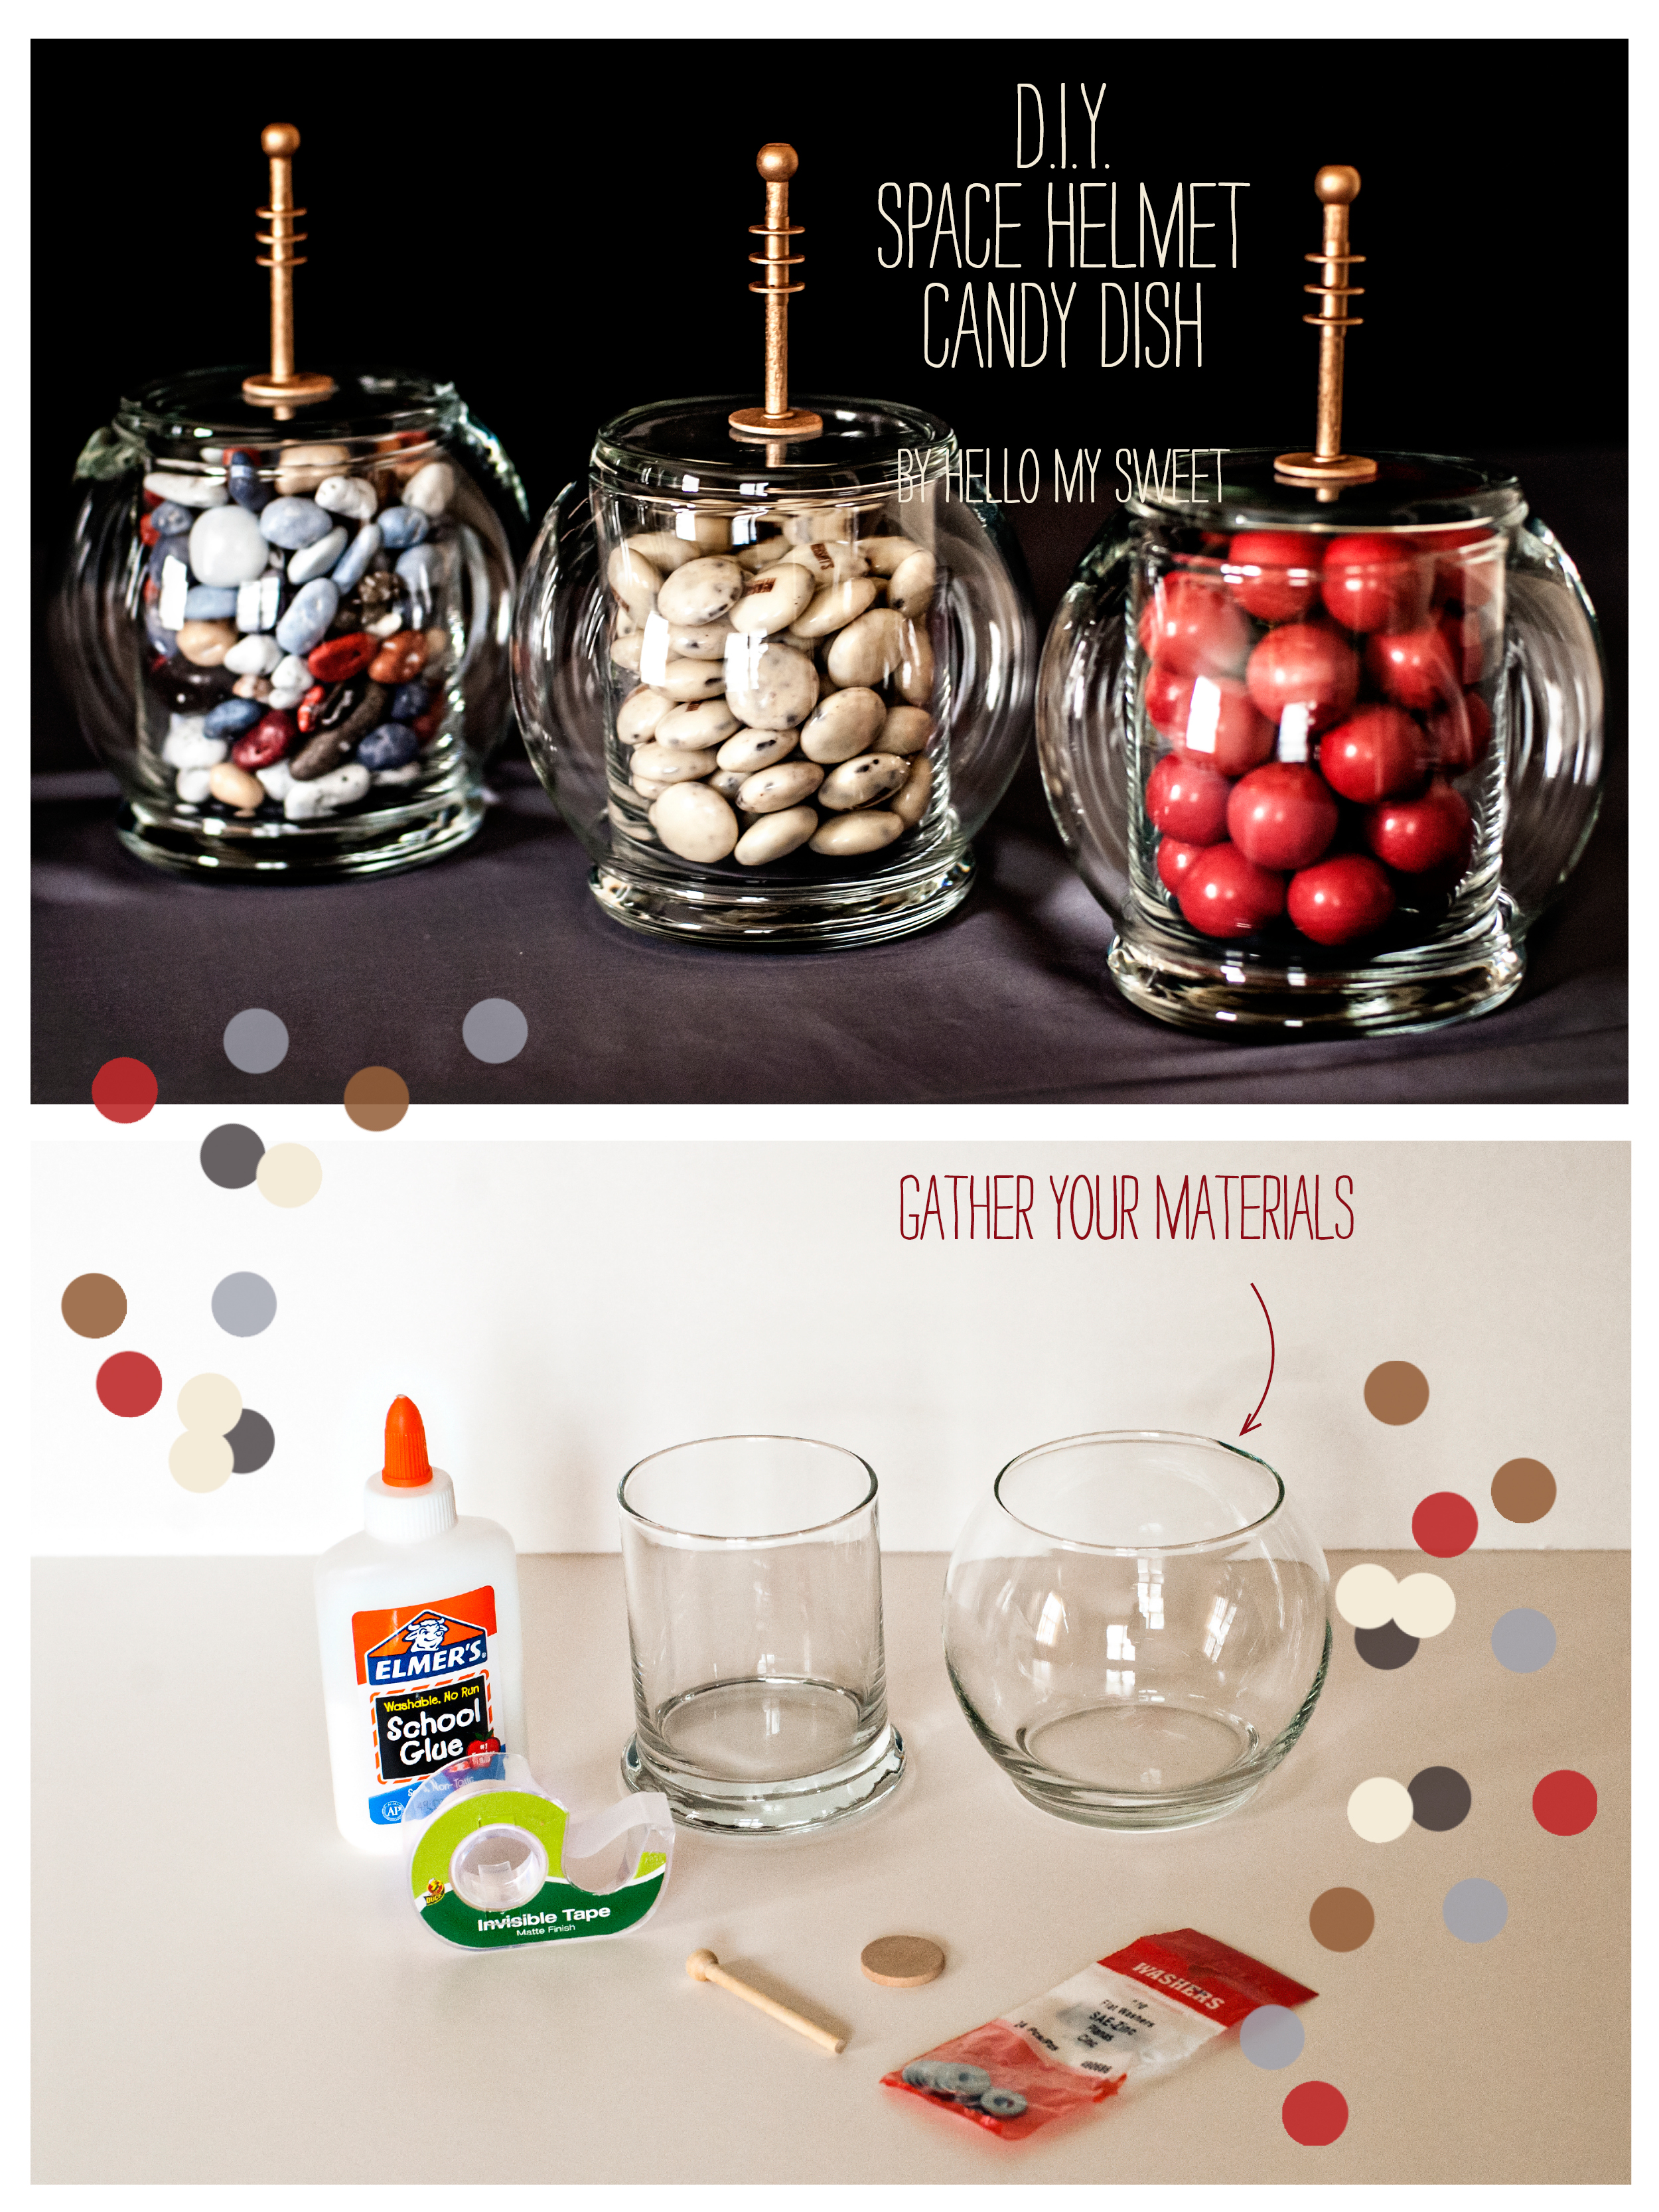
Astronaut Helmet Candy Dish
This DIY project and tutorial is so easy it is going to blow your mind. That is if the cost of this project and tutorial doesn't first! We are going to show you how to assemble these super fun and creative Space Helmet Candy Dishes that were featured on our Retro Space Dessert Table. If you happened to miss that post you are going to want to click that little link up there in the previous sentence and check it out. Jason really out-did him self with the creative ideas this time!
First things first, let’s talk about cost. Above you will see all of the materials used for this project. The Glass candle holders,(yes they are candle vessels) were found at Dollar Tree, so that is $2 bucks for the main part of the candy dish. The next part is optional and completely customizable. So you could quite literally not spend any more money at this point.
We used some simple wooden craft pieces and metal washers to create a “retro antenna” for the top of the “space helmet”. You can skip that step if you want, or you may find some other bits and pieces you like to use better. Ours was a mish-mash of found objects that combined into pure awesome. If you were to purchase those bits and bobs though, you would only be spending just a few bucks. We also chose to paint our antenna with some gold spray paint we already had on hand. Again, your choice, decorate however you see fit!
Here is the official material list as we completed the project:
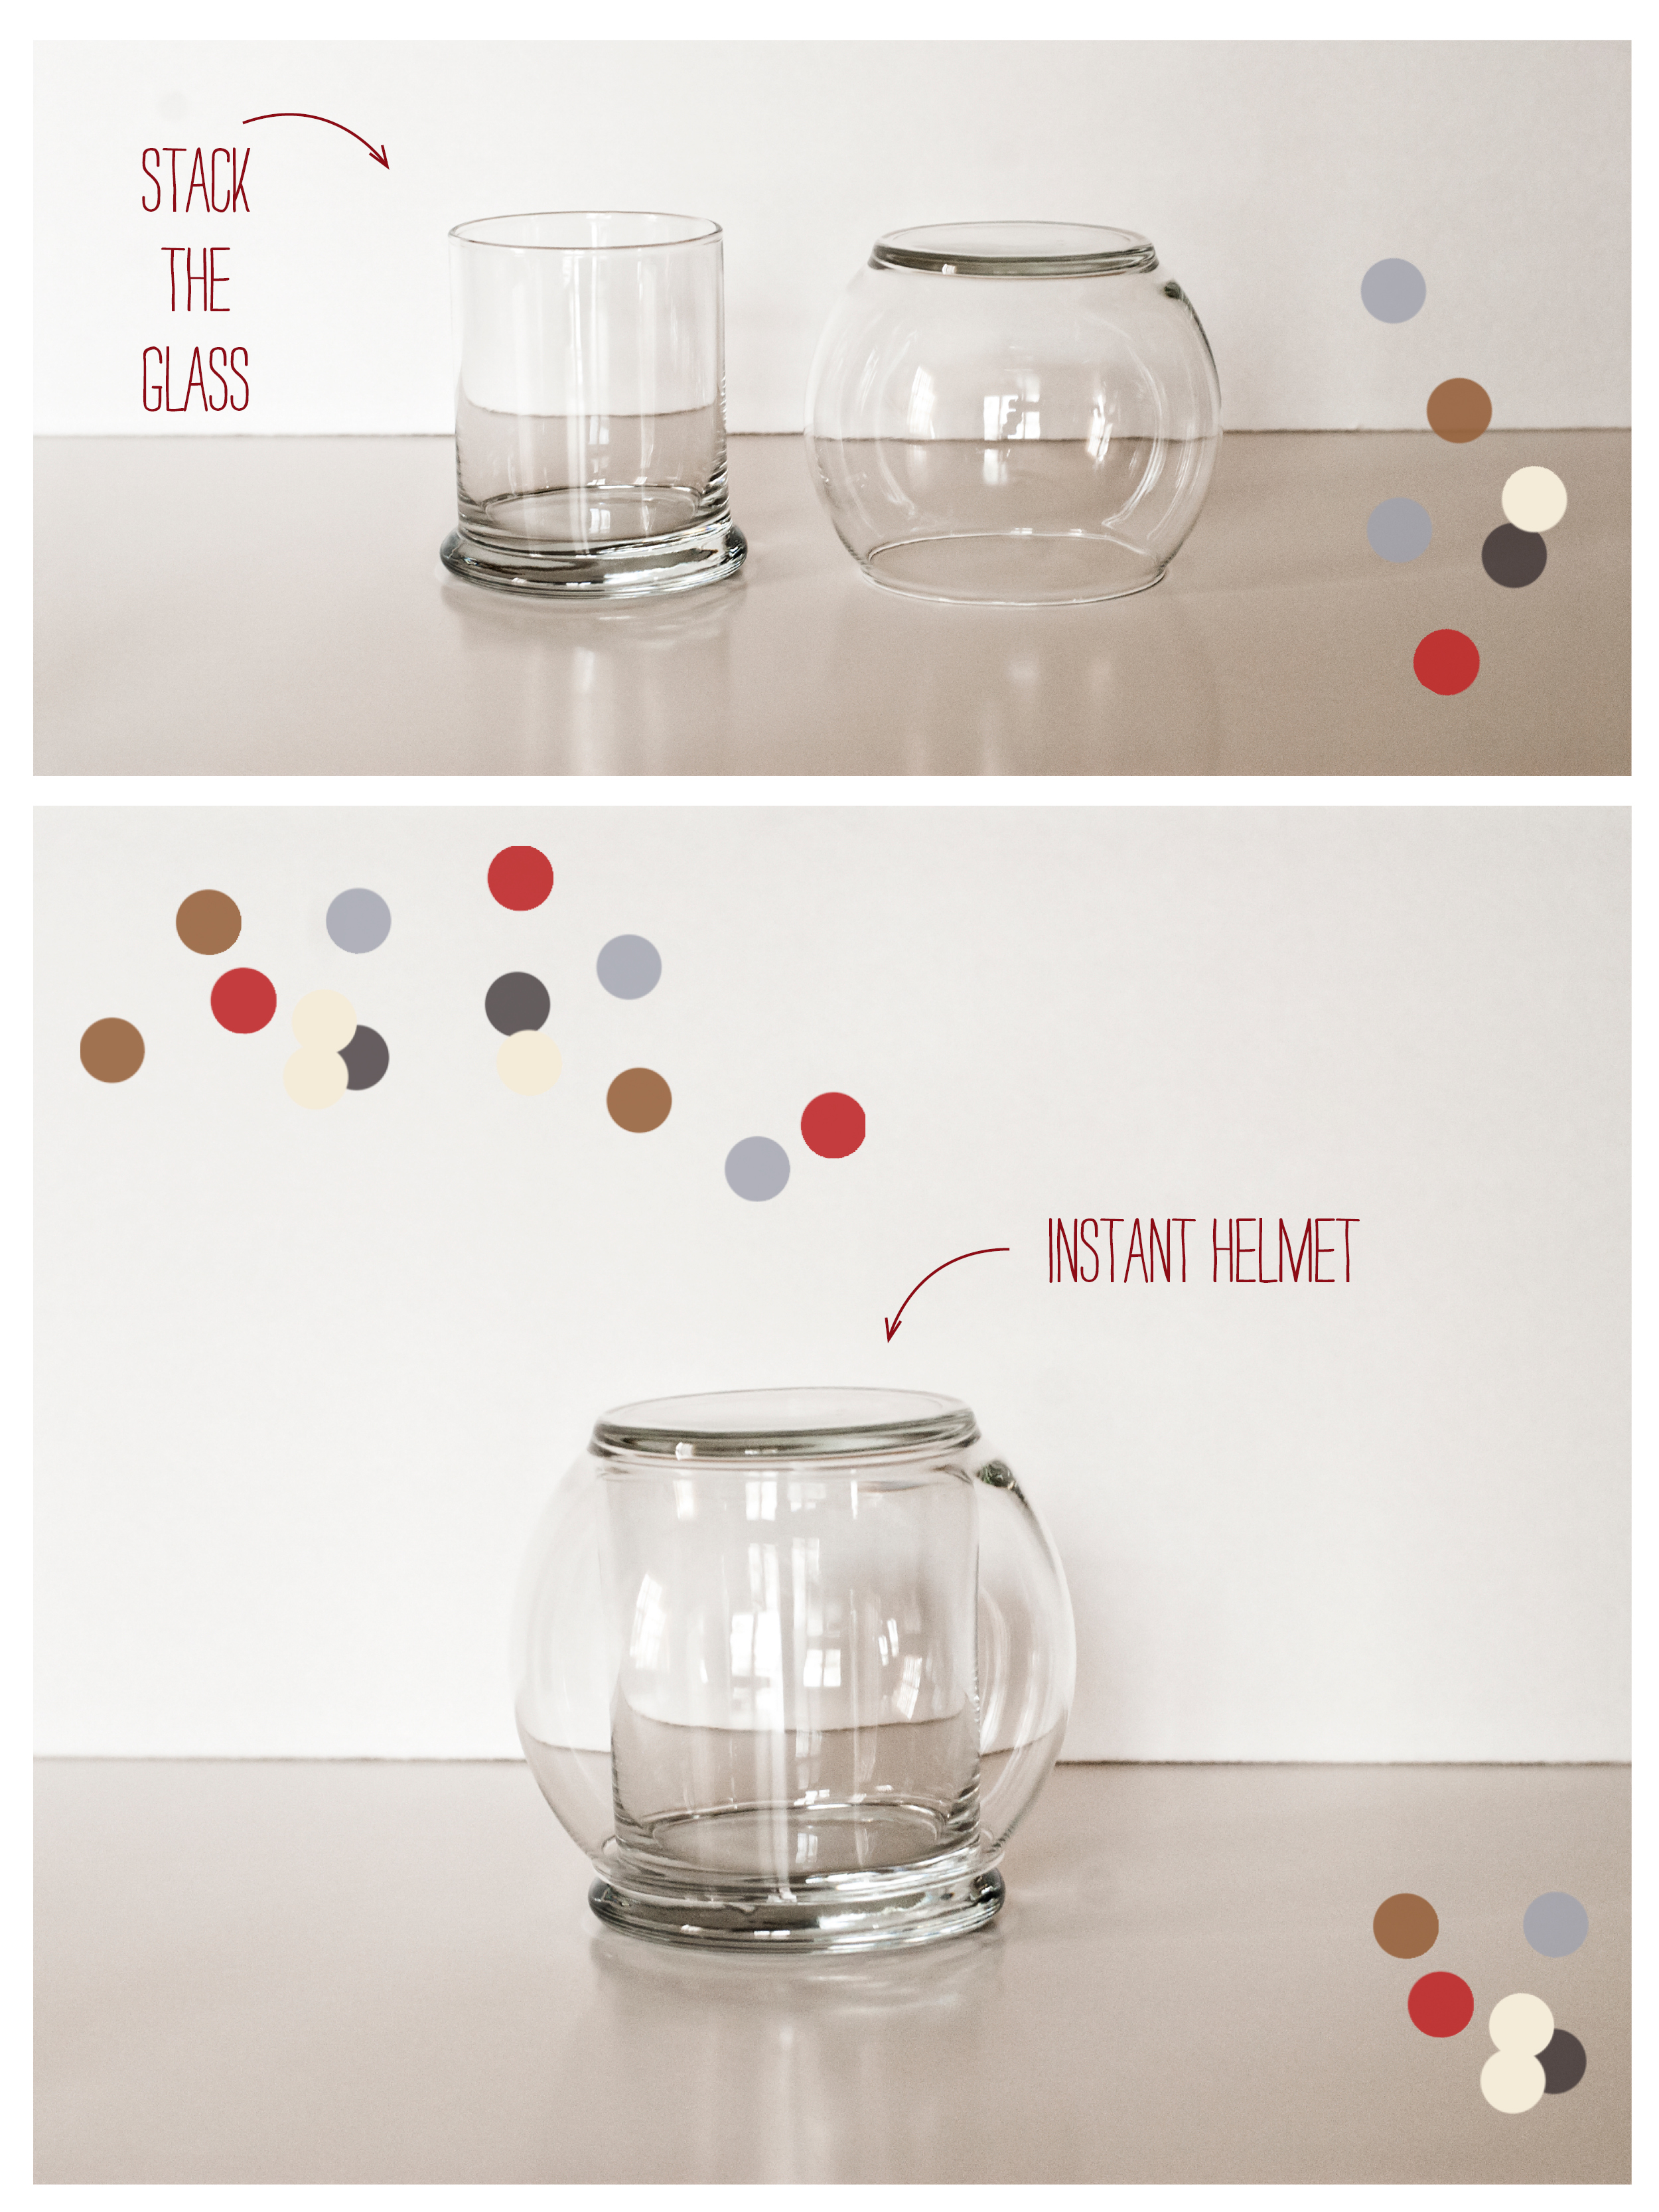
Glass containers, one Cylindrical, one Globe - make sure to test them out before you bring them home to see if they fit easily together and apart.
Wooden Pieces - one for antenna, one for base - our antenna had a ball already attached at one end
Small Washers - make sure these fit onto your wooden antenna piece
Tape
Glue - Craft, Hot, Super
Spray Paint (or craft paint and applicator)
Step One: Like we mentioned in the material list, you want to make sure your two glass pieces fit nicely together without being too snug to fit together/apart. We recommend testing this BEFORE you bring them home :)
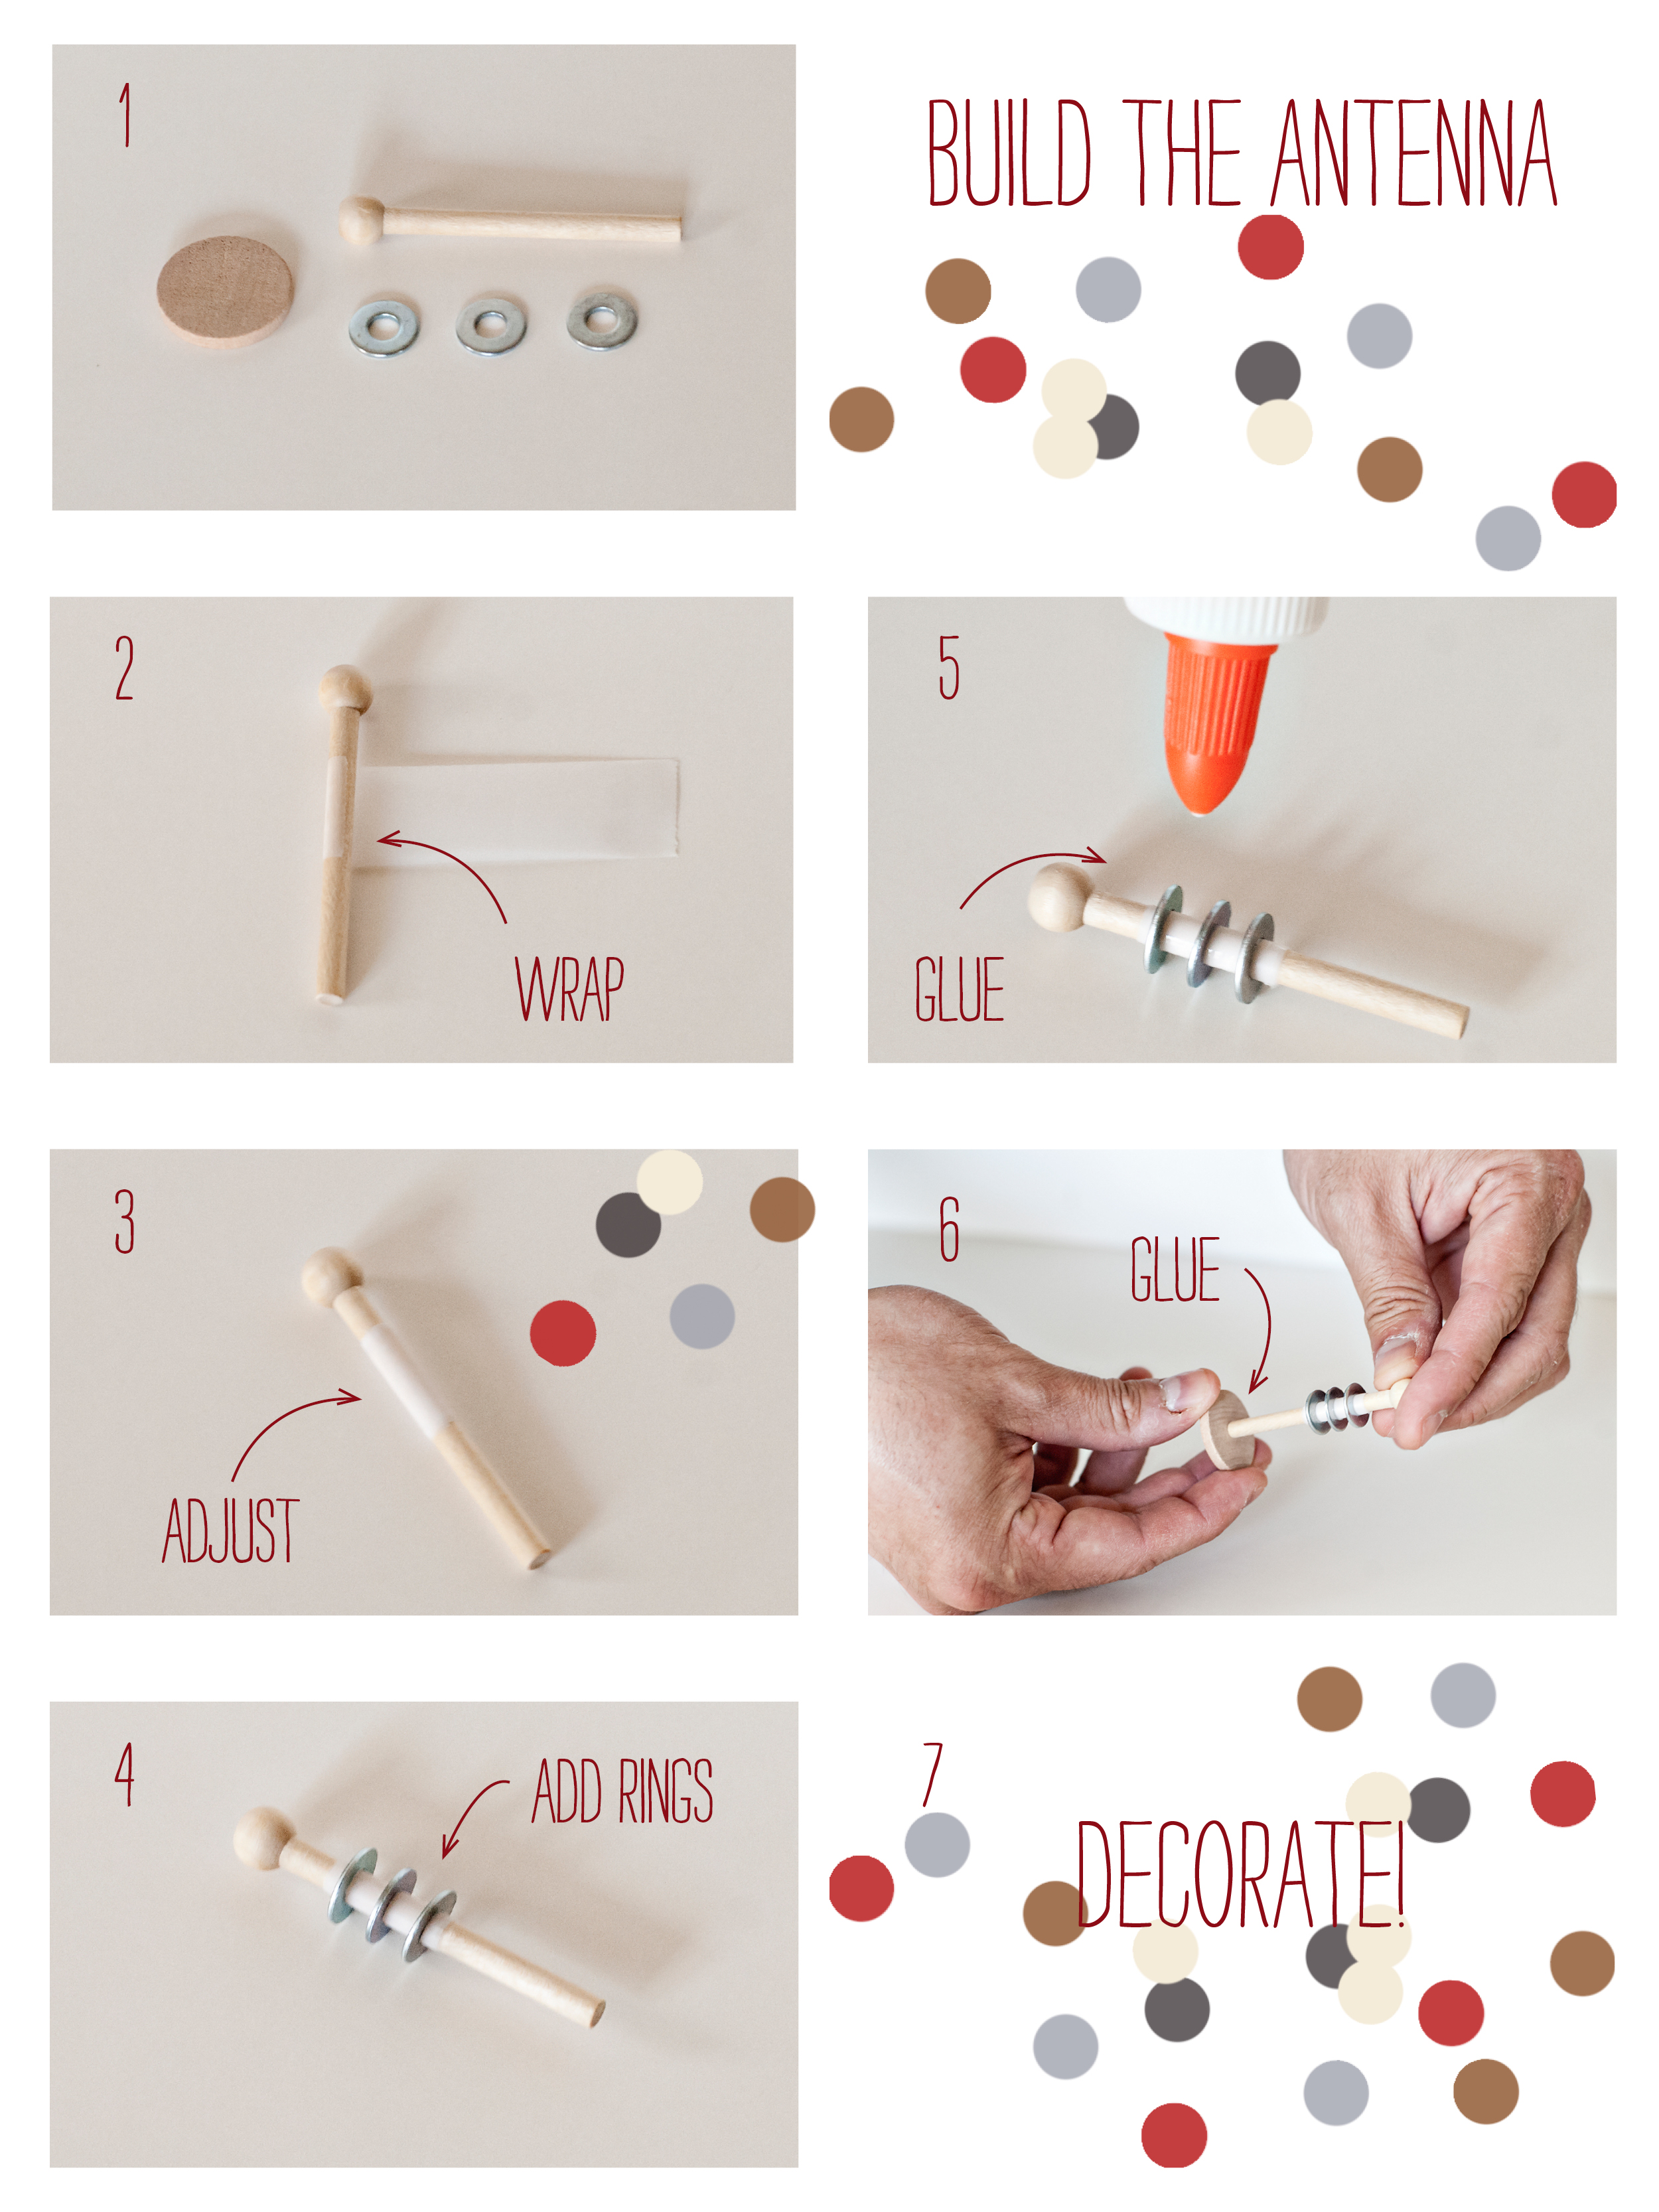
Step Two: If your washers weren’t quite the perfect fit for your wooden antenna piece, you will need to add a bit of cushioning to make them fit snugly around. We used tape and wrapped it around to make things fit nicely together. Thread your washers on, then spread your glue in between and around so that they are sure to stay put. Let this dry before you move on. When your antenna is ready, go ahead and glue it to the small wooden circle, and again let dry before moving on. We used Elmer’s glue but in hindsight super glue might have been easier, we’ll let you decide!
Step Three: Decorate it! As we said above, we sprayed our antenna with gold spray paint and let it dry. You could just as easily use a metallic craft paint or even cover it in glitter if you want it to sparkle! Once your decoration method is dry, it is time to attach the antenna to the helmet top. The helmet top of course is the bottom of the glass globe. We used hot glue to do this because we wanted to make sure our efforts were temporary and that we would be able to re-use the glass pieces again in the future. Hot Glue doesn't bond well to glass and usually pops right off with the tiniest of force, so if you want your more permanent you may need a stronger adhesive.
And there you have it! A super duper inexpensive and easy way to transform some very plain-jane glass containers into something a lot more interesting for your party!