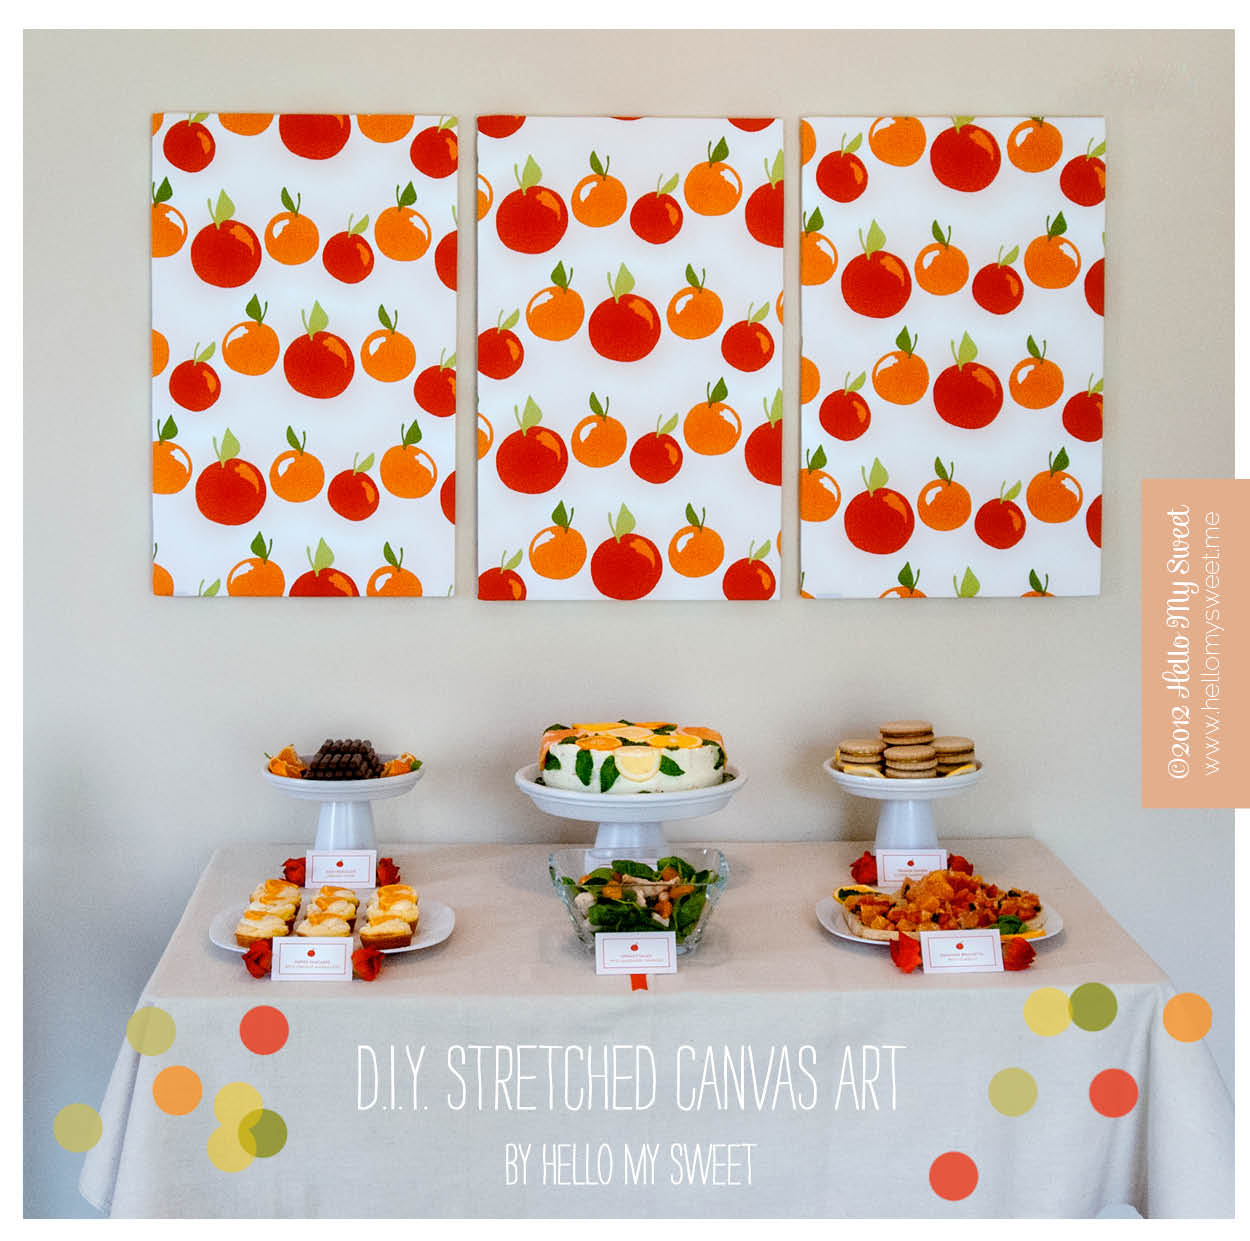
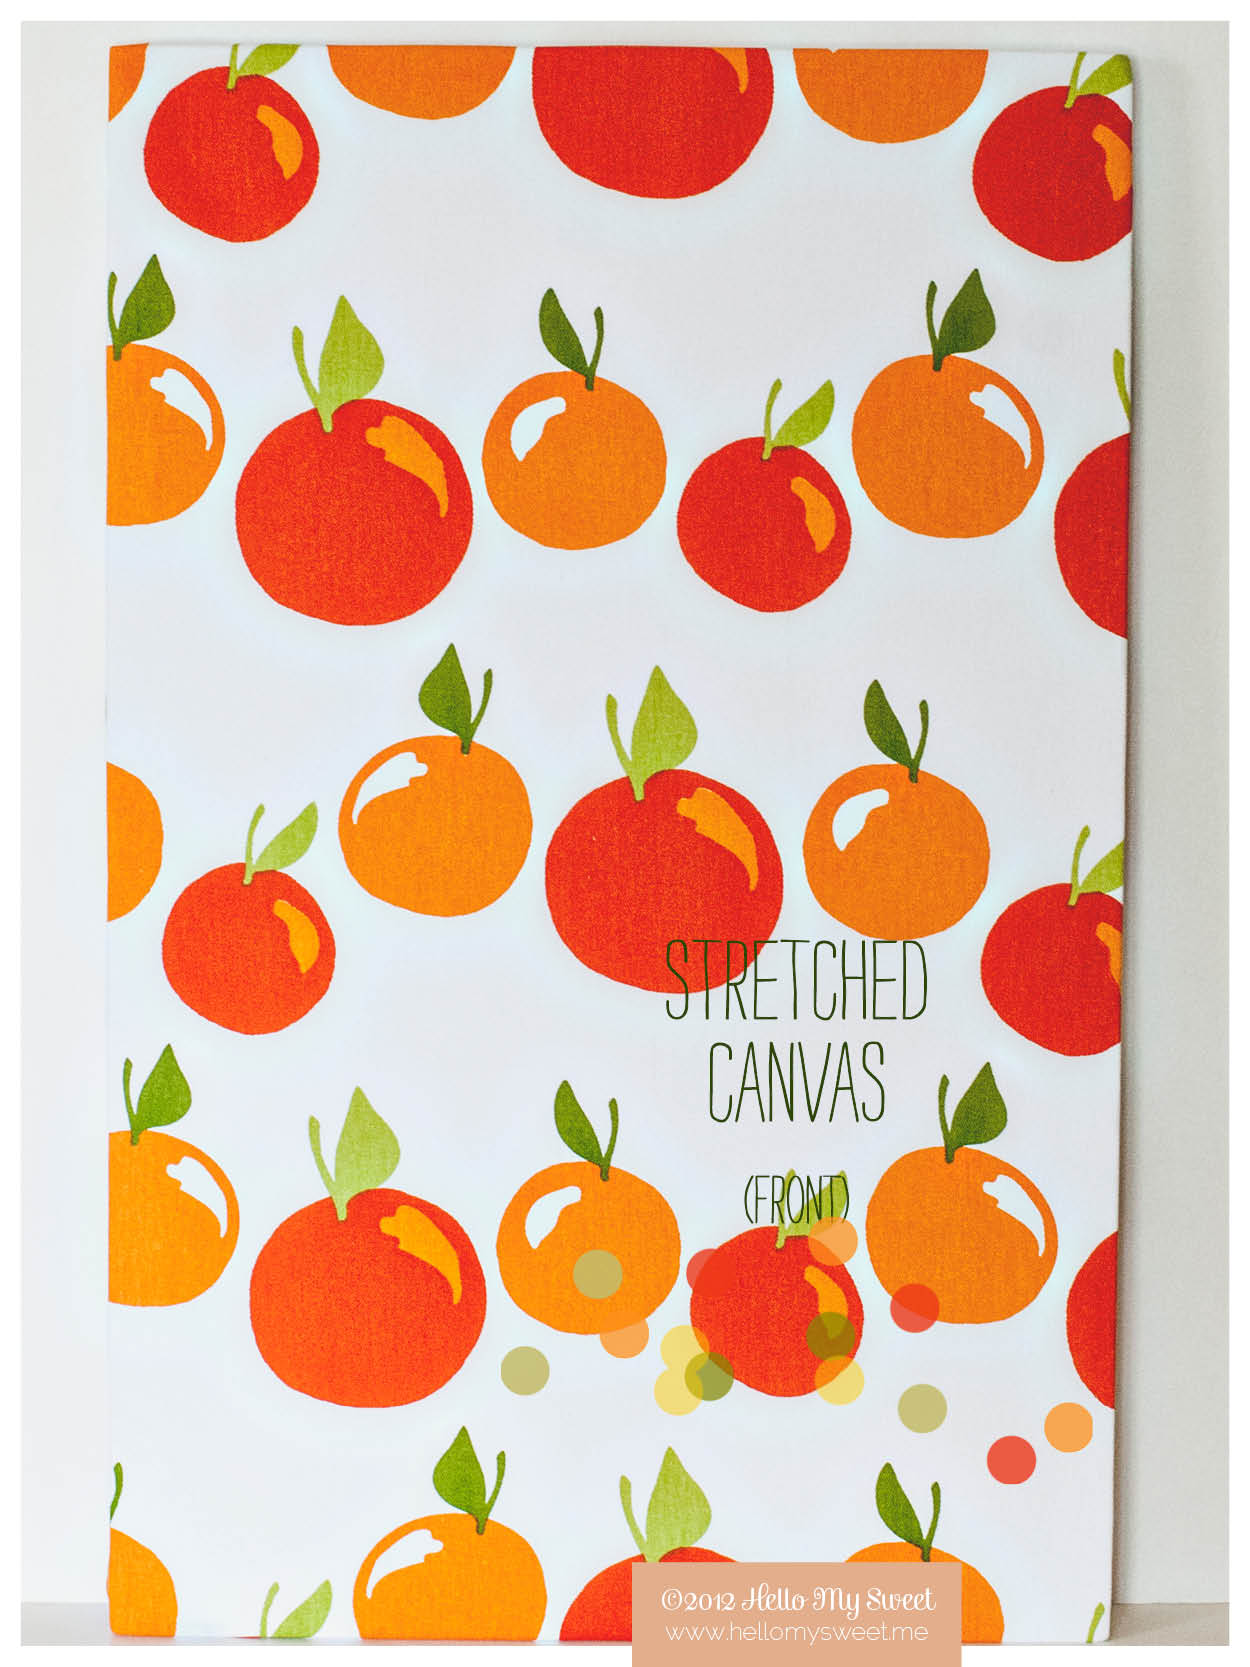
Easy Canvas Art
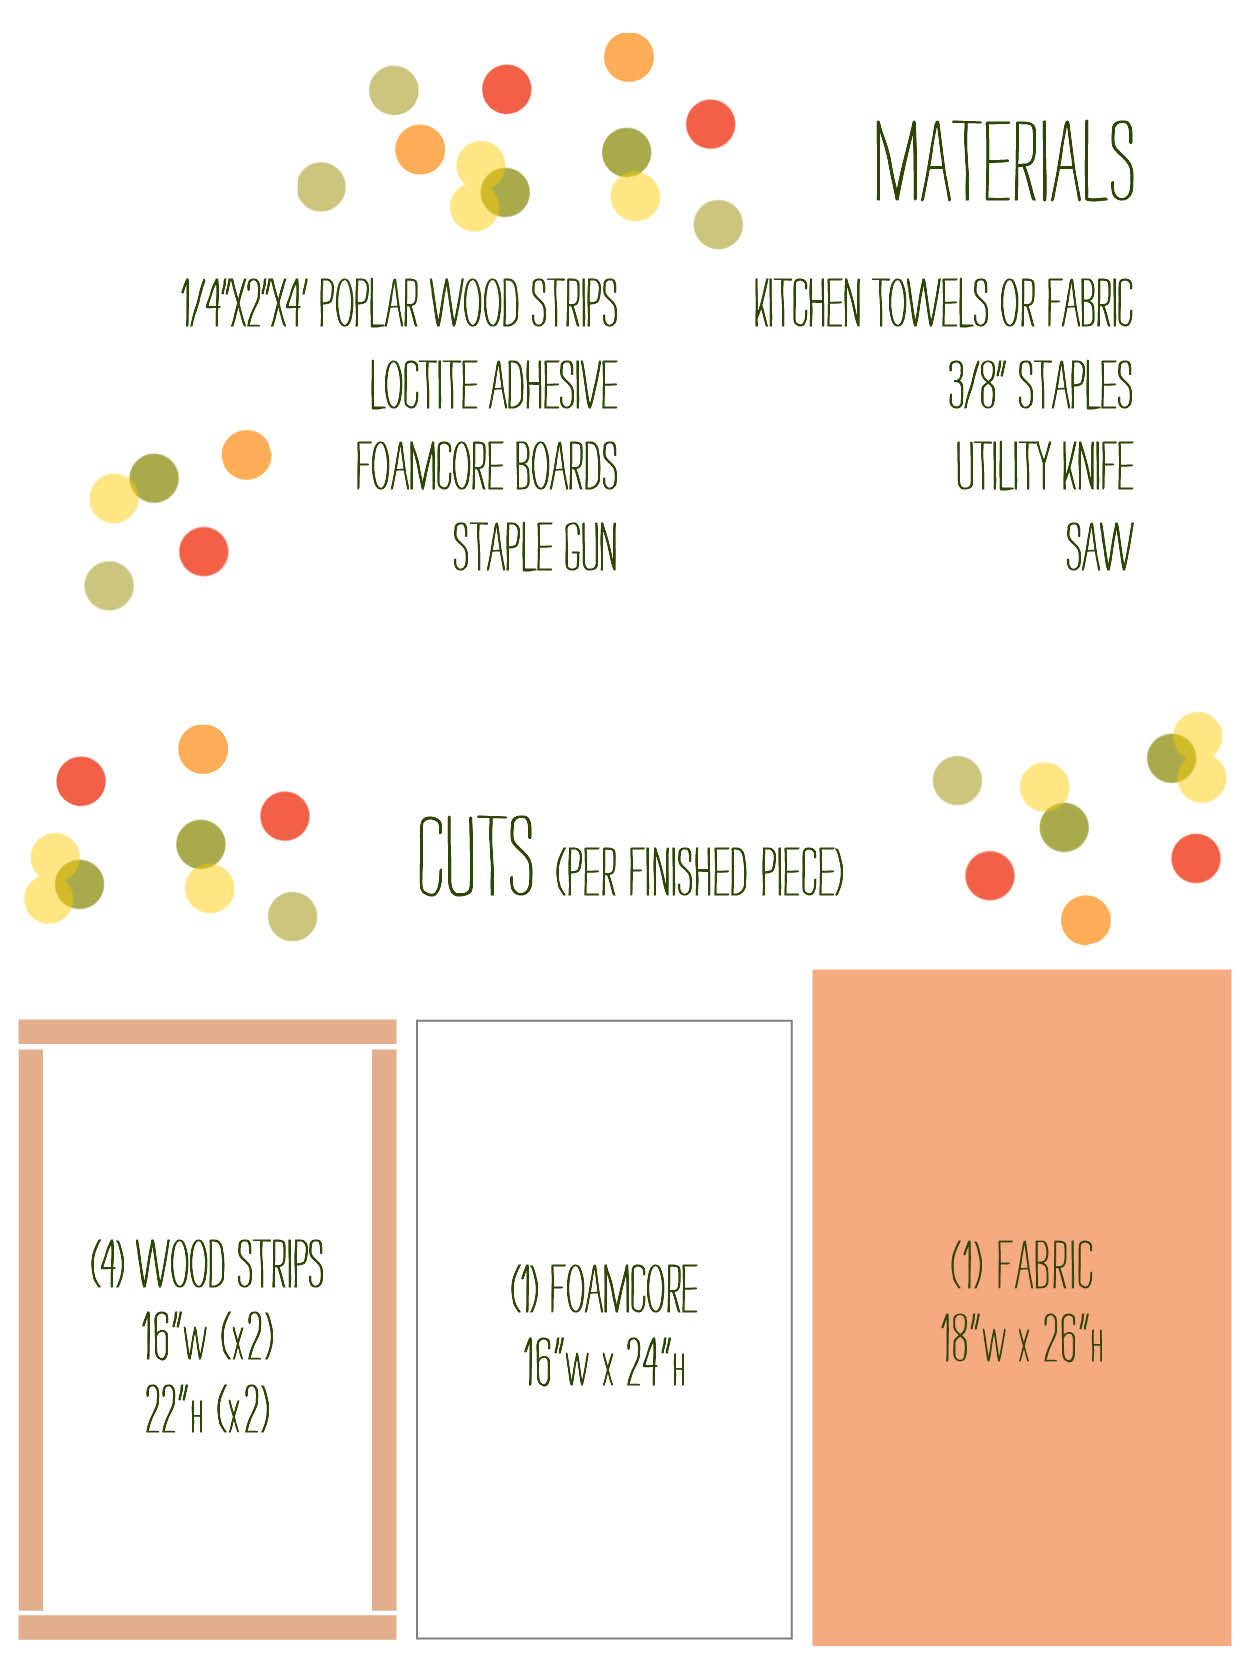
We are going to demonstrate for you how to build a frame and stretch the fabric across it. Ours had specific dimensions due to the fabric we chose, which were actually a 3-pack of kitchen towels from Target. So they were already sized and we built our frame to accomodate that size. However you could pick any fabric you want and make your frame any size you want as well, using our technique as a guide. Take notice that NO NAILS or MITRE BOXES are required for this project. Super duper easy.
Step One: Lay your foam core down onto the fabric you chose. Adjust so that the foam core rests on top of the fabric with at least 1” of fabric extra on each side. Then cut the excess fabric away. You should now have a piece of fabric with 1” or more overhang all the way around each side of the foam core.
Step Two: Measure the width and height of your foam core. Mark your wood strips accordingly so that you have two pieces to cut as your width. Subtract two inches from your height measurement and mark two more pieces to cut at that final measurement as well. Cut your wood pieces. Our foam core is 16”w x 24”h, so we had two wood pieces at 16”w and two wood pieces at 22”h. (See photo for example.)
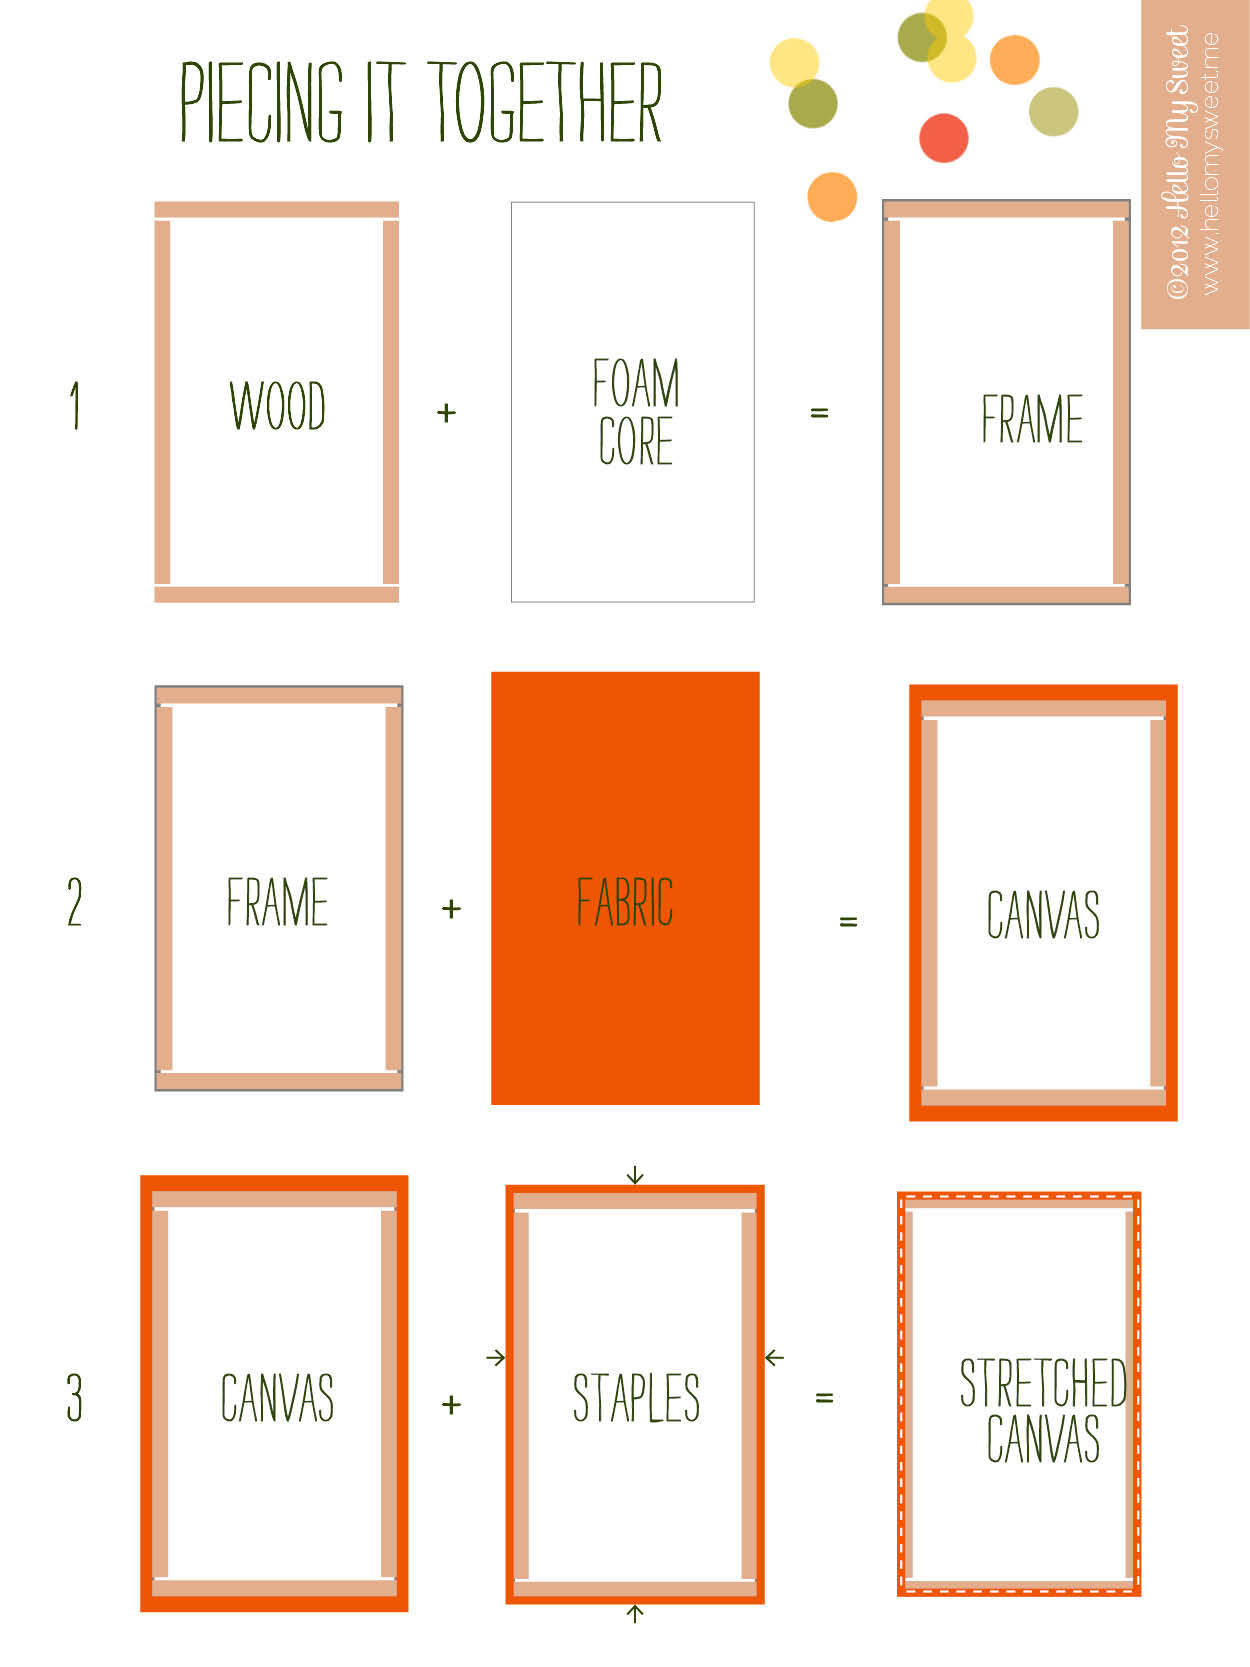
Step Three: Assemble your frame by laying our your wood pieces on top of the back side of the foam core. Lay your width pieces down first, they should stretch equally from edge to edge of the foam core at the top and the bottom. Then lay your height pieces down, they should meet up with the top and bottom pieces you already have and fill in the gap on the left and right sides of the foam core, completing the frame. Once you have everything as it should be, secure it in place with your loctite adhesive. (Photo example #1 below.)
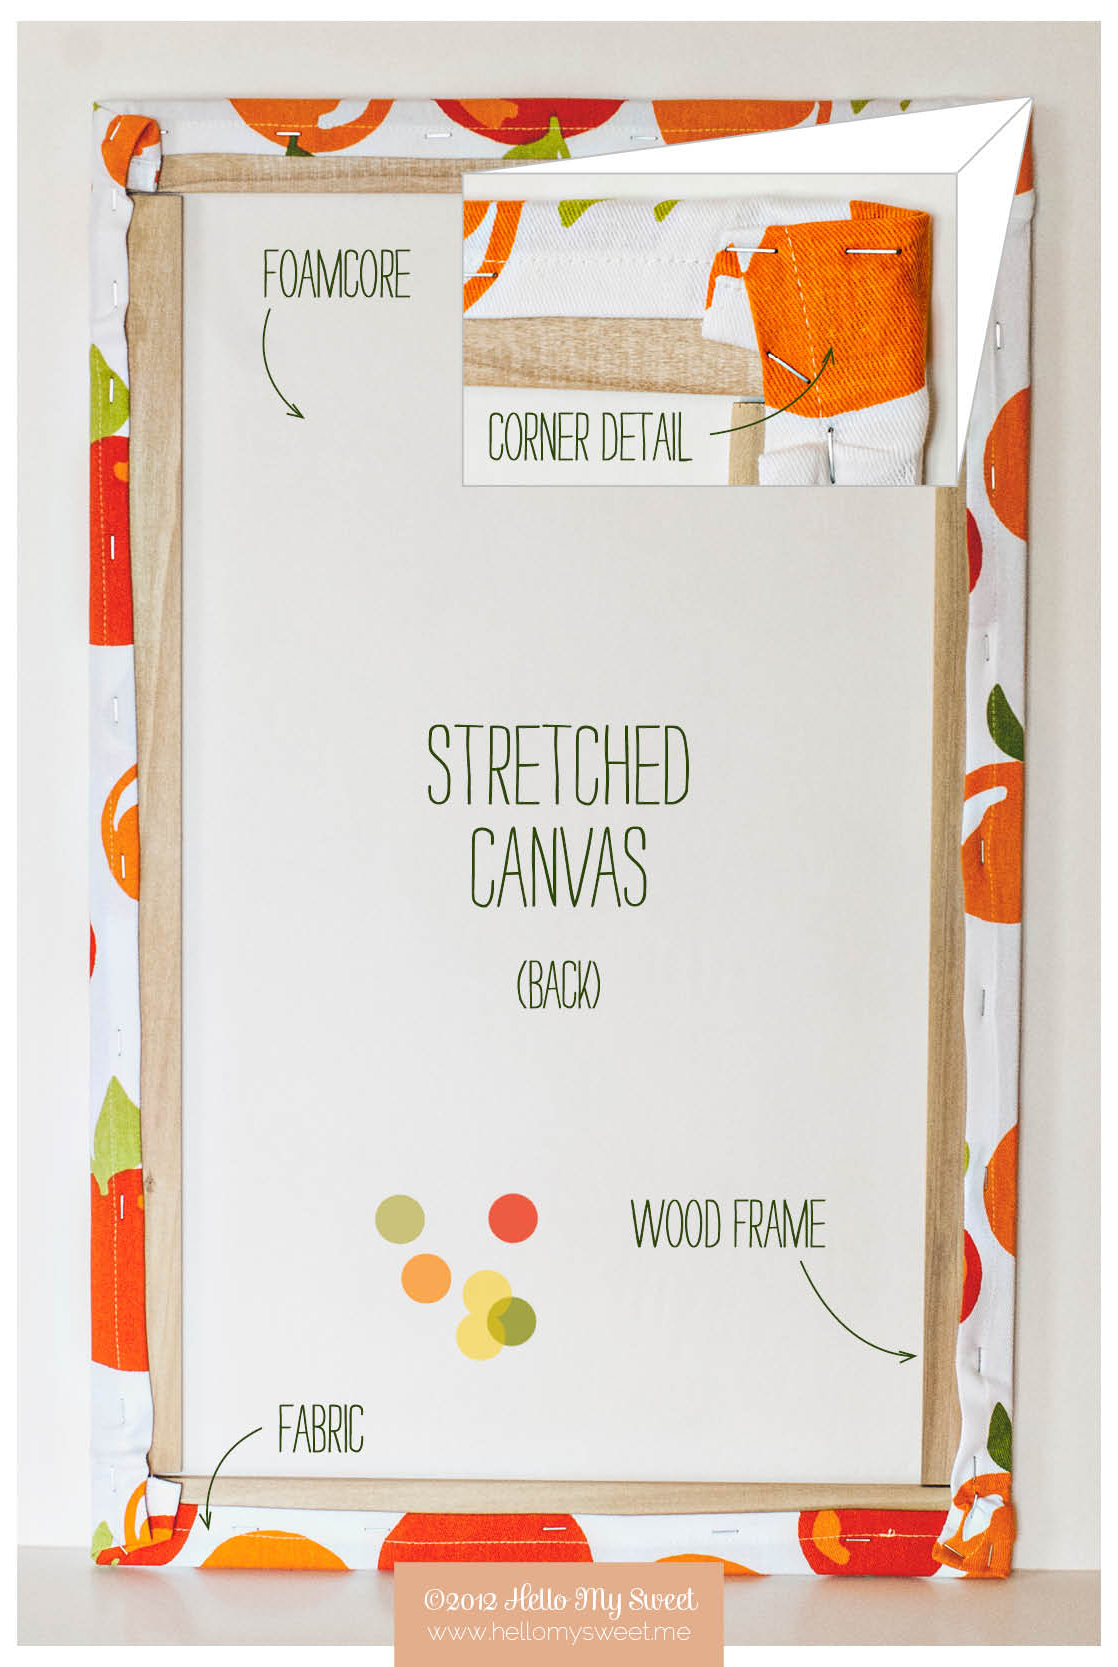
Step Four: Place your fabric wrong side up and place your finished frame on top, wood side up, foam side down. Position it as you did when measuring in Step One. You should have your frame centered with at least 1” of extra fabric on all sides.(Photo example #2 above.)
Step Five: Using your staple gun to secure it, careful pull your fabric tight over the center of one side of your wood frame and staple it there. Do this for all four sides, stretching your fabric carefully and evenly and tightly across the frame, secure it with one staple. (Photo example #3 above.) You should now have your fabric secure to the frame. Proceed by stapling the sides the rest of the way, working from the stapled center point out toward the corners on all sides, leave the corners for last. When you are ready to finish the corners, tuck the excess fabric in on the sides, then pull the corner tightly toward the center of the foam core and staple to the wood frame. (Corner detail example below.)
Step Six: (Optional) You can add a picture hanger to the top of your frame to make hanging easier.
Well there you have it! Stretched Canvas Art without a hammer, nails or mitre box. (Jason is pretty genius right?) Imagine the possibilities. I bet you’ll never overlook that awesome fabric pattern online or that cool vintage patterned table cloth you spotted again. Now you have a reason to take them home and make them into your own wall art!