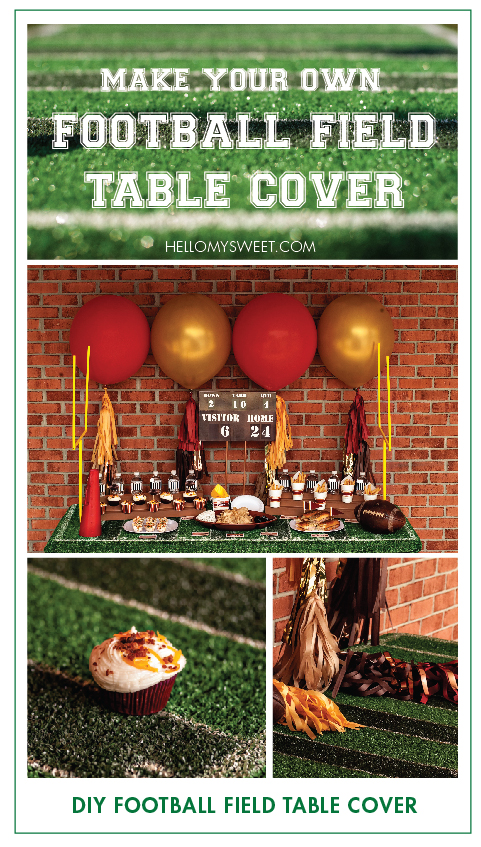
Football Field Table Cover
You will need:
Heavy-duty scissors (to trim the sides of the rug)
Antique White spray paint (or paint brush and craft paint)
Dark Green spray paint (or paint brush and craft paint)
Staple gun
Number stencil
Roll of masking tape
Foam core or cardboard (for the lines on the field)
Poster board or cardboard
Utility knife
Pencil
Measuring tape
An important thing to remember is to make sure you have a space large enough for you to work comfortably. We have an unoccupied apartment beneath ours that I have access to that provided an excellent work space. An empty garage or even a driveway would suffice as well.
Step One:
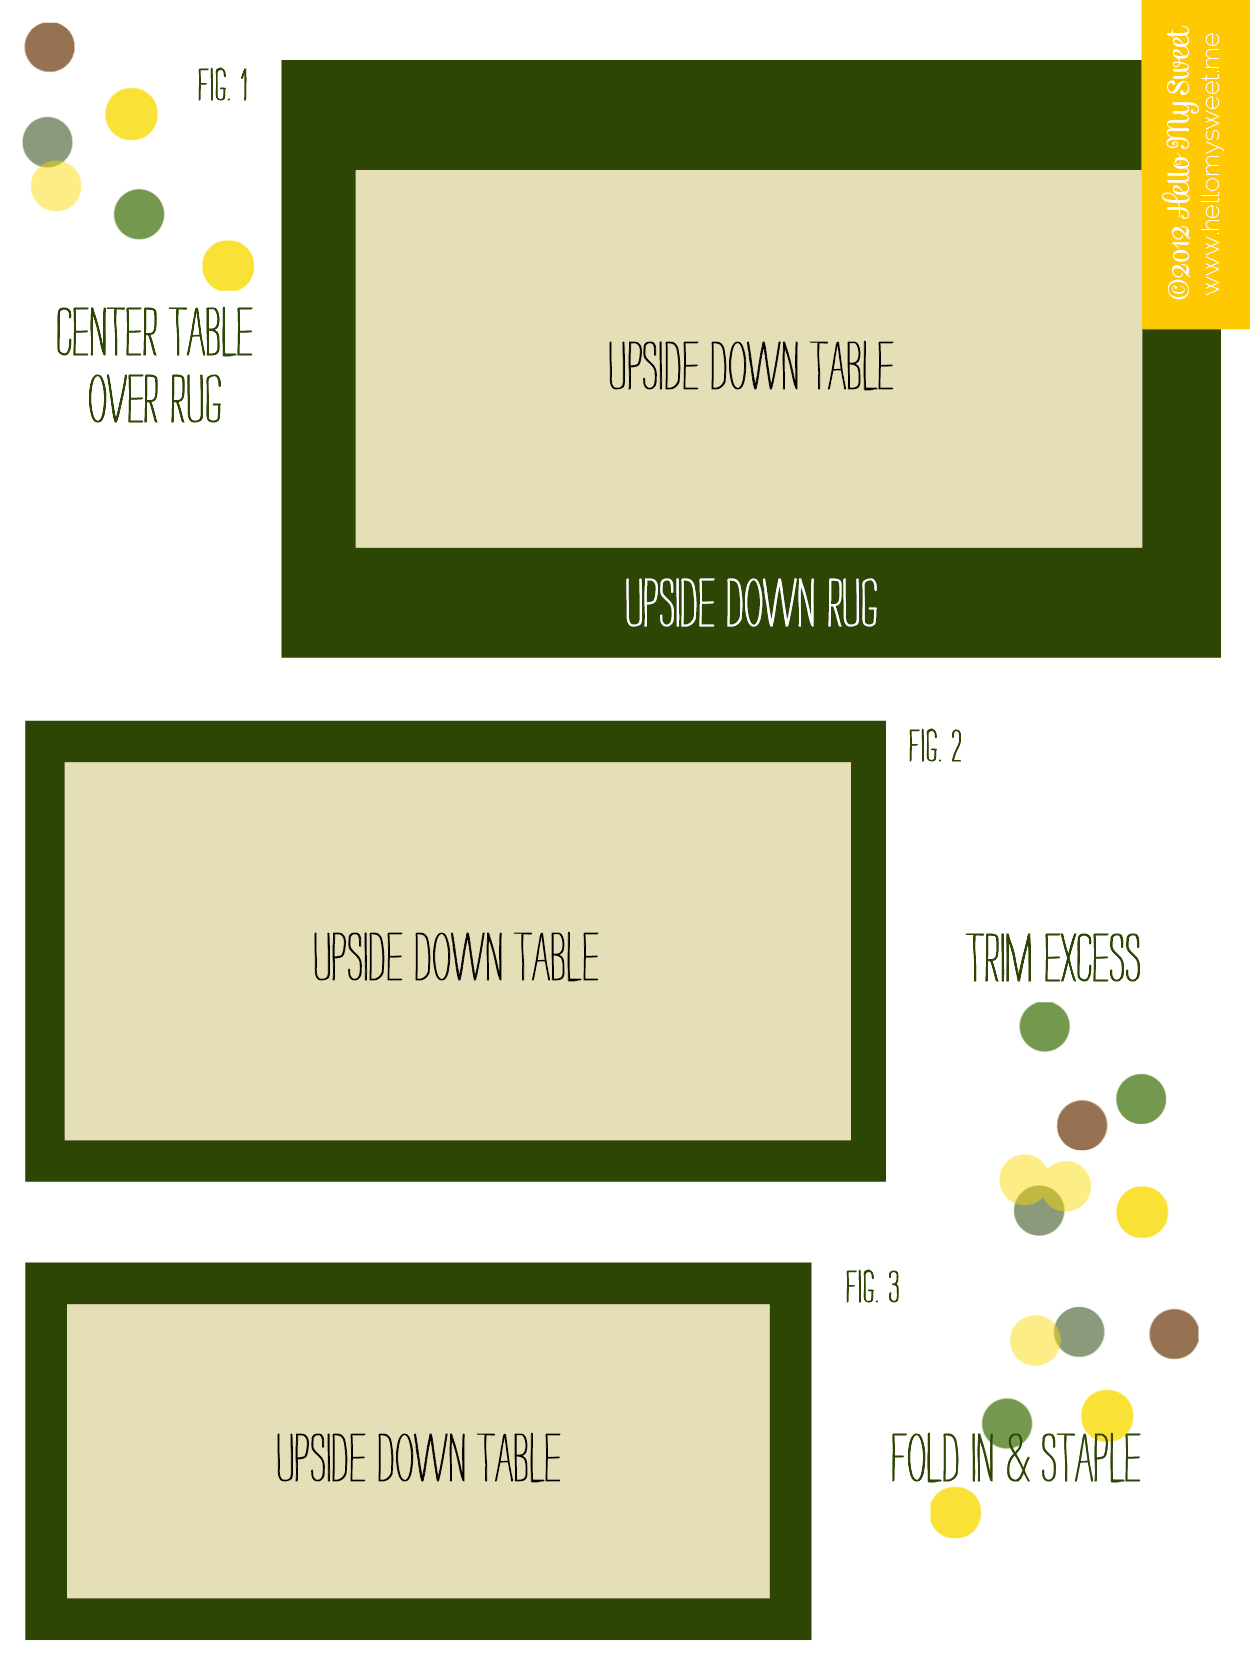
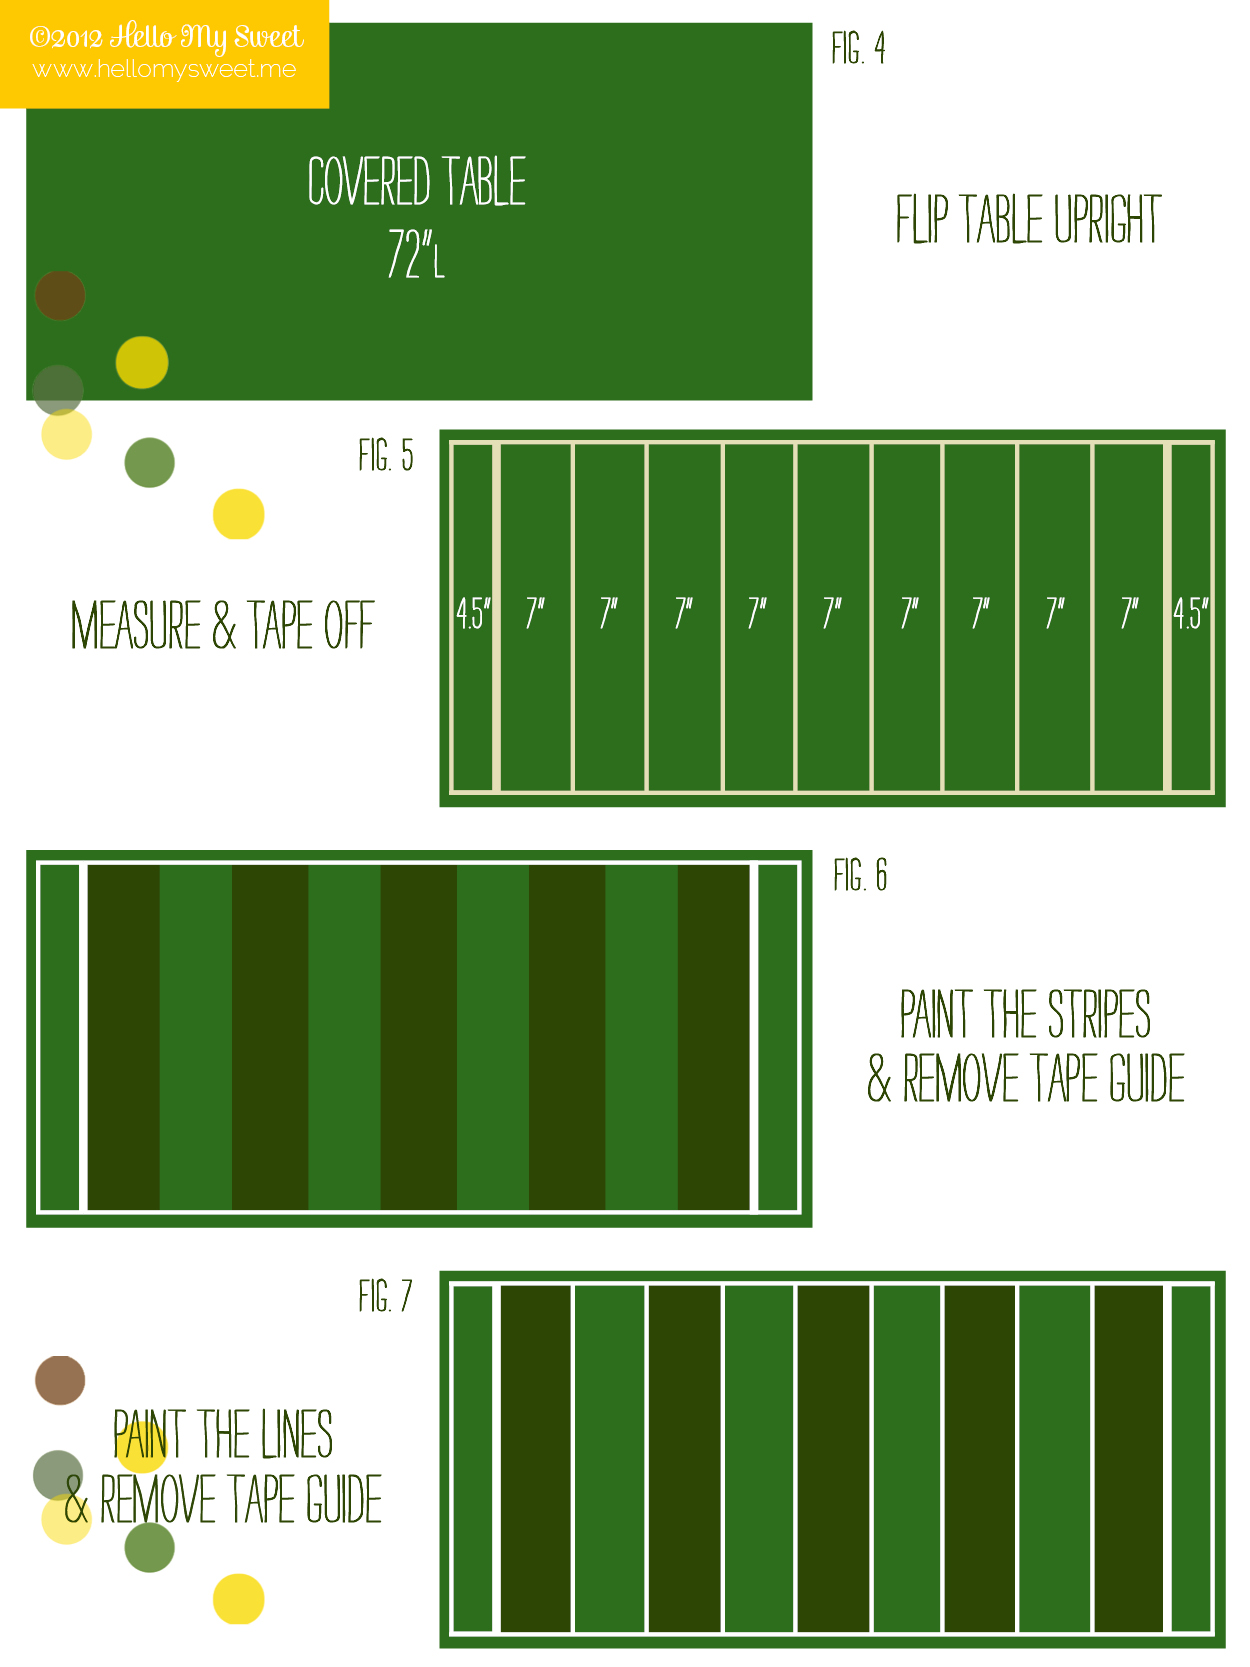
Unroll the outdoor rug and lay it upside down on the floor. Place the folding table, unfolded and legs locked into position, top side down onto the underneath side of the rug. (Fig.1) Trim off about 1 foot from either side of the 6 foot side of the rug. (Fig.2) Tightly fold up the edges of the rug and staple (with the staple gun) them to the underside of the table. (Fig.3) With that done all you need to do is to flip the table right side up. (Fig.4) You now have “blank” football field to work with!
Step Two:
Mark out where your lines will go down. (Fig.5) I used the following picture to give me an idea of where the lines needed to be in relation to the field. With a measurement of 72” long for the table, you can place 9 (7”) sections in the center of the field, and 2 (4.5”) section at either end for the “End-Zones.” You may find it easiest to mark the center of the field first and work your way out on either side. (Measuring 3.5”inches to the left and right of center first, then 7” sections on either side afterwards.) Tape down the end zone and yardage lines with the masking tape.This will serve as your guide to paint.
Step Three:
Using the dark green paint, paint every other 7” strip in the field, starting with the left side and working your way right. (Fig.6) You should end up with 5 dark stripes. You can use craft paint for this (easier to control) or make yourself a stencil that masks off the area you do not want painted so that you can use spray paint. We used spray paint, but if we were to do it again, I would opt for a paintbrush and paint instead, much less room for error! Let this dry before moving onto your next step.
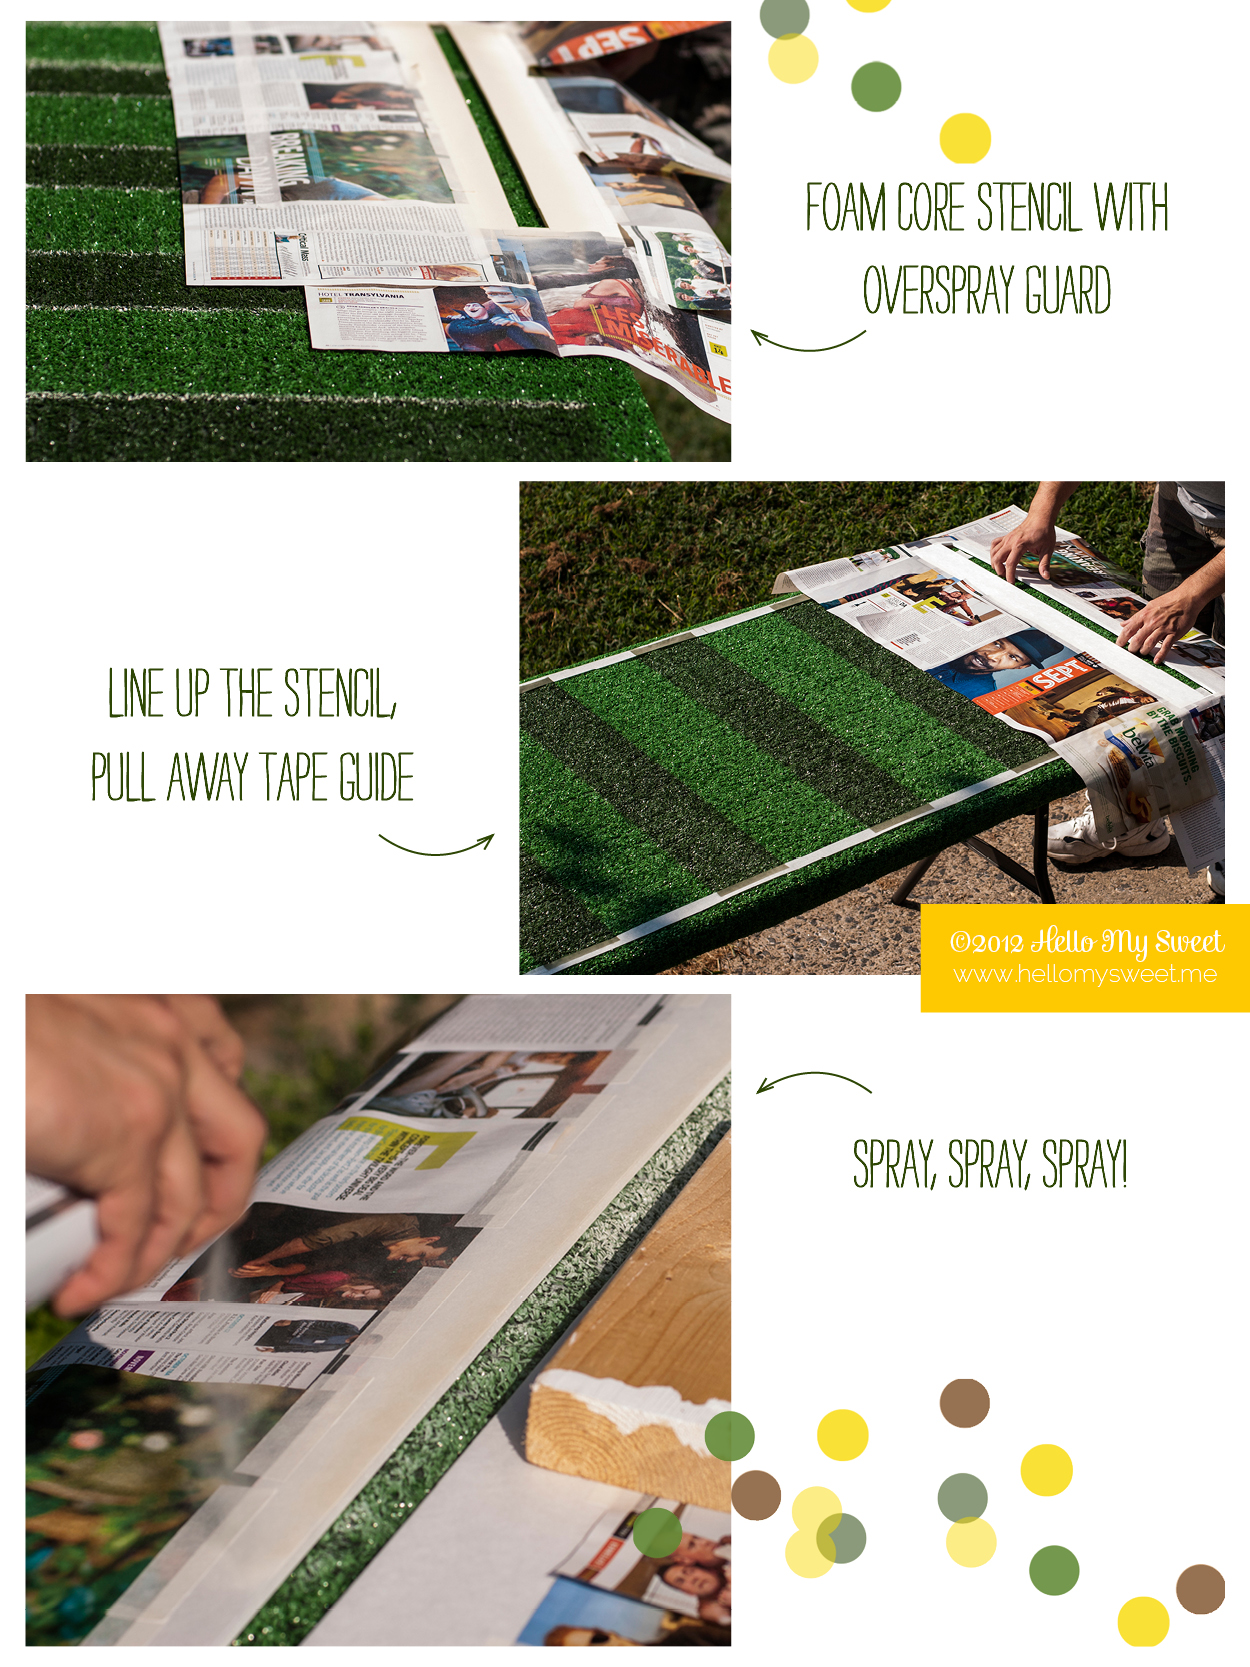
style="font-family: proxima-nova; line-height: 19.5px; margin: 0px 0px 1.5em; color: rgb(82, 82, 82);">Step Four:
Take the foam core and cut out a line stencil, the same width of the masking tape. You will use this stencil as a guide to paint your white border lines. (Fig. 7) When I was ready to paint a section of line, I would line up the stencil with my masking tape and pull off the tape up through the stencil hole right before painting. Alternatively, you can use a paintbrush and craft paint for this as well, again much more control and less room for painting errors! Let this dry before moving onto your next step.
Step Five:
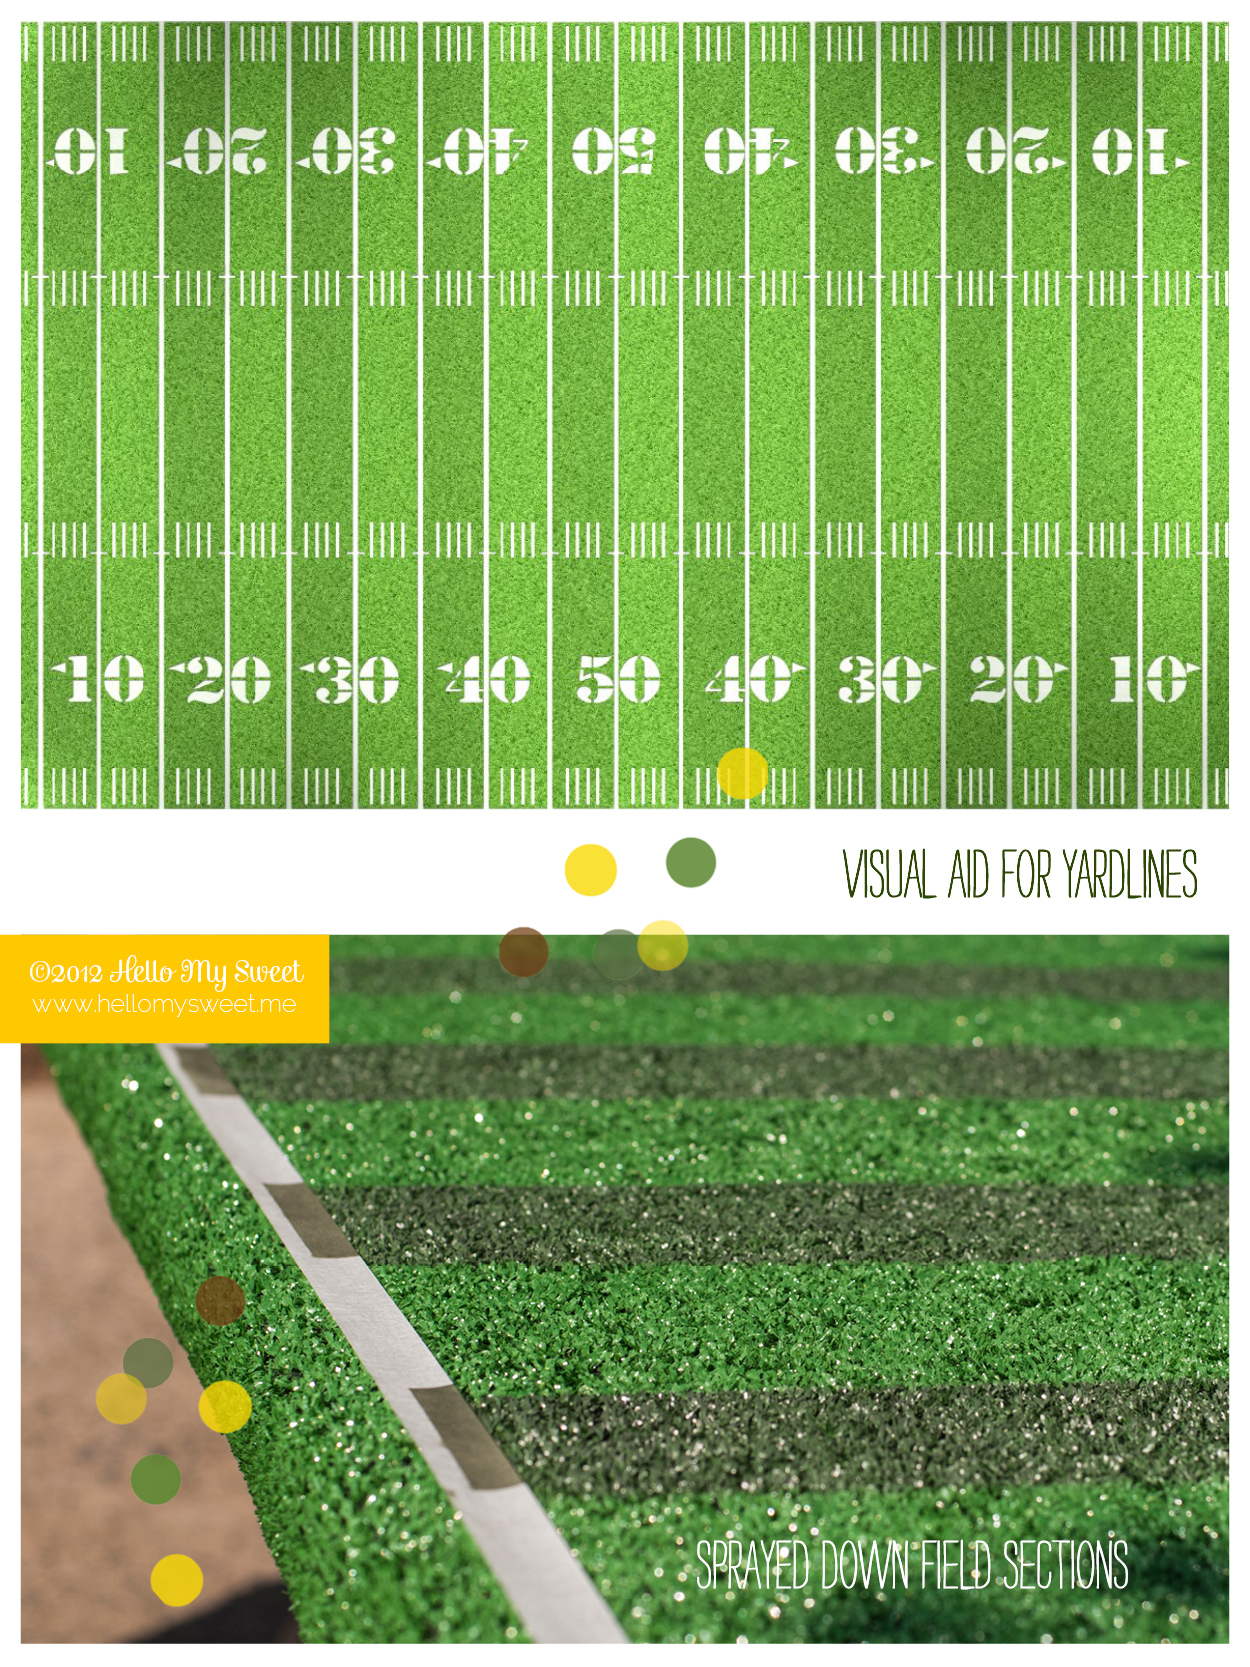
Time for yardage! Taking the numbers stencil, I cut out the numbers 1, 2, 3, 4 and 0. Take some scrap poster board or cardboard and cut out a border to expand the edges of your stencil and protect from paint overspray. This extra border is not necessary if you plan to paint with a brush instead of spray paint. Making sure to pay attention the direction of the field you are painting on, and using the field diagram picture as a guide, spray down the numbers onto the field. Let those dry for approximately an hour, then stand back and admire your handiwork!
This table cover accompanies our Vintage Football Party, perfect for tailgates, super bowls or just a sports theme birthday!