• Home
  • DIYs & Recipes
  • Party Gallery
  • Blog
  • Downloads
  • Contact
Menu

Hello My Sweet

Street Address
City, State, Zip
Phone Number
Printable Party Decorations, Party Inspiration, and DIY Projects

Hello My Sweet

  • Home
  • DIYs & Recipes
    • Citrus Cake Recipe
    • Easy Canvas Art
    • Clay Pot Cake Stand
    • Football Party Cupcakes
    • Football Field Table Cover
    • Life Preserver Donuts
    • Retro Ray Guns
    • Astronaut Helmet Candy Dish
    • Mummified Candy Bars
    • Foo Fighter Treats
    • Killer Halloween Sugar Cookies
    • Candy Apple "Staked Hearts"
    • Mummified Pretzel Treats
    • Skeleton Bone Treats
    • Peanut Butter Ghost Treats
    • Gooey Zombie Brain Cupcakes
    • Reanimated Marshmallow Pops
    • Best Pumpkin Cake Recipe
    • Easy Acorn Cookies
    • Caramel Corn Stalks
    • Sweet Potato Cupcakes with Toasted Marshmallow
    • Spiced Candied Nuts
    • Geometric Modern Easter
    • Ruffled Crepe Paper Garland
    • Cake Stand Ribbon Skirt
    • Wooden Dessert Stand
    • Red Velvet Cake
    • Ombre Clothespin Garland
    • Flamingo Sugar Cookies
    • Painted Tree Ornaments
    • Patriotic Cupcake Wraps
  • Party Gallery
    • Zombie Strike Nerf Party
    • Jaws Shark Party
    • 50s Diner Party
    • Football Party
    • Spooky Gothic Halloween Party
    • Nerf Party
    • Star Wars Party
    • Circus Carnival Party
    • Adventure Time Party
    • Space Rocket Party
    • Citrus Summer Party
    • Vintage Movie Night
    • Walking Dead Party
    • Valentine Party
    • Cherry Blossom Party
    • Garden Tea Party
    • Thanksgiving Dinner Party
    • Chevron Pattern Party
    • Gatsby Peacock Party
    • Cardinal Birch Winter Party
    • Mad Men Christmas Party
    • Flamingo Party
    • Rainbow Party
    • Easter Party
    • Customer Submissions: Eve's Geek Chic Jaws Party
    • Customer Submission: AJ's Jaws Birthday
    • Customer Submission: Vintage Circus
    • Customer Submission: Shabby Chic Cowgirl Party
    • Fancy Cupcakes
    • Cakes, Cookies & Mini-Desserts
    • Spring Themes
    • Summer Themes
    • Holiday Themes
    • Fall Themes
    • Weddings & Bridal Showers
    • Birthdays & Baby Showers
    • Valentines & Super Bowl
  • Blog
  • Downloads
  • Contact

Citrus Cake Recipe

I fell in love with a cake. June 14th, 2011.

Of course I never got around to making it. That is until we settled on a summer Citrus Brunch Celebration and started planning our menu. Then out came my “Cakes” board and the Citrus Cake was re-pinned to our “Citrus Brunch Ideas” board. It was finalized. This cake was going to happen. In my kitchen.

Enough talk of my cake love though, here is the recipe we adapted from Apollinas.

Citrus Cake with Orange & Lemon

Ingredients

2 sticks unsalted butter, at room temperature

2 1/2 cups all-purpose flour

grated zest of 2 oranges

grated zest of 2 lemons

1 1/2 tsp baking powder

1/4 tsp baking soda

1/2 tsp salt

1 1/2 cups granulated sugar

2 tsp vanilla extract

3 eggs, room temperature

1 cup milk

Non-stick baking spray

Parchment Paper, cut to fit the bottoms of your baking pans.

Assorted citrus fruits, sliced and drained to decorate with.

Fresh mint leaves, for decoration.

Directions

Heat your oven to 350°F and prepare two 8″, 9″ or 10″ cake pans. I prefer to use Pam for baking, and spray the pans generously, then line the bottoms with parchment paper and spray again. I find it is easier than buttering and flouring. 

Whisk together the flour, baking powder, baking soda, and salt in a bowl, then set it aside.

With an electric mixer, beat the butter and sugar on medium-high until fluffy, 2 - 3 minutes.  

Add the grated zest of the oranges and lemons.  

Add the vanilla.

Add the eggs one at a time, scraping down the sides if needed.

Reduce speed to low, then add the dry mixture and the milk, alternating a little of each, and ending with the dry. Mix this until just until combined, and take care not to overmix.

Divide the batter equally between the prepared cake pans, leveling the top of each with a large spoon or rubber spatula.  

Bake until a toothpick from the center of the cake comes out clean, 25 to 30 minutes for 8-inch pans, 22 to 25 minutes for 9-inch pans and 20 to 22 minutes for a 10 inch pan.  

Cool the cakes in the pans for 15 minutes, then turn out onto racks to cool completely.

Citrus Curd Filling

Ingredients

4 large eggs

1 cup sugar

1 tbsp grated lemon zest

1 tbsp grated orange zest

1/4 cup fresh lemon juice

1/4 cup fresh orange juice

1 stick unsalted butter, sliced

Directions

In a stainless or glass bowl, whisk together the eggs, sugar, zests and juices. 

Add the butter, then set the bowl on top of a saucepan of simmering water.

Cook the curd, whisking constantly, until the mixture has thickened, about 15 minutes. 

Pour into a medium bowl.  

Cover and refrigerate until completely cool, about 2 hours.

Fresh Orange Lemon Buttercream

Ingredients

4 sticks unsalted butter, at room temperature

2 tablespoons finely grated lemon zest

2 tablespoons fresh orange juice

4 cups of powdered sugar

Directions

Beat the butter in your electric mixture until light and fluffy. 

Reduce the speed to low and add the orange juice and zest.

Add the sugar a cup at a time, waiting until one is fully in corporated before adding another.

Resume a medium-high speed and beat the buttercream until it is smooth and fluffy.

Store at room tempurature until you are ready to ice the cake. (Up to 2 days in an air-tight container.)

Assorted Citrus Fruits & Mint Leaves

Chose which citrus fruits you want to feature on top of the cake.

Slice them thinly and pat dry with a paper towel before laying them on top of your cake.

Pluck your mint off the sprigs and scatter about the cake between your citrus slices to add a bit of greenery. We also added in a bit of sage as well for color around the base of our cake.

CitrusBrunchblog6.jpg
CitrusBrunchblog7.jpg

Easy Canvas Art

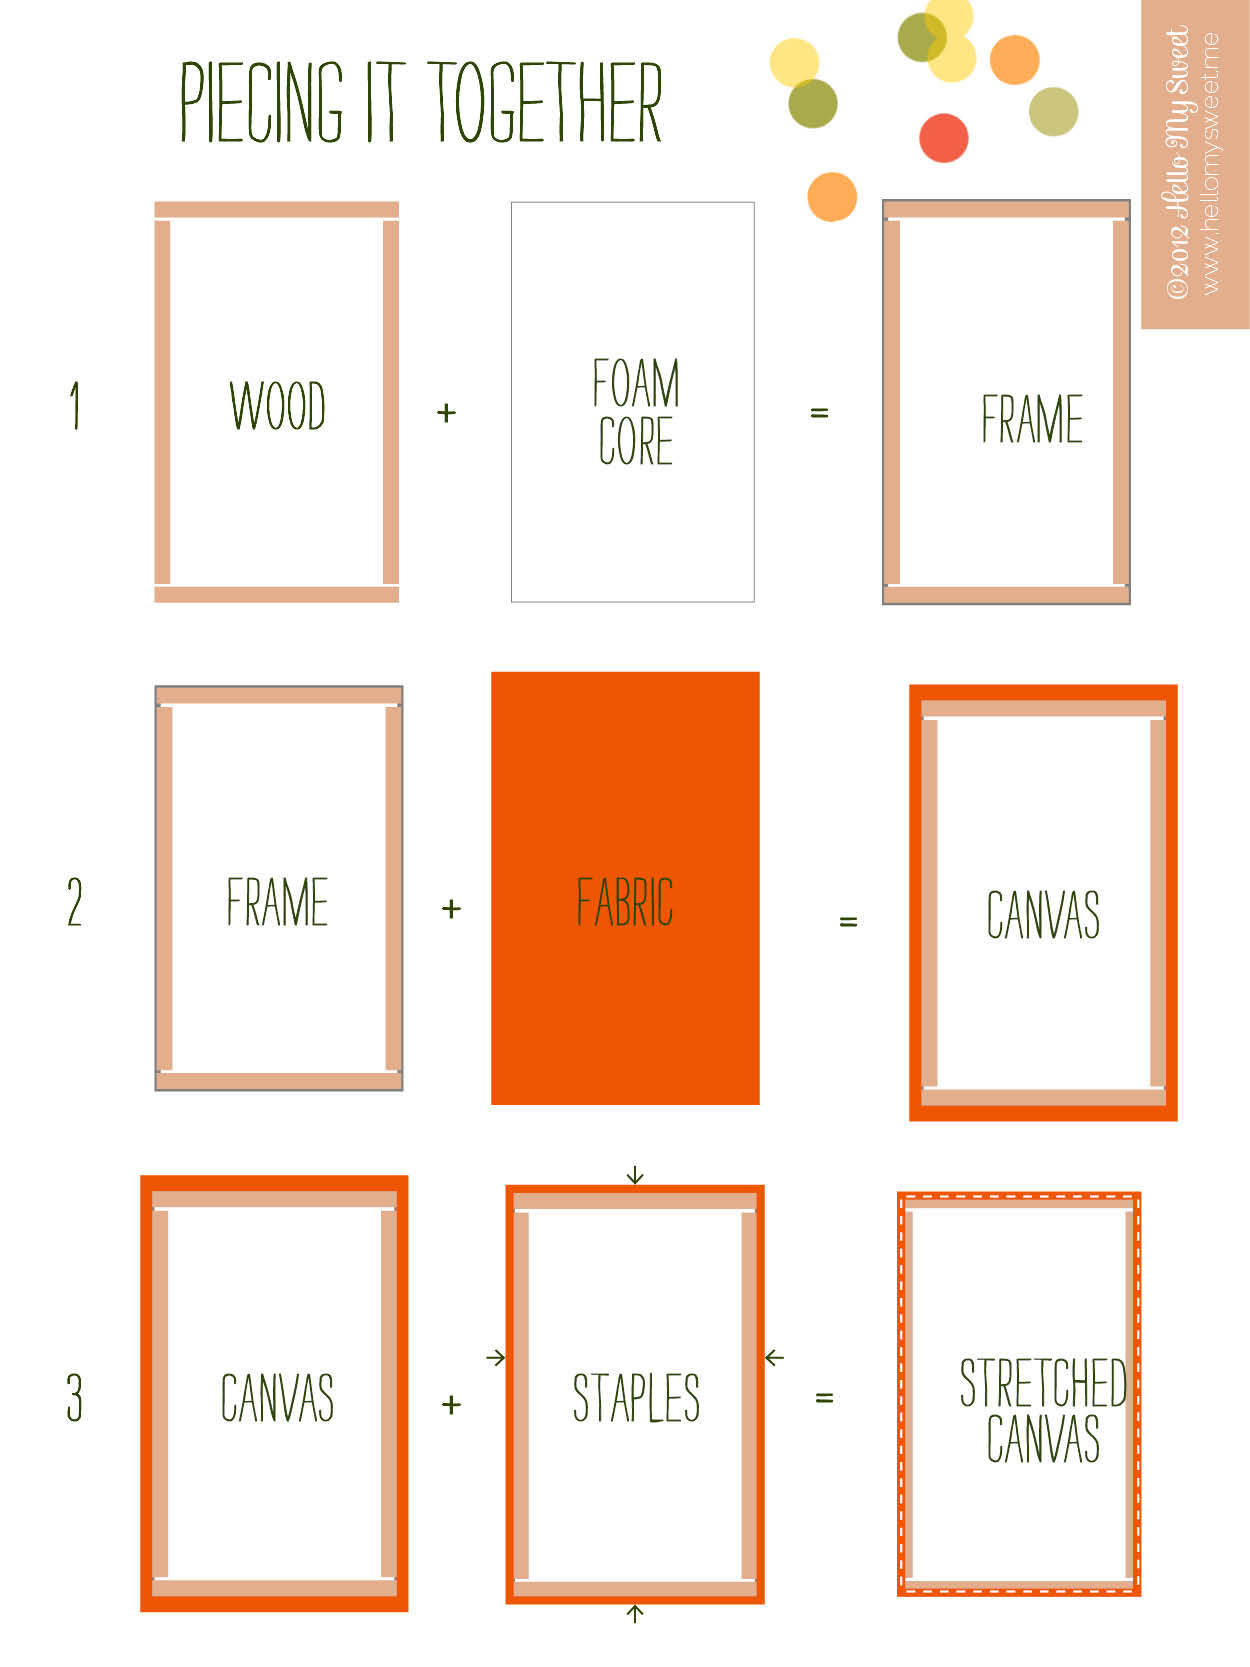
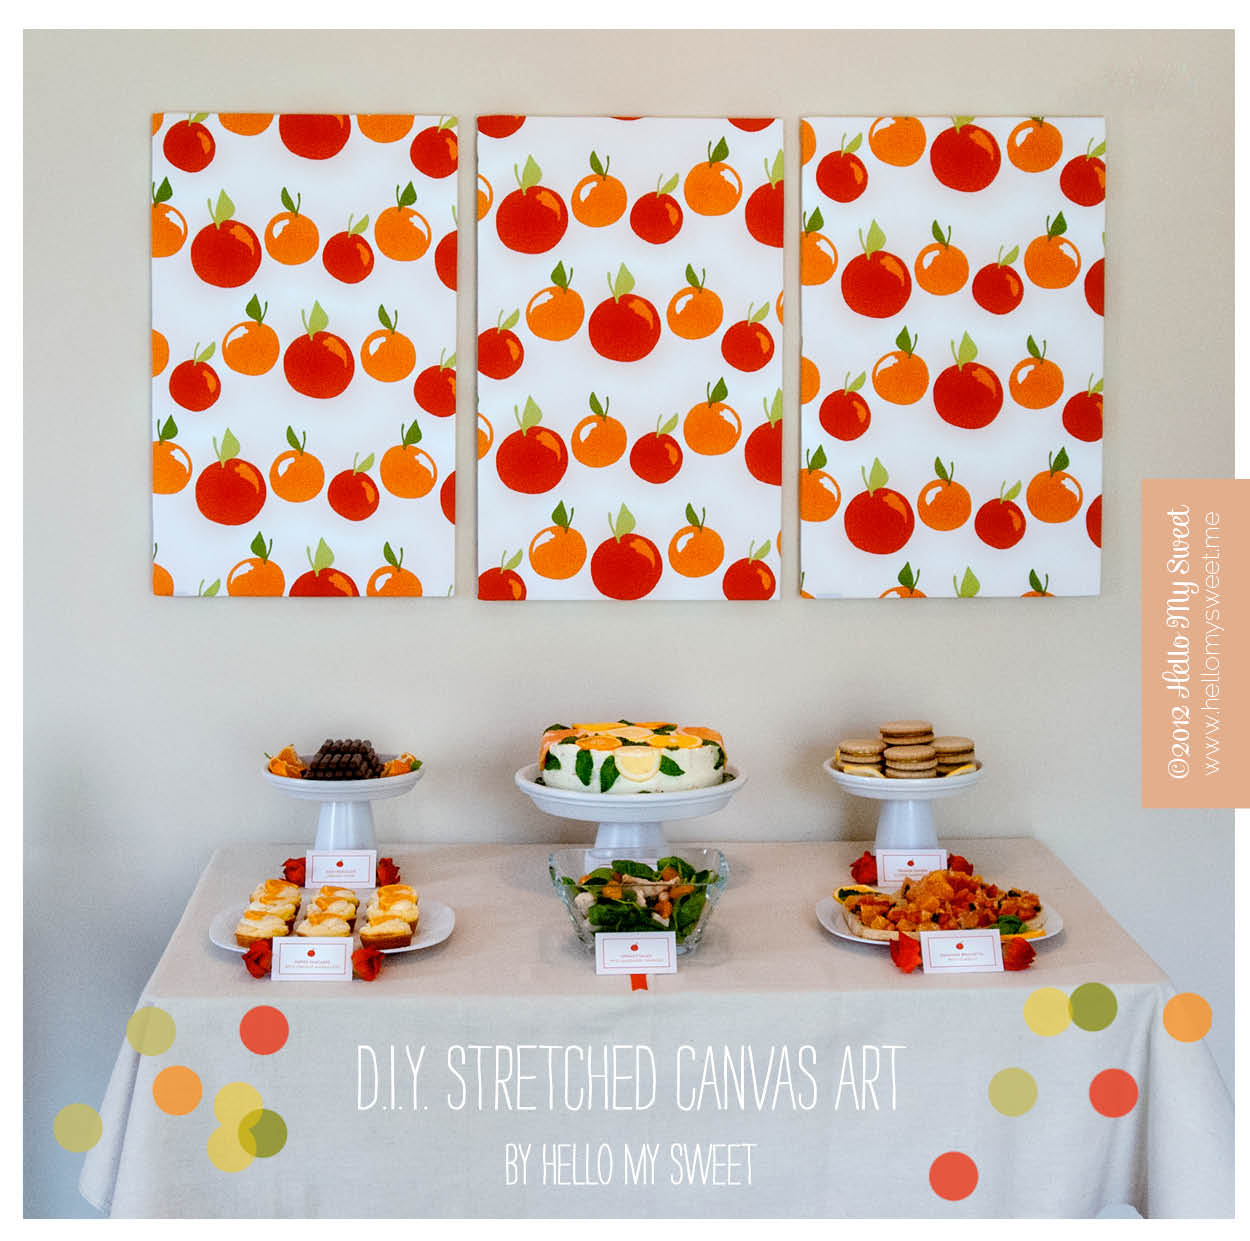
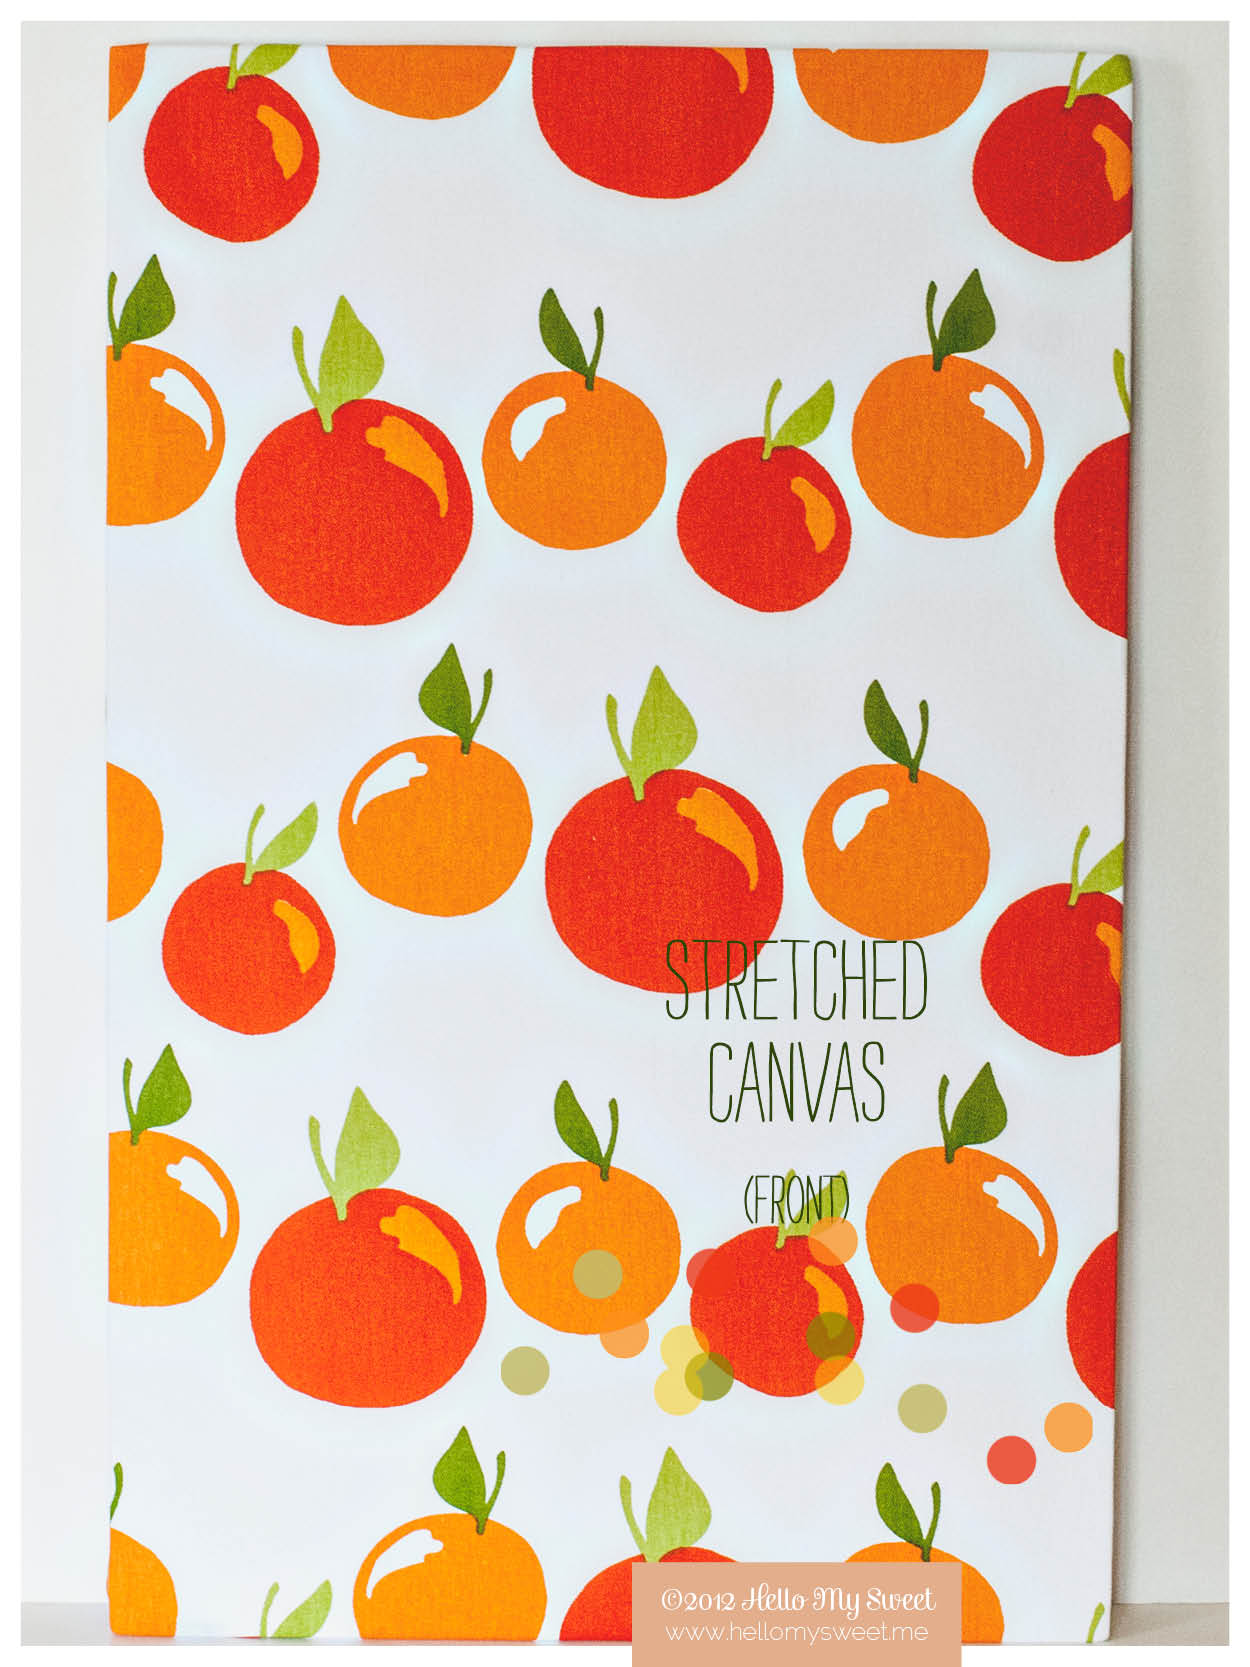
We are going to demonstrate for you how to build a frame and stretch the fabric across it. Ours had specific dimensions due to the fabric we chose, which were actually a 3-pack of kitchen towels from Target. So they were already sized and we built our frame to accomodate that size. However you could pick any fabric you want and make your frame any size you want as well, using our technique as a guide. Take notice that NO NAILS or MITRE BOXES are required for this project. Super duper easy.


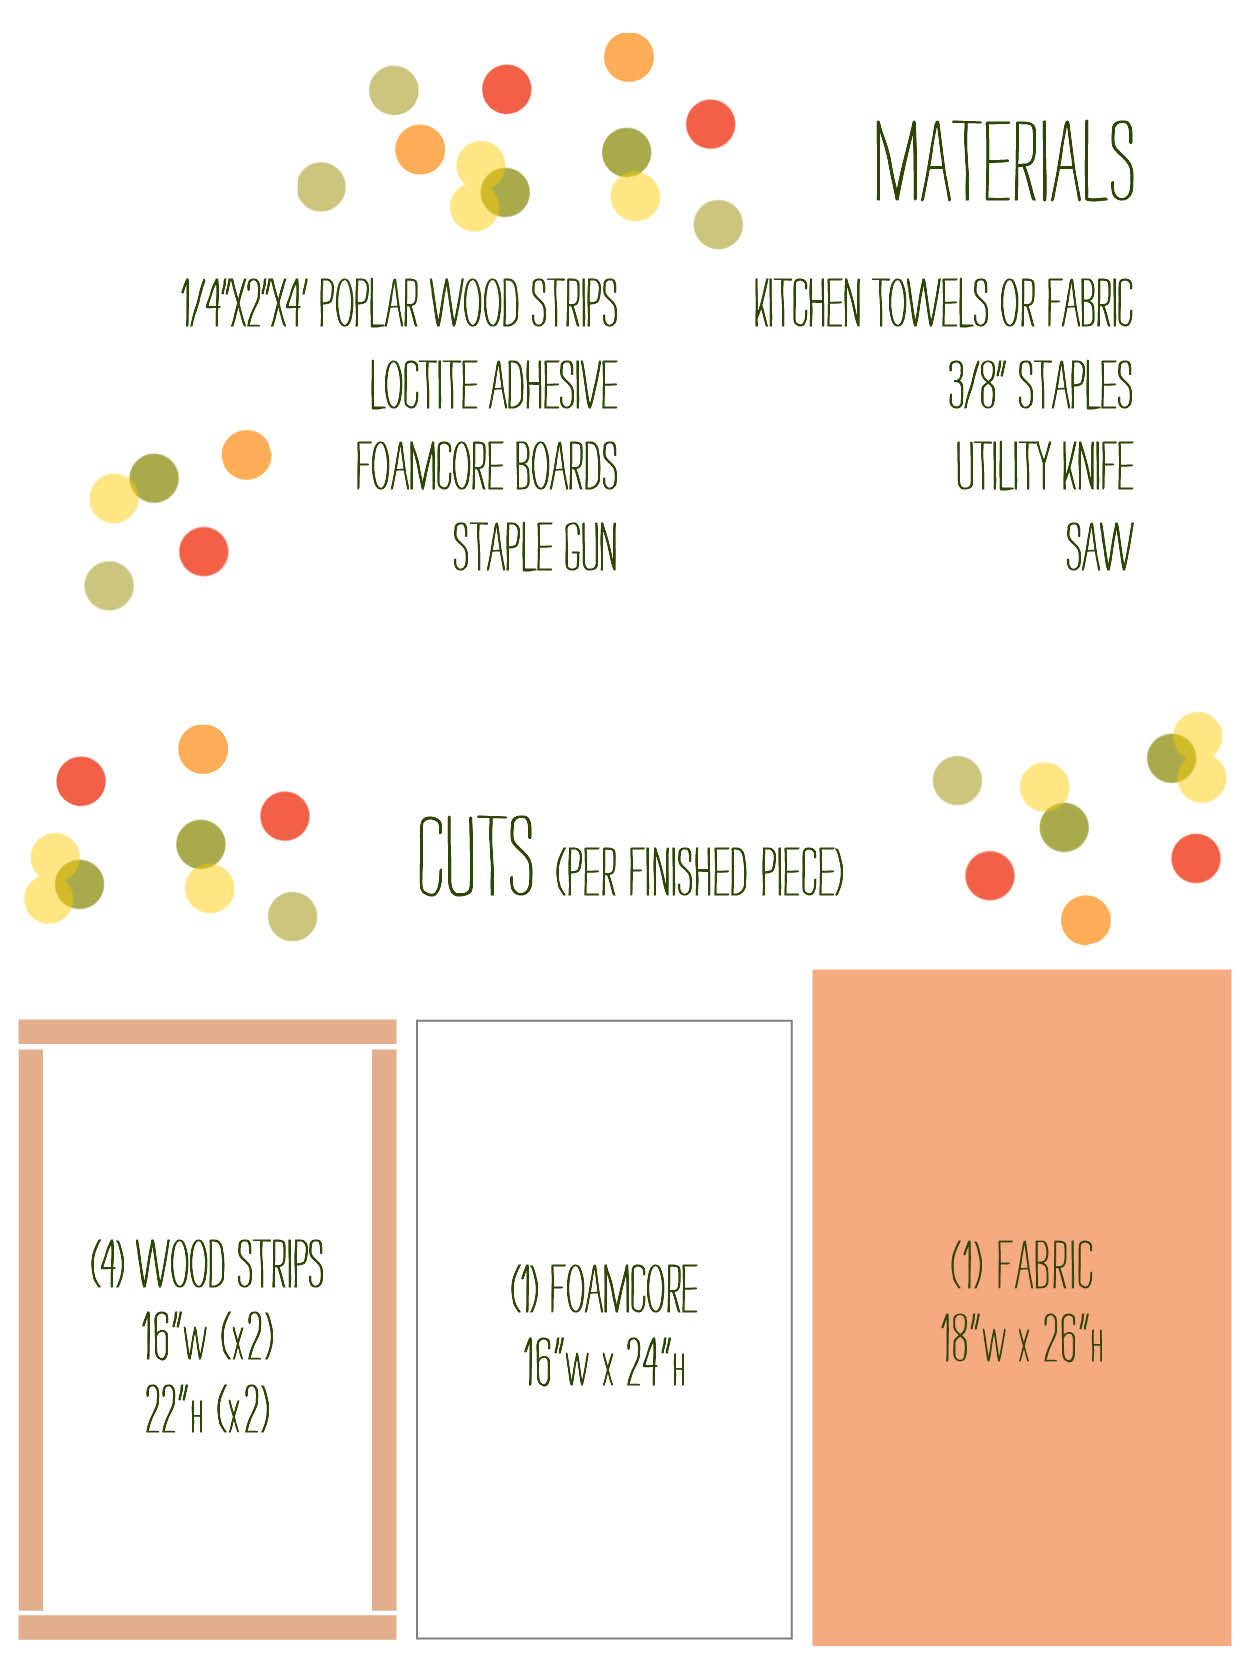
Step One: Lay your foam core down onto the fabric you chose. Adjust so that the foam core rests on top of the fabric with at least 1” of fabric extra on each side. Then cut the excess fabric away. You should now have a piece of fabric with 1” or more overhang all the way around each side of the foam core.

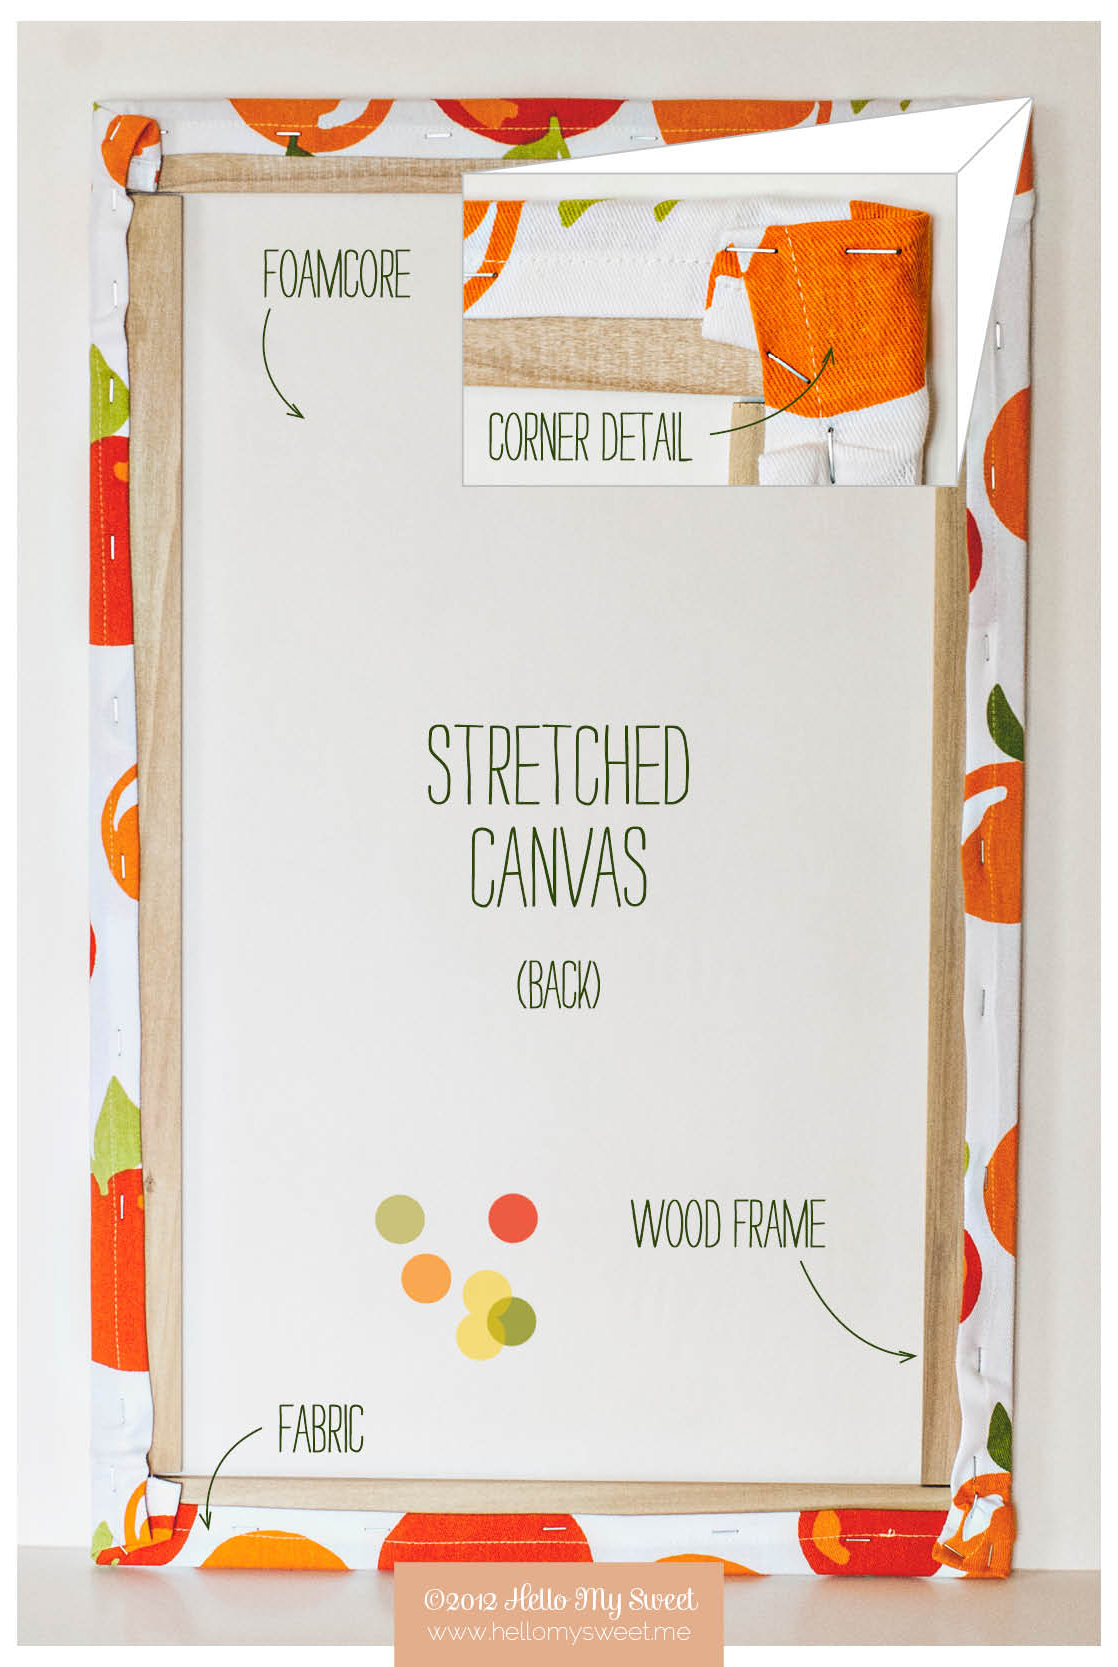
Step Two: Measure the width and height of your foam core. Mark your wood strips accordingly so that you have two pieces to cut as your width. Subtract two inches from your height measurement and mark two more pieces to cut at that final measurement as well. Cut your wood pieces. Our foam core is 16”w x 24”h, so we had two wood pieces at 16”w and two wood pieces at 22”h. (See photo for example.)

Step Three: Assemble your frame by laying our your wood pieces on top of the back side of the foam core. Lay your width pieces down first, they should stretch equally from edge to edge of the foam core at the top and the bottom. Then lay your height pieces down, they should meet up with the top and bottom pieces you already have and fill in the gap on the left and right sides of the foam core, completing the frame. Once you have everything as it should be, secure it in place with your loctite adhesive. (Photo example #1 below.)

Step Four: Place your fabric wrong side up and place your finished frame on top, wood side up, foam side down. Position it as you did when measuring in Step One. You should have your frame centered with at least 1” of extra fabric on all sides.(Photo example #2 above.)

Step Five: Using your staple gun to secure it, careful pull your fabric tight over the center of one side of your wood frame and staple it there. Do this for all four sides, stretching your fabric carefully and evenly and tightly across the frame, secure it with one staple. (Photo example #3 above.) You should now have your fabric secure to the frame. Proceed by stapling the sides the rest of the way, working from the stapled center point out toward the corners on all sides, leave the corners for last. When you are ready to finish the corners, tuck the excess fabric in on the sides, then pull the corner tightly toward the center of the foam core and staple to the wood frame. (Corner detail example below.)

Step Six: (Optional) You can add a picture hanger to the top of your frame to make hanging easier. 

Well there you have it! Stretched Canvas Art without a hammer, nails or mitre box. (Jason is pretty genius right?) Imagine the possibilities. I bet you’ll never overlook that awesome fabric pattern online or that cool vintage patterned table cloth you spotted again. Now you have a reason to take them home and make them into your own wall art!


HMS DIY Canvas Art.jpg
HMS DIY Canvas Art2.jpg
HMS DIY Canvas Art3.jpg
HMS DIY Canvas Art4.jpg
HMS DIY Canvas Art5.jpg

Clay Pot Cake Stand

This stand is simple to make and of course VERY inexpensive. Just a couple of simple clay pots and saucers in different sizes and you could have an entire set of serve ware for your own party or dessert table display.

Here is a list of the materials that you will need to make your own “Clay Pot Dessert Stand(s)”:

Lock Tite Adhesive (super heavy duty for porous surfaces like clay)

Pencil

Clay Pot

Clay Saucer

Decorative Material to finish (We used spray paint, but you could be as creative you want of course!)

Step One: Choose a small clay pot and a large saucer. We found that the darker clay versions (as pictured) work better as far as paint coverage is concerned. The orange clay tends to show cracks when you paint it. The larger the saucer you choose the larger the pot underneath should be to make sure it can support properly. You want these to be nice and sturdy!

Step Two: Flip your saucer over bottoms up and place the base of the small clay pot on the center of the saucer. Trace the bottom of the pot outline onto the saucer and remove.

Step Three: Carefully apply your Locktite adhesive to the bottom of the clay pot, taking precautions to keep your glue inside the rim. Flip the pot over and place it inside the traced area on the saucer to secure in place. Let sit for 24 hours to completely dry before you flip it over.

Step Four: Now it is time to decorate your stand. Go ahead and flip it over and admire your handiwork. We chose to take a can of glossy white spray paint to our because we wanted something neutral that we can use over and over. The sky really is the limit here though, you could glitterize it, modge podge collage it, spray it, paint or stencil. It’s up to you! Take into consideration the finish of the area the food will be touching. Leave it unfinished to keep it food safe. Use a food safe base of parchment or paper underneath to keep the food from touching the surface of the pot if you do paint it. You could also apply a coat of food safe polyurethane spray and not have to worry about it!

Congratulations!

You now have your very own Clay Dessert Stand! These are really nice because they weigh quite a bit and are sturdy.

HMS-DIY-Claypot-1flair.jpg
HMS-DIY-Claypot-2flair.jpg
HMS-DIY-Claypot-3flair.jpg
HMS-DIY-Claypot-4flair.jpg
HMS-DIY-Claypot-5flair.jpg
HMS-DIY-Claypot-6flair.jpg

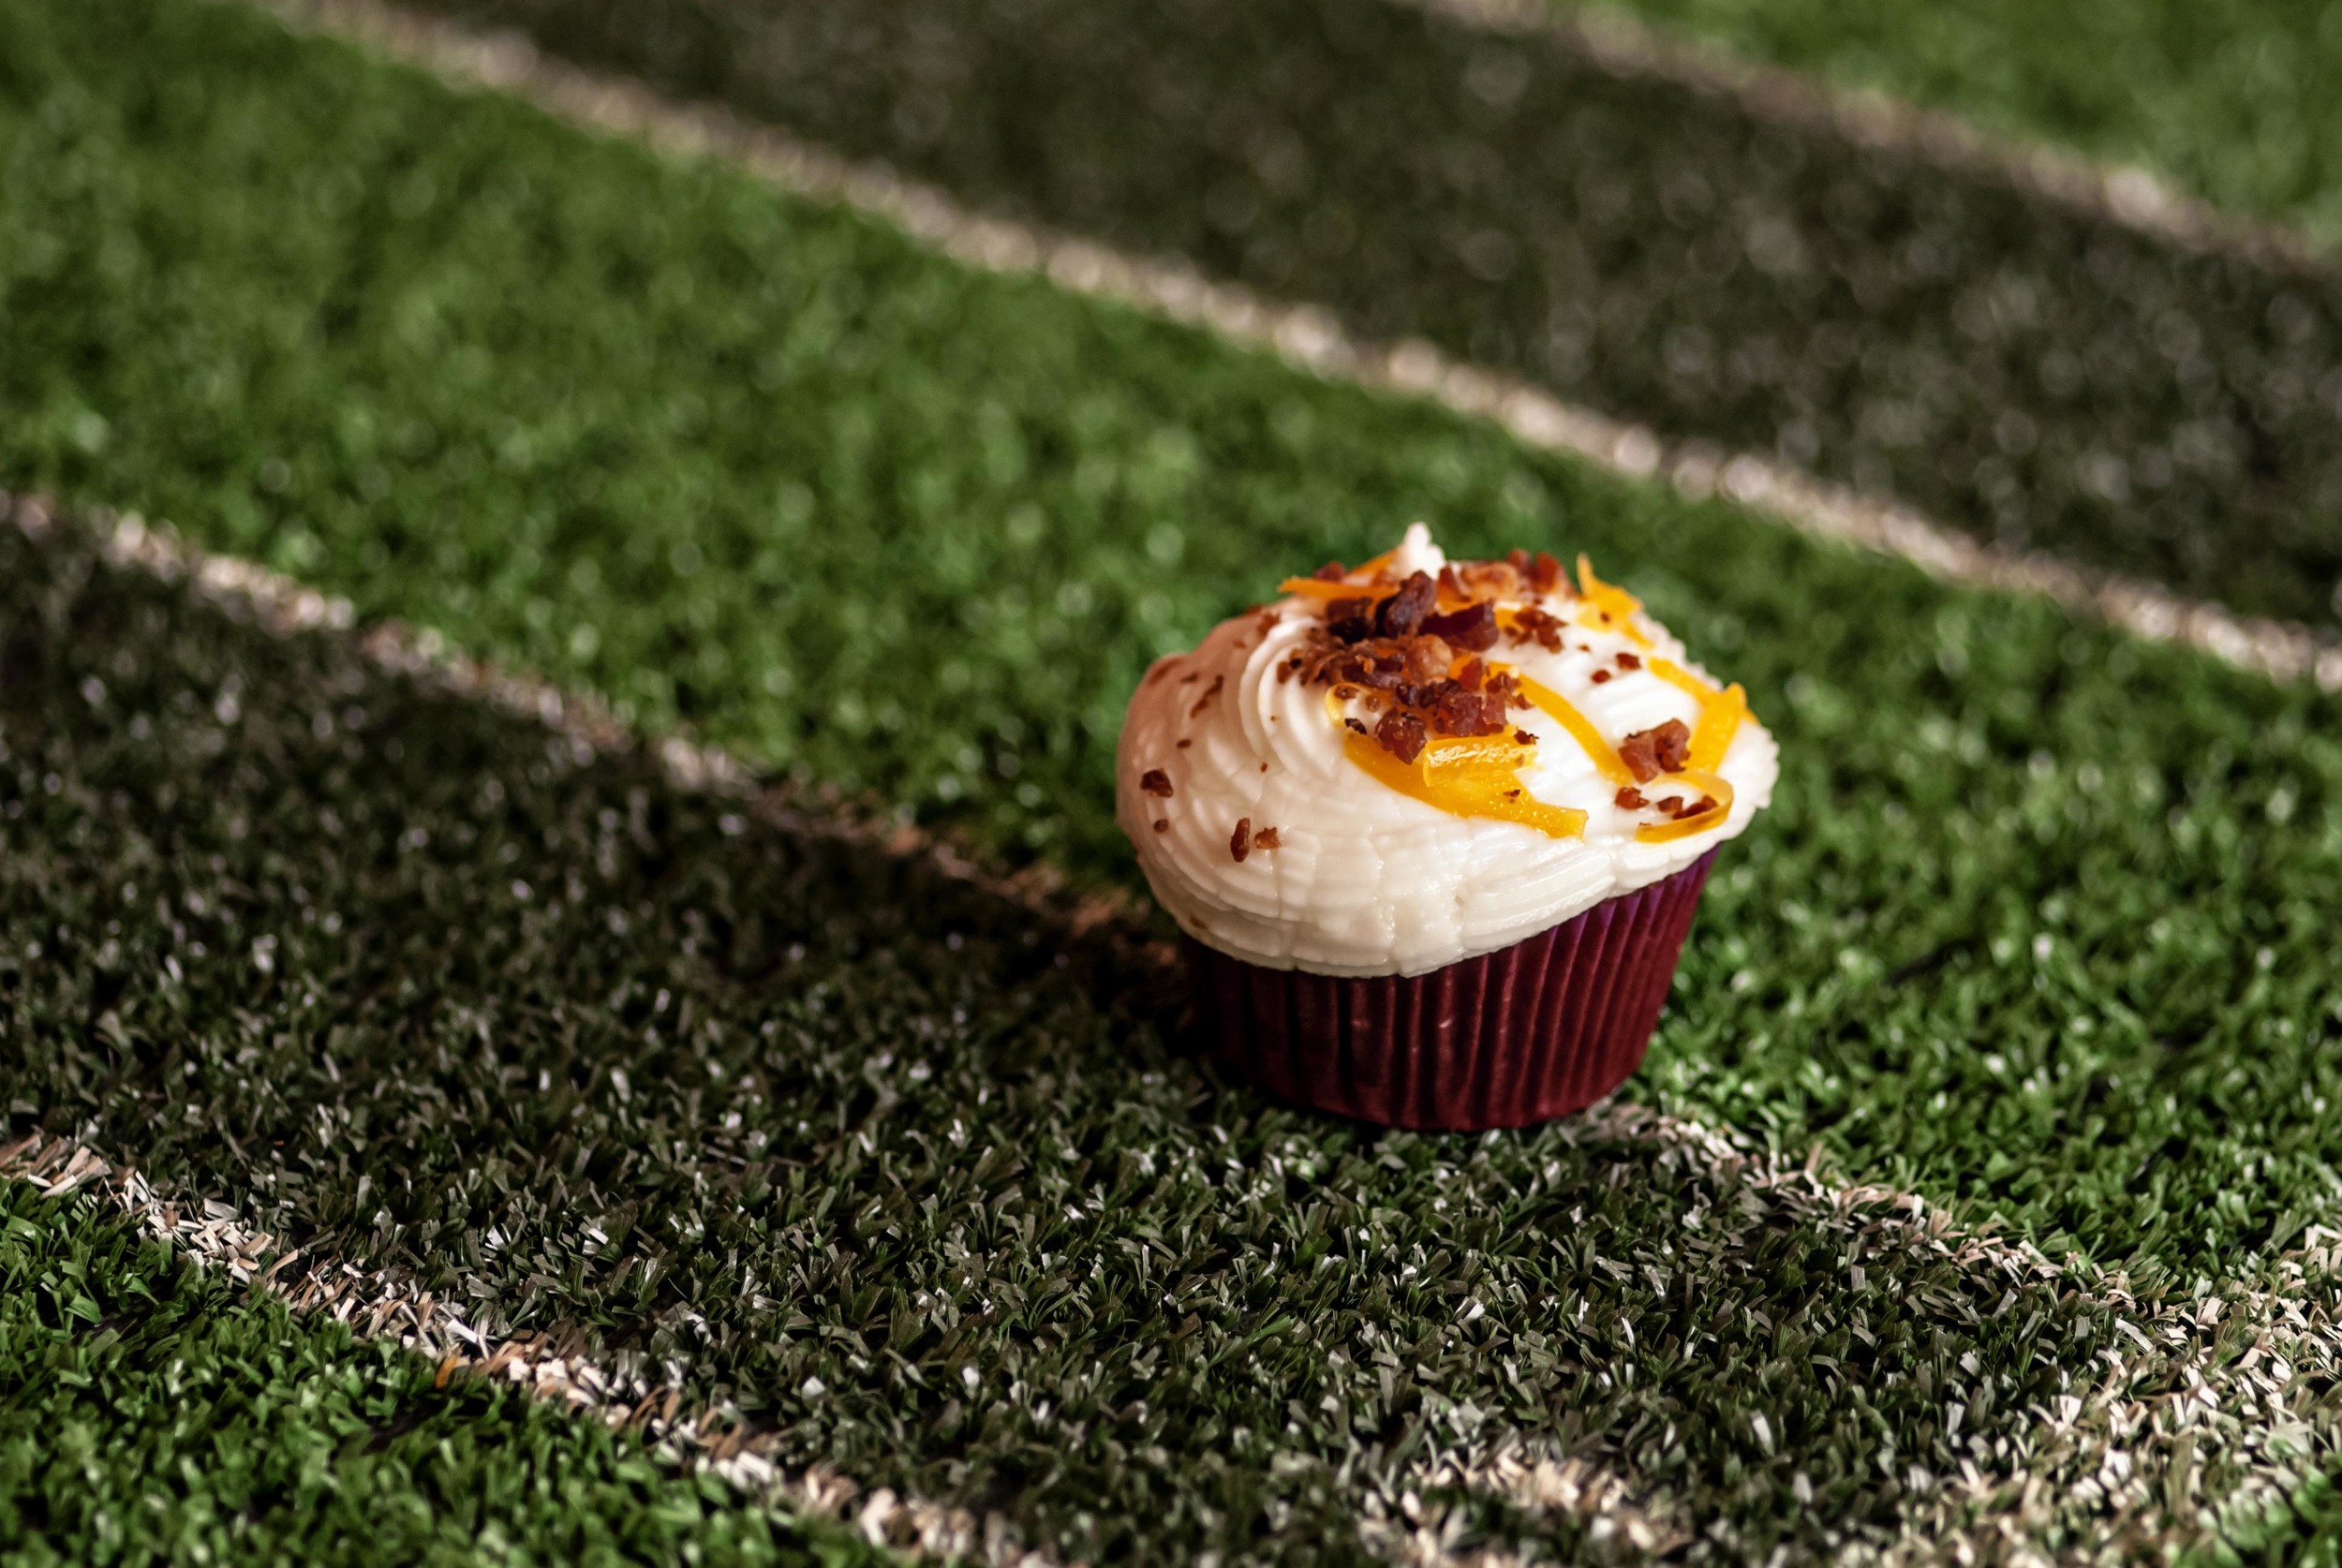
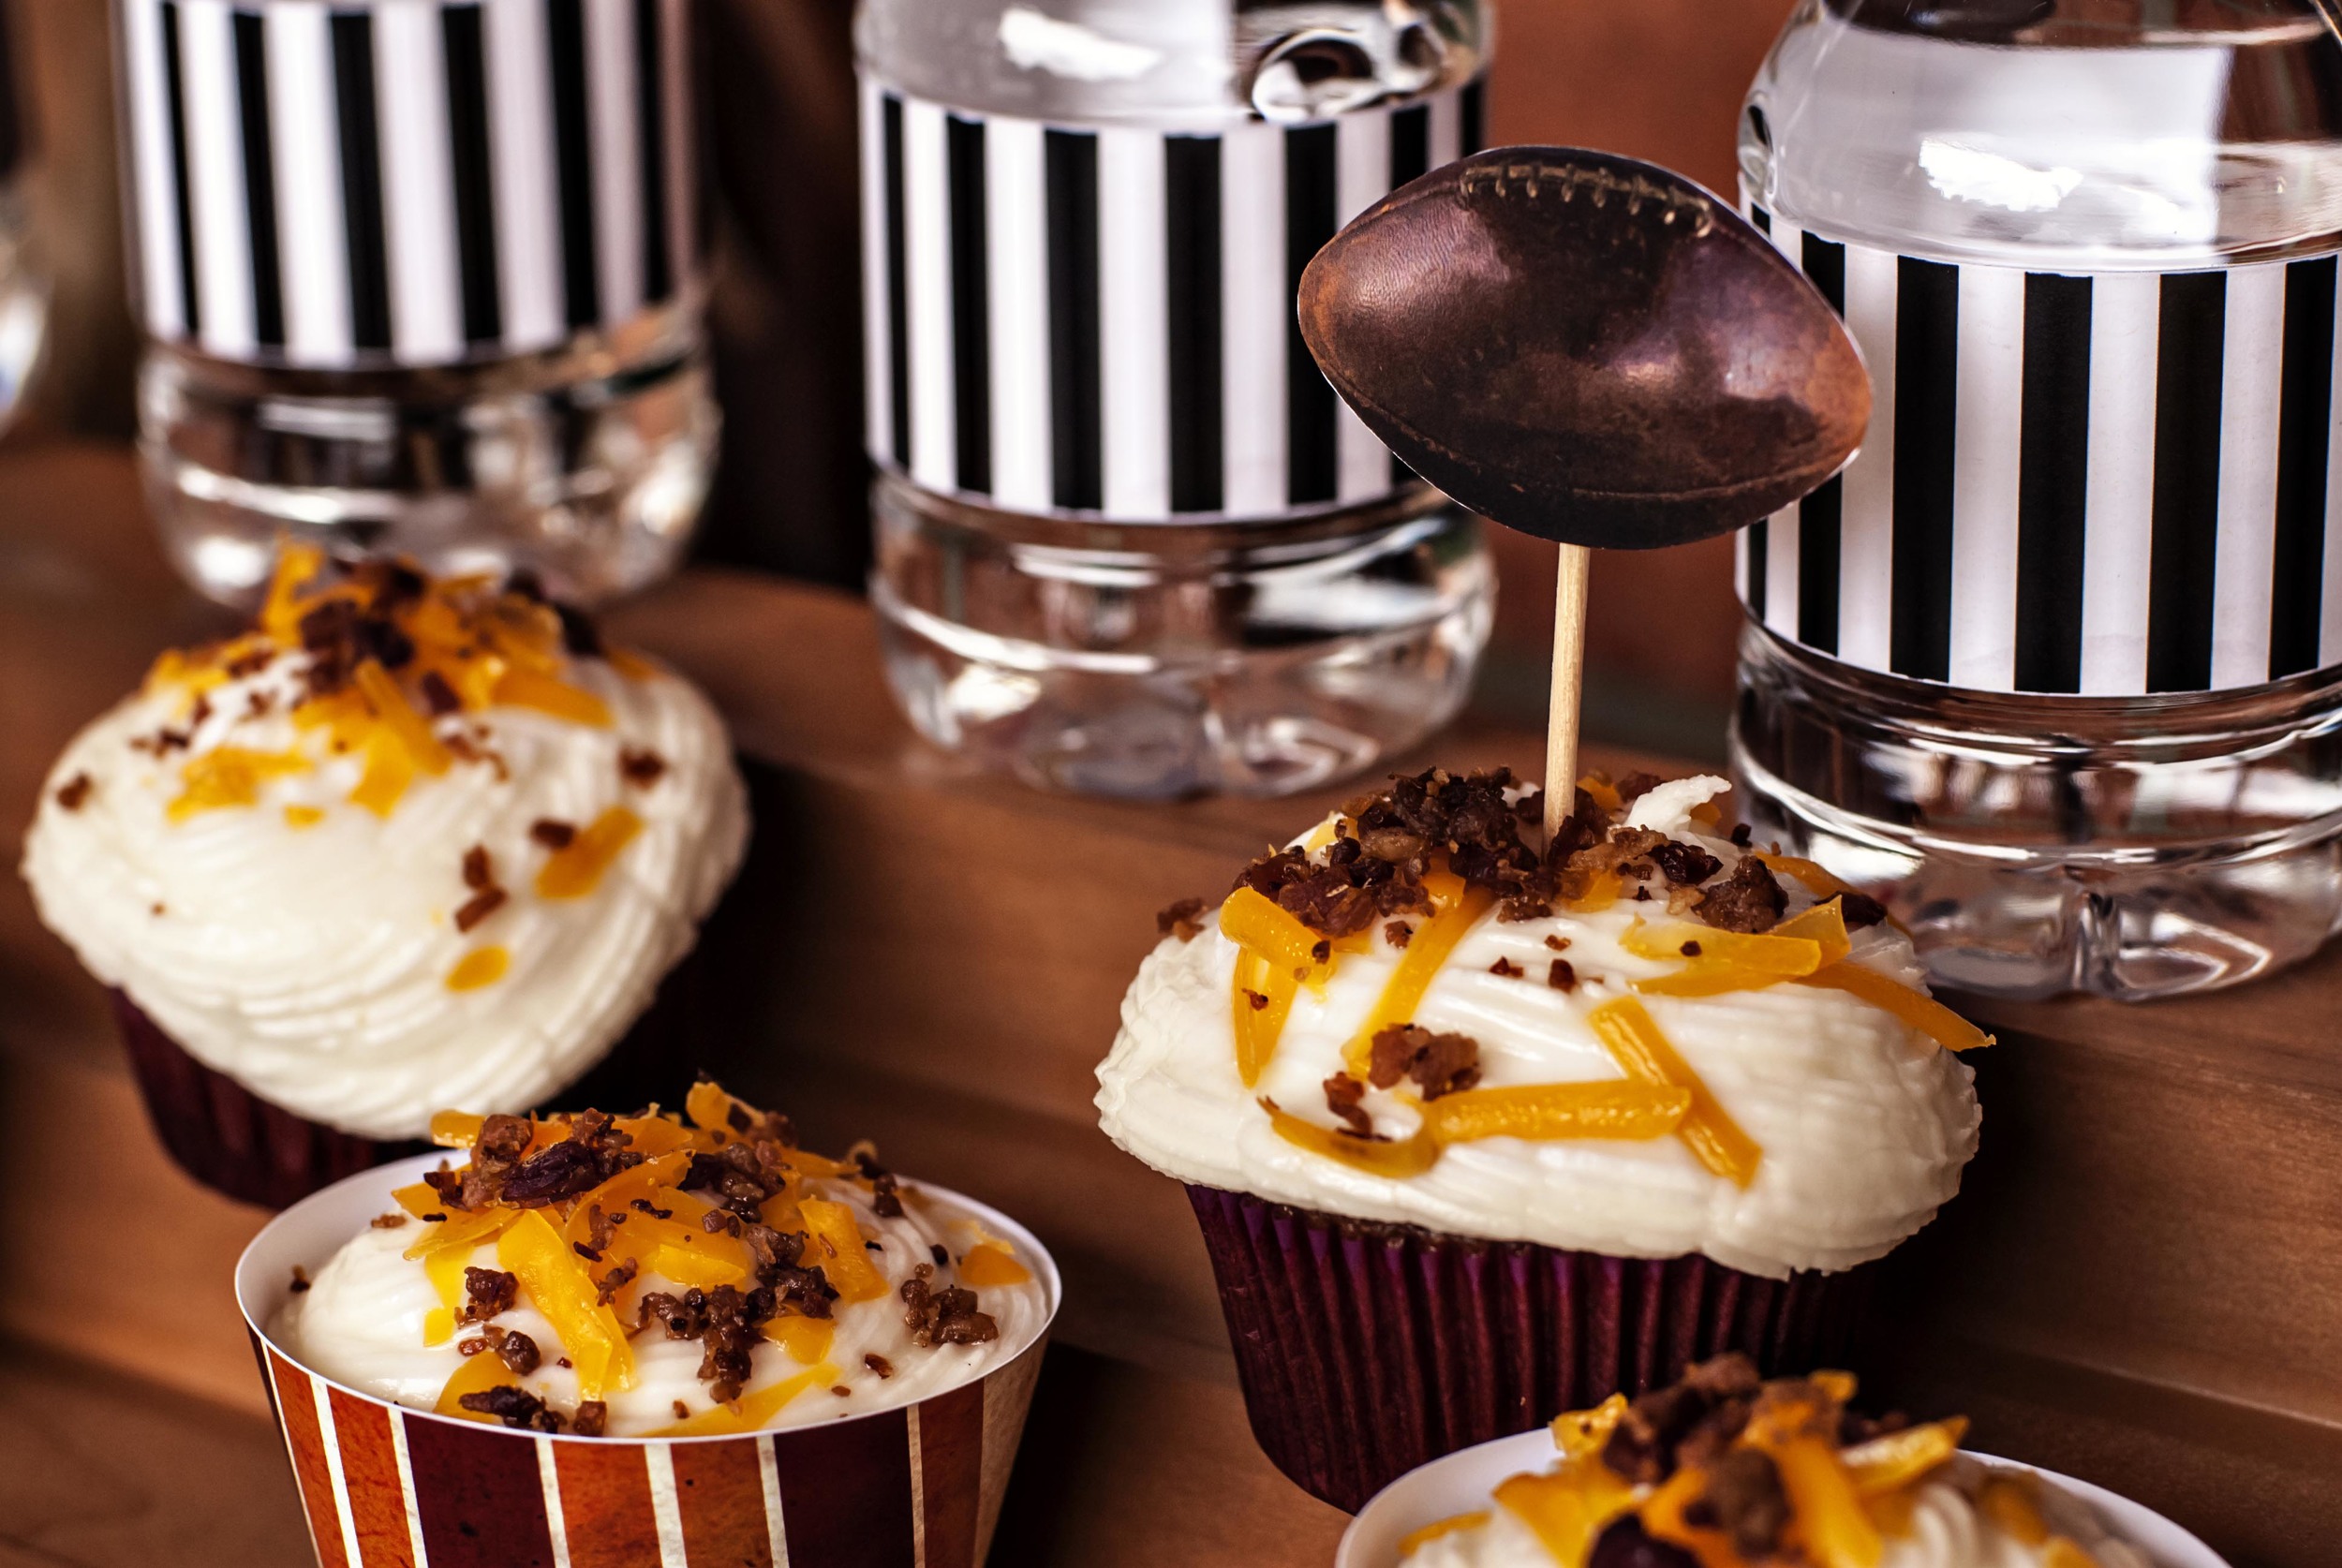
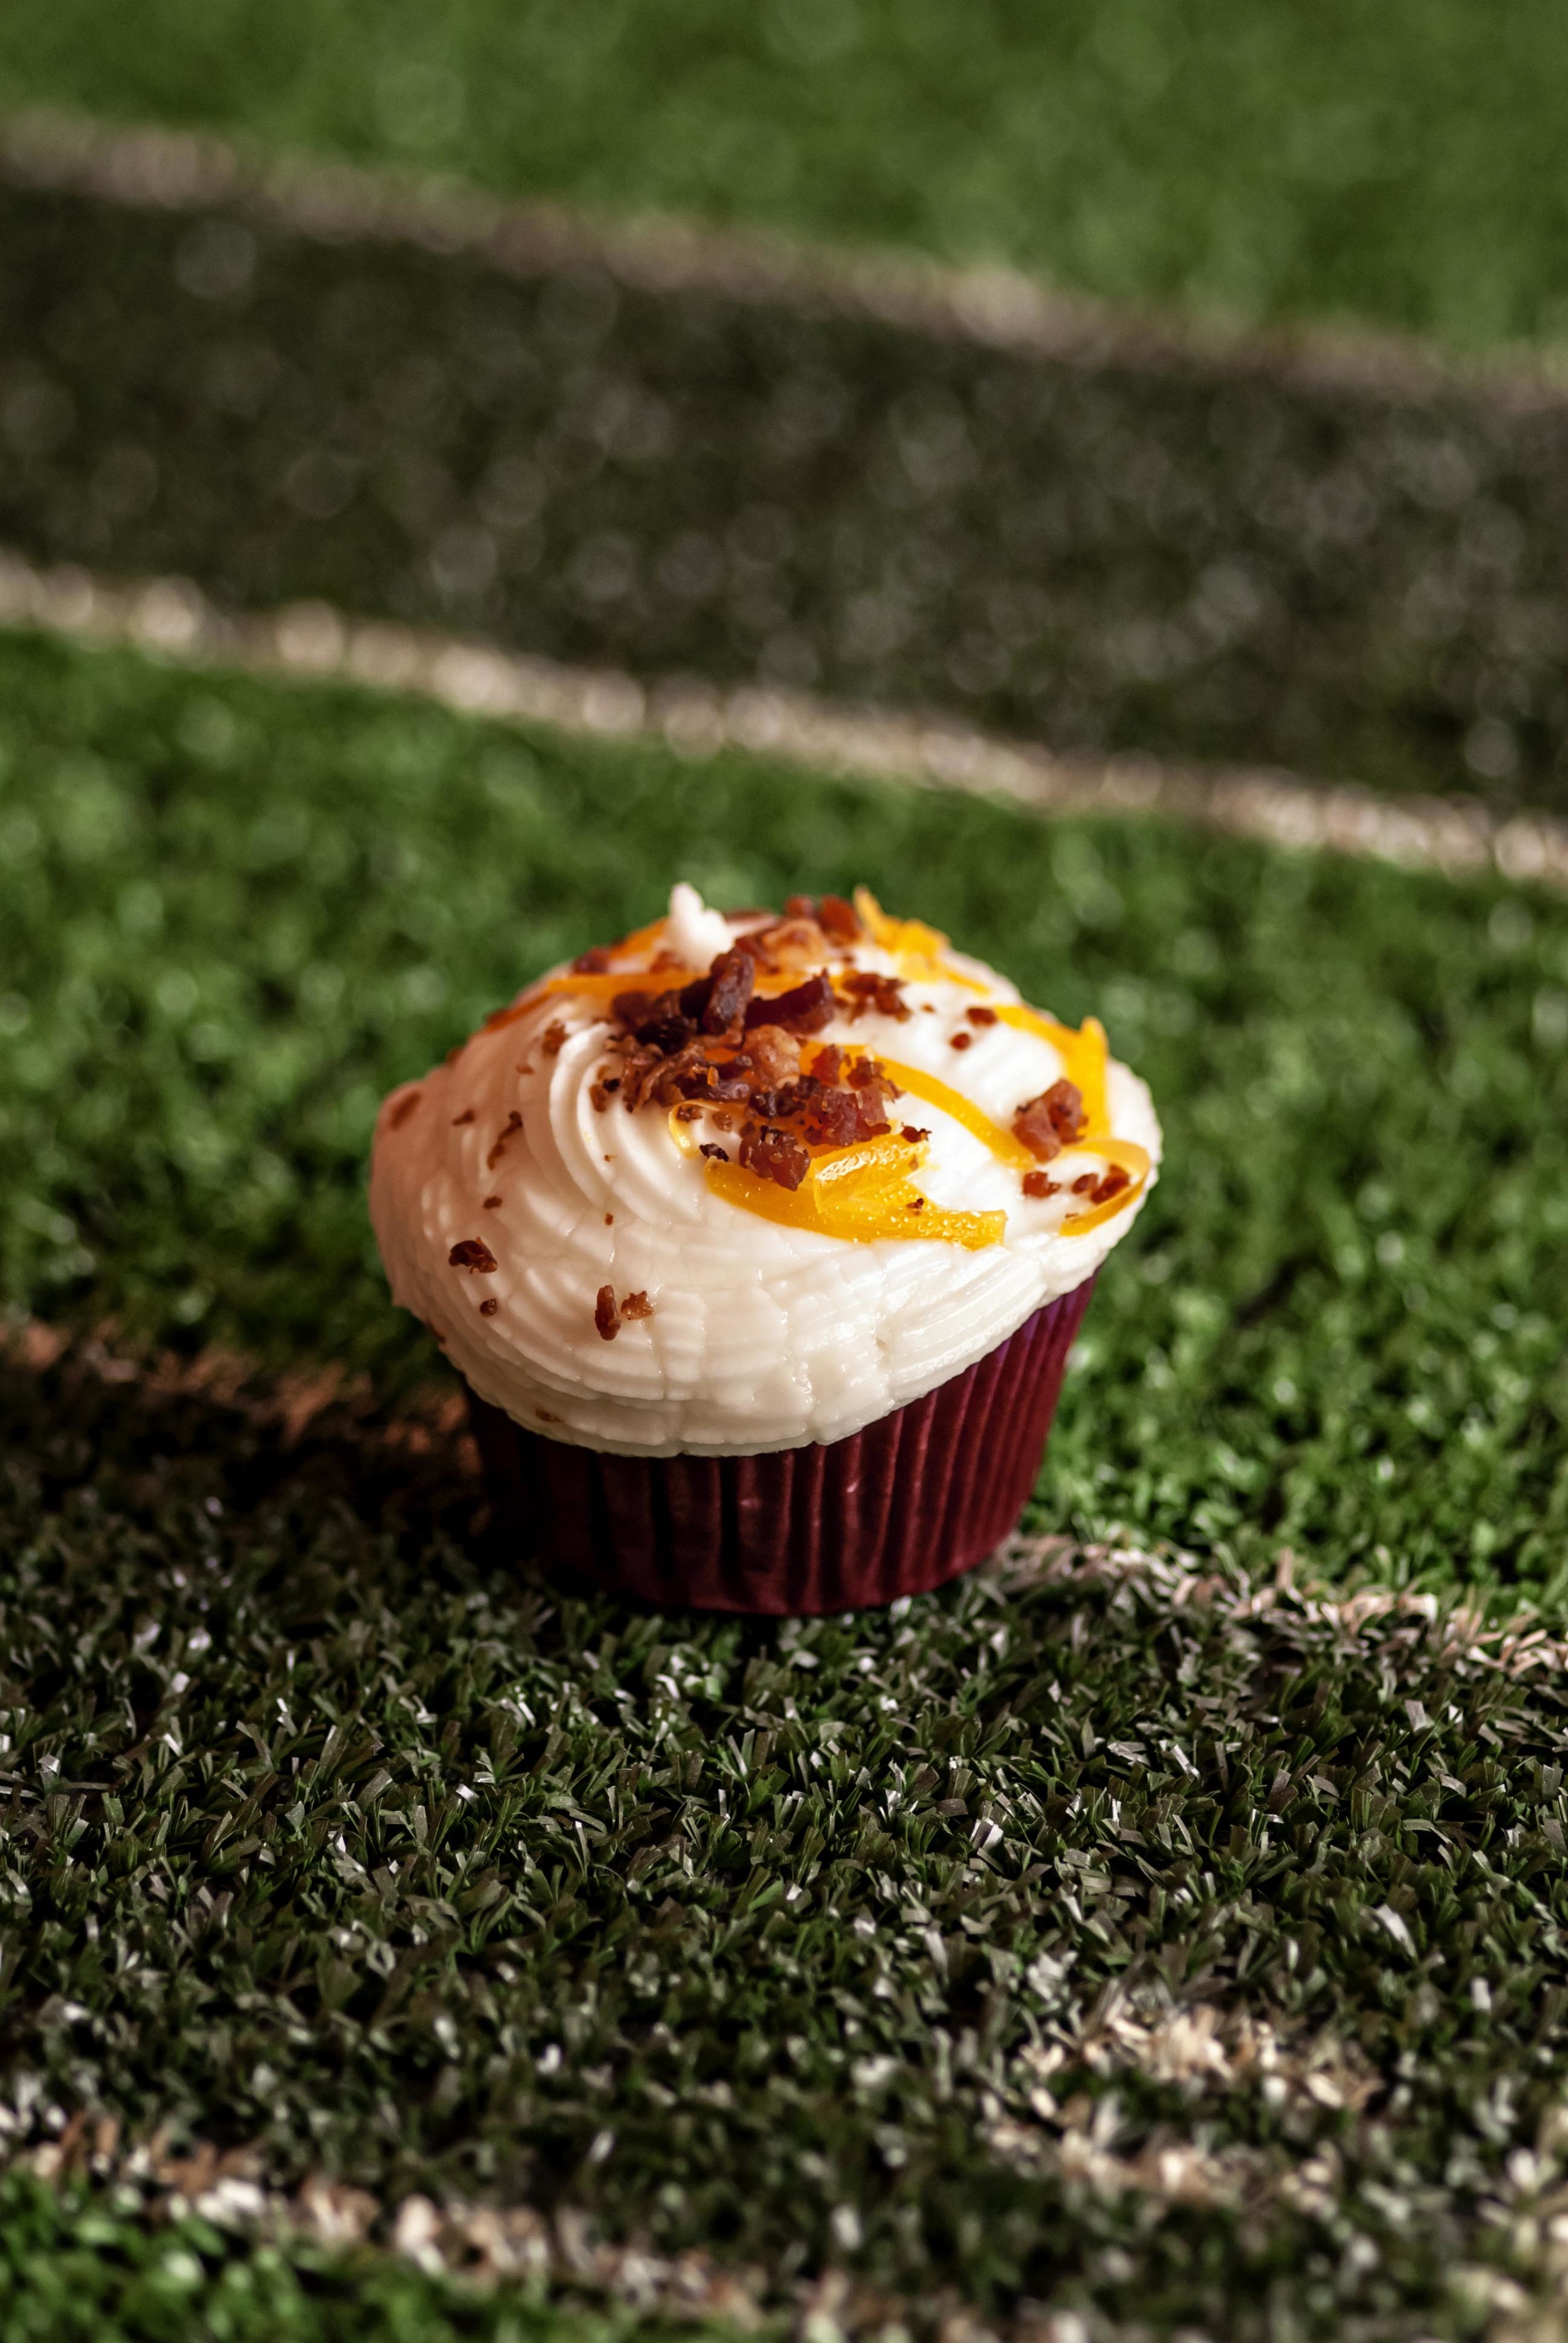
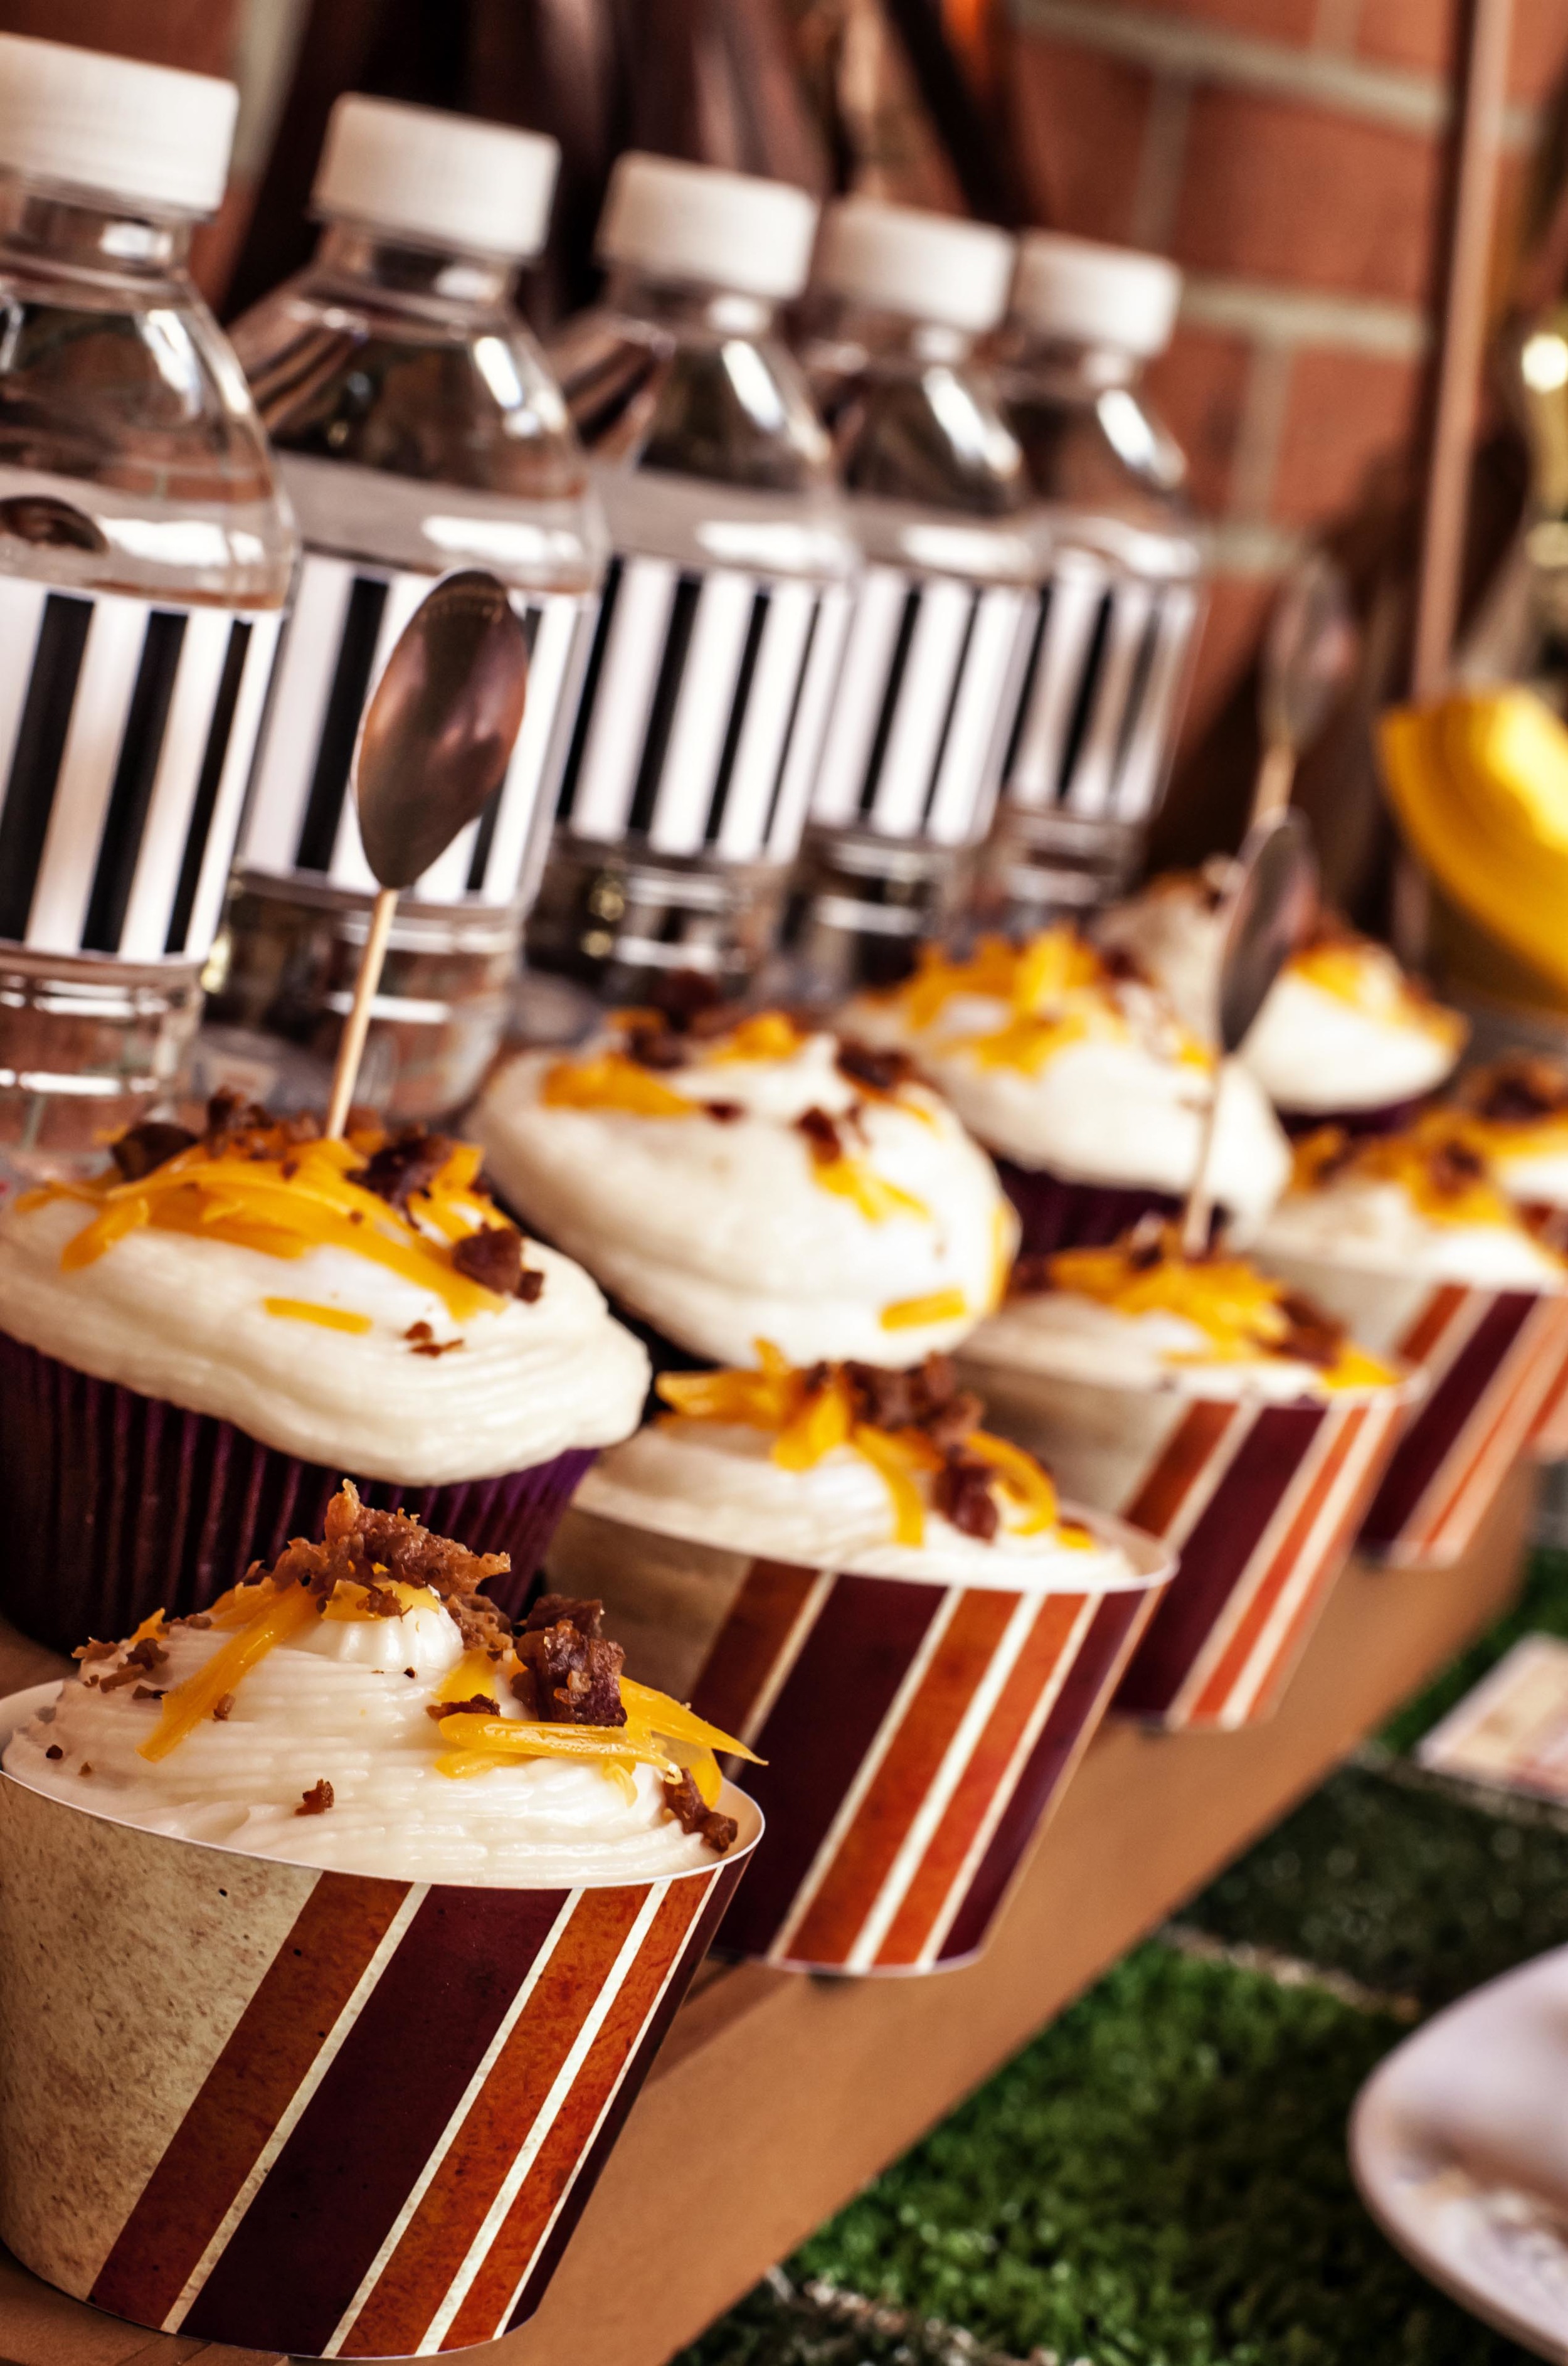
Beer, Bacon & Cheddar Cupcakes

This recipe is all about the ingredients. Use whatever kind of beer you like. Use a good quality smoked bacon that crisps up nice. Use a more expensive extra sharp cheddar, not the stuff that some pre-shredded. Remember this is for you and your discerning tastes, not the sugar crazed kids!

Sweet Cheddar Beer Cupcake Recipe

1 cup Beer , Your Preference.

1 stick Unsalted Butter

1 cup Sharp Cheddar, Grated. Get something nice and sharp, not the cheap stuff.

2 cups Dark Brown Sugar

3/4 cup Sour Cream

2 Eggs

1 Tbsp Vanilla Extract

2 cups Flour

2 1/2 Tsp Baking Soda


Heat beer and butter in a large saucepan on medium-high heat until butter is melted.

Add cheddar. 

Remove from heat, and whisk in the sugar.

In a separate bowl, whisk the sour cream with the eggs and vanilla.

Mix the sour cream mixture into the beer mixture. 

In a separate bowl, sift together the flour and baking soda.

Fold flour mixture into the batter. 

Fill cupcake liners 3/4 fill.

Bake at 350 F for 18-25 minutes, or until inserted cake tester comes out clean. Watch them closely you want them moist not dry. 

Let them cool completely before frosting.


High Gravity Beer Buttercream Recipe

2 sticks Unsalted Butter, Room Temperature

4-6 cups Powdered Sugar

1 cup Beer

Grated Cheddar

Crispy Cooked Bacon Pieces (smoked tastes great)


Beat butter until creamy. 

Slowly mix in 4 cups powdered sugar. 

Add beer to taste, more for a stronger flavor if you prefer. 

Add in remaining sugar, or just enough to get your buttercream to the right consistency. Not too stiff, not too runny, spread-able. 

Top with cheddar and bacon and serve immediately.


VinFoot_34.jpg
VinFoot_15.jpg
VinFoot_33.jpg
VinFoot_8.jpg
VinFoot_1.jpg

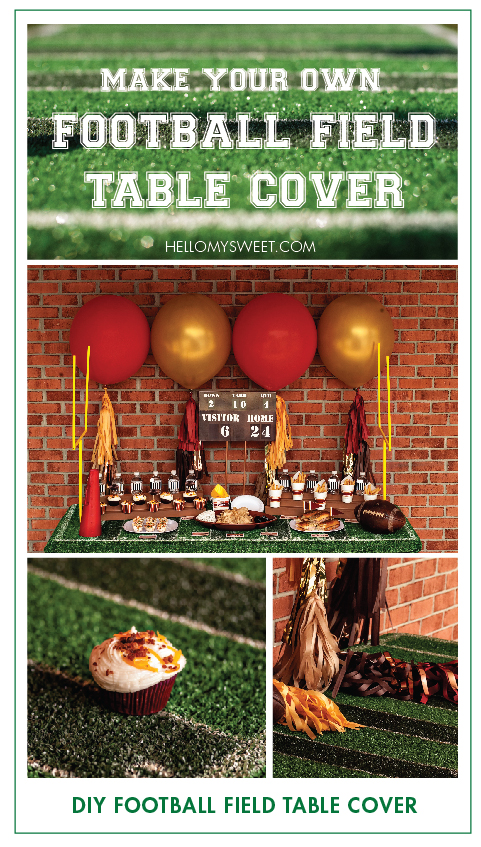
Football Field Table Cover

You will need:

Heavy-duty scissors (to trim the sides of the rug)

Antique White spray paint (or paint brush and craft paint)

Dark Green spray paint (or paint brush and craft paint)

Staple gun

Number stencil

Roll of masking tape

Foam core or cardboard (for the lines on the field)

Poster board or cardboard

Utility knife

Pencil

Measuring tape

An important thing to remember is to make sure you have a space large enough for you to work comfortably.  We have an unoccupied apartment beneath ours that I have access to that provided an excellent work space.  An empty garage or even a driveway would suffice as well.

Step One: 

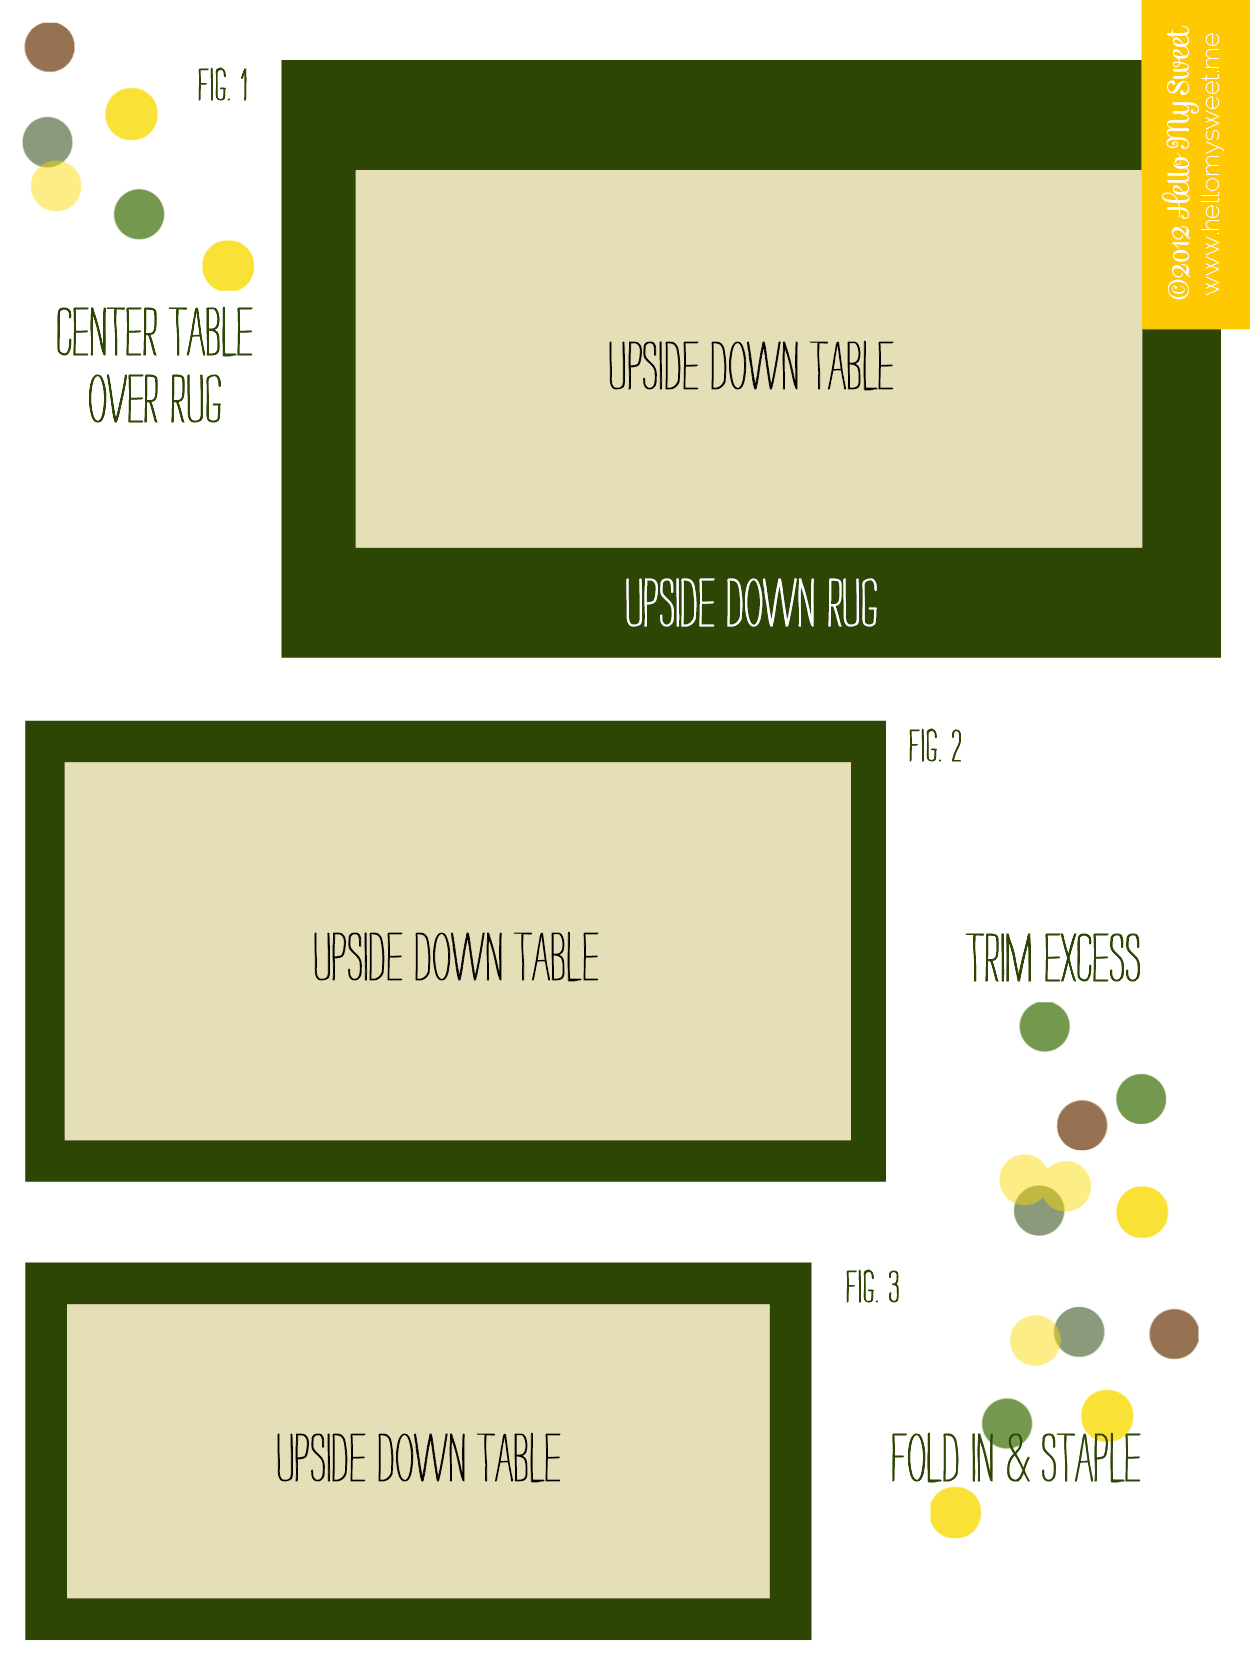
Unroll the outdoor rug and lay it upside down on the floor. Place the folding table, unfolded and legs locked into position, top side down onto the underneath side of the rug.  (Fig.1)  Trim off about 1 foot from either side of the 6 foot side of the rug.  (Fig.2)  Tightly fold up the edges of the rug and staple (with the staple gun) them to the underside of the table. (Fig.3) With that done all you need to do is to flip the table right side up. (Fig.4) You now have “blank” football field to work with!

Step Two: 

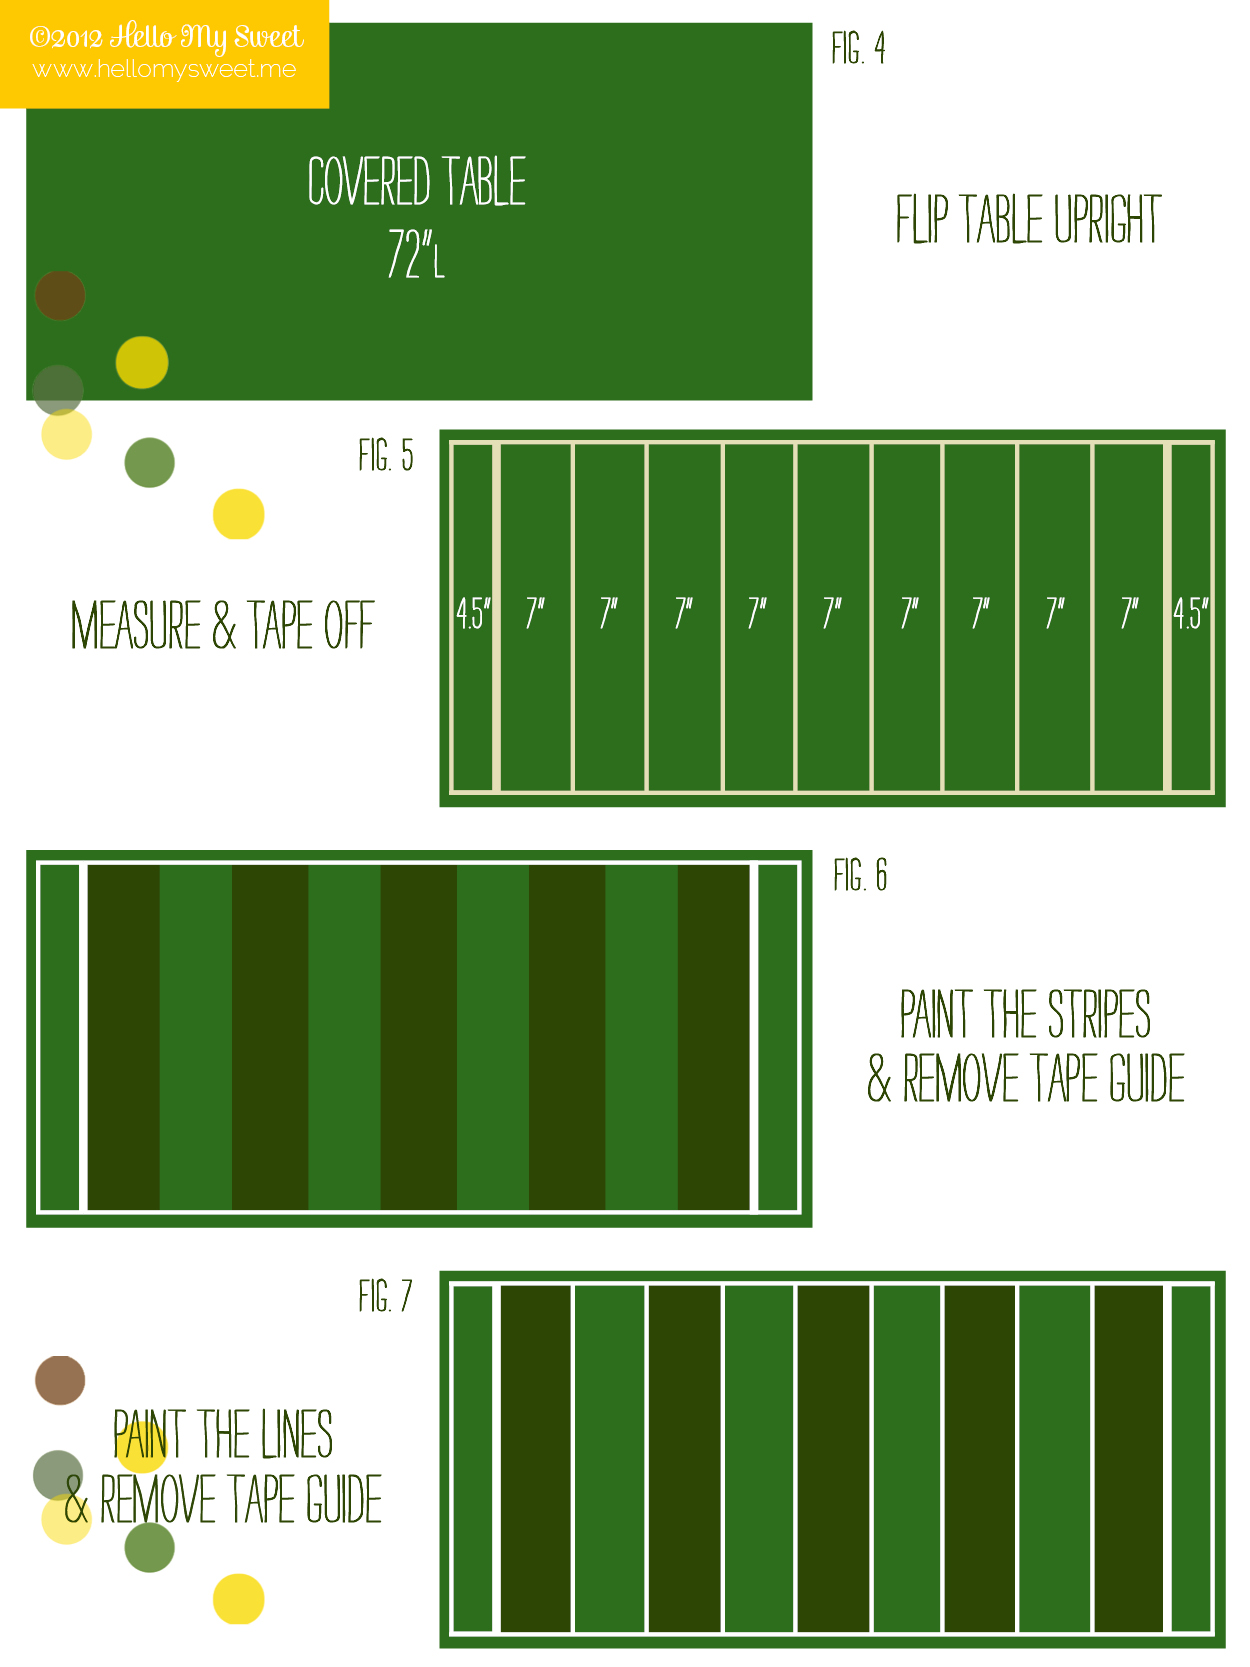
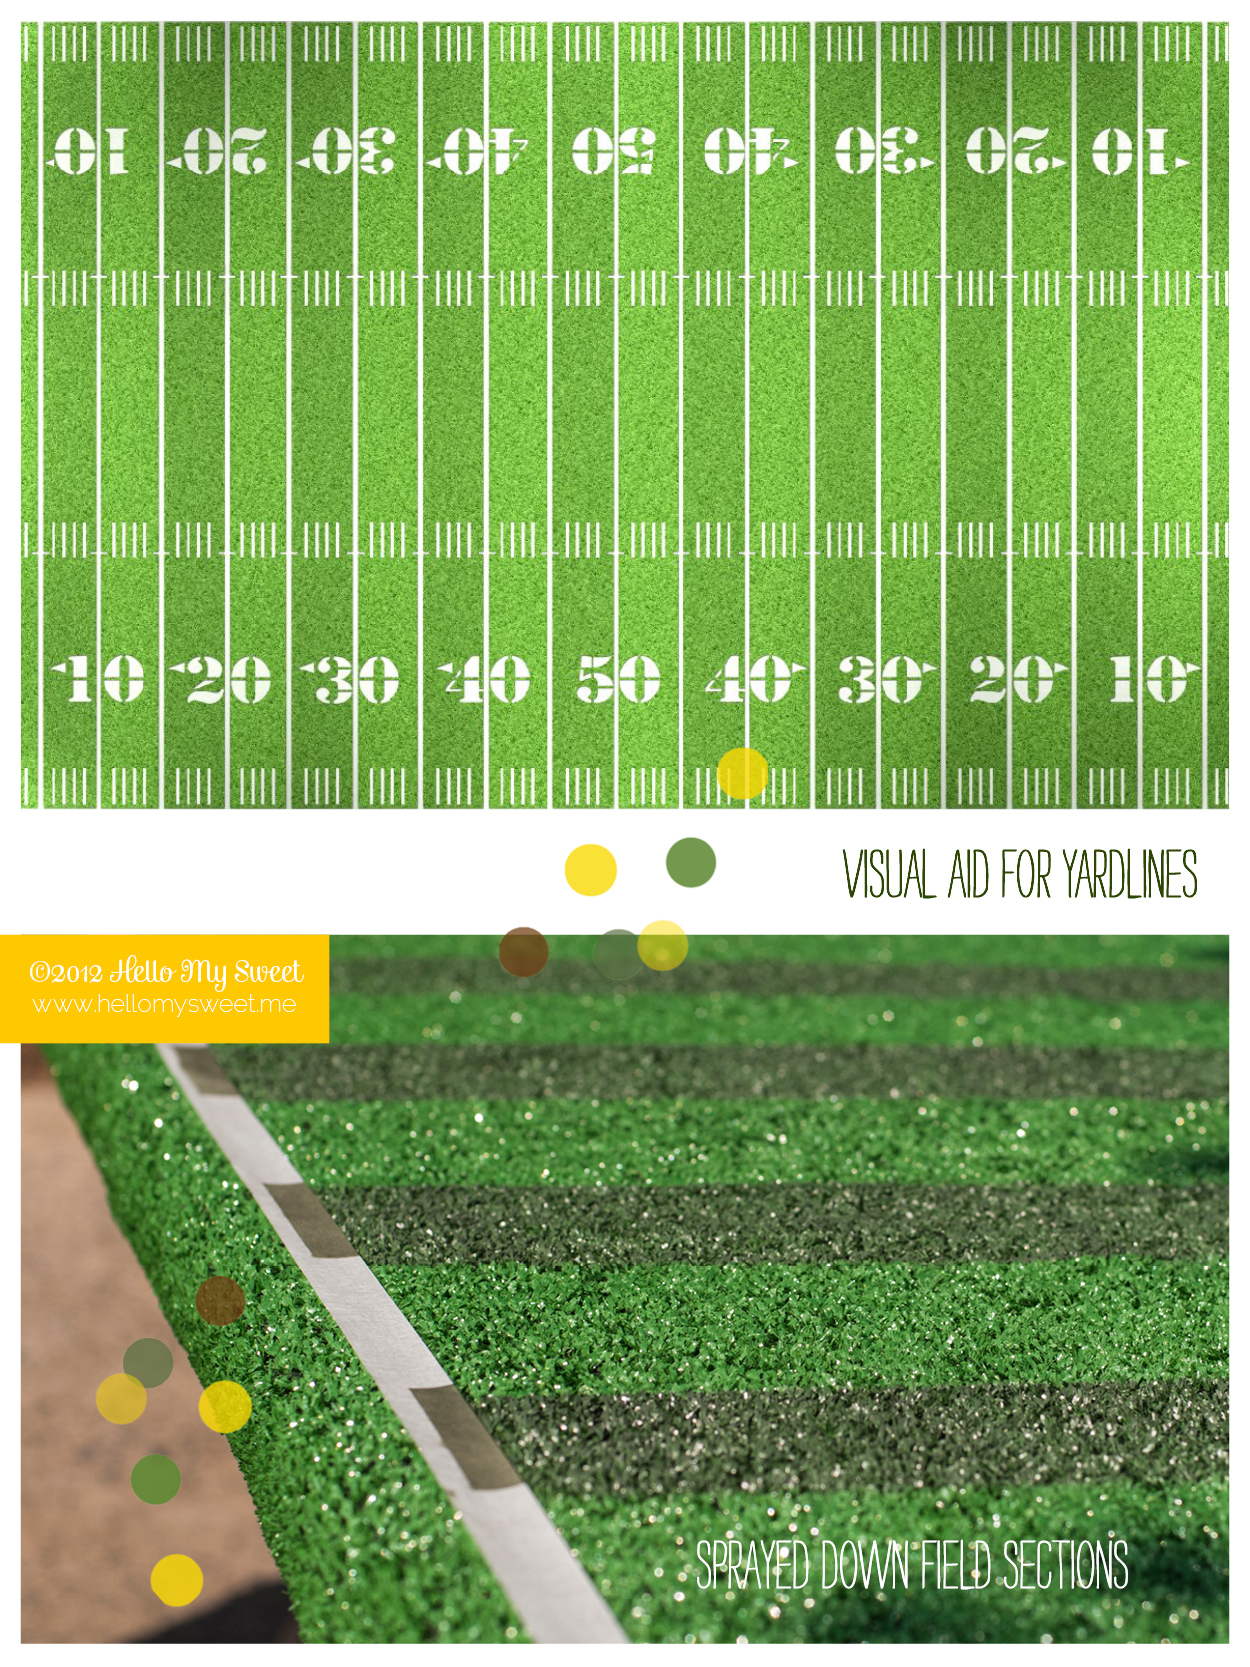
Mark out where your lines will go down. (Fig.5)  I used the following picture to give me an idea of where the lines needed to be in relation to the field.  With a measurement of 72” long for the table, you can place 9 (7”) sections in the center of the field, and 2 (4.5”) section at either end for the “End-Zones.” You may find it easiest to mark the center of the field first and work your way out on either side. (Measuring 3.5”inches to the left and right of center first, then 7” sections on either side afterwards.) Tape down the end zone and yardage lines with the masking tape.This will serve as your guide to paint.

Step Three:

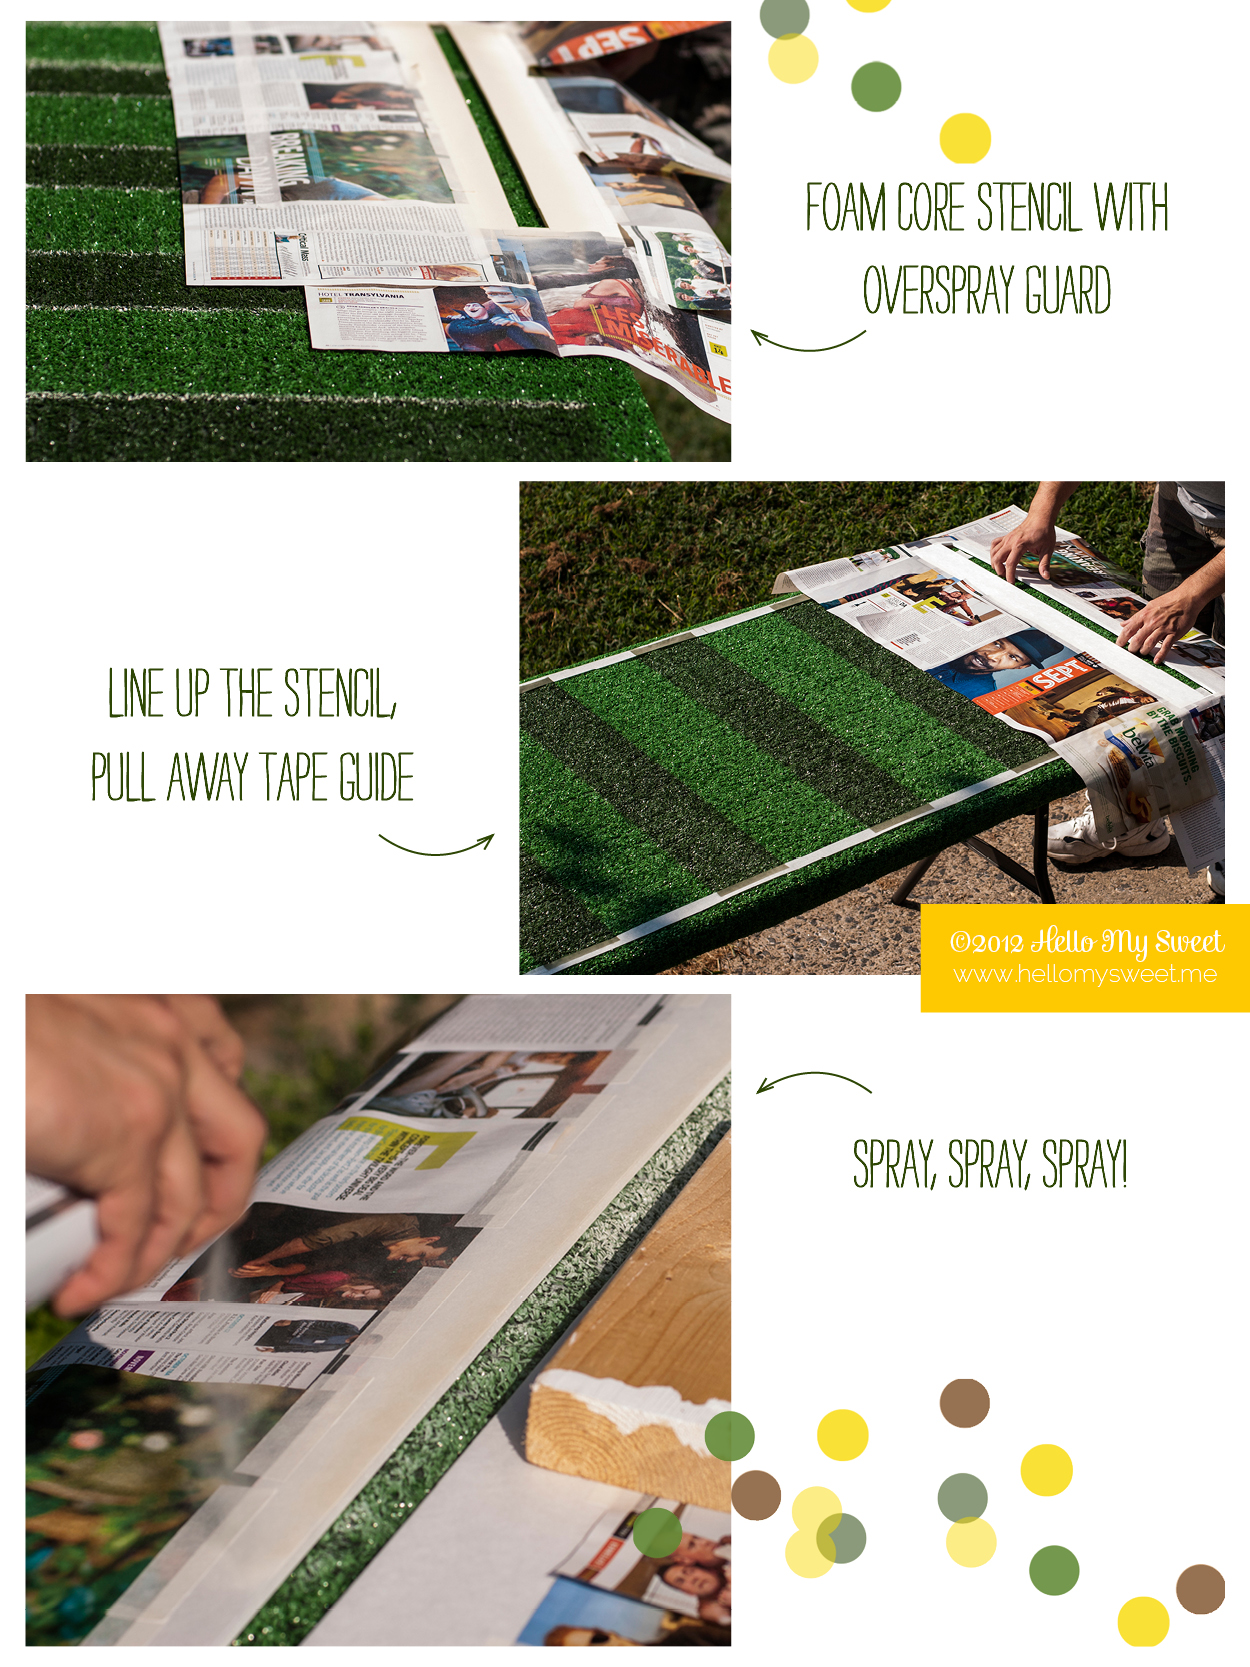
Using the dark green paint, paint every other 7” strip in the field, starting with the left side and working your way right. (Fig.6) You should end up with 5 dark stripes. You can use craft paint for this (easier to control) or make yourself a stencil that masks off the area you do not want painted so that you can use spray paint. We used spray paint, but if we were to do it again, I would opt for a paintbrush and paint instead, much less room for error! Let this dry before moving onto your next step.

style="font-family: proxima-nova; line-height: 19.5px; margin: 0px 0px 1.5em; color: rgb(82, 82, 82);">Step Four:

Take the foam core and cut out a line stencil, the same width of the masking tape. You will use this stencil as a guide to paint your white border lines. (Fig. 7) When I was ready to paint a section of line, I would line up the stencil with my masking tape and pull off the tape up through the stencil hole right before painting. Alternatively, you can use a paintbrush and craft paint for this as well, again much more control and less room for painting errors! Let this dry before moving onto your next step.

Step Five: 

Time for yardage! Taking the numbers stencil, I cut out the numbers 1, 2, 3, 4 and 0.  Take some scrap poster board or cardboard and cut out a border to expand the edges of your stencil and protect from paint overspray. This extra border is not necessary if you plan to paint with a brush instead of spray paint. Making sure to pay attention the direction of the field you are painting on, and using the field diagram picture as a guide, spray down the numbers onto the field.  Let those dry for approximately an hour, then stand back and admire your handiwork!

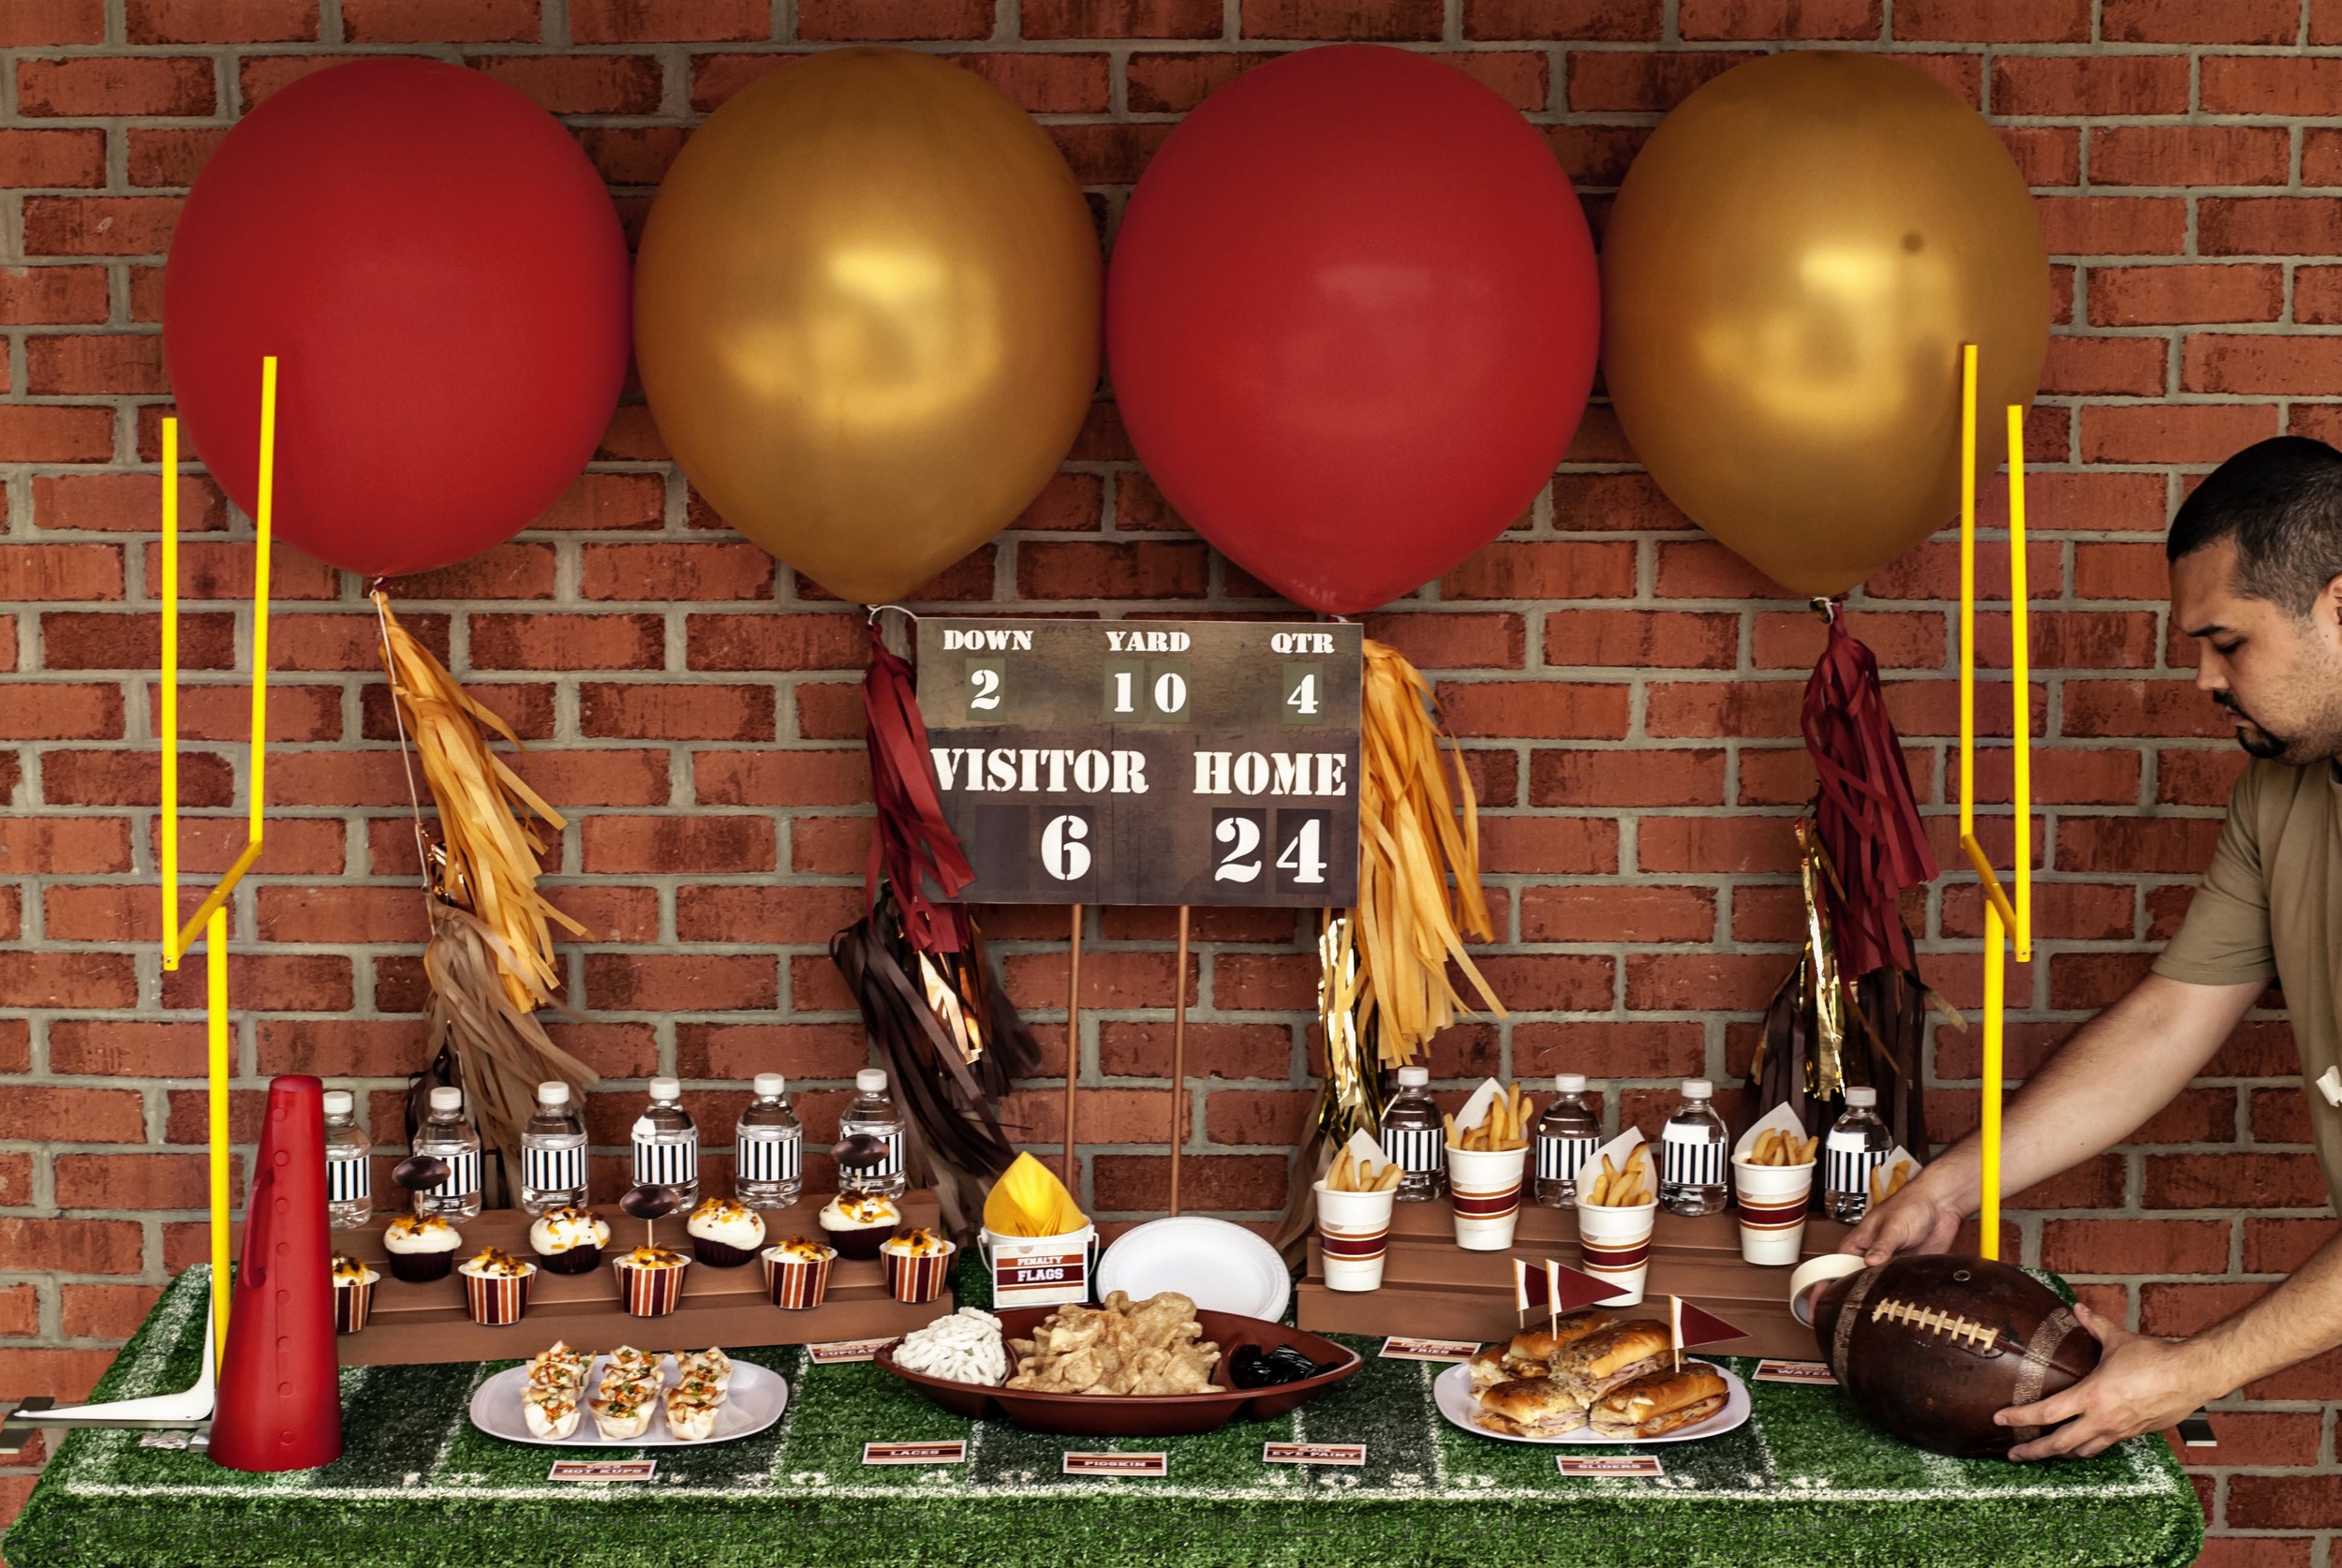
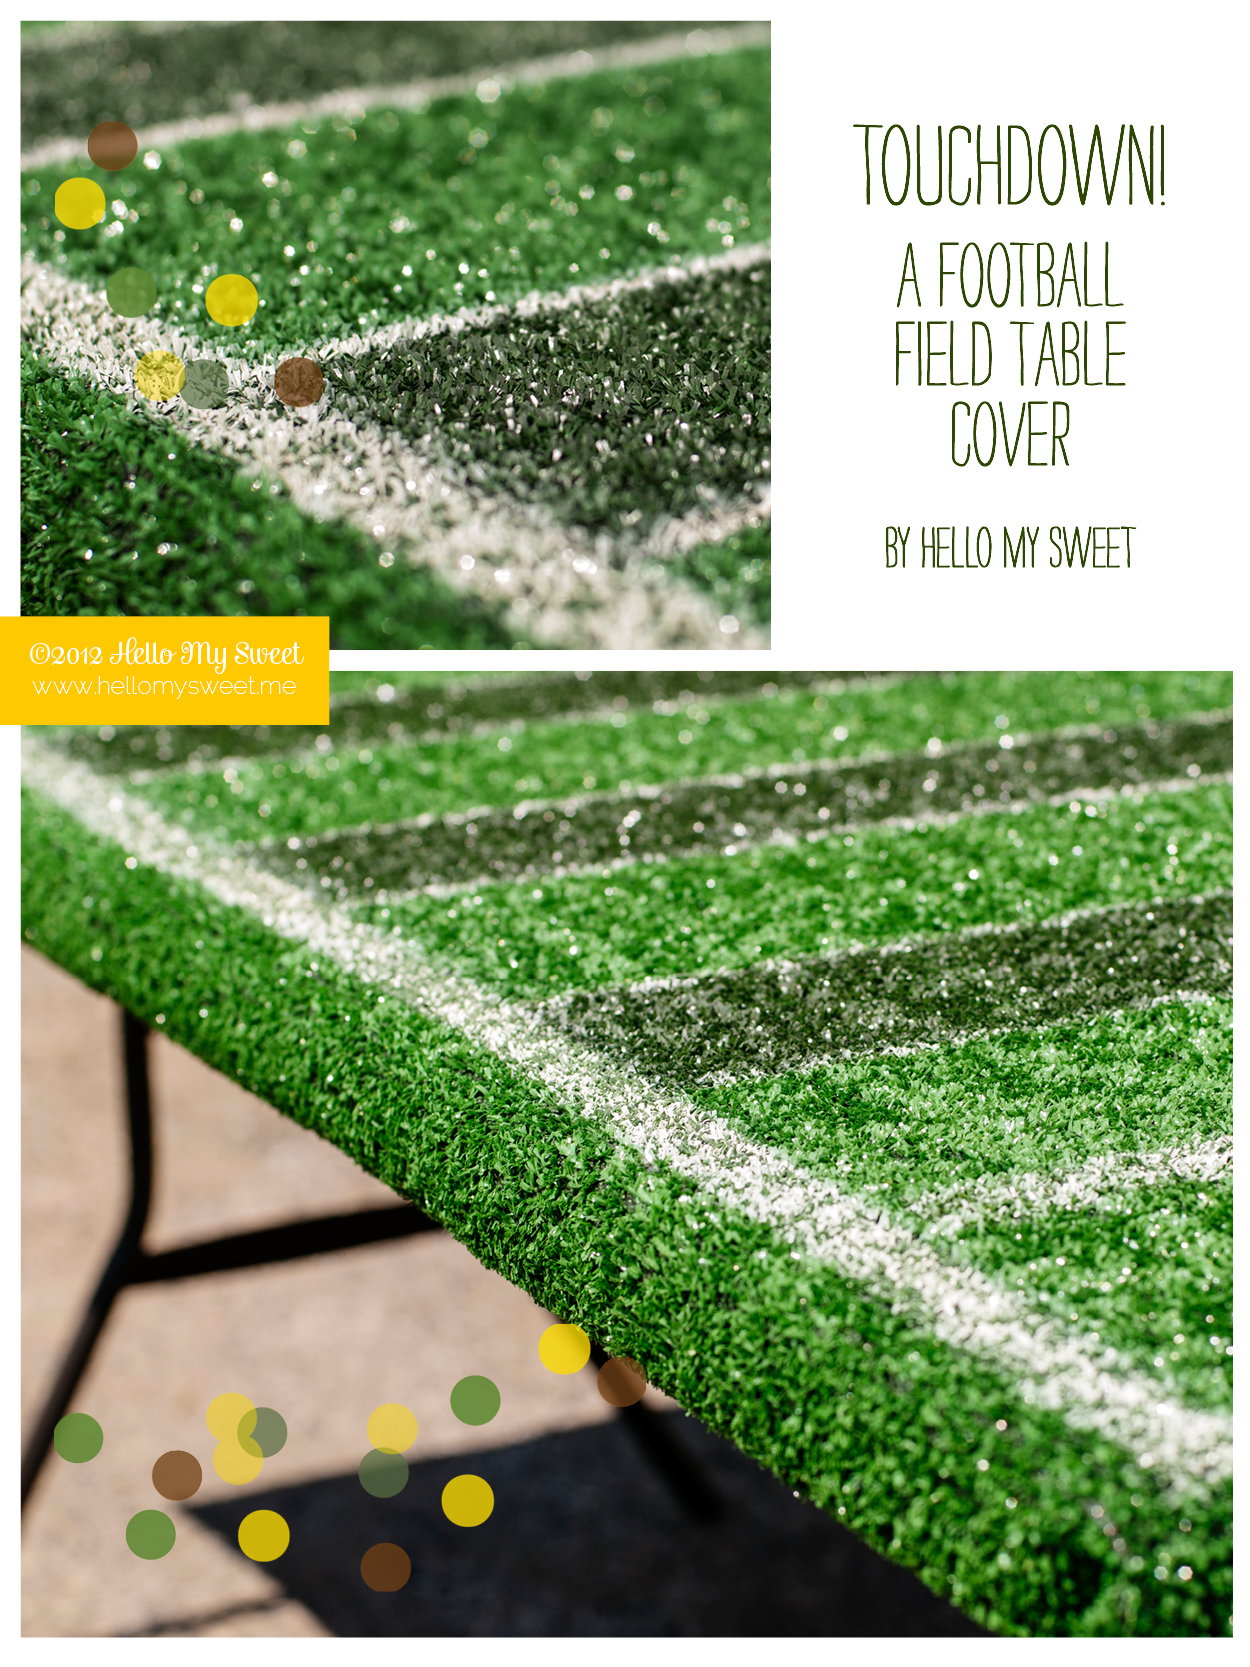
This table cover accompanies our Vintage Football Party, perfect for tailgates, super bowls or just a sports theme birthday!


DIY-Football-Field-Table-Cover-02.jpg
HMS DIY Football2.jpg
HMS DIY Football3.jpg
HMS DIY Football4.jpg
HMS DIY Football5.jpg
HMS DIY Football6.jpg
FootballProps_0004-1.jpg

Life Preserver Donuts

Life Preserver Donuts

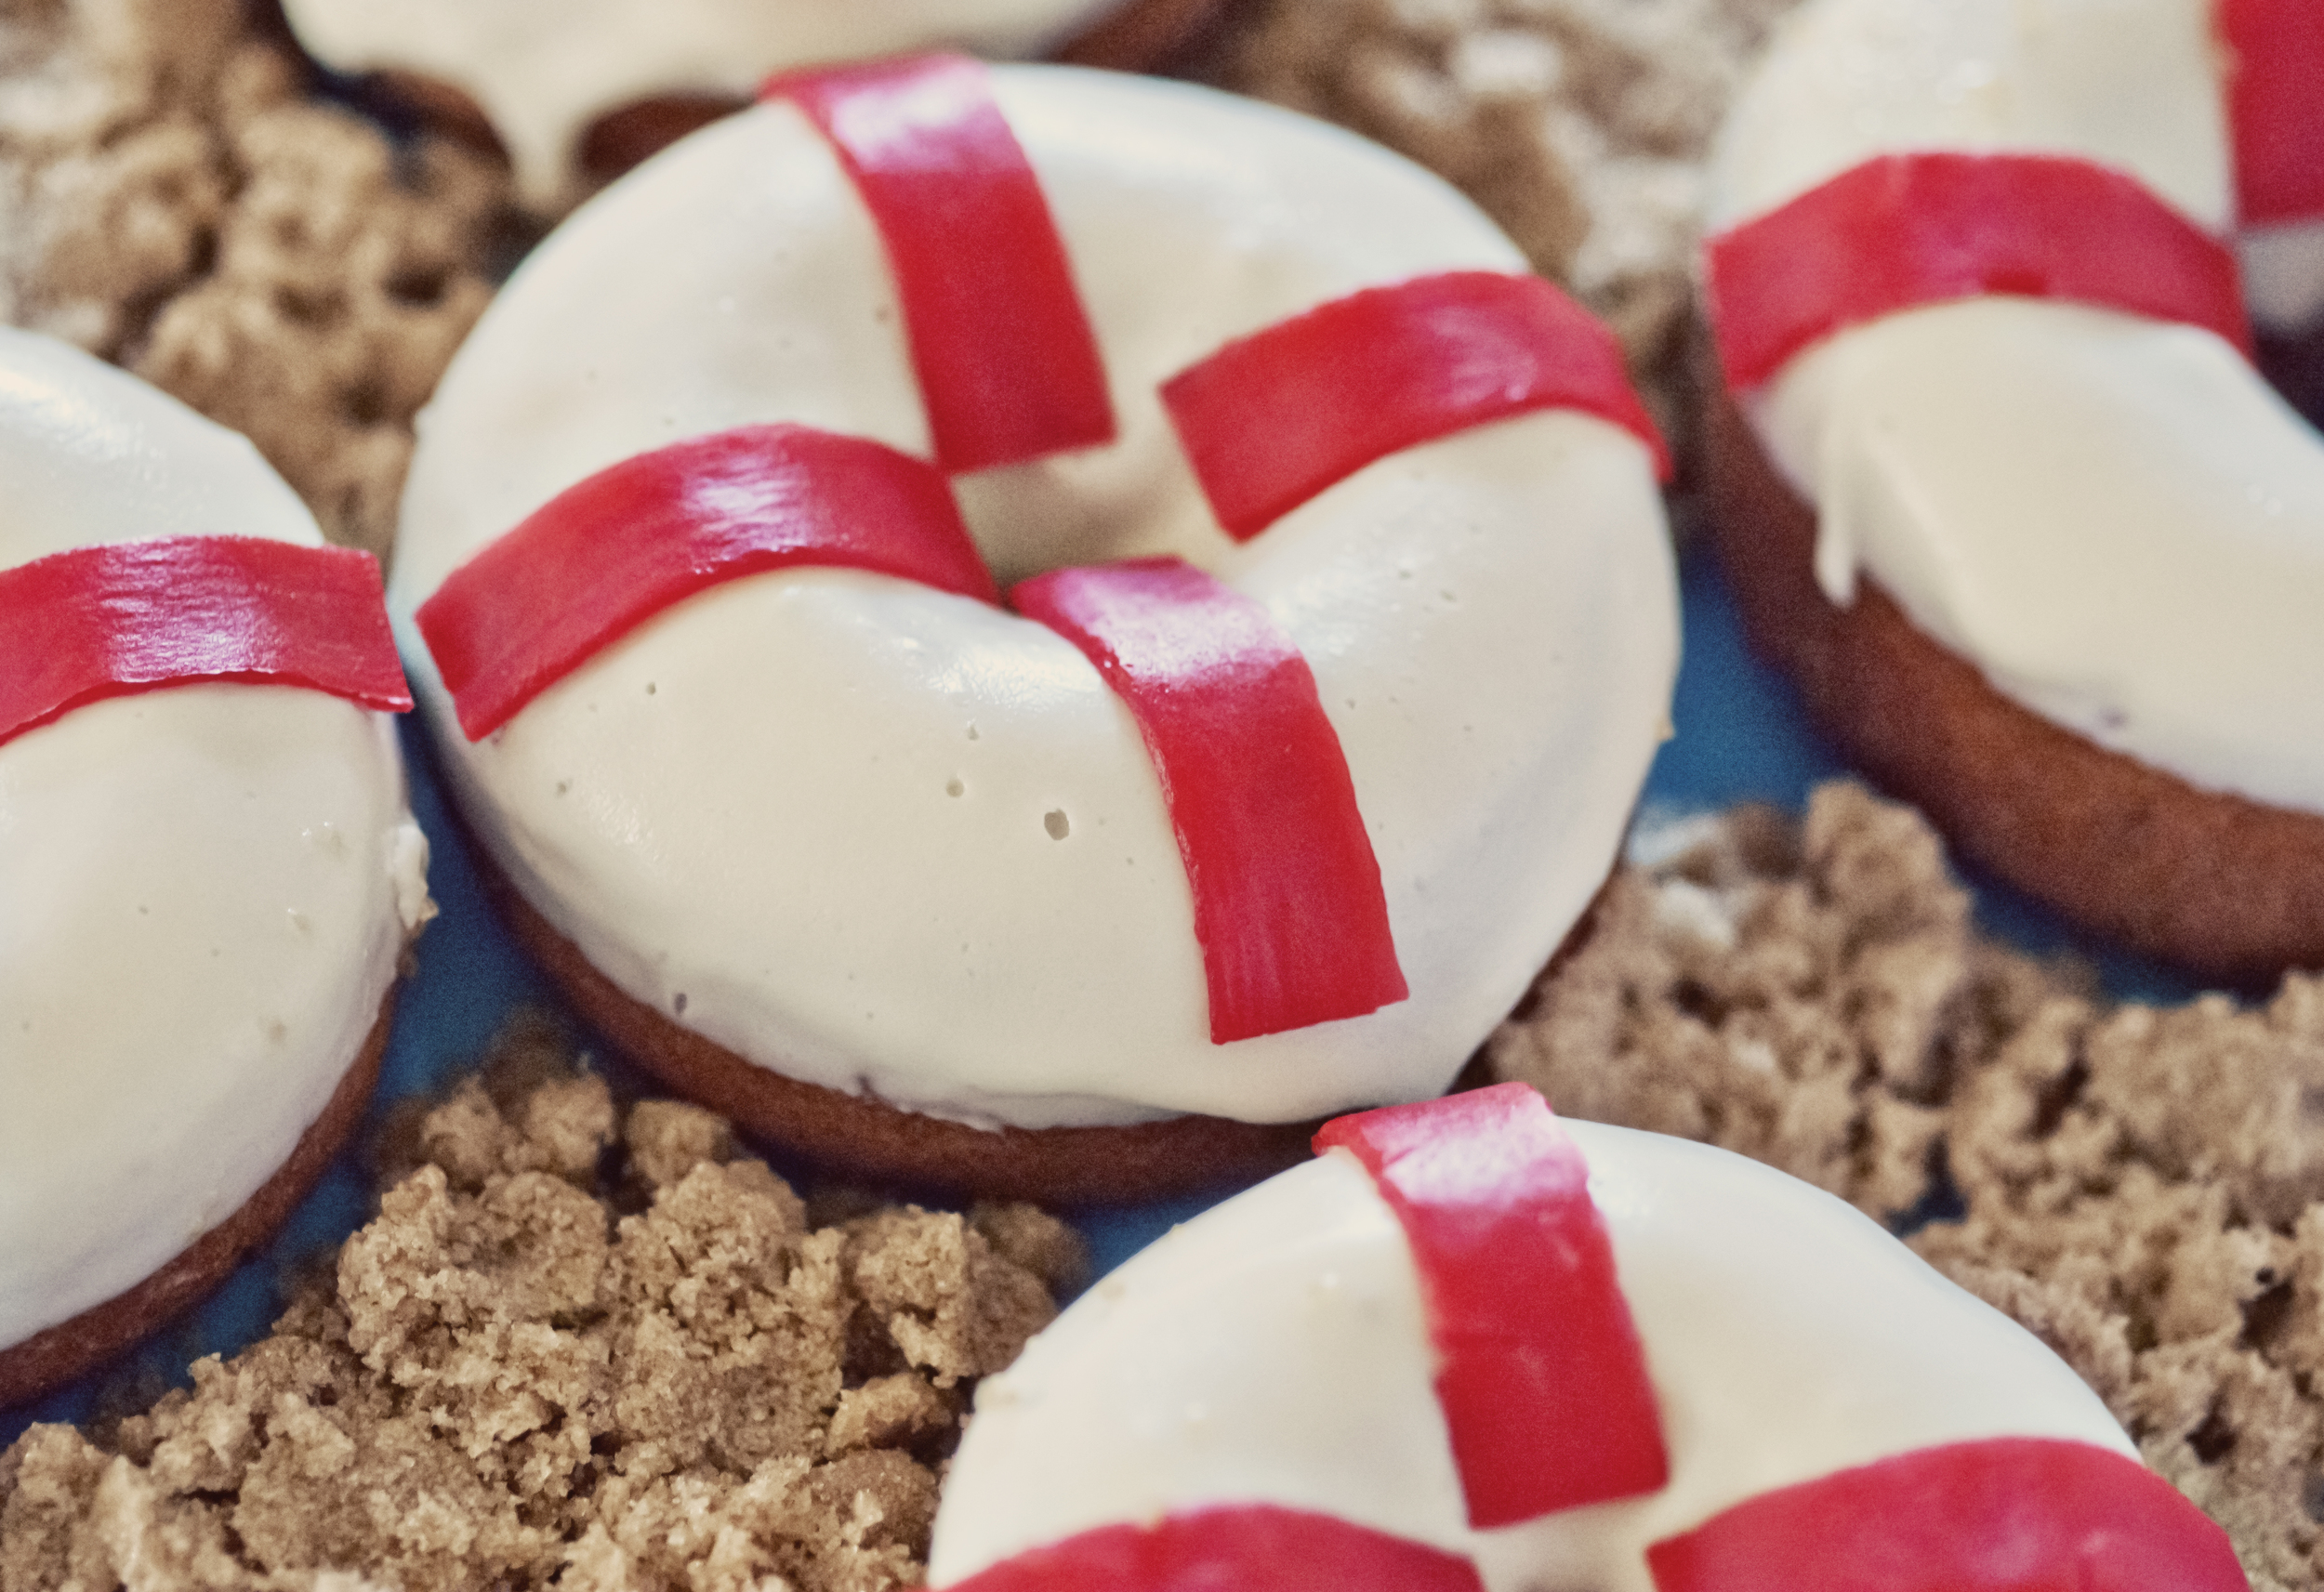
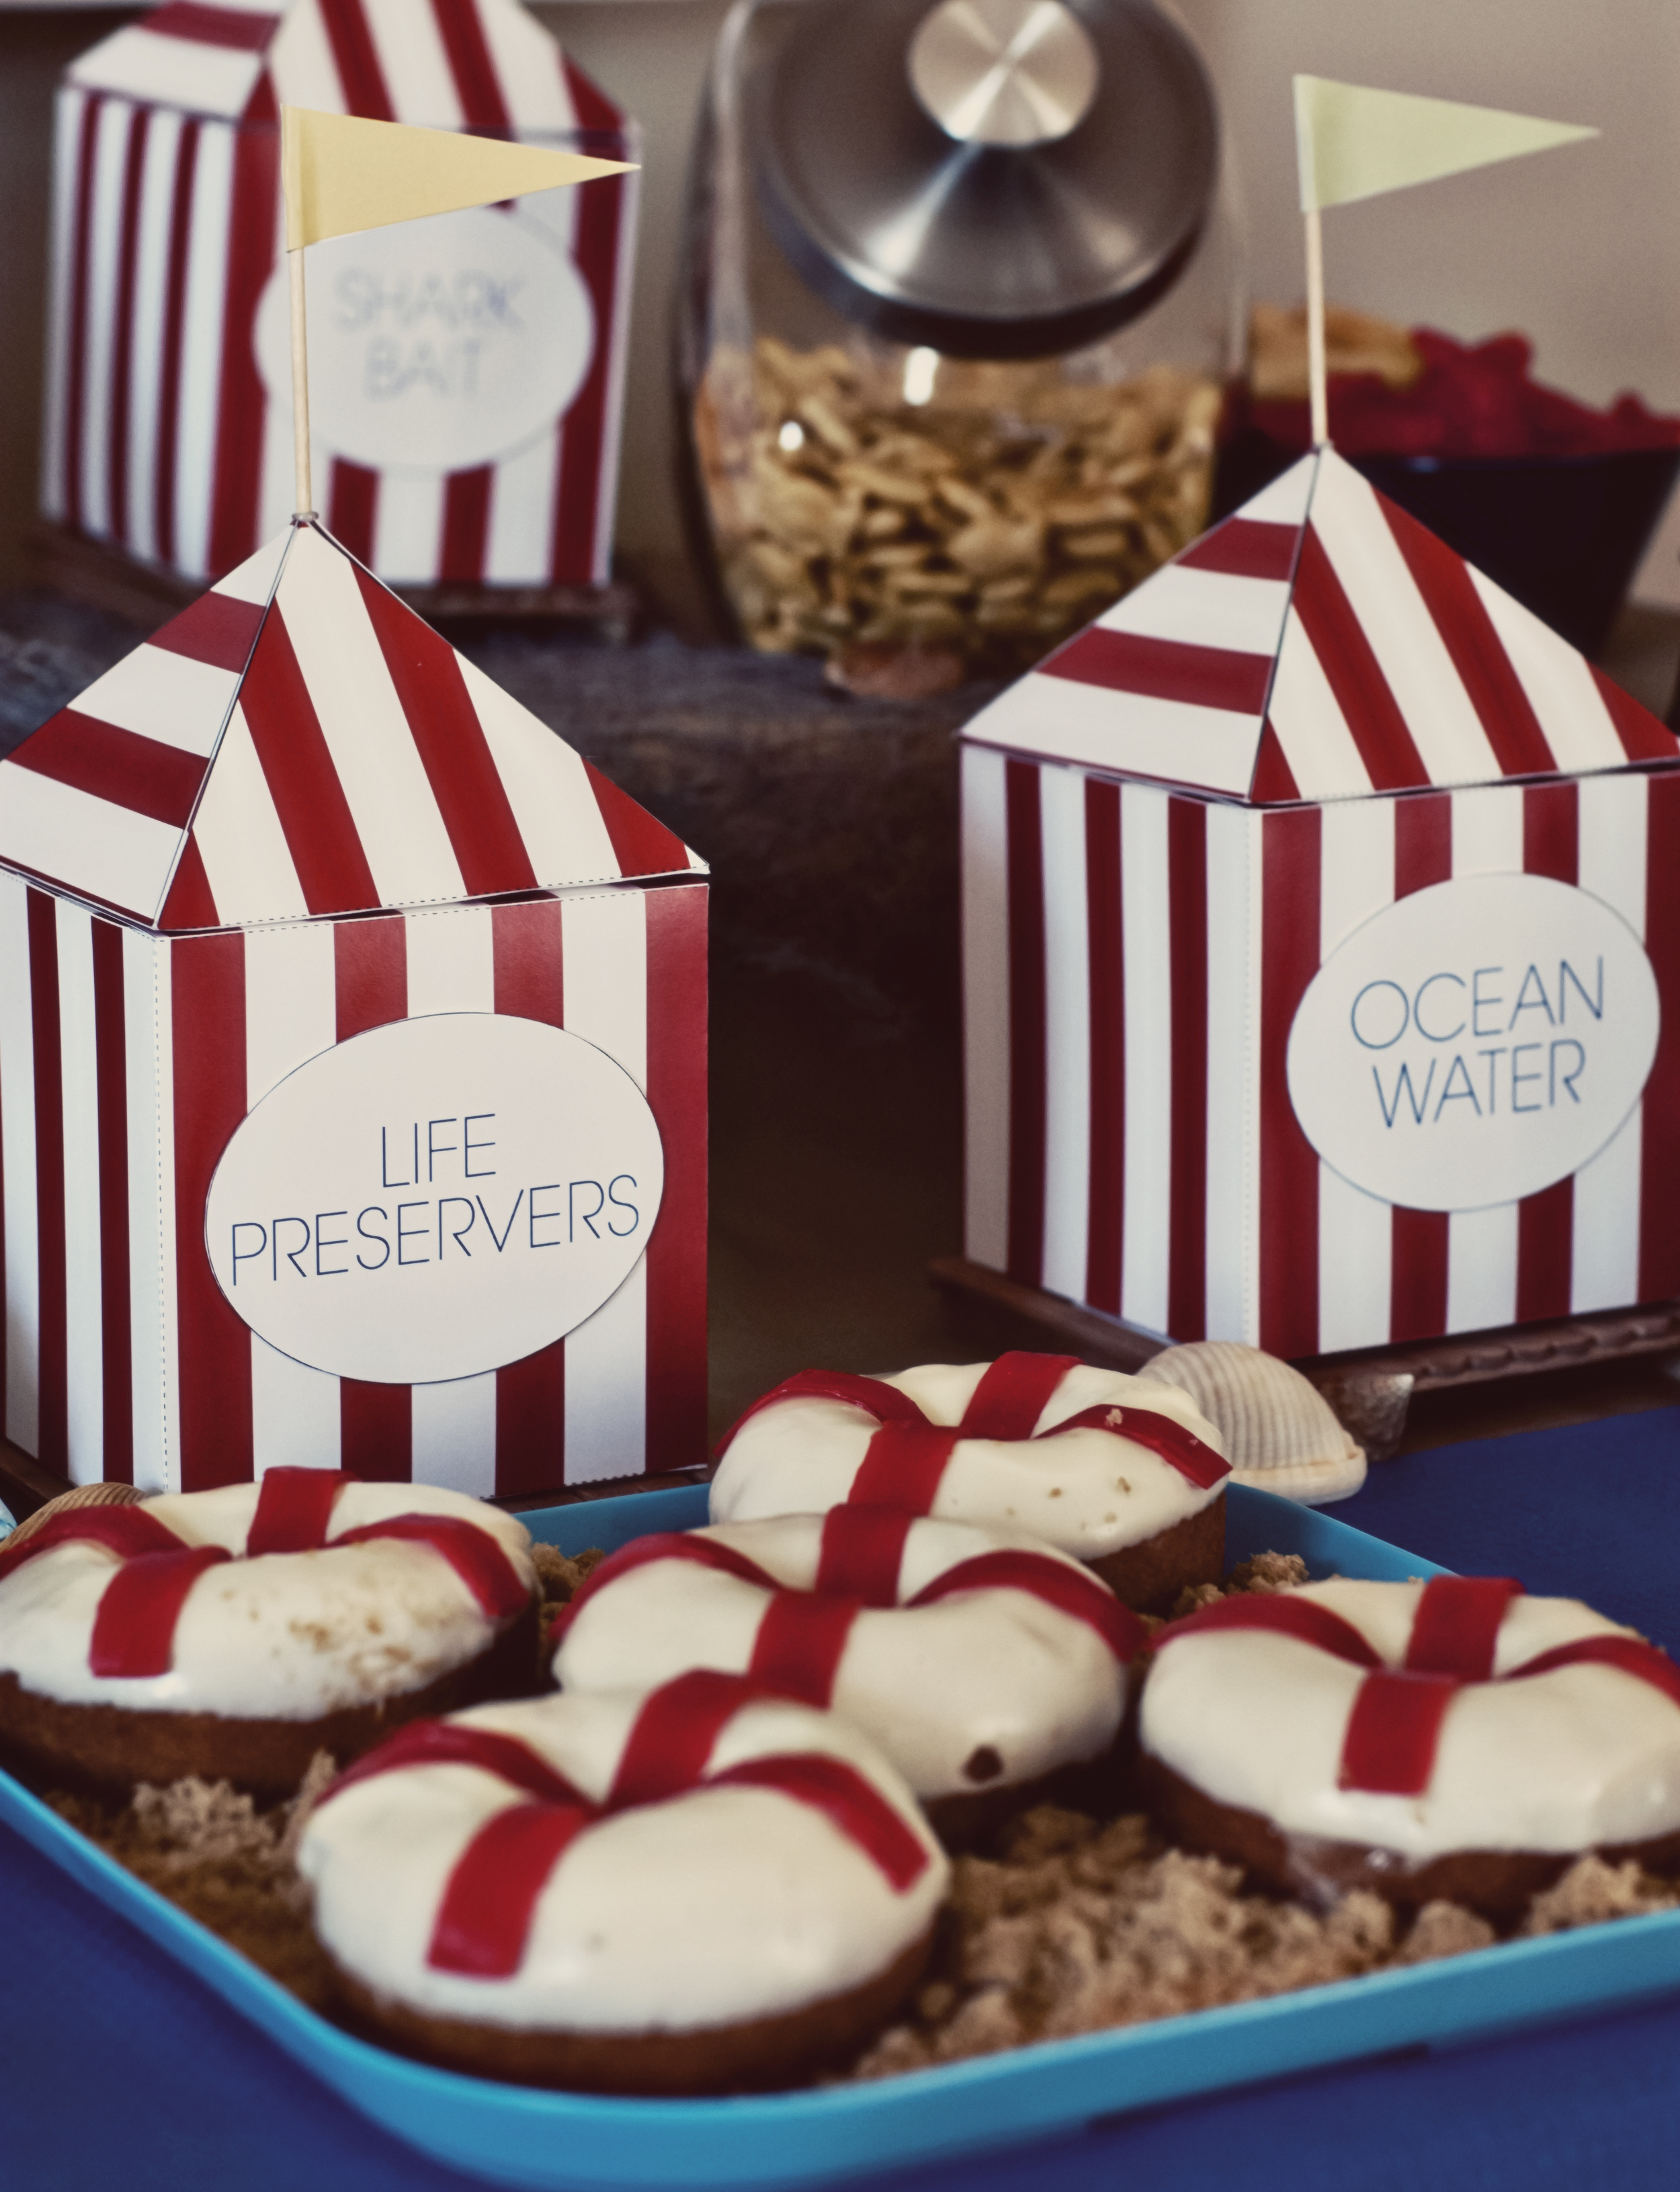
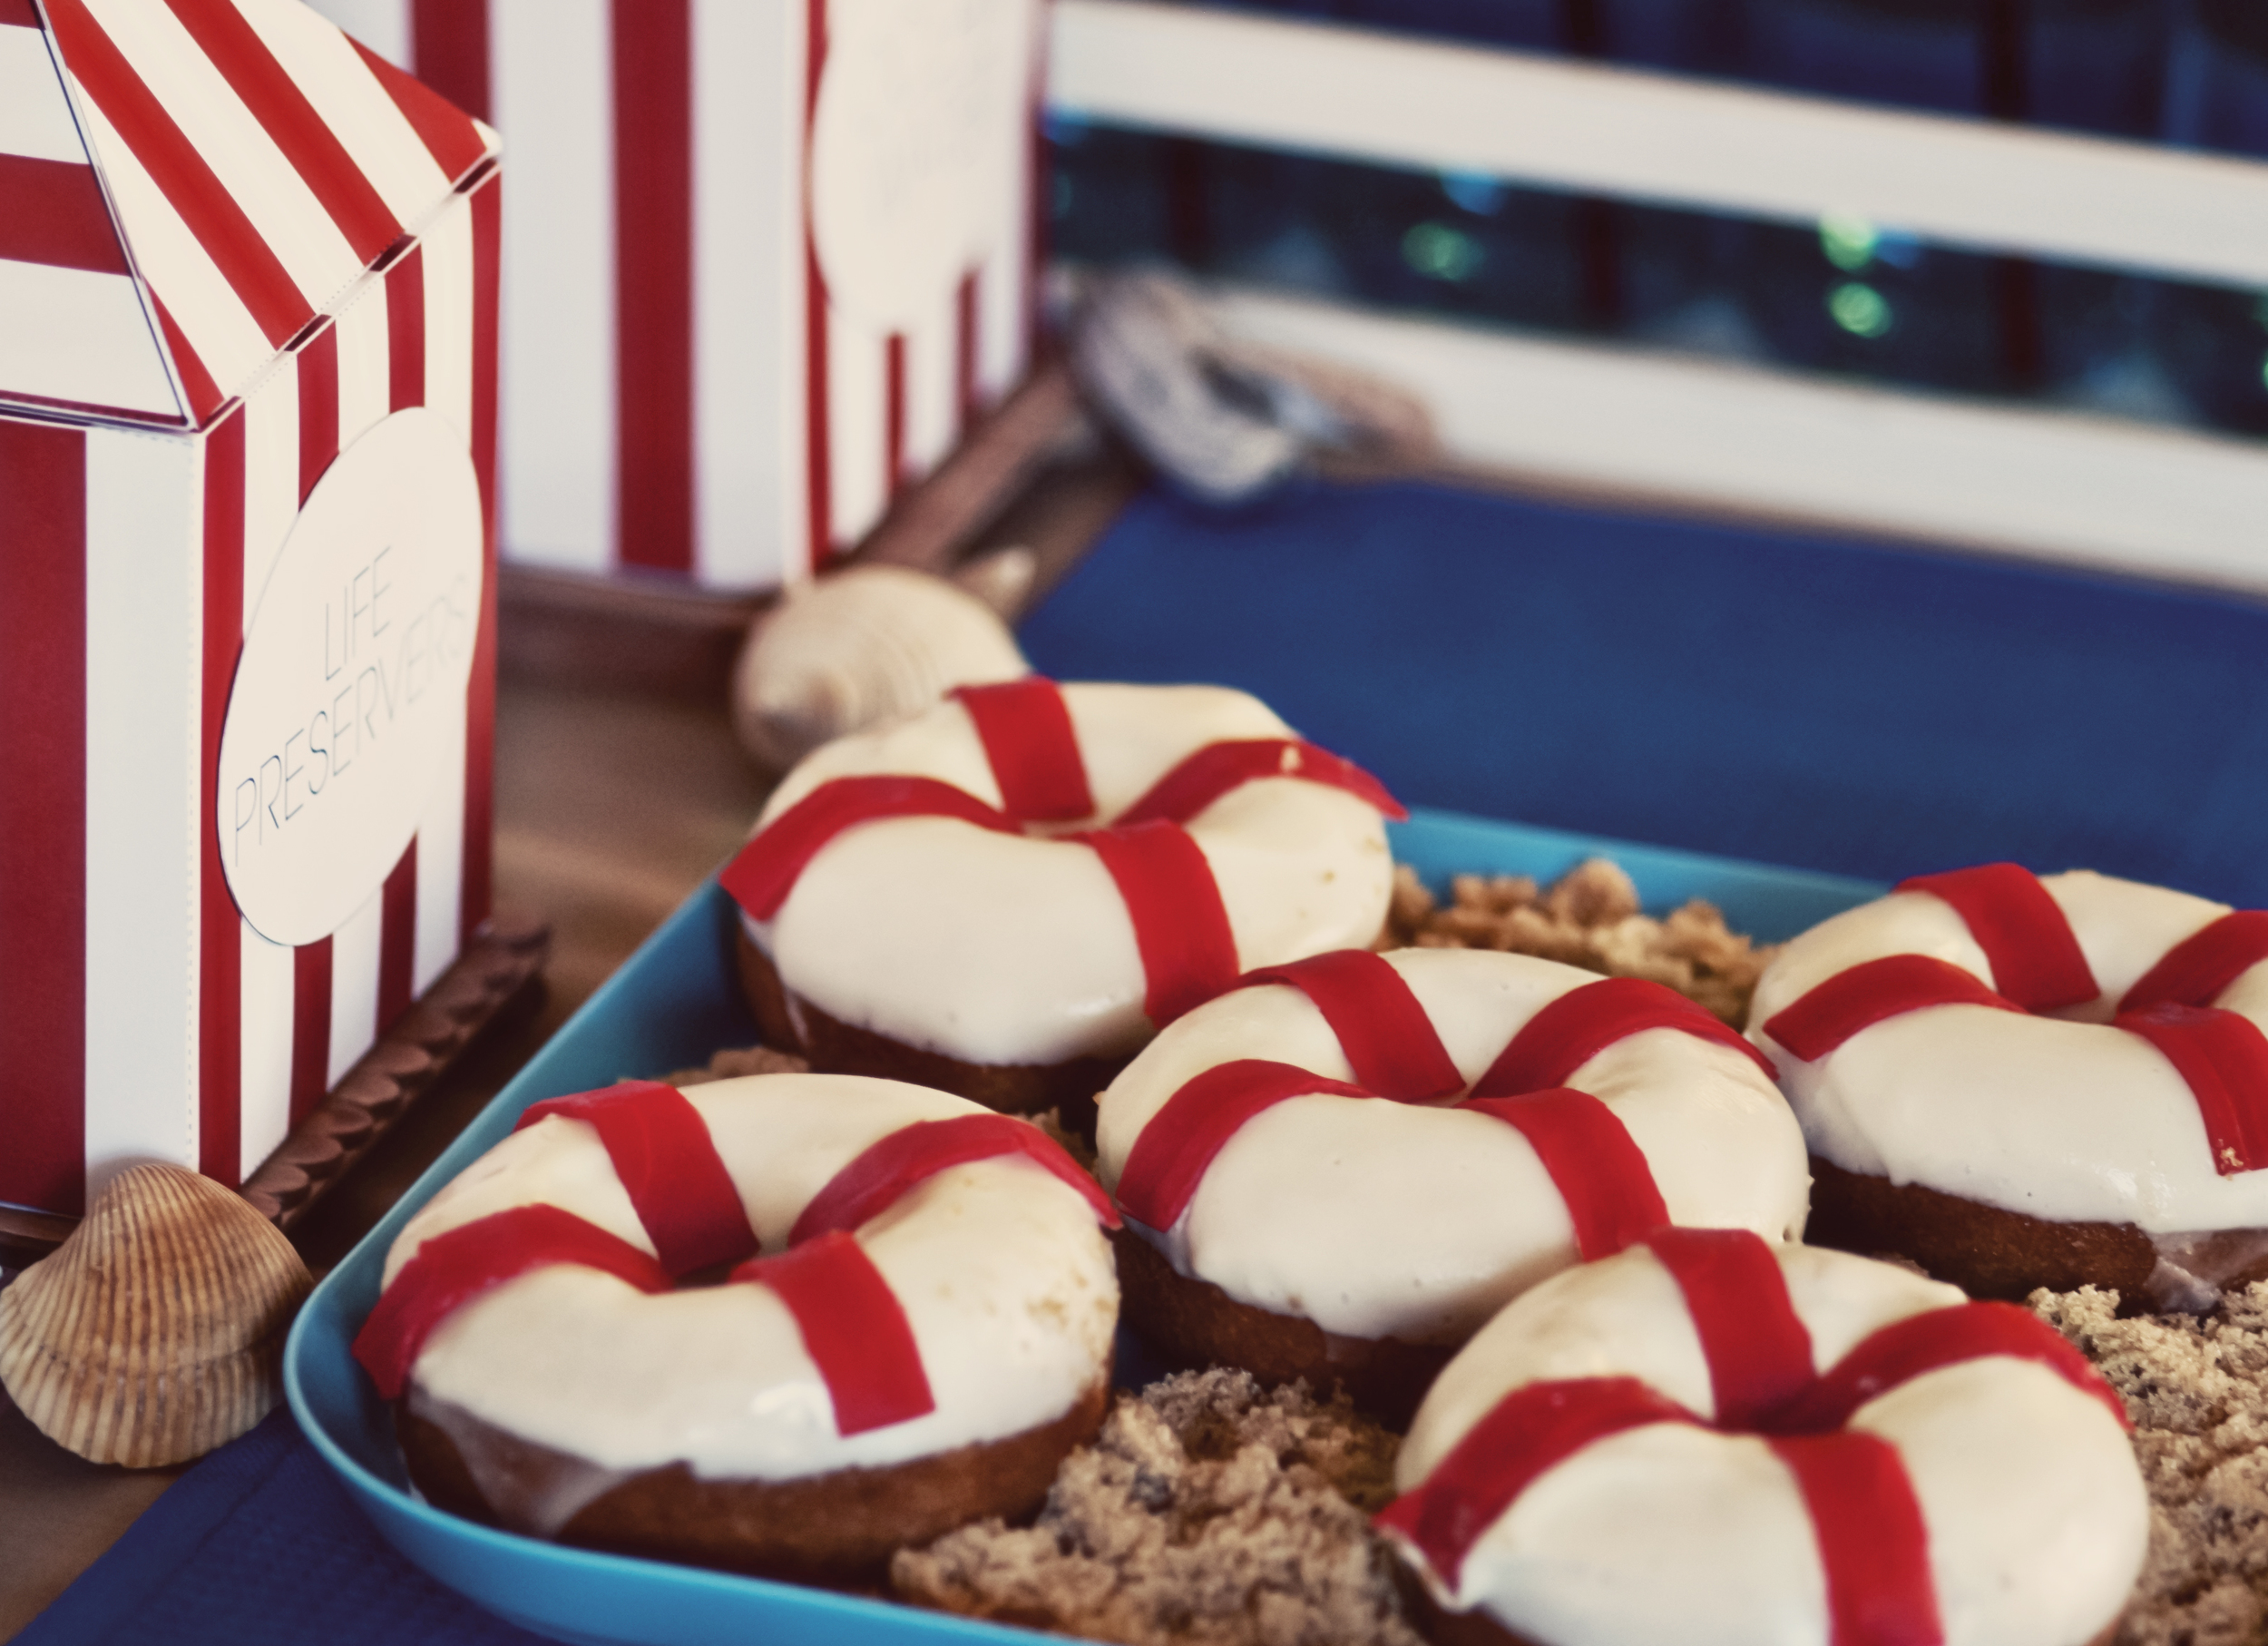
These cute party treats are super easy and quick to make!

Ingredients:

Donuts (we used the plain cake kind)

White Frosting - any kind you prefer

Red Fruit Roll-ups

How to make them:

Using kitchen scissors or an x-acto knife, cut the fruit roll-ups into strips about 3" long and 1/2" wide. You will need four of these per donut. Remove the top of the frosting container and heat it in the microwave for 20 seconds or until slightly runny. Pour your frosting into a bowl wide enough to dip your donuts. Dip the top side of each donut and place onto wazed paper. Quickly add your strips to the wet frosting before it hardens. Let dry before serving.

Jaws_13.jpg
Jaws_15.jpg
Jaws_21.jpg

Retro Ray Guns

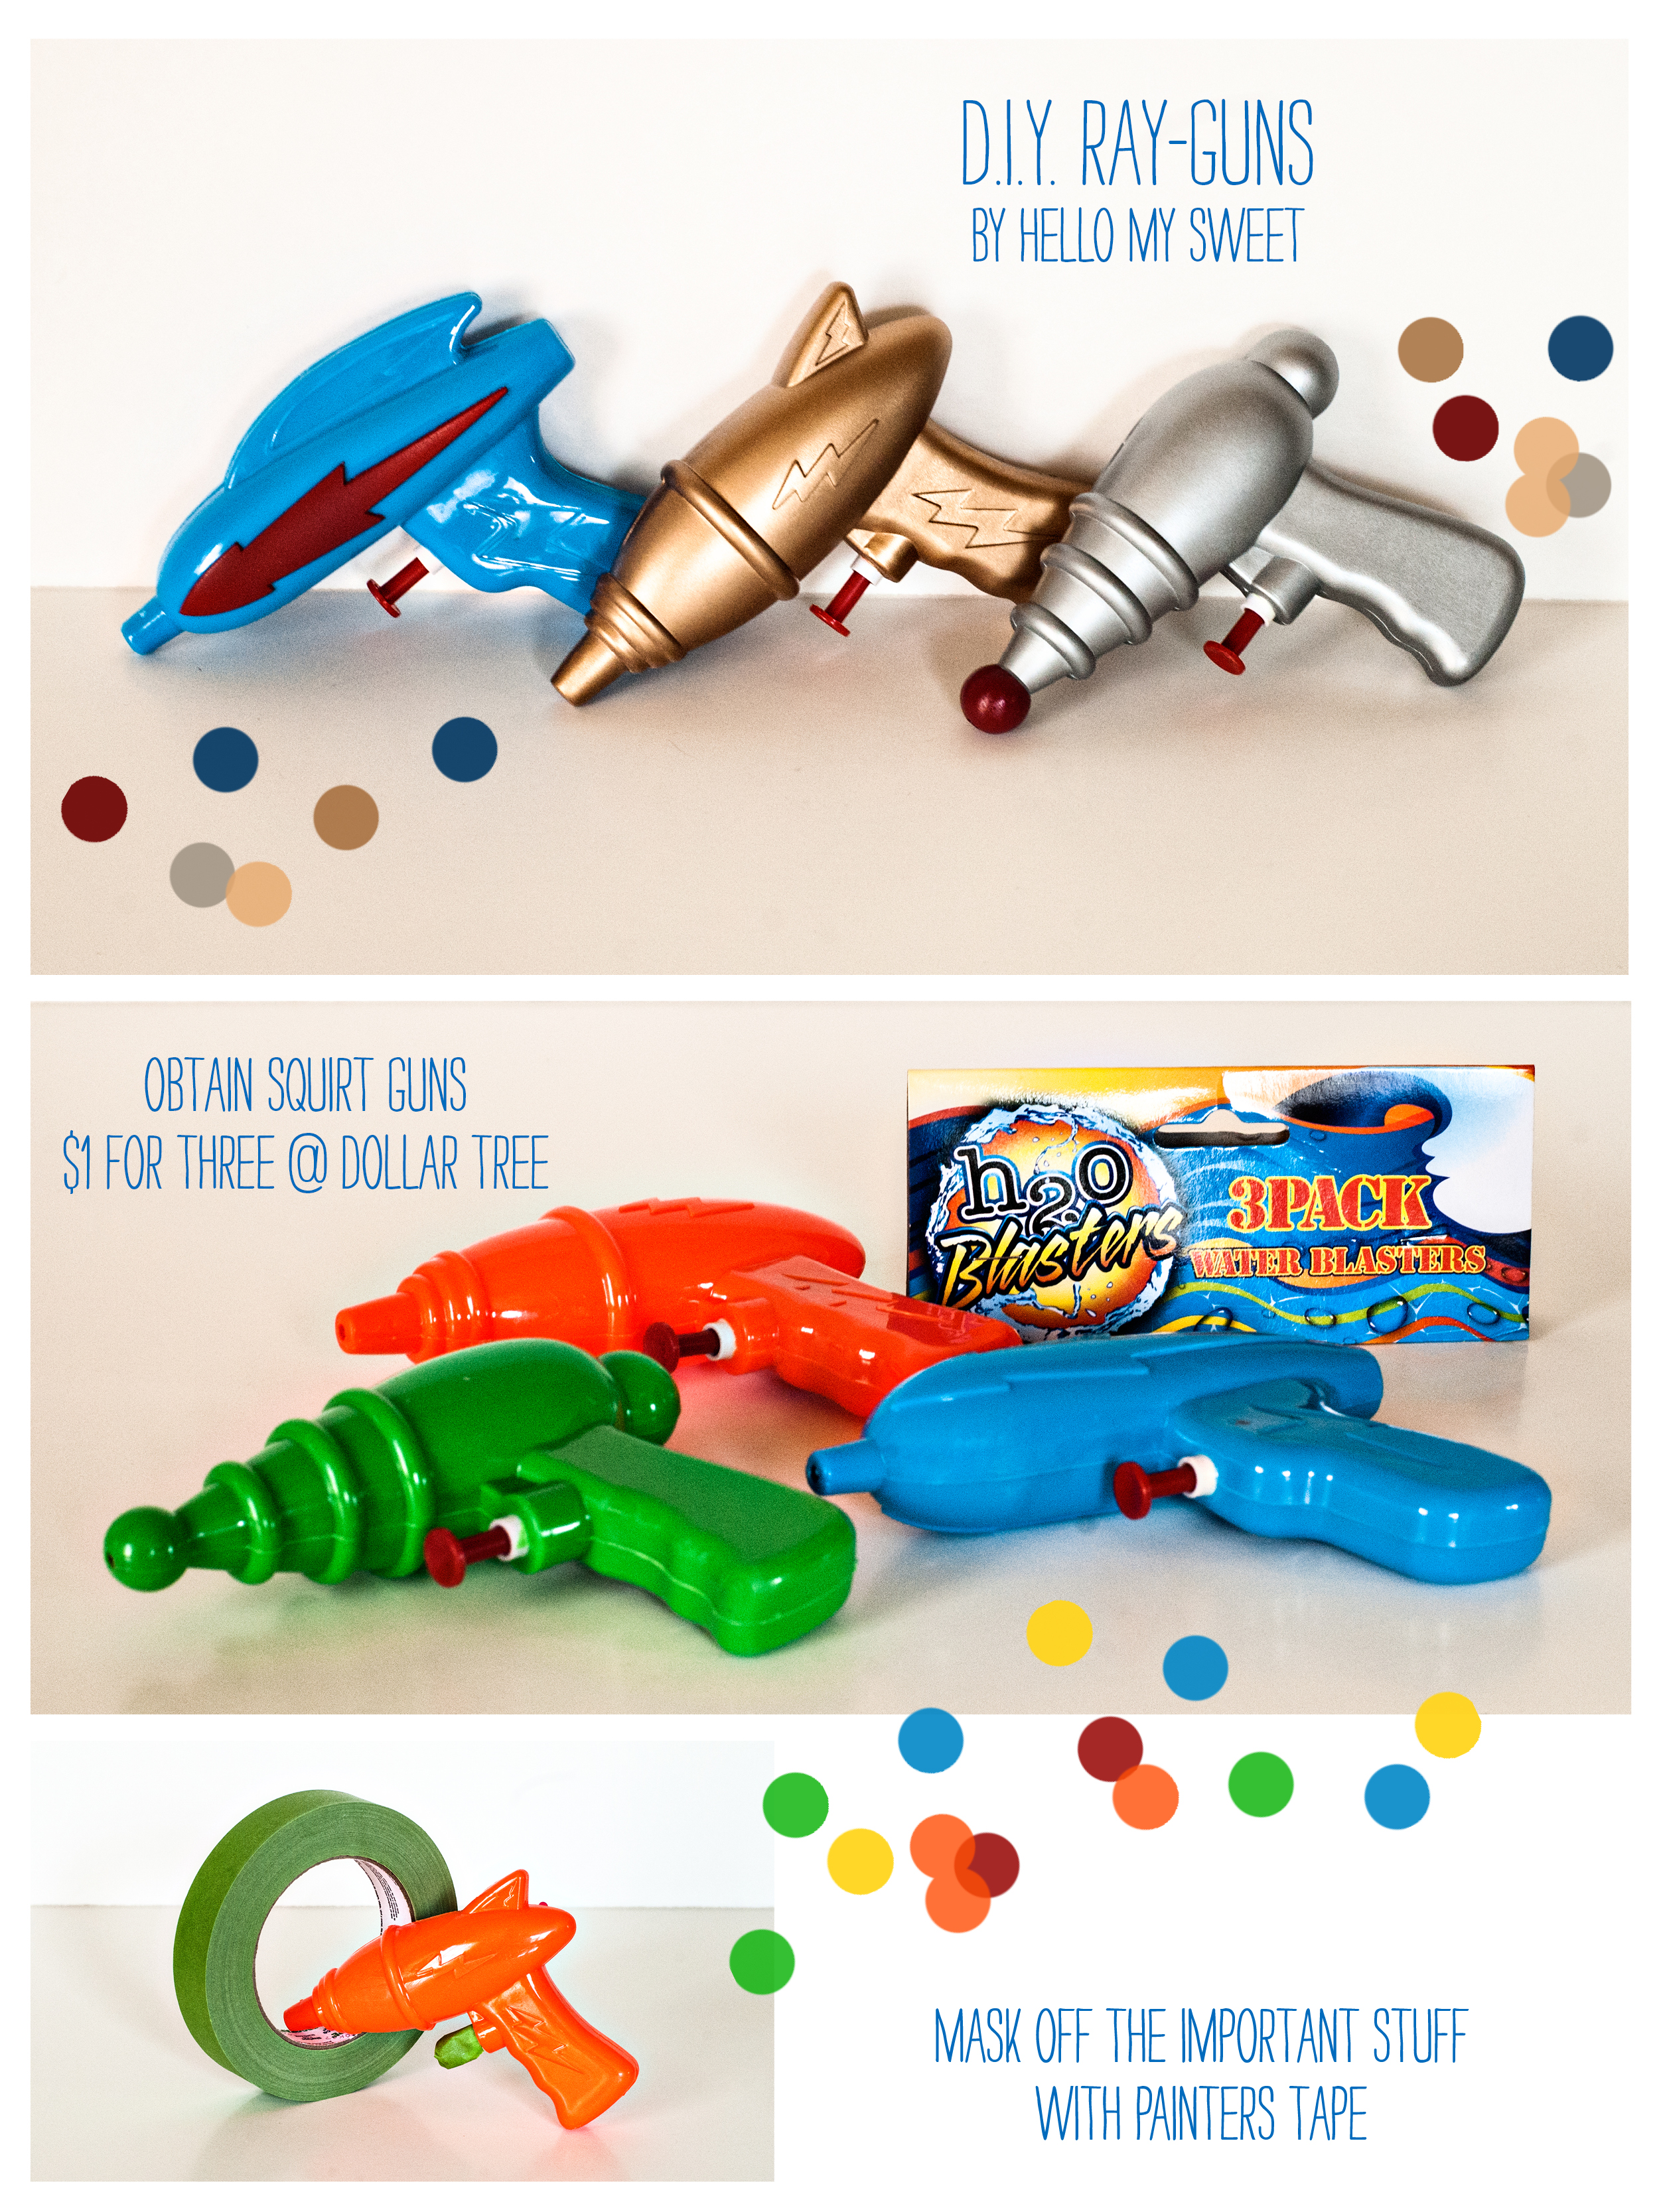
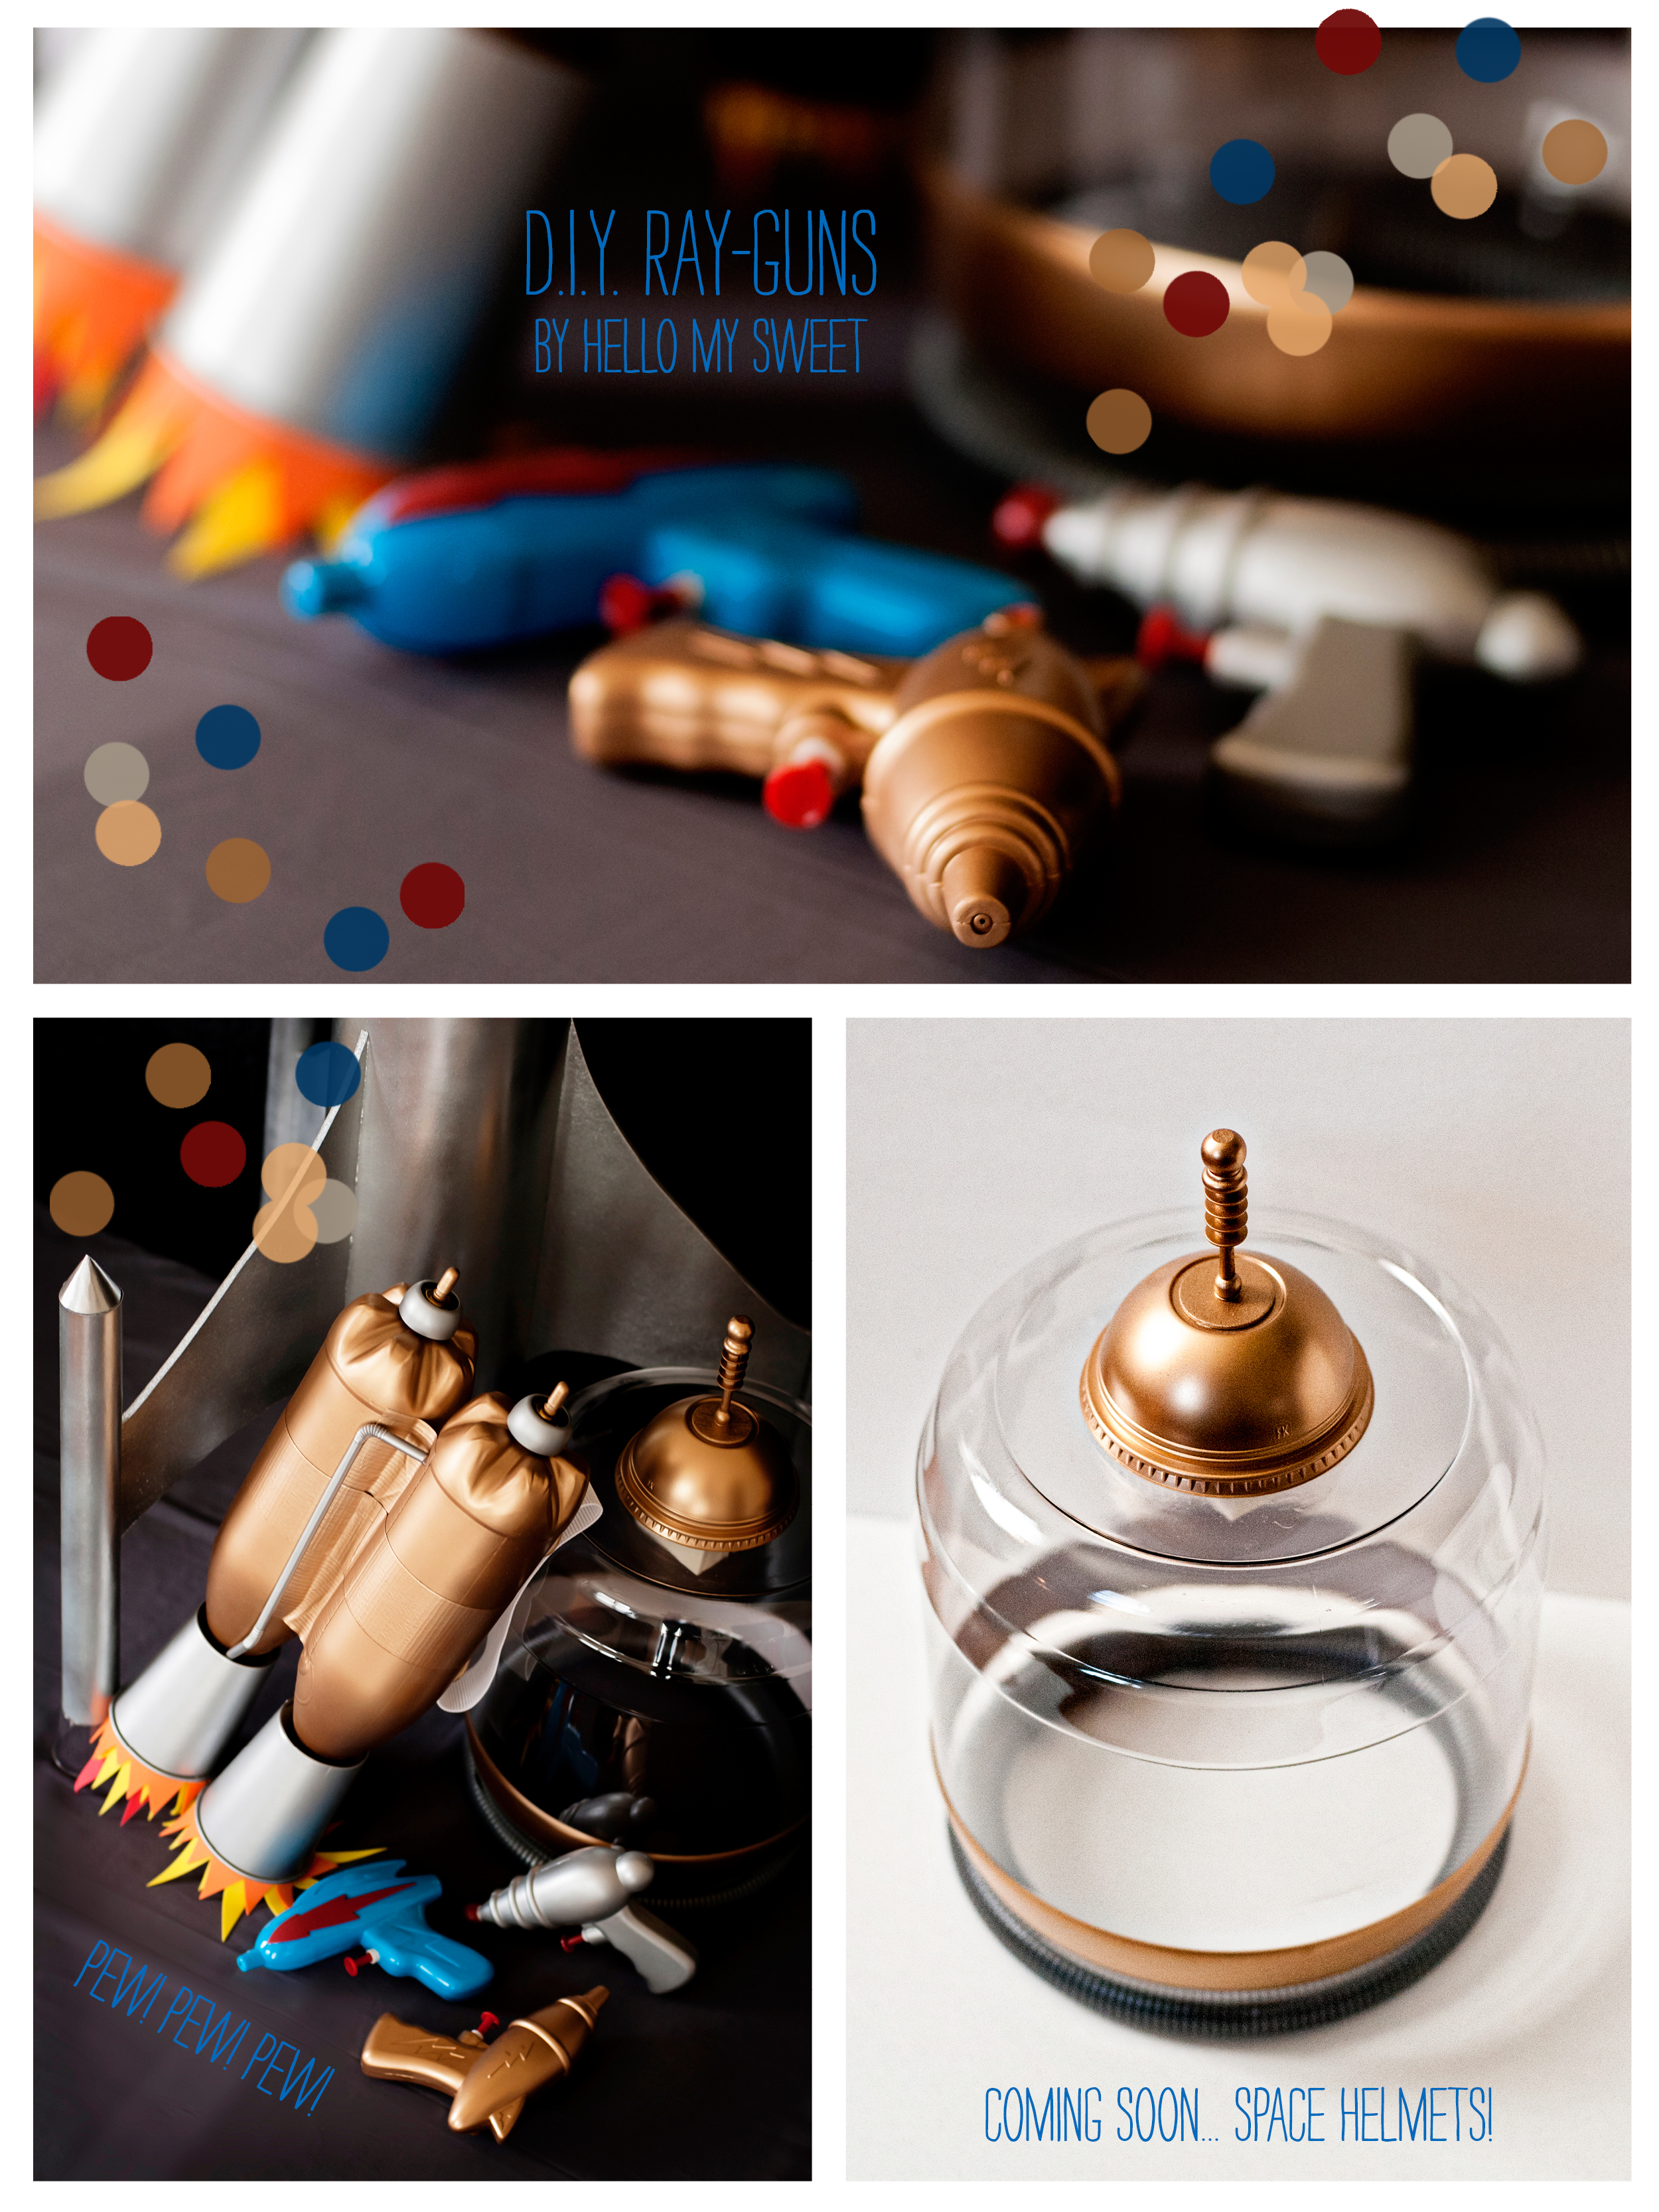
We have another simple, and affordable DIY tutorial up our sleeves to show you today. This go round we are going to make some Dollar Tree squirt guns magically transform into Retro Ray-guns. This project is all about the vision to see what an objects potential is. Jason is really skilled at this. He can see something in the store as a completely different object down the road. All we required were a few crafting materials we already had at home, and a package of squirt guns, which cost $1 per three pack. 

For this project you will need:

Spray Paint (or Craft Paint & Applicator)

Sandpaper

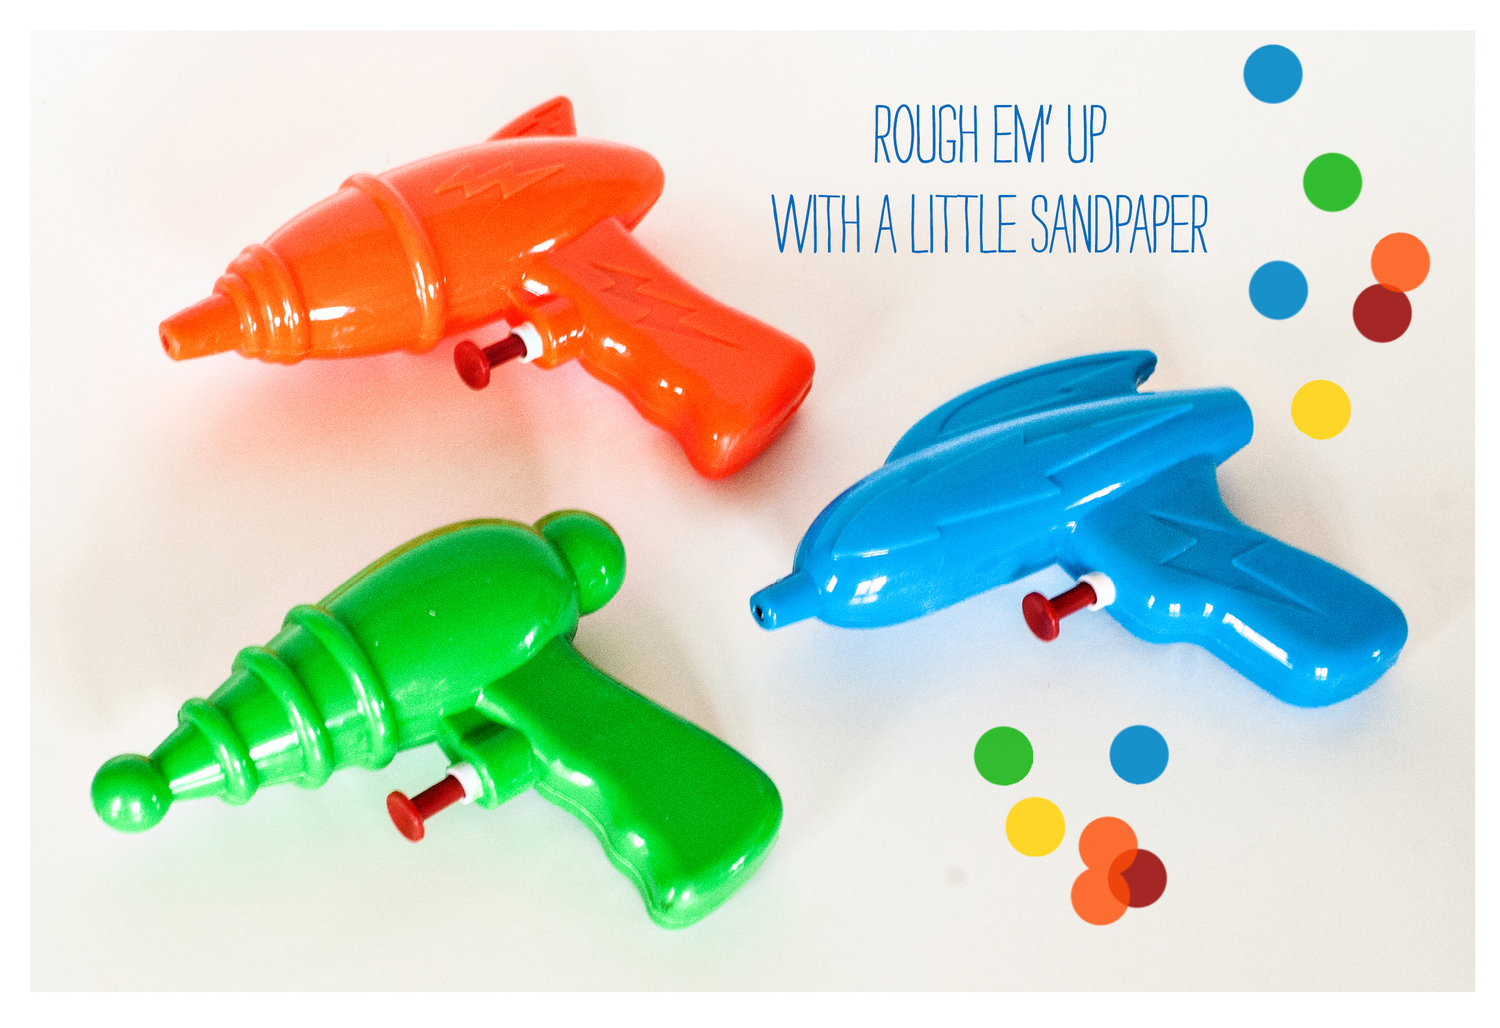
Plastic Squirt Guns

Painters Tape

Newspaper

Spray Polyurethane

Step One: Decide what area of your ray-guns you want to paint. We chose to completely cover two of ours, and leave one blue and just paint the bolt on the side of it. You will want to mask off the trigger area just to make sure it doesn’t get stuck in place with paint. Use your painters tape and newspaper to mask. 

Step Two: Rough up your painting area with a fine grit sandpaper. This will help ensure your paint adheres well to the plastic. The shiner and smoother the plastic, the more difficult the bond can be. Once you are done sanding, be sure to wipe the ray-guns down to remove any loose debris that would prevent the paint from sticking as well.

Step Three: Unleash your inner paint artist and go town on those ray-guns! We tried to achieve a nice retro feel by using some matte metallic spray paint and an accent of dark red here and there to match the overall color palette of our Retro Space Dessert Table. Allow your paint to dry thoroughly and then apply a polyurethane spray coat as well to keep the paint from scratching of and protect little hands too!

We used our Ray-guns as decoration, but you could easily hand them out to your guests to have a super fun squirt gun fight, or even as a party favor or gift!

DIY Rayguns 1.jpg
DIY Rayguns 2.jpg
DIY Rayguns 33.jpg
DIY Ray-guns-2.jpg
DIY Ray-guns1.jpg
DIY Ray-guns3.jpg

Astronaut Helmet Candy Dish

This DIY project and tutorial is so easy it is going to blow your mind. That is if the cost of this project and tutorial doesn't first! We are going to show you how to assemble these super fun and creative Space Helmet Candy Dishes that were featured on our Retro Space Dessert Table. If you happened to miss that post you are going to want to click that little link up there in the previous sentence and check it out. Jason really out-did him self with the creative ideas this time! 

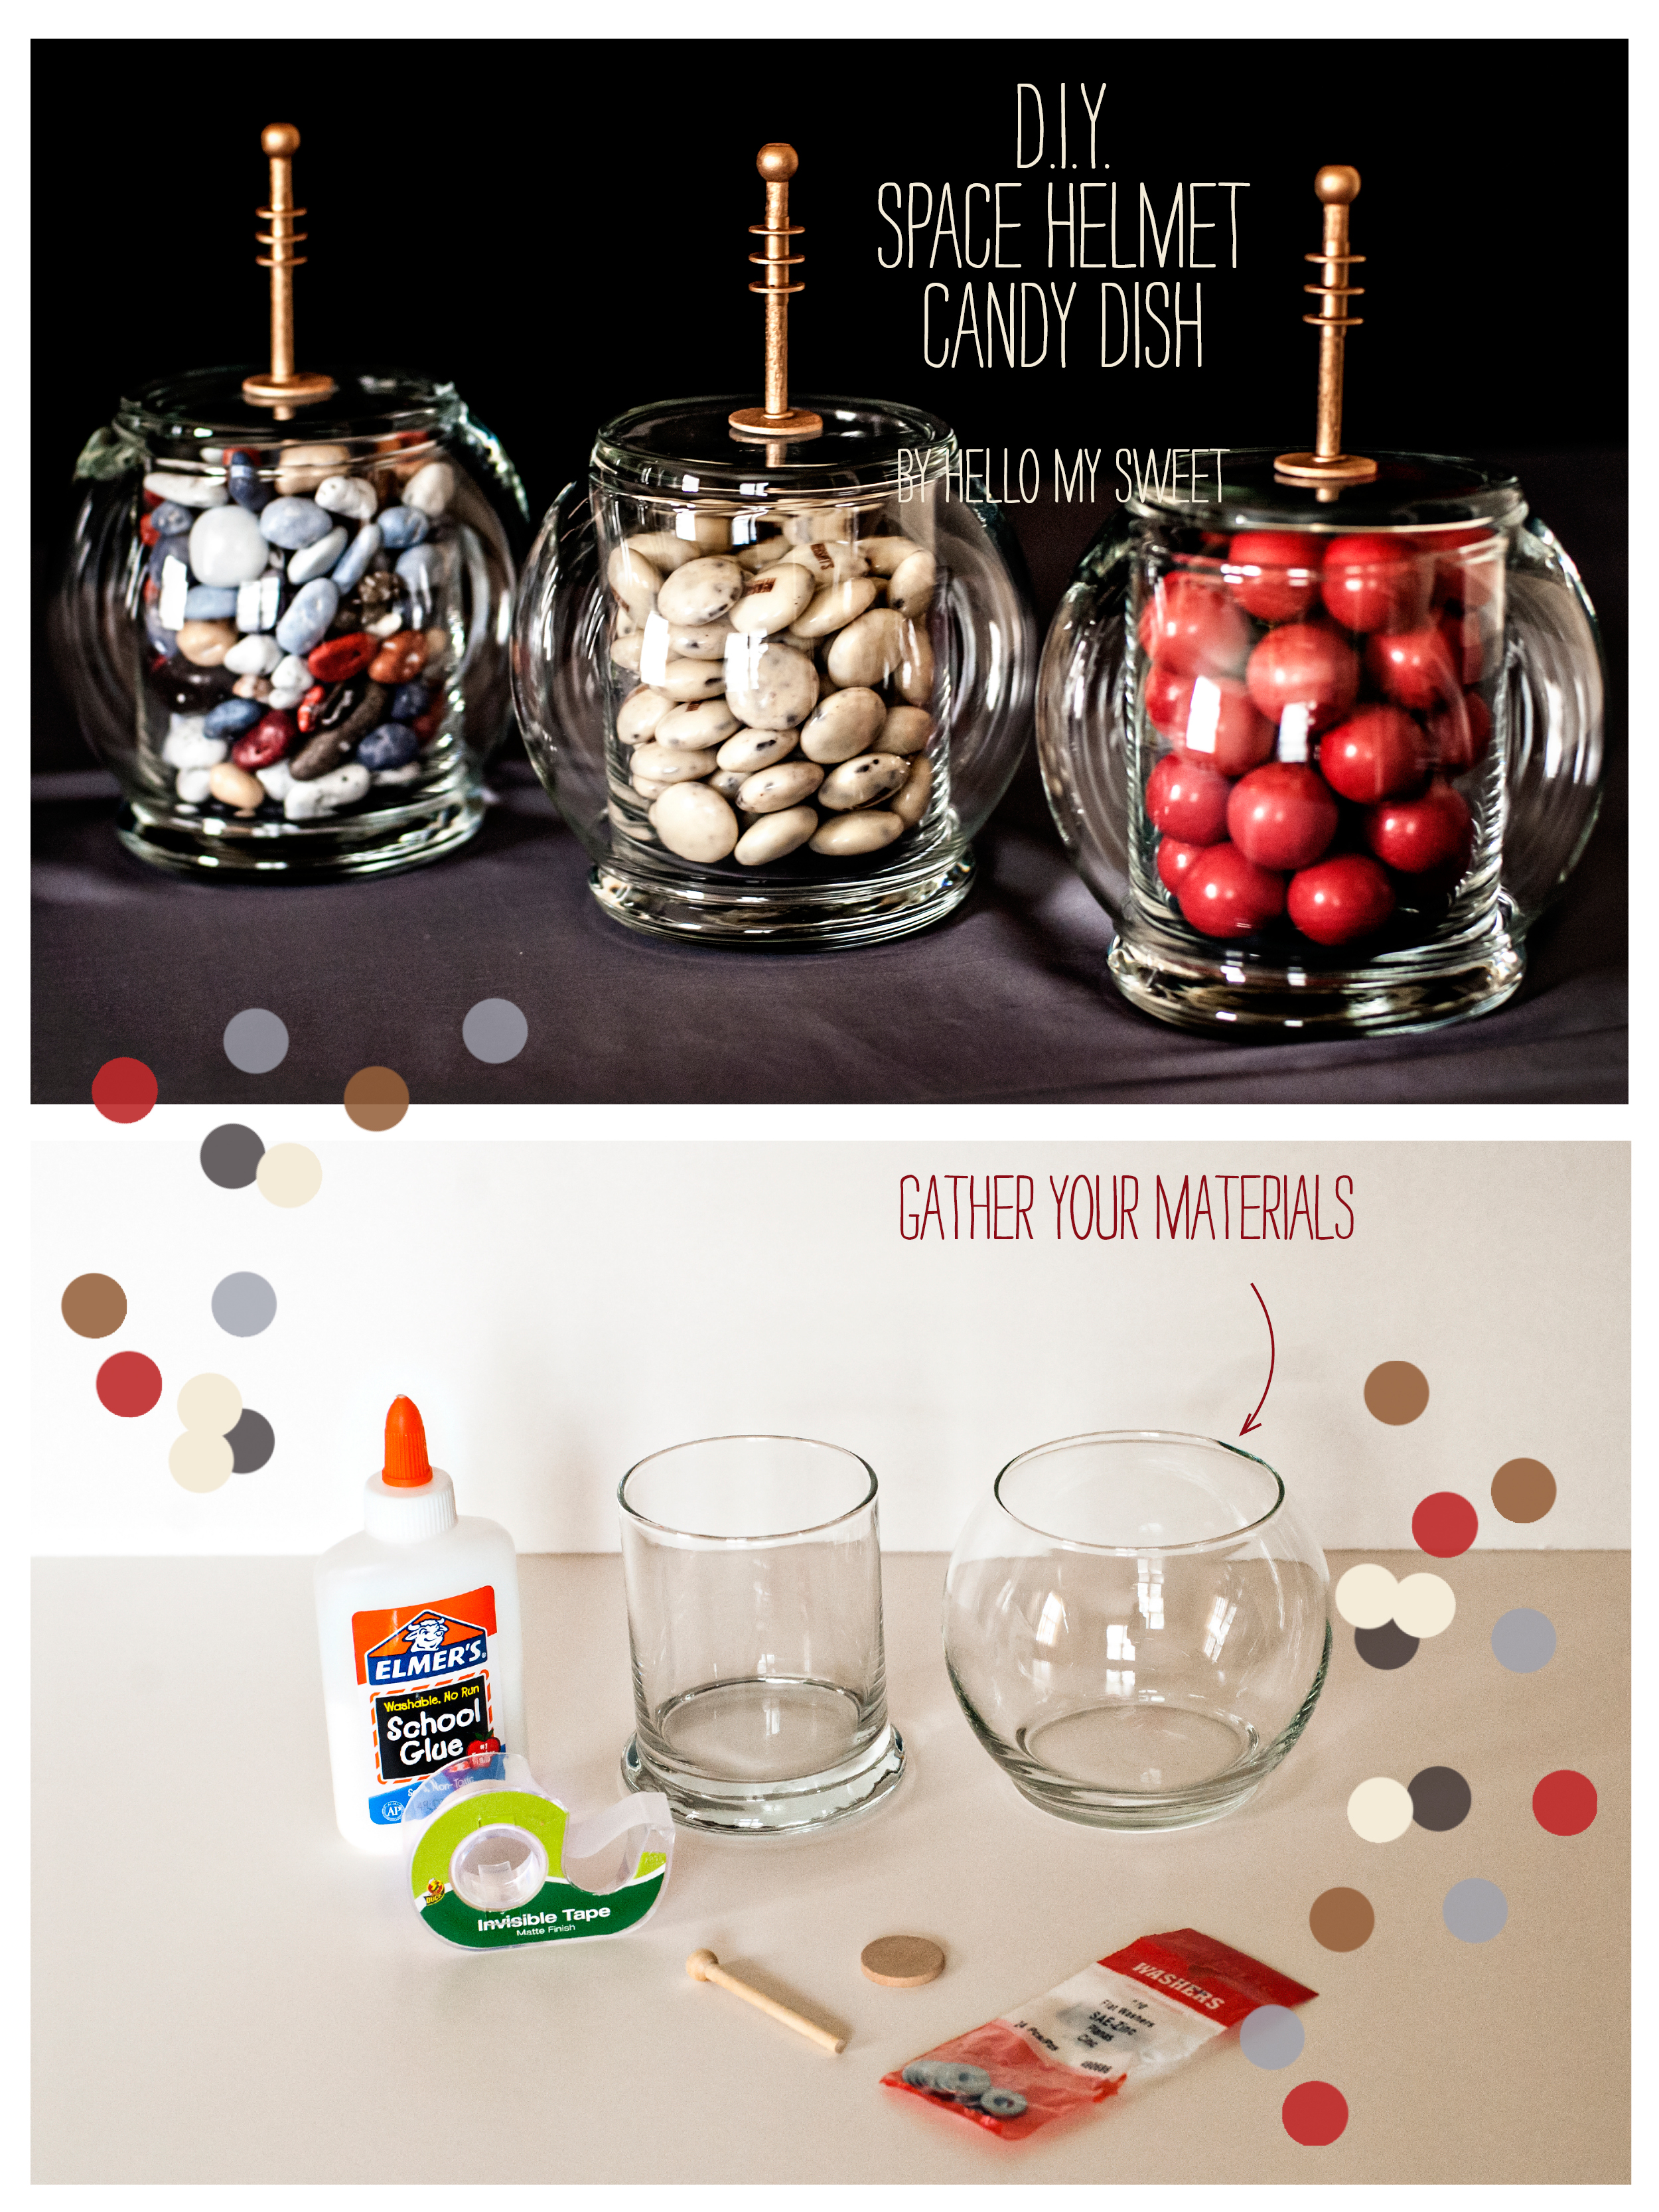
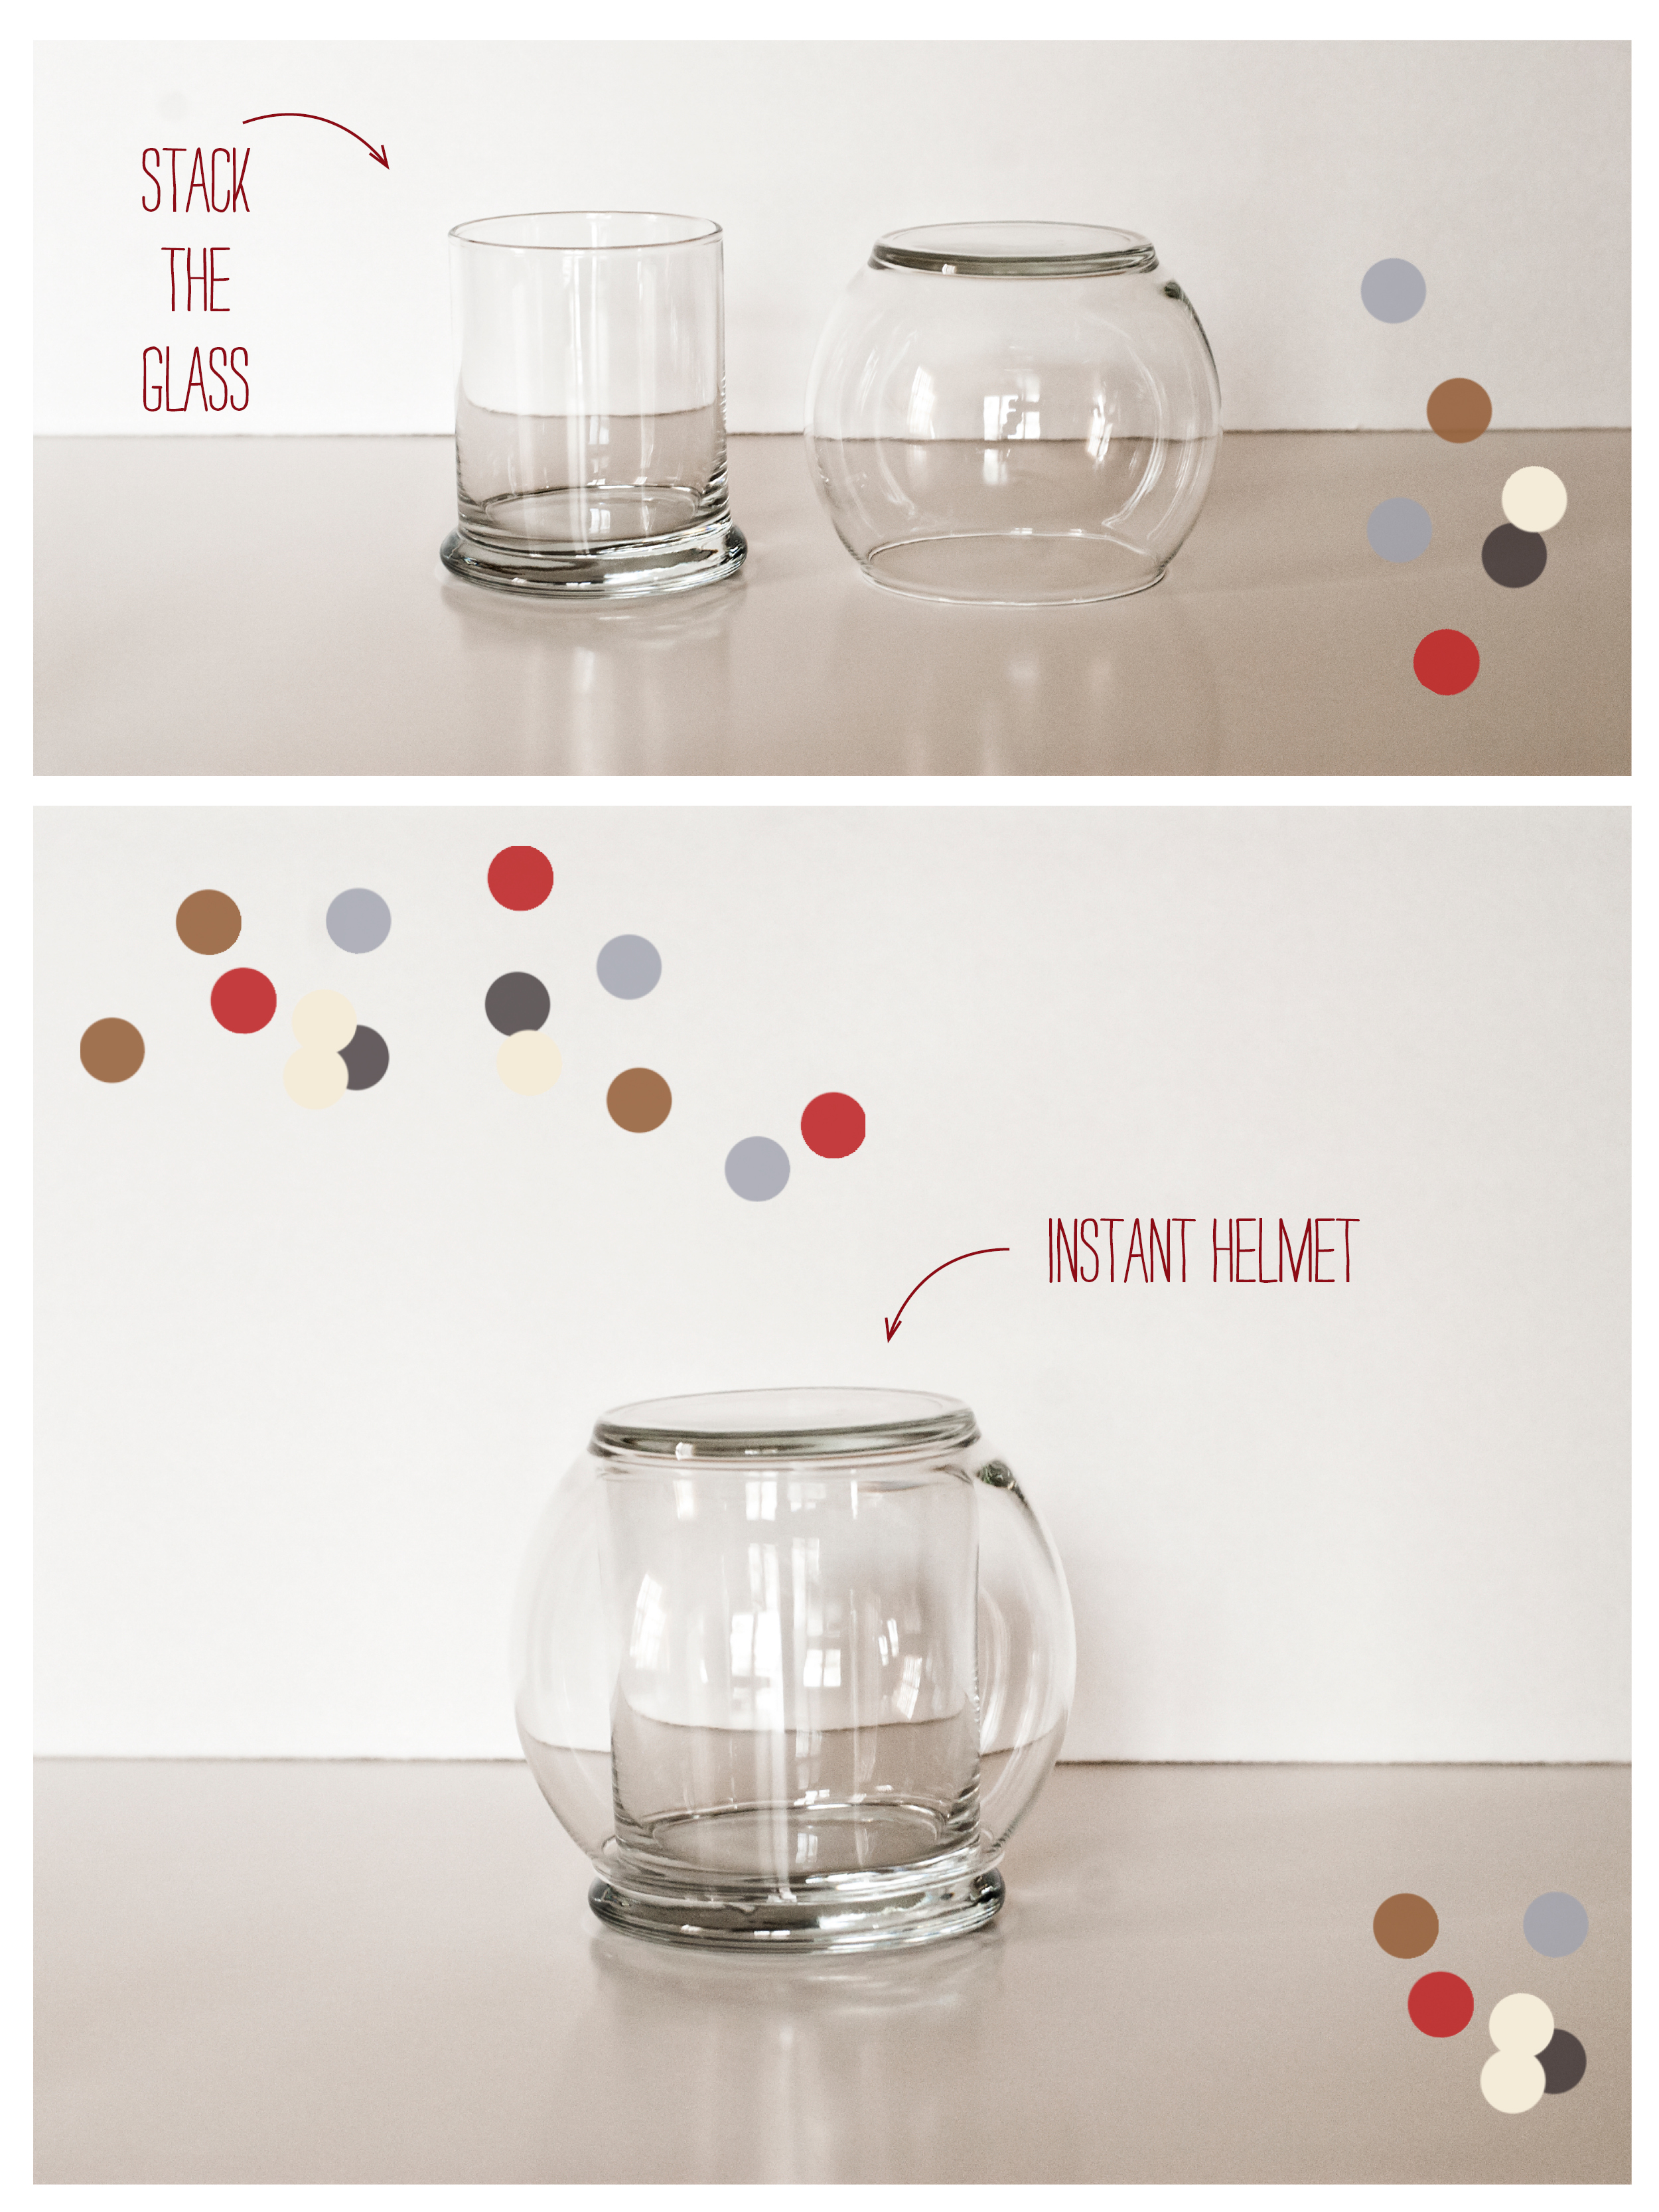
First things first, let’s talk about cost. Above you will see all of the materials used for this project. The Glass candle holders,(yes they are candle vessels) were found at Dollar Tree, so that is $2 bucks for the main part of the candy dish. The next part is optional and completely customizable. So you could quite literally not spend any more money at this point.

We used some simple wooden craft pieces and metal washers to create a “retro antenna” for the top of the “space helmet”. You can skip that step if you want, or you may find some other bits and pieces you like to use better. Ours was a mish-mash of found objects that combined into pure awesome. If you were to purchase those bits and bobs though, you would only be spending just a few bucks. We also chose to paint our antenna with some gold spray paint we already had on hand. Again, your choice, decorate however you see fit!

Here is the official material list as we completed the project:

Glass containers, one Cylindrical, one Globe - make sure to test them out before you bring them home to see if they fit easily together and apart.

Wooden Pieces - one for antenna, one for base - our antenna had a ball already attached at one end

Small Washers - make sure these fit onto your wooden antenna piece

Tape

Glue - Craft, Hot, Super

Spray Paint (or craft paint and applicator)


Step One: Like we mentioned in the material list, you want to make sure your two glass pieces fit nicely together without being too snug to fit together/apart. We recommend testing this BEFORE you bring them home :)

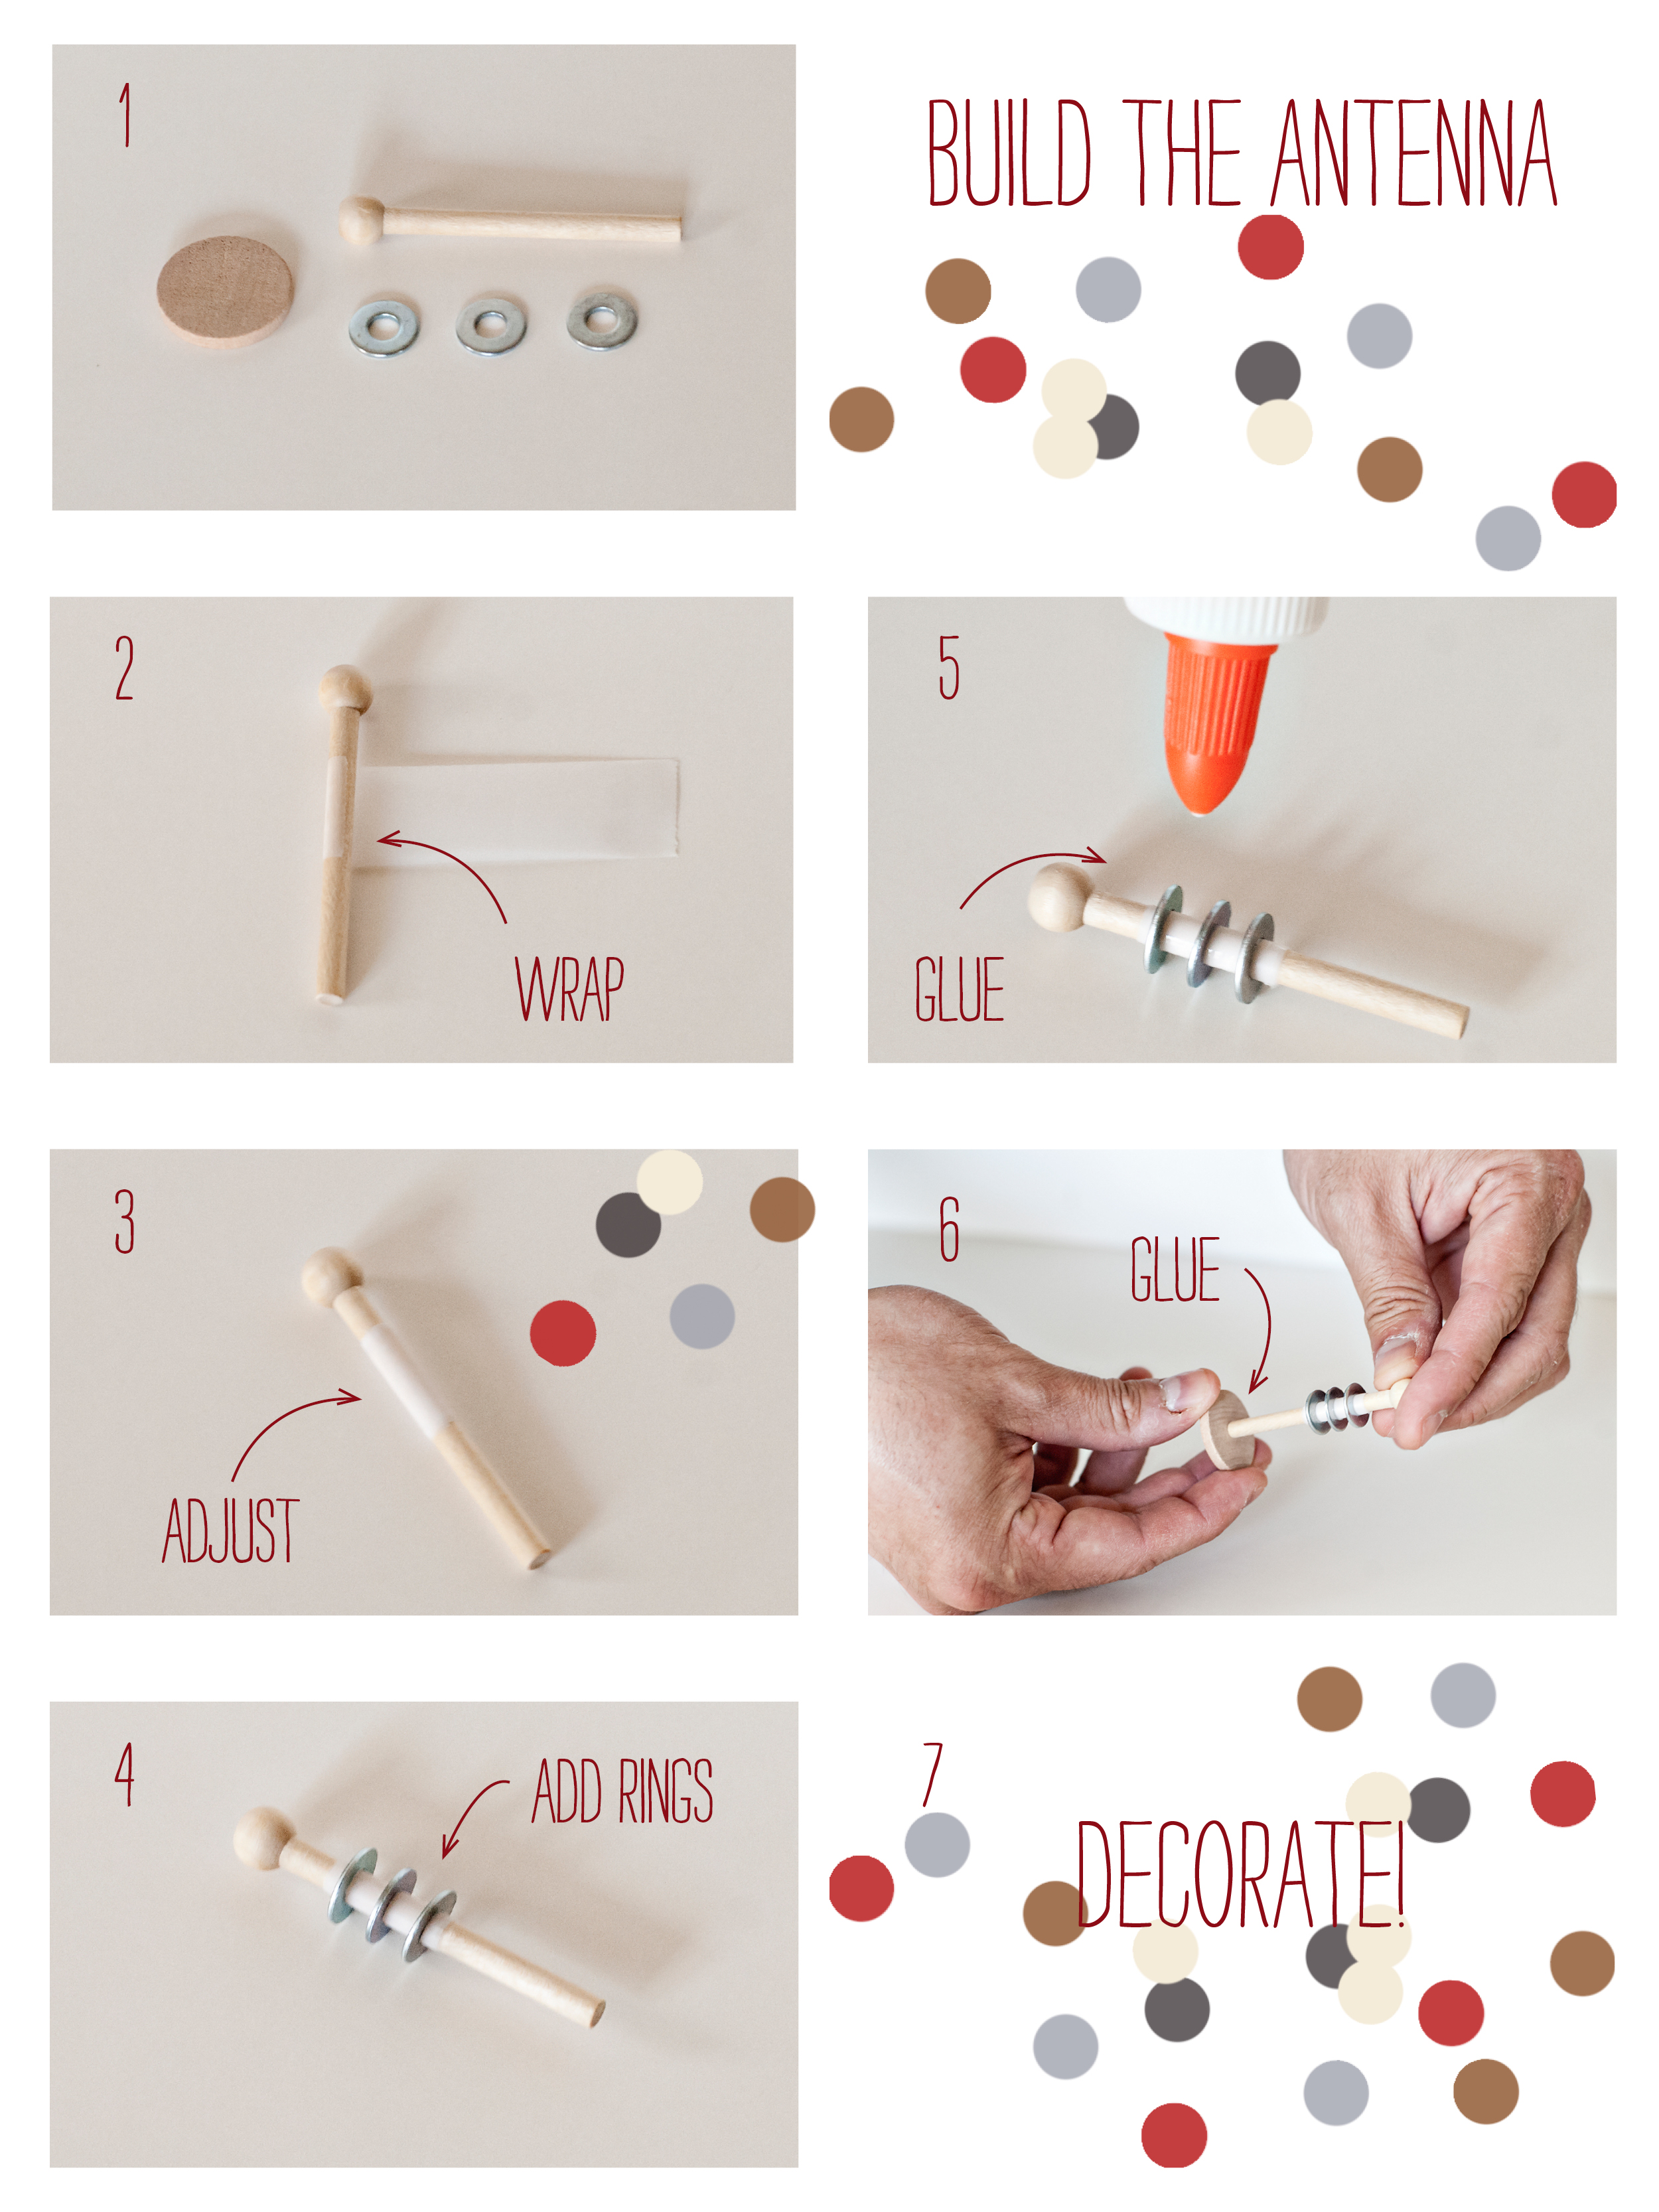
Step Two: If your washers weren’t quite the perfect fit for your wooden antenna piece, you will need to add a bit of cushioning to make them fit snugly around. We used tape and wrapped it around to make things fit nicely together. Thread your washers on, then spread your glue in between and around so that they are sure to stay put. Let this dry before you move on. When your antenna is ready, go ahead and glue it to the small wooden circle, and again let dry before moving on. We used Elmer’s glue but in hindsight super glue might have been easier, we’ll let you decide!

Step Three: Decorate it! As we said above, we sprayed our antenna with gold spray paint and let it dry. You could just as easily use a metallic craft paint or even cover it in glitter if you want it to sparkle! Once your decoration method is dry, it is time to attach the antenna to the helmet top. The helmet top of course is the bottom of the glass globe. We used hot glue to do this because we wanted to make sure our efforts were temporary and that we would be able to re-use the glass pieces again in the future. Hot Glue doesn't bond well to glass and usually pops right off with the tiniest of force, so if you want your more permanent you may need a stronger adhesive.

And there you have it! A super duper inexpensive and easy way to transform some very plain-jane glass containers into something a lot more interesting for your party!

DIY Space Container.jpg
DIY Space Container3.jpg
DIY Space Container4.jpg
DIY Space Container5.jpg
DIY Space Container2.jpg

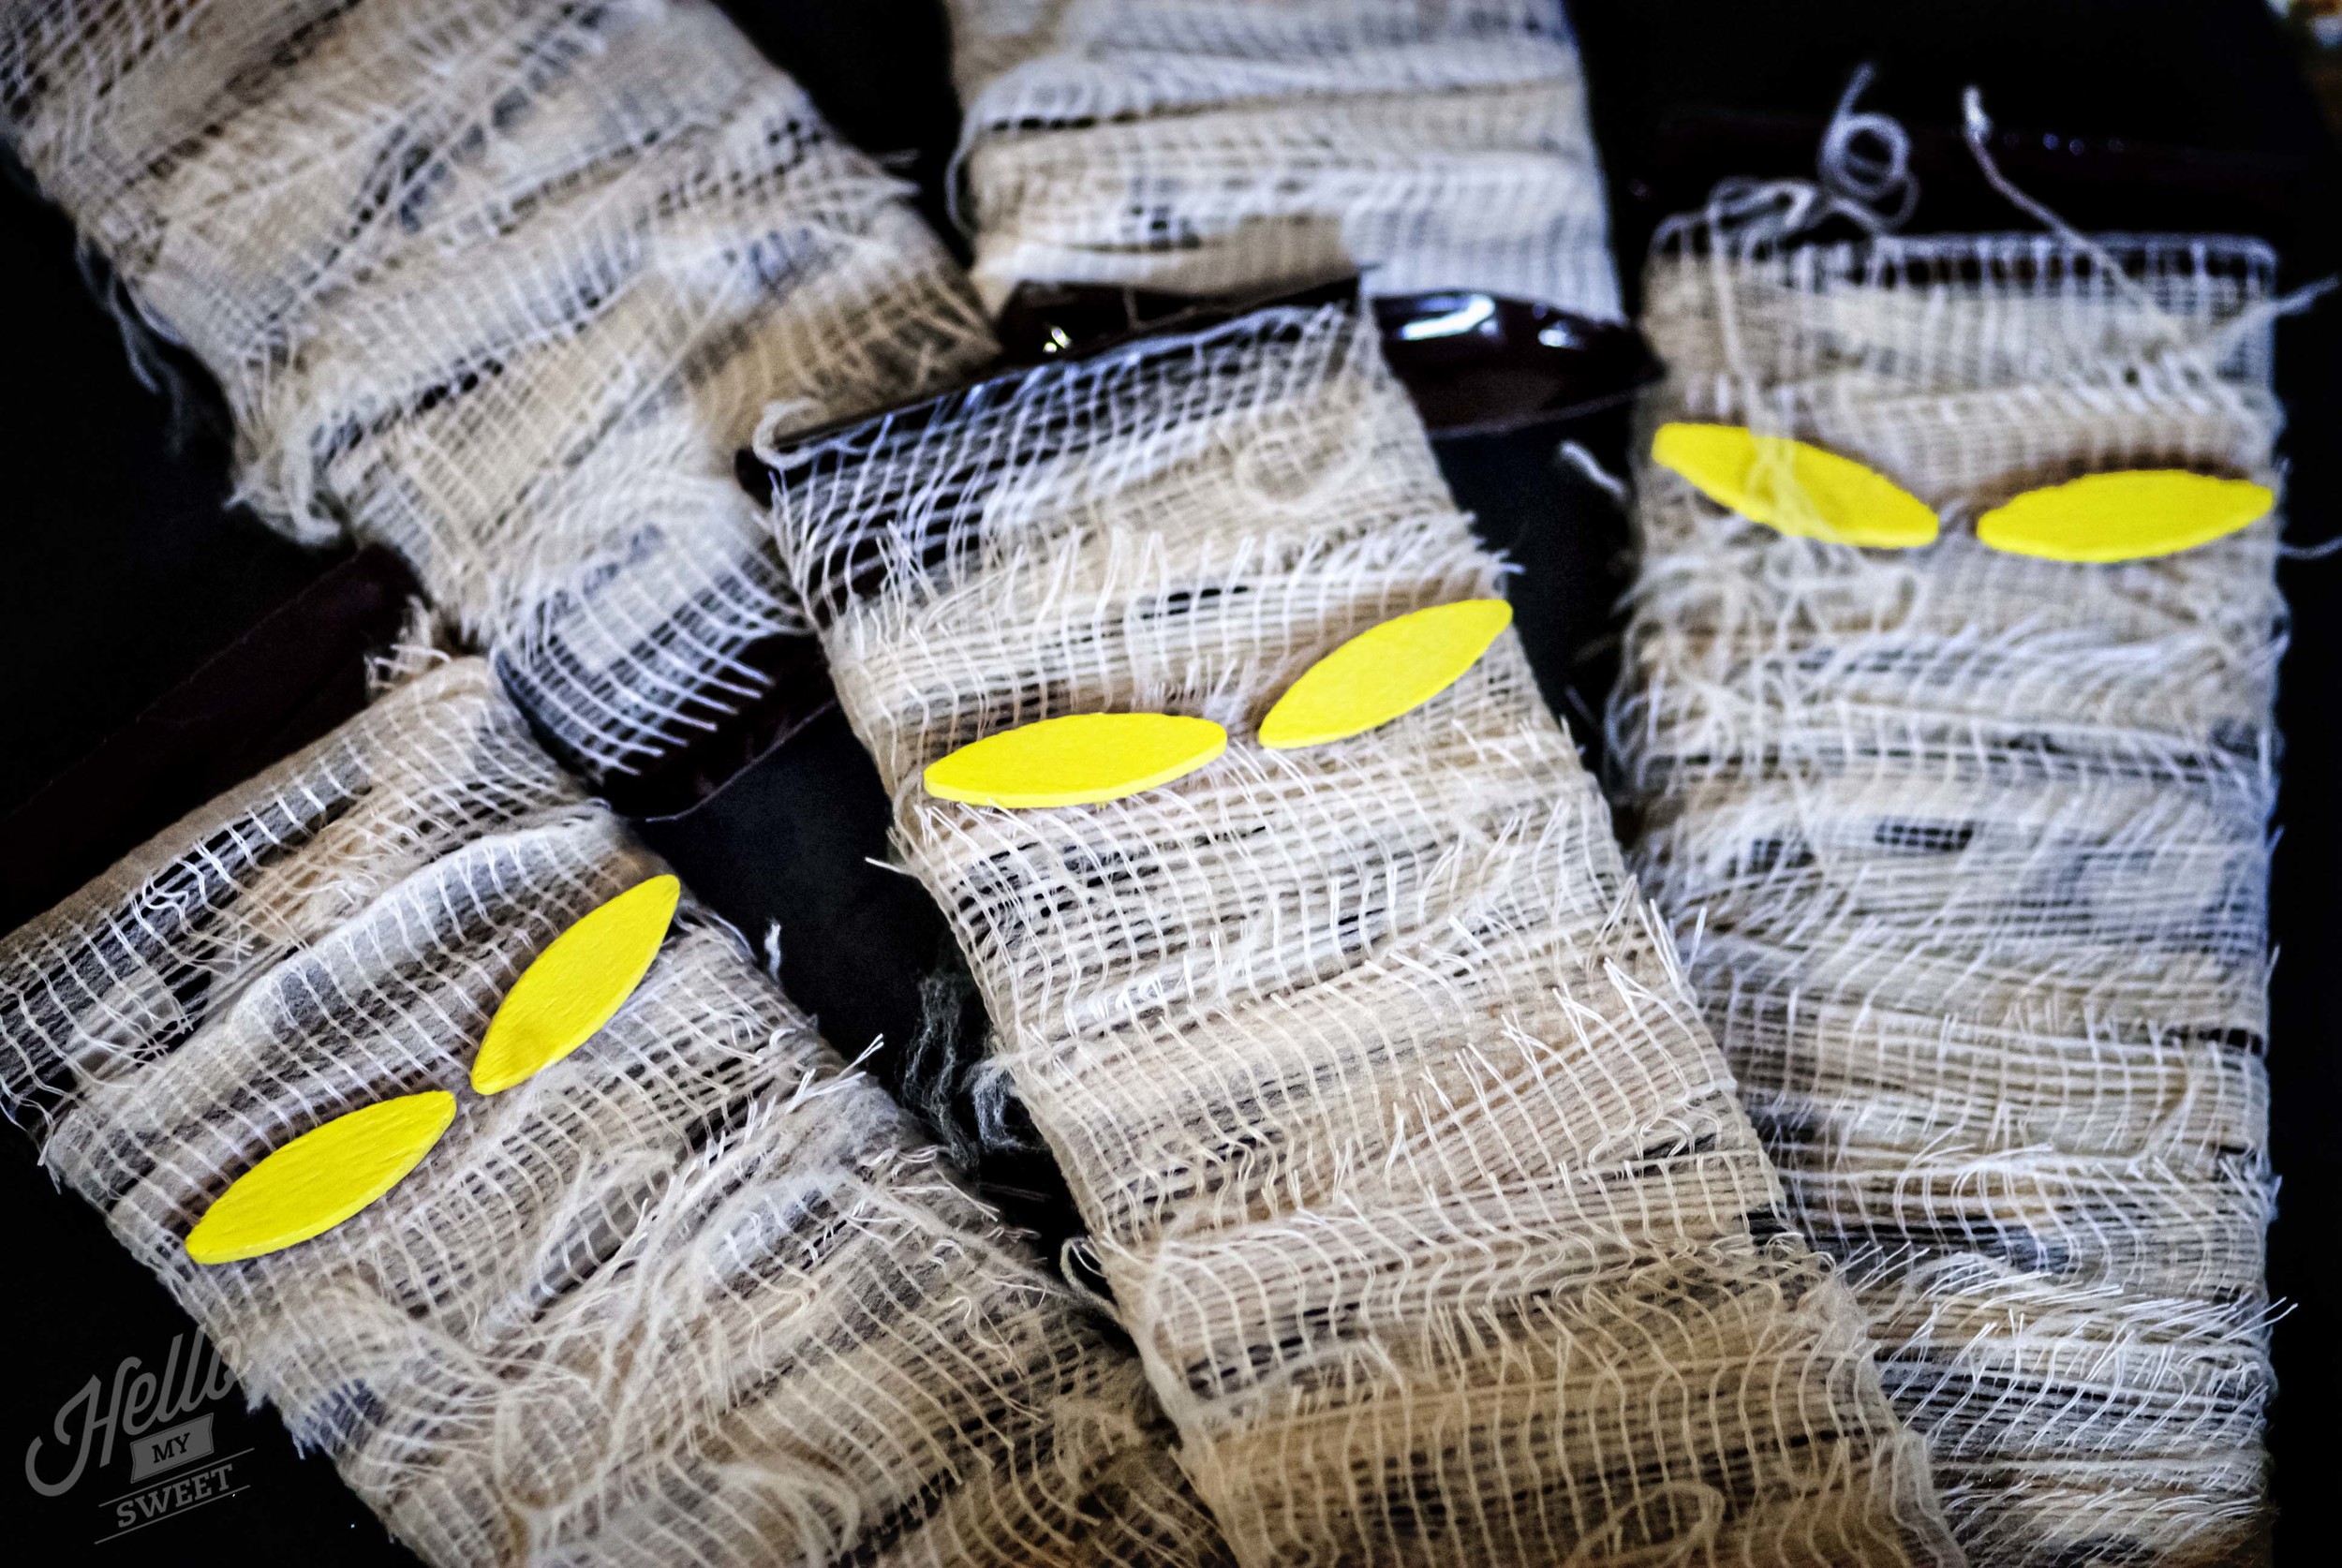
Mummified Candy Bars

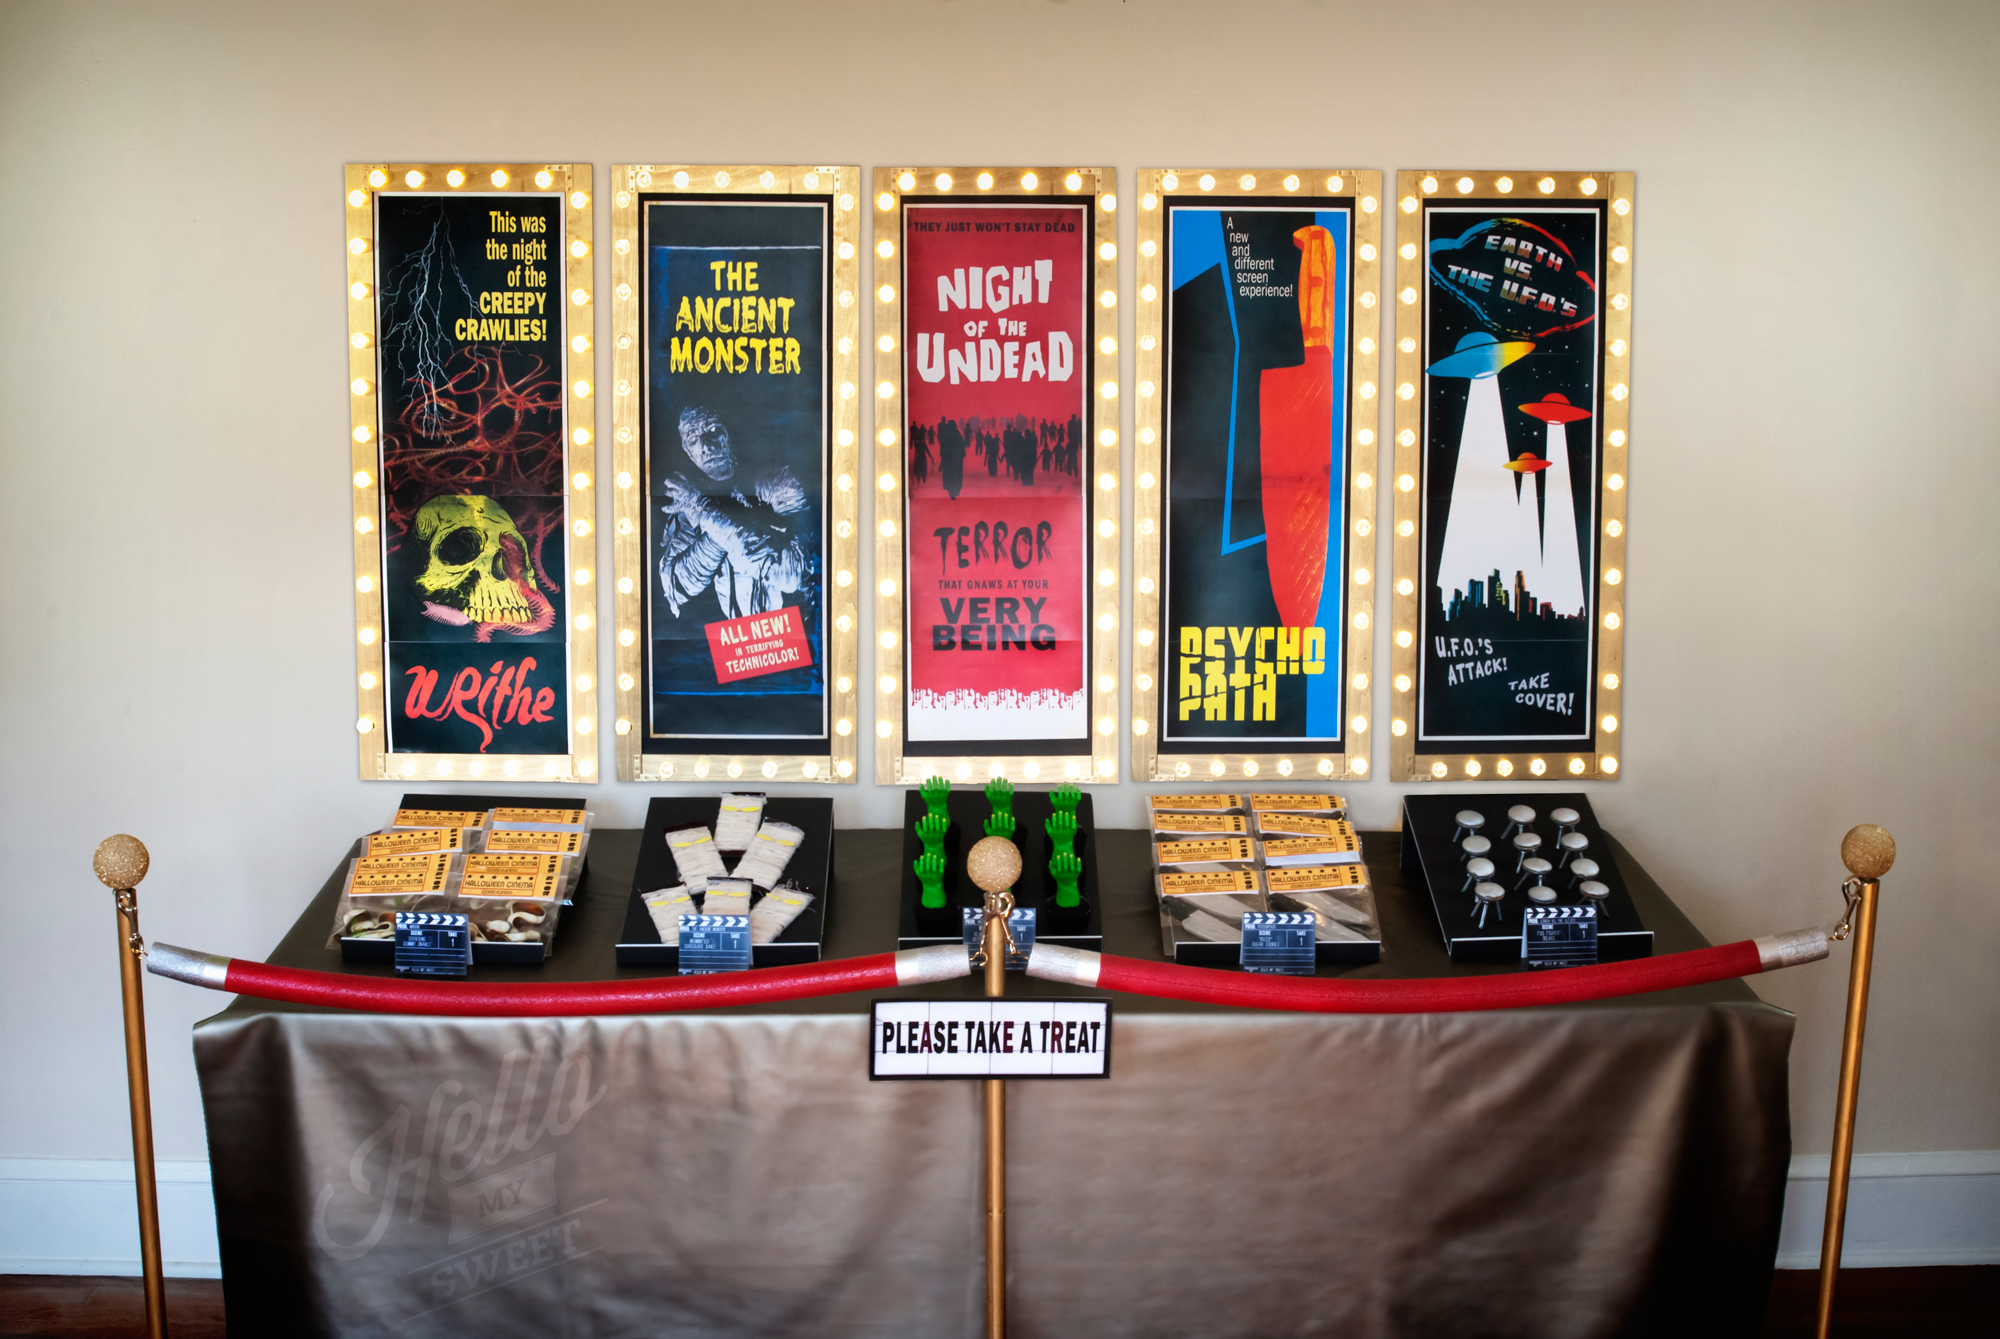
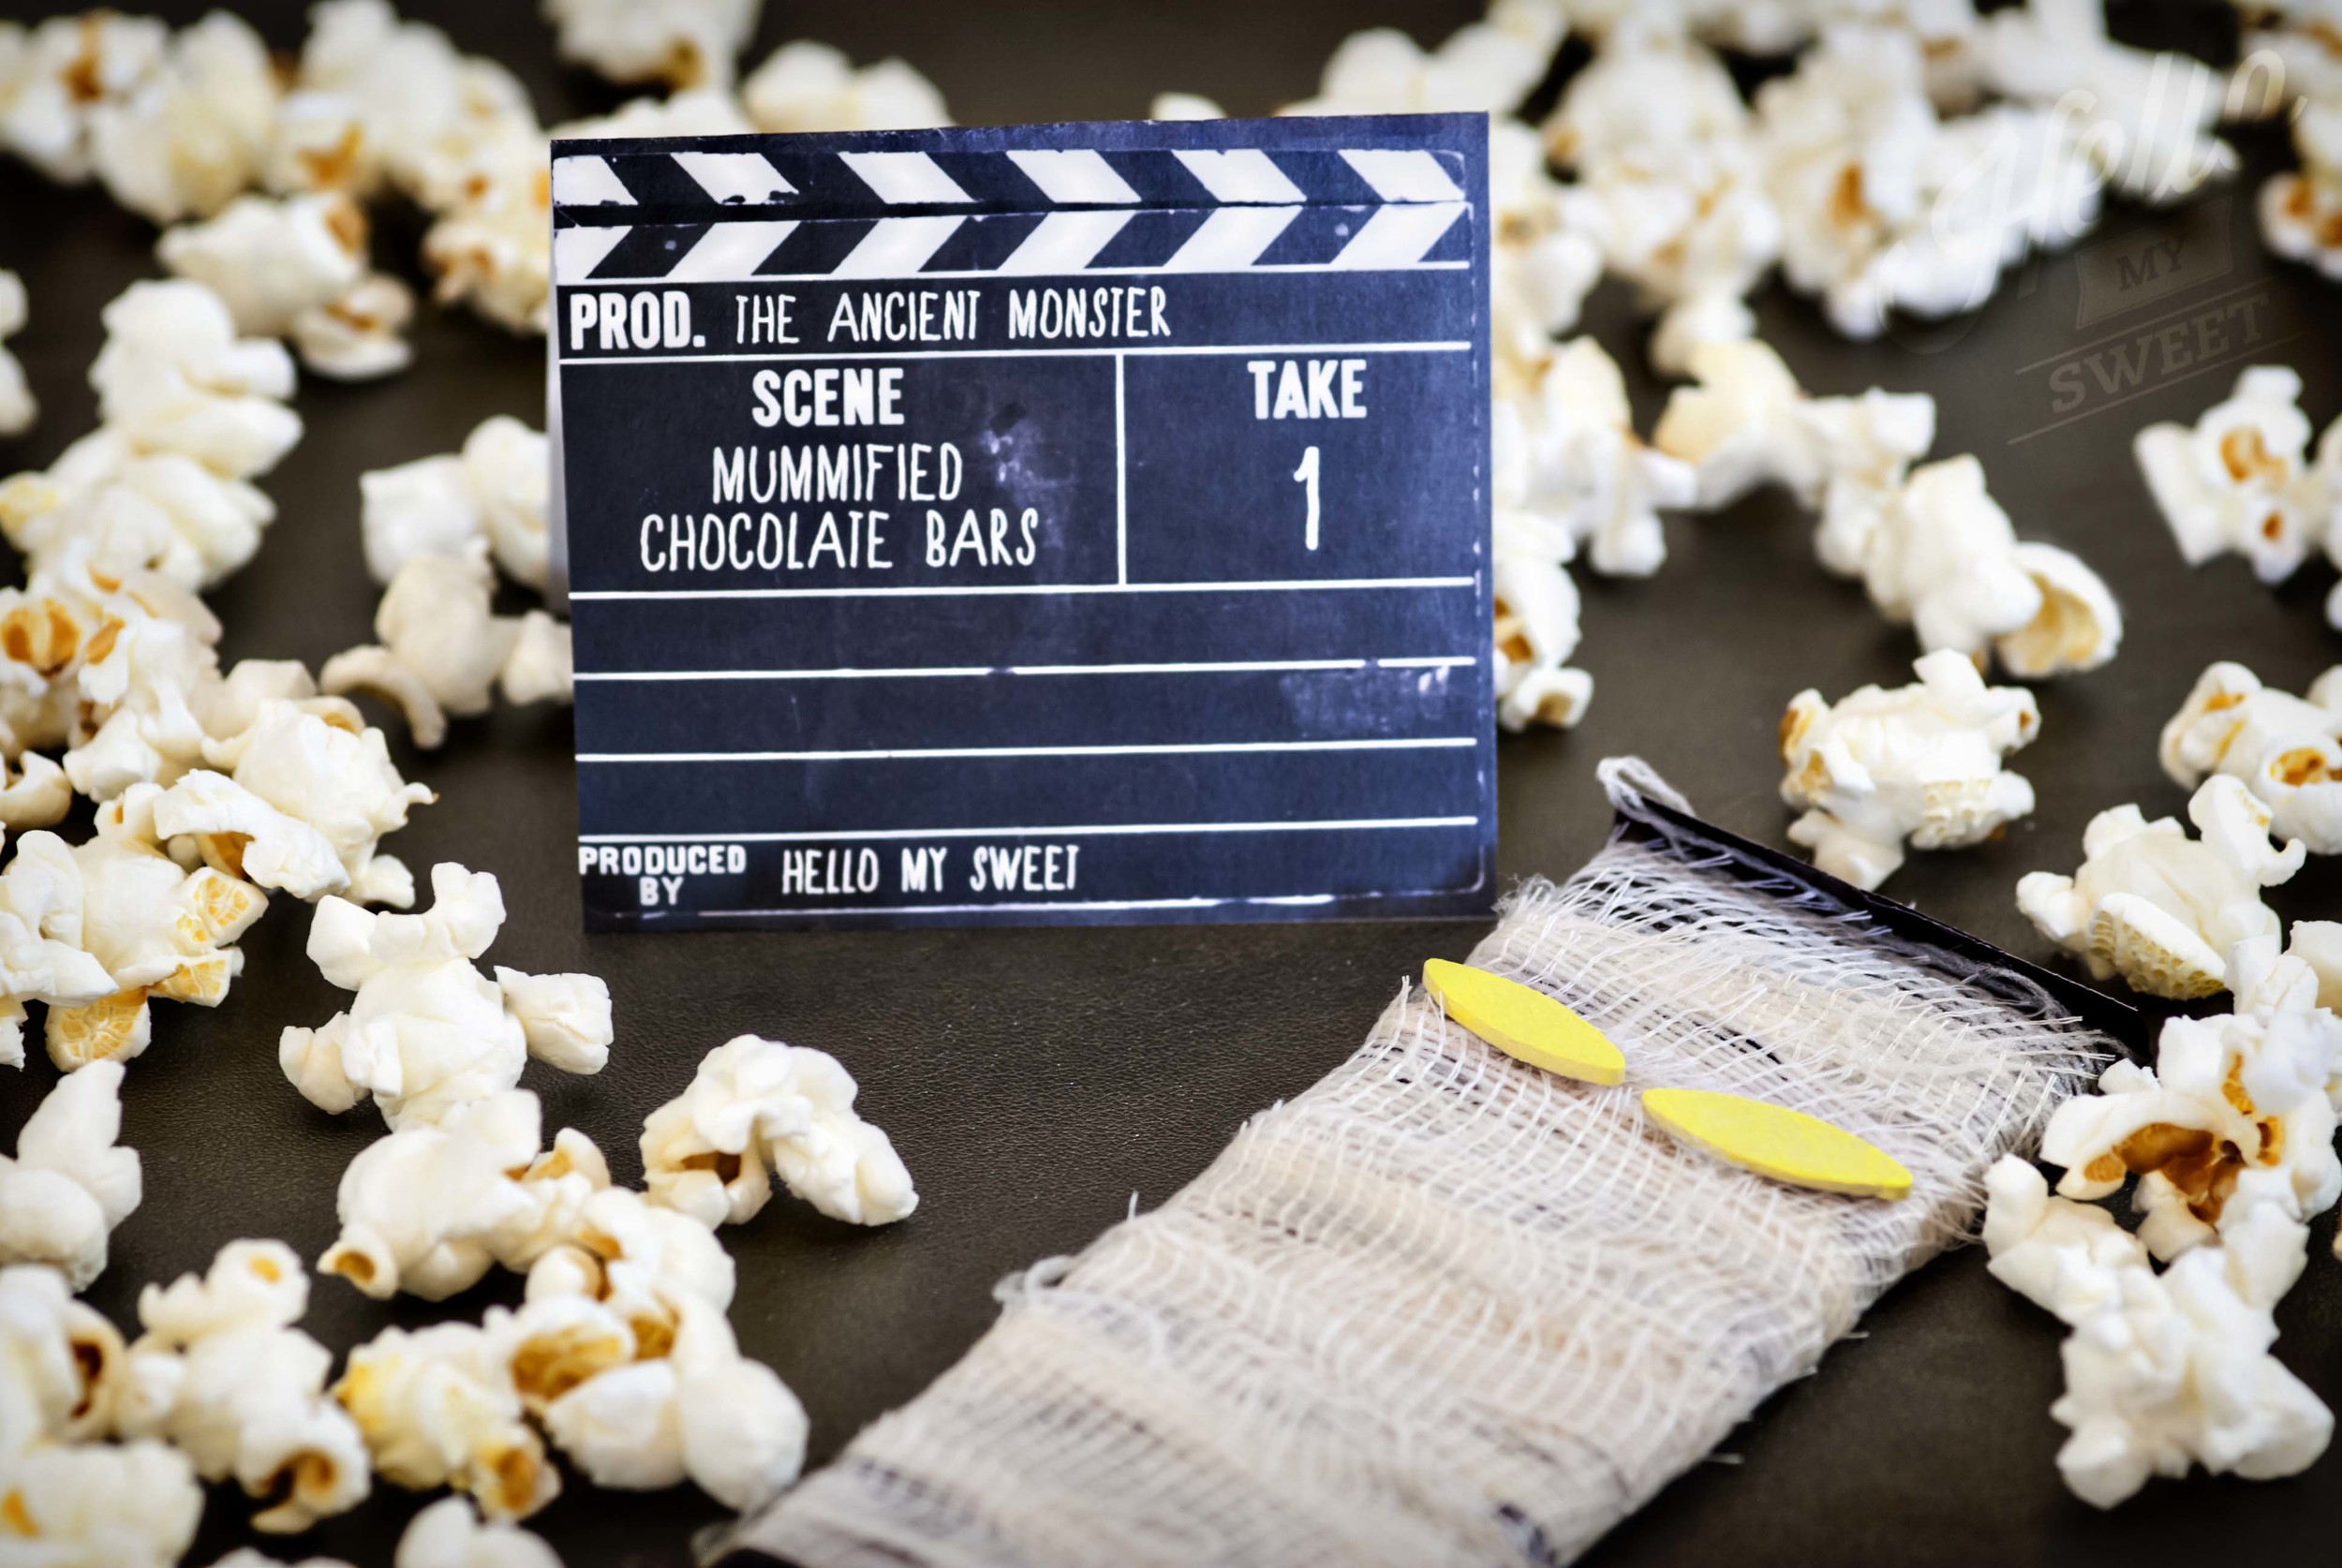
How to create creepy old looking Mummified Chocolate Bars

Materials Needed:

Chocolate Bars

Gauze Rolls

Tea & Water

Neon Yellow Paper

Hot Glue or other craft glue

Scissors

Step One: Prepare your tea using one tea bag for each cup of water. Depending on how many bars you plan to wrap, you will need several cups of tea. Heat the water and tea bags in the microwave until the tea steeps, and allow it to sit until it is dark. Add the gauze and let it sit for at least an hour.

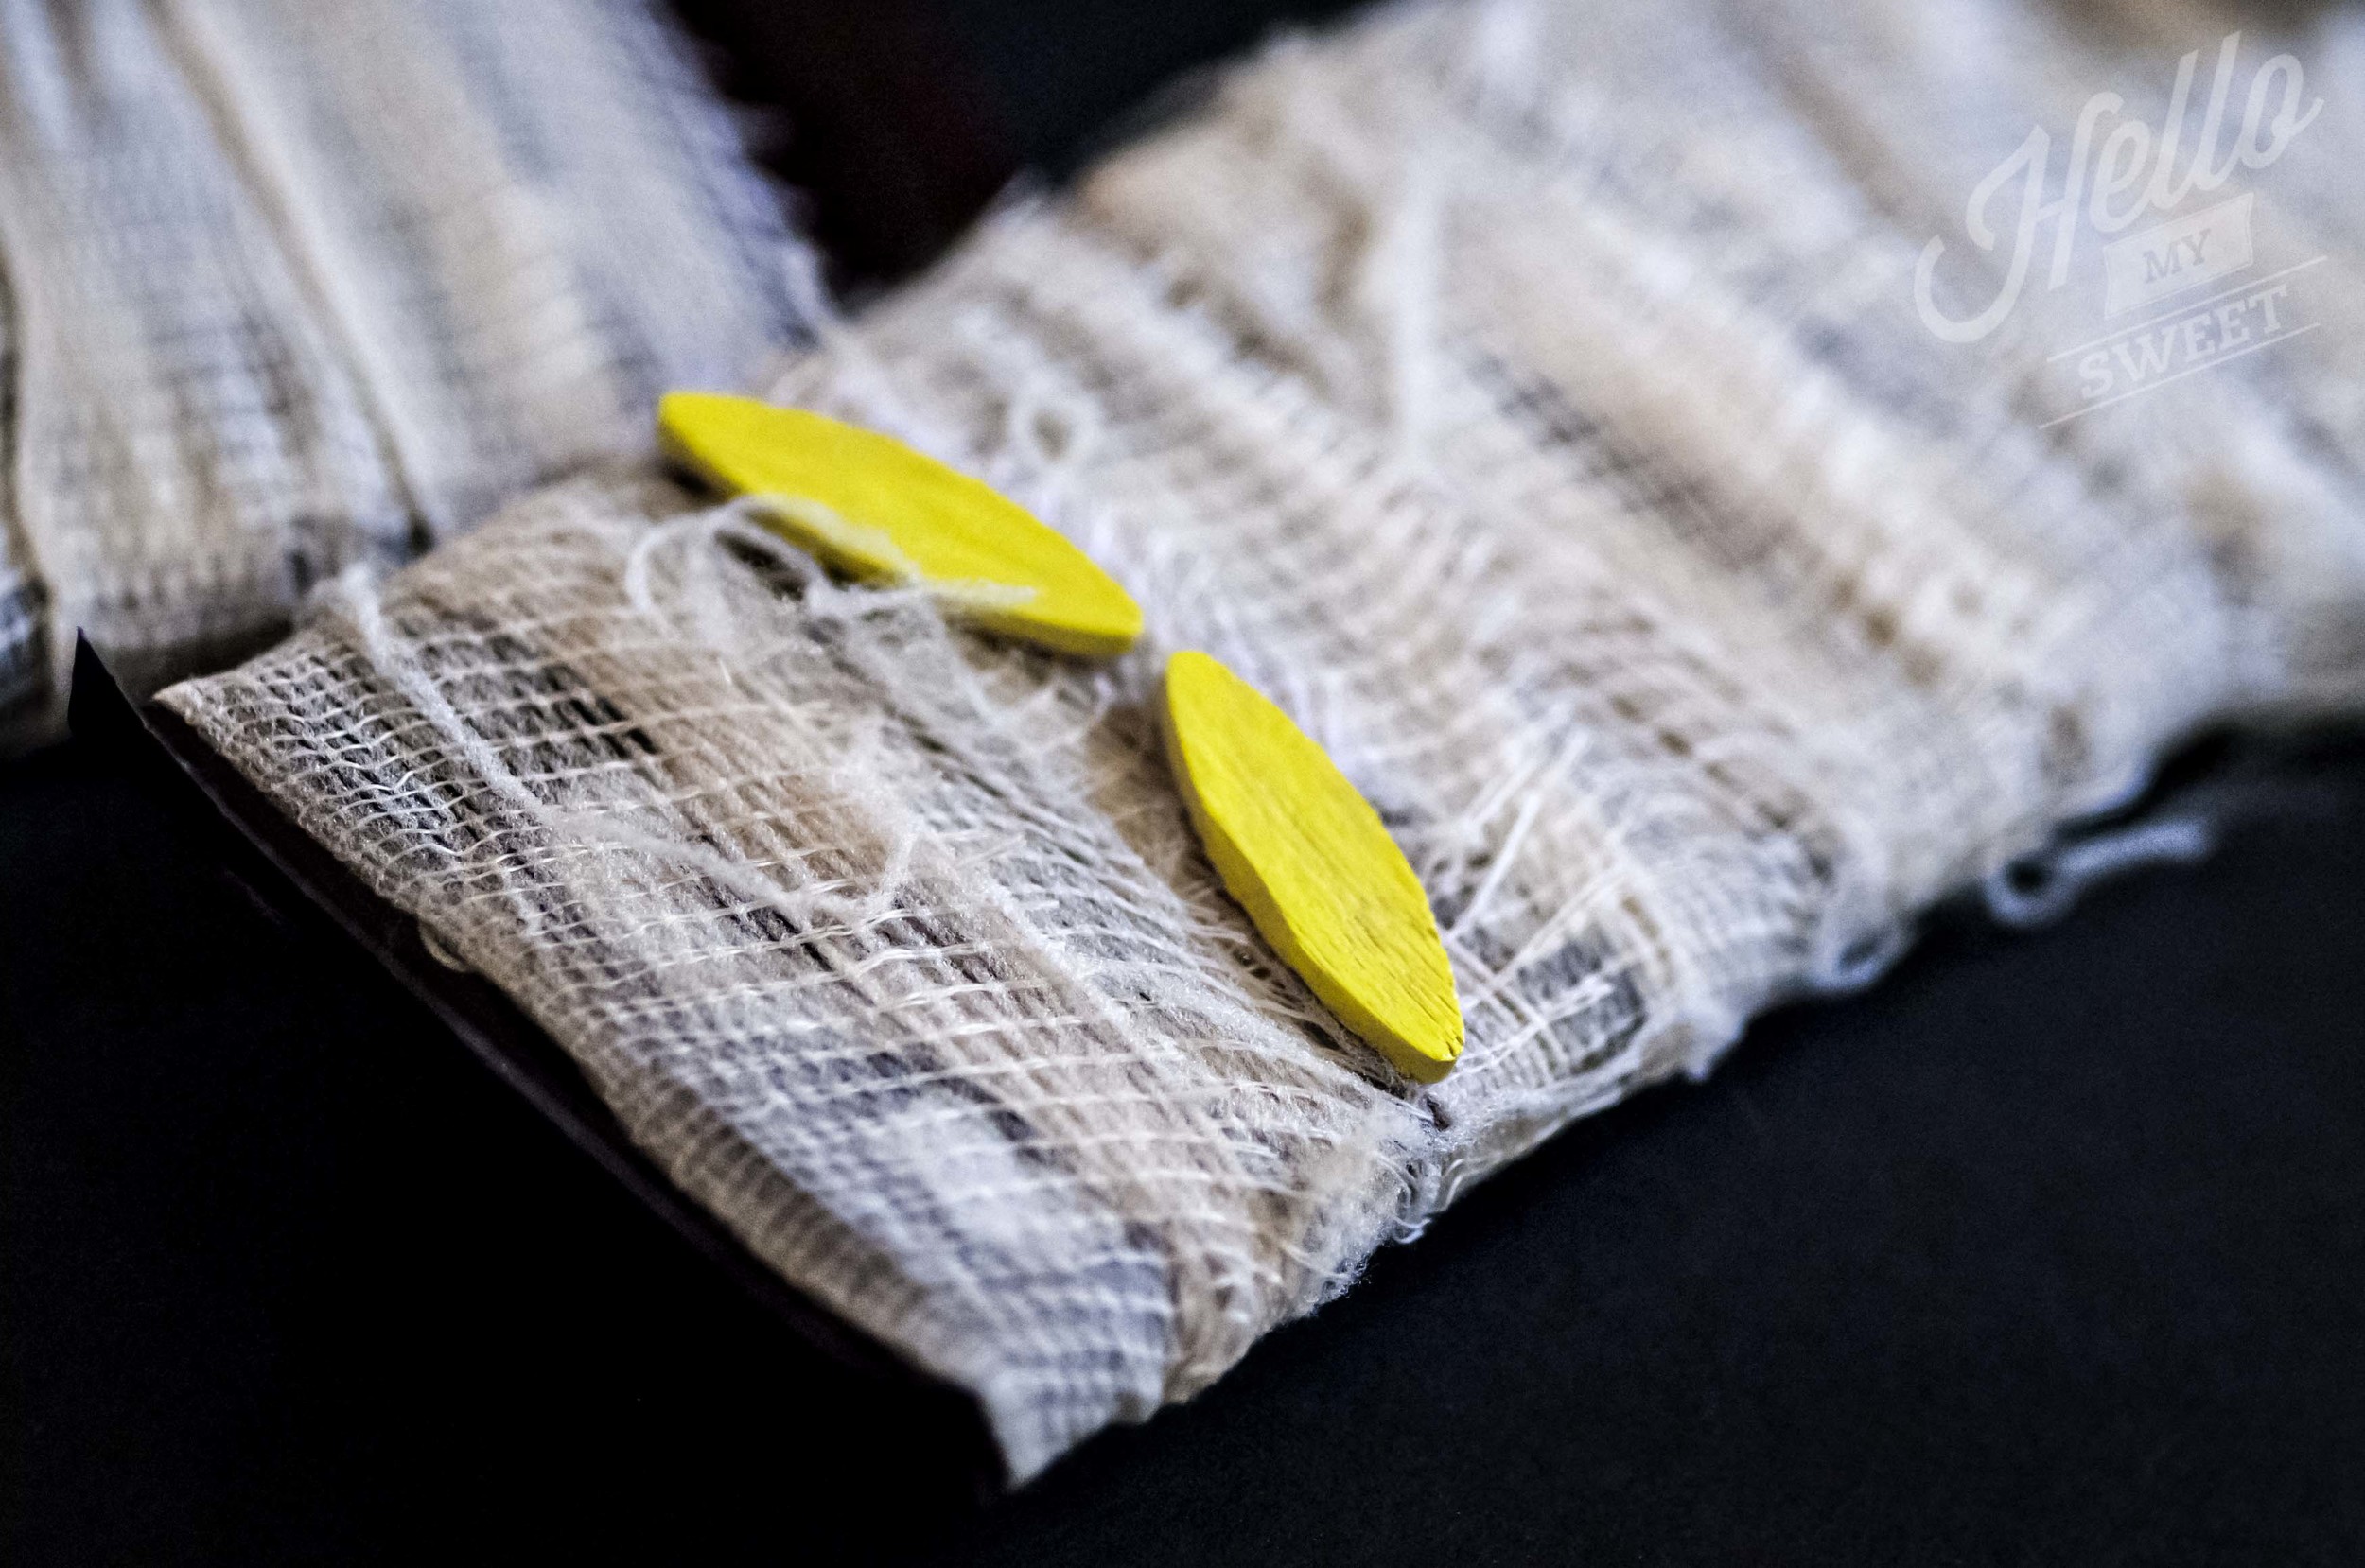
Step Two: While your gauze is soaking, draw small ovals onto your neon paper and cut them out. We really wanted our mummy to have eyes that matched the poster we used for inspiration, which meant glowing yellow eyes, no googly eyes!

Step Three: When the gauze has completed soaking, wring it out as dry as you can then drape it over an outdoor railing or hang.  Make sure it is not hanging over top of anything that you wouldn't want tea to drip on!  

Step Four: When your gauze is dry, take a pair of sharp scissors and cut down the length of the strip, dividing it in half. Afterwards, take your fingers to it, pulling and stretching it to create texture and fraying. Preheat your glue gun.

Step Five:  Take one chocolate bar and one piece of gauze. Hold the gauze to one end of the bar and wrap and stretch the gauze in a zig-zag pattern around the bar until you reach the other end, then tuck it in place and add a dot of glue to hold it at each end. After the glue is dry you can go back in a perfect any areas that may not have been covered well by pulling on the gauze here and there. Repeat for all of your bars.

Step Six: Glue on the yellow ovals to represent the mummy eyes for each chocolate bar. All done!

bMovieHelloMySweet_0194.jpg
bMovieHelloMySweet_0155.jpg
bMovieHelloMySweet_Full.png
bMovieHelloMySweet_0278.jpg
bMovieHelloMySweet_0314.jpg

Foo Fighter Treats

Foo Fighter Treats

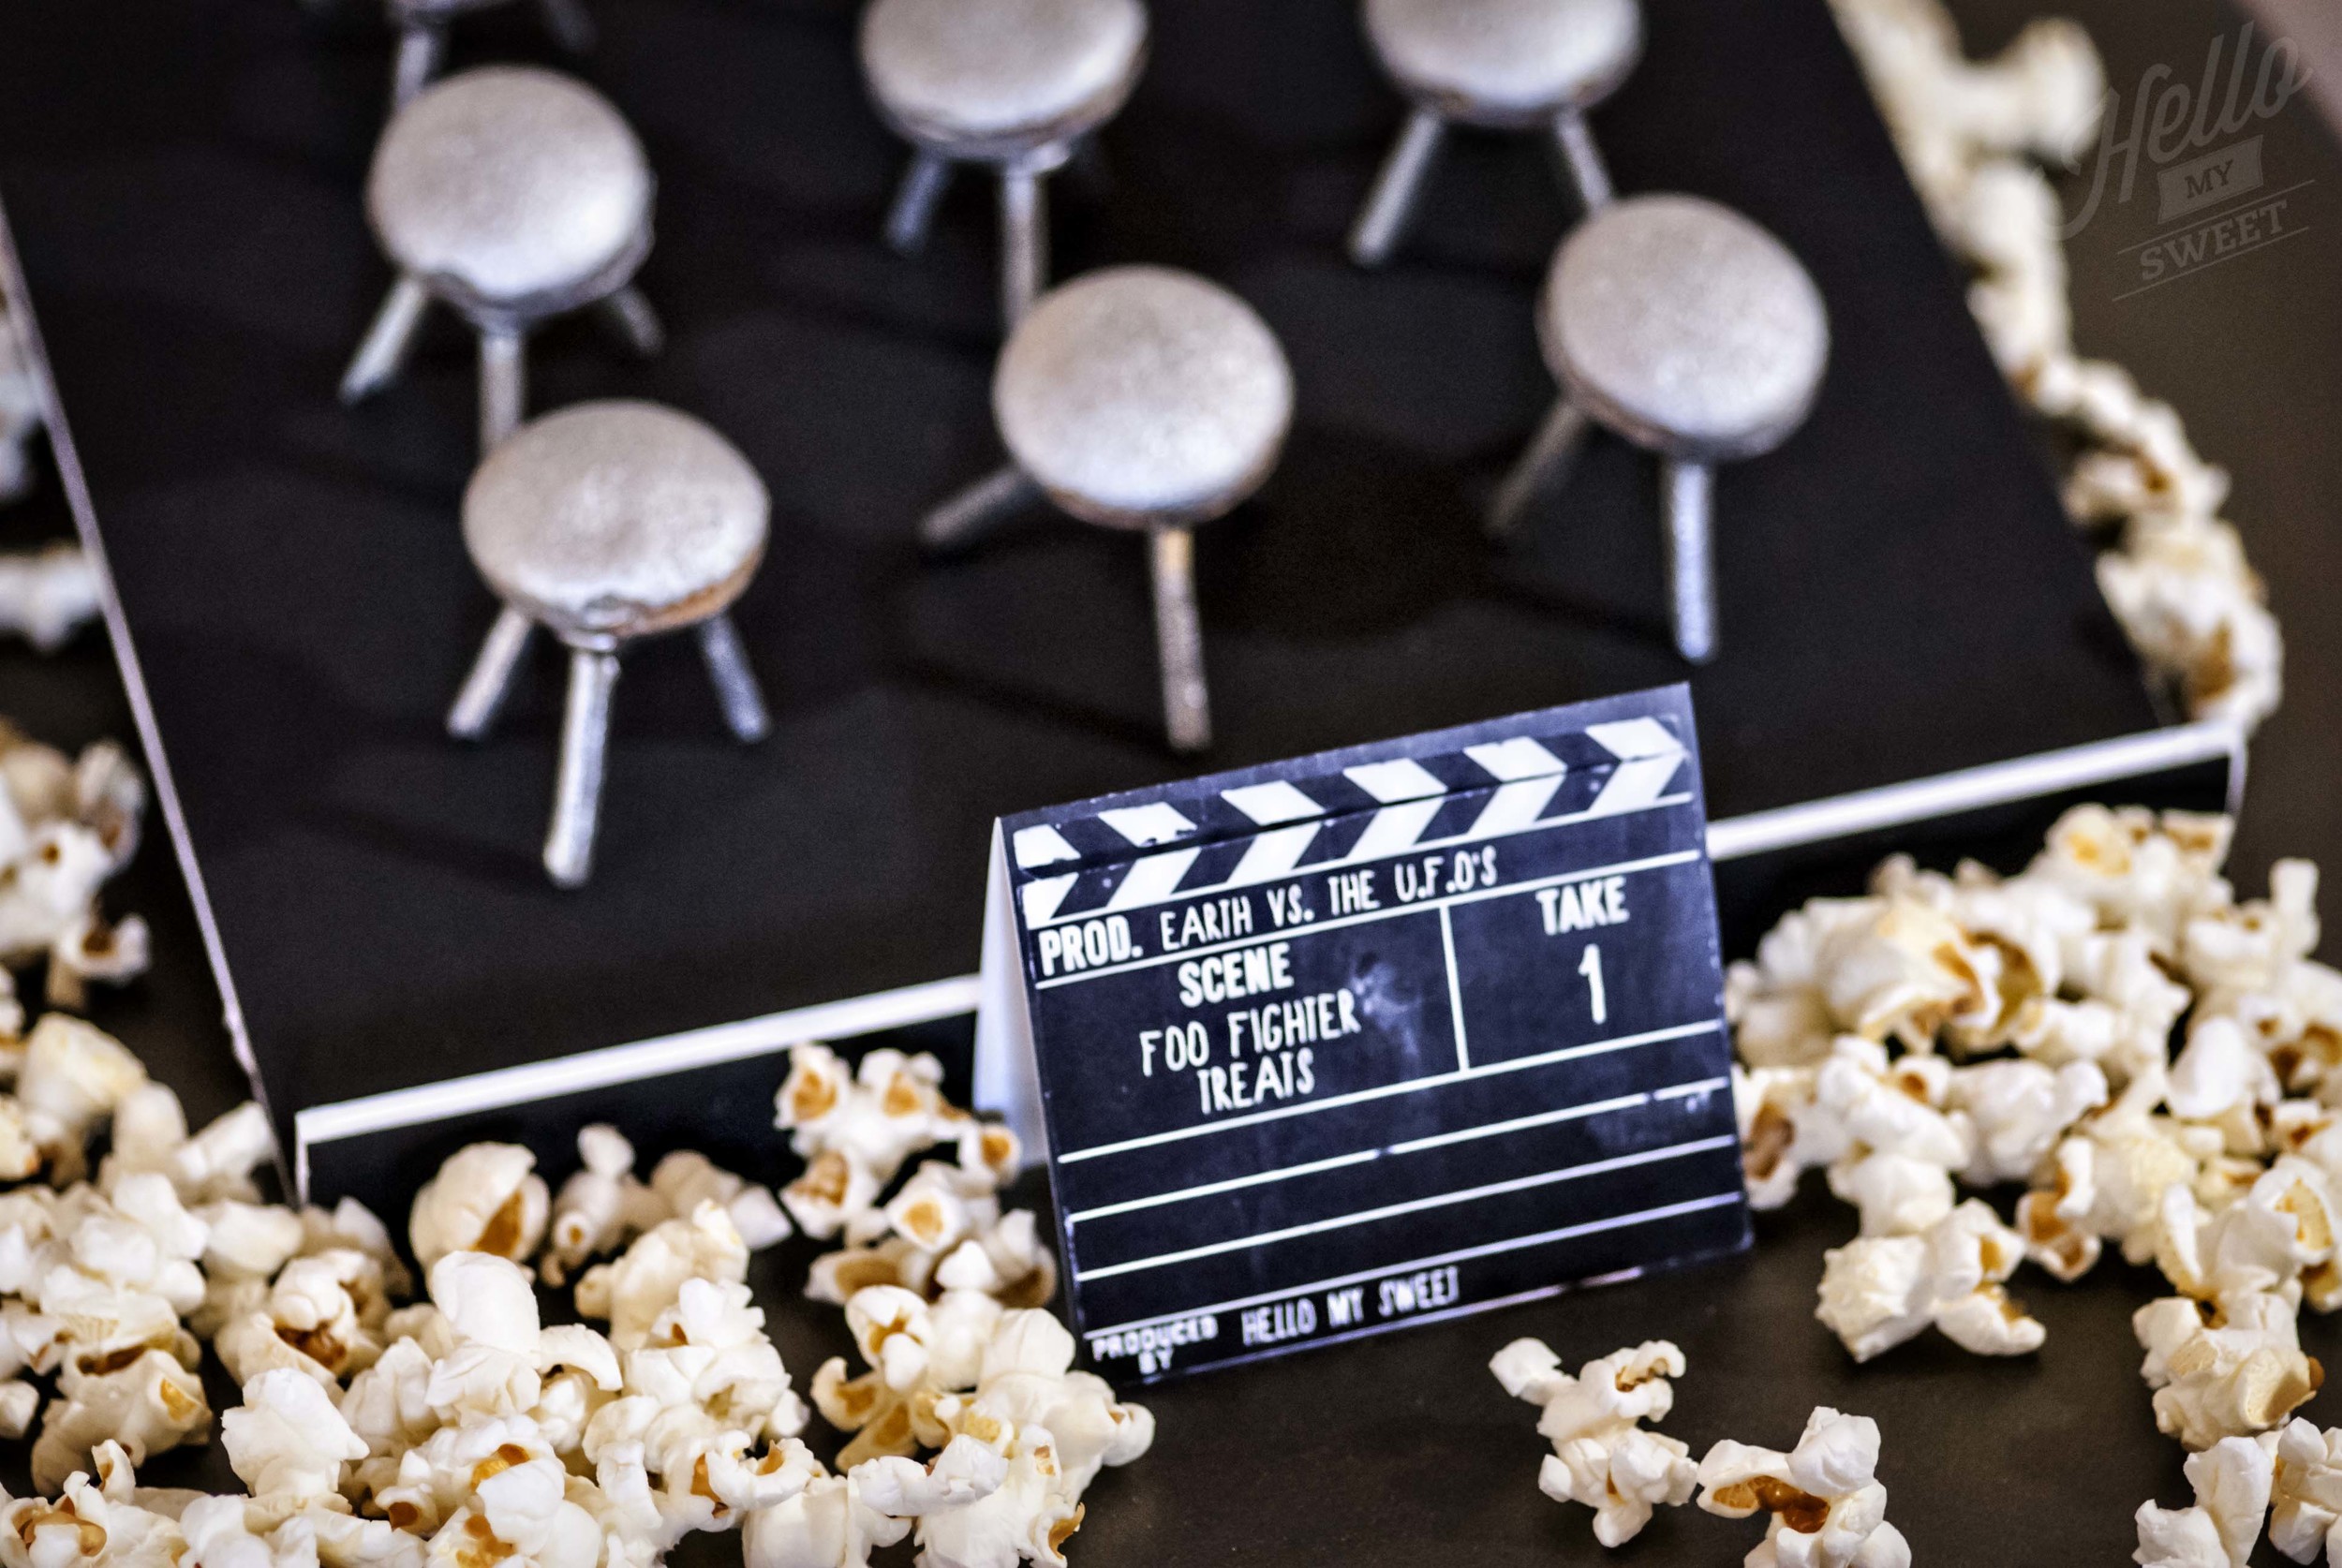
The term foo fighter was used by Alliedaircraft pilots in World War II to describe various UFOs or mysterious aerial phenomena seen in the skies over both the European and Pacific Theater of Operations.  

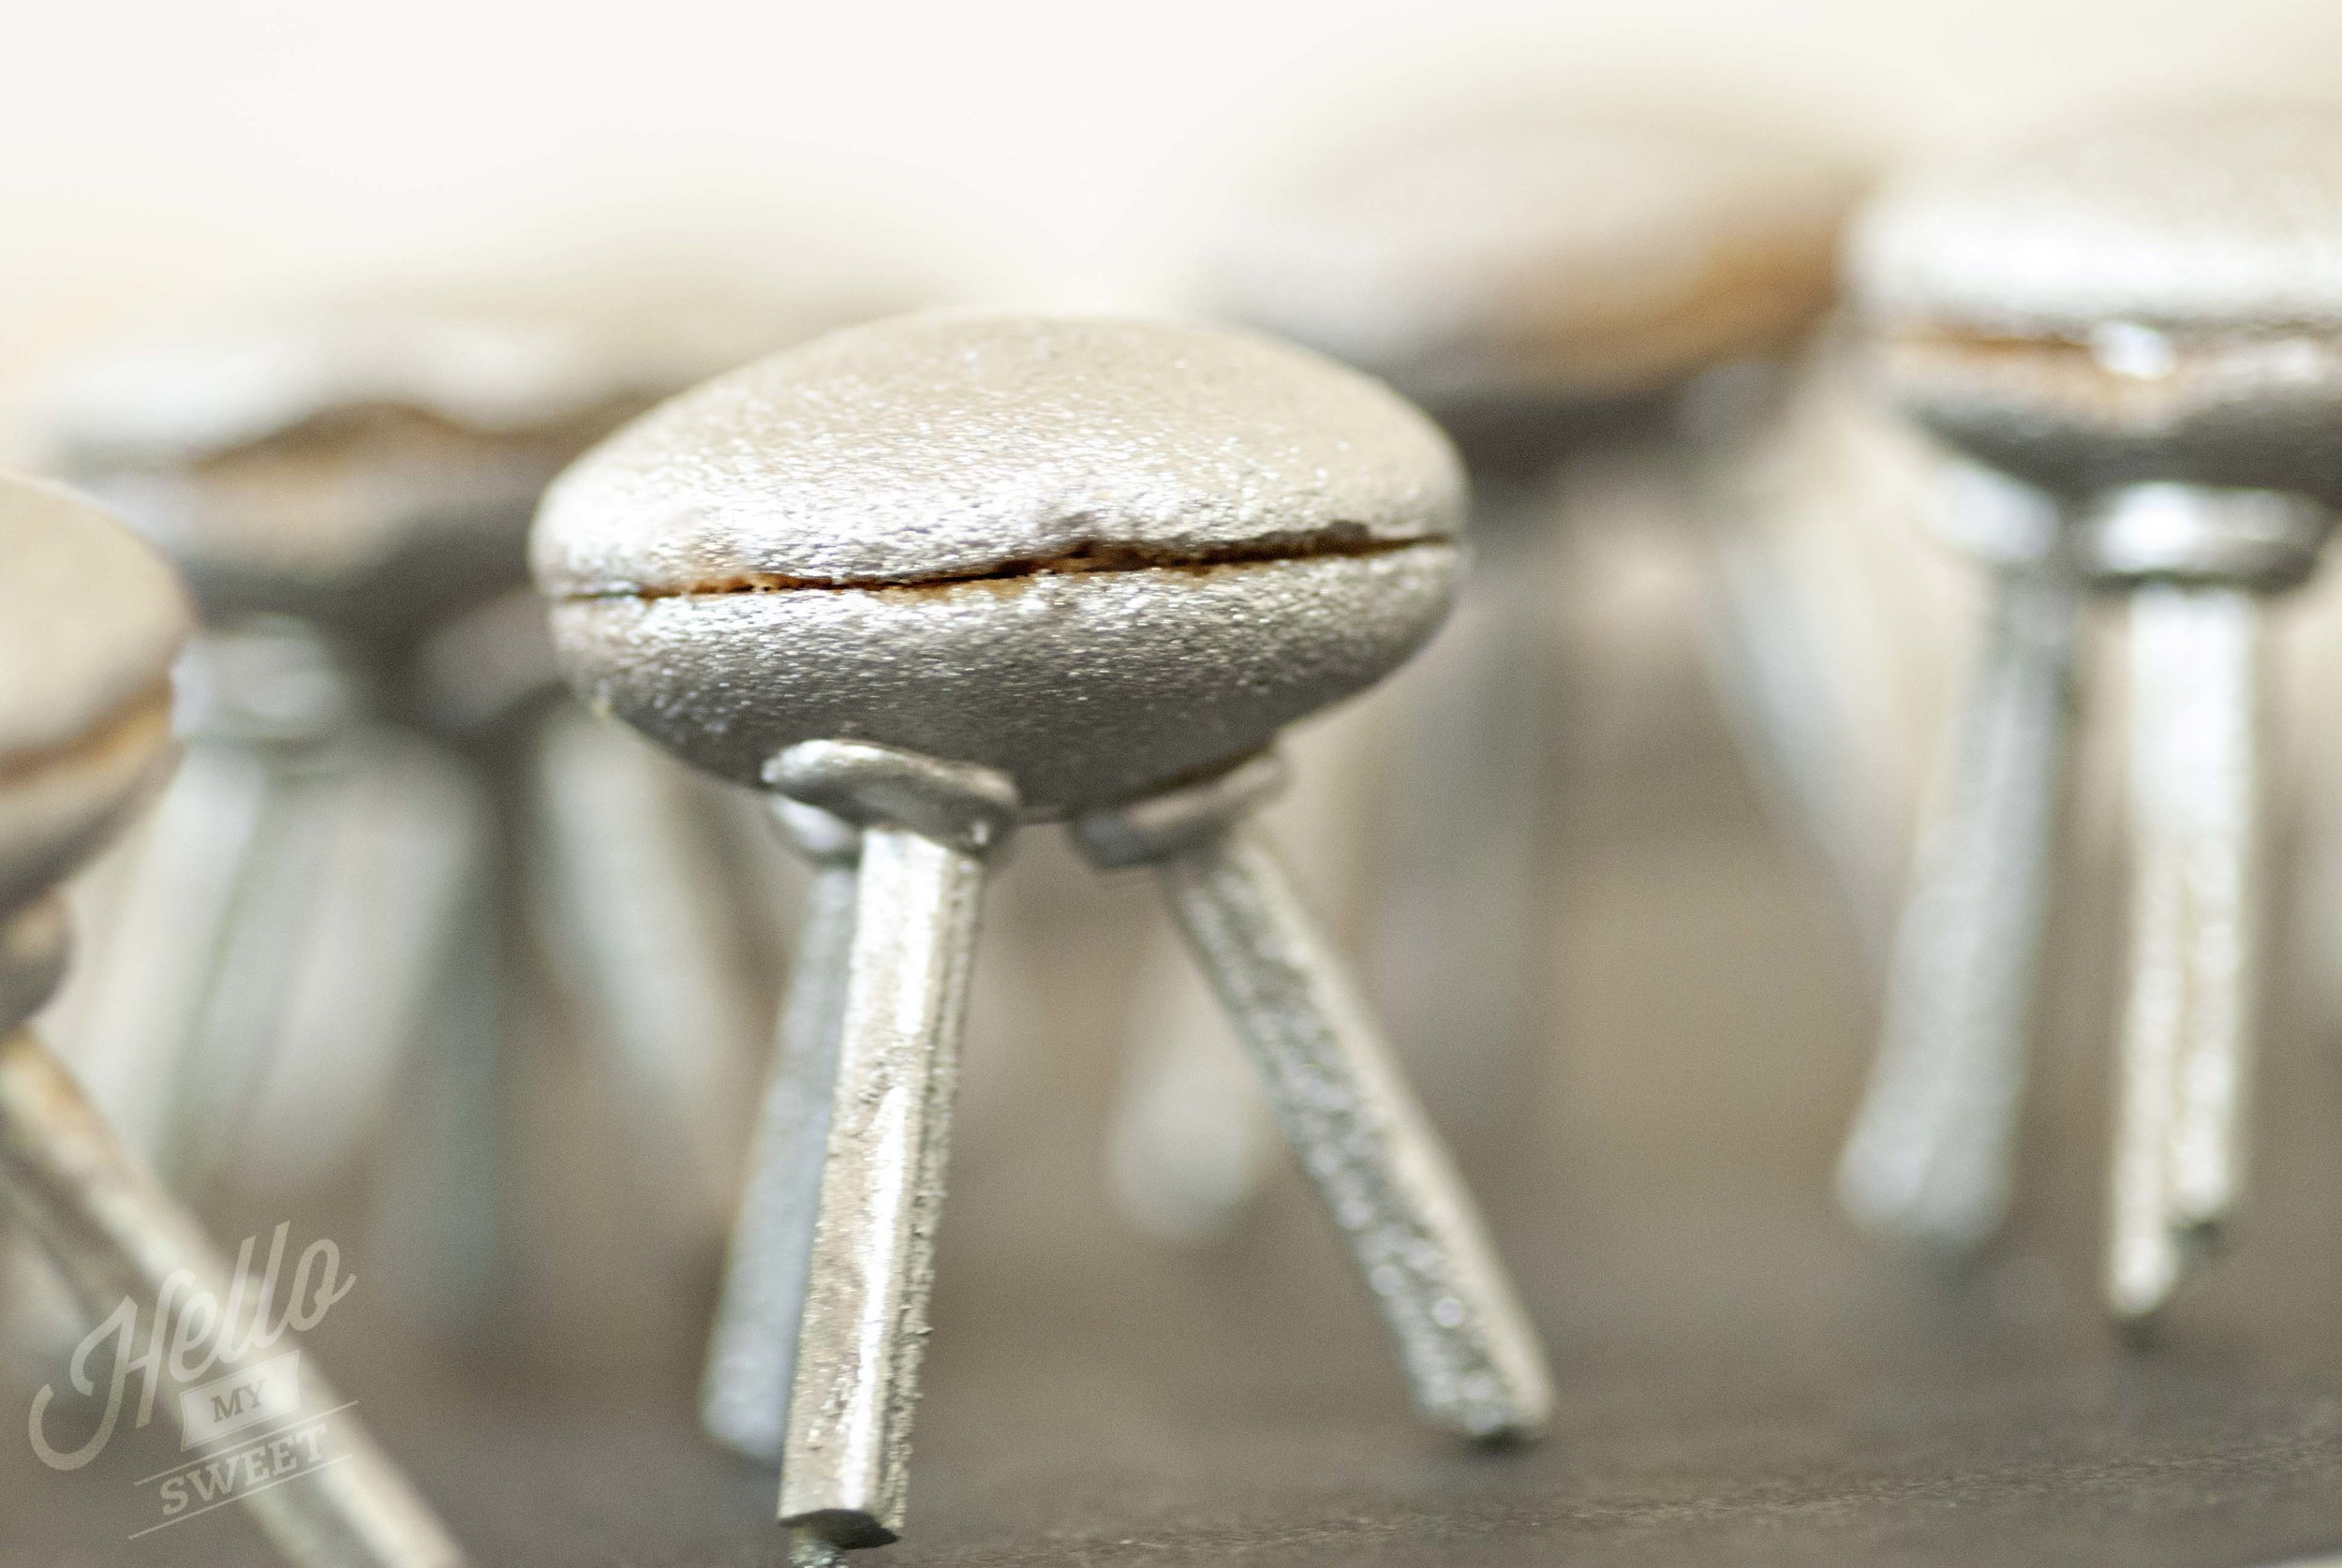
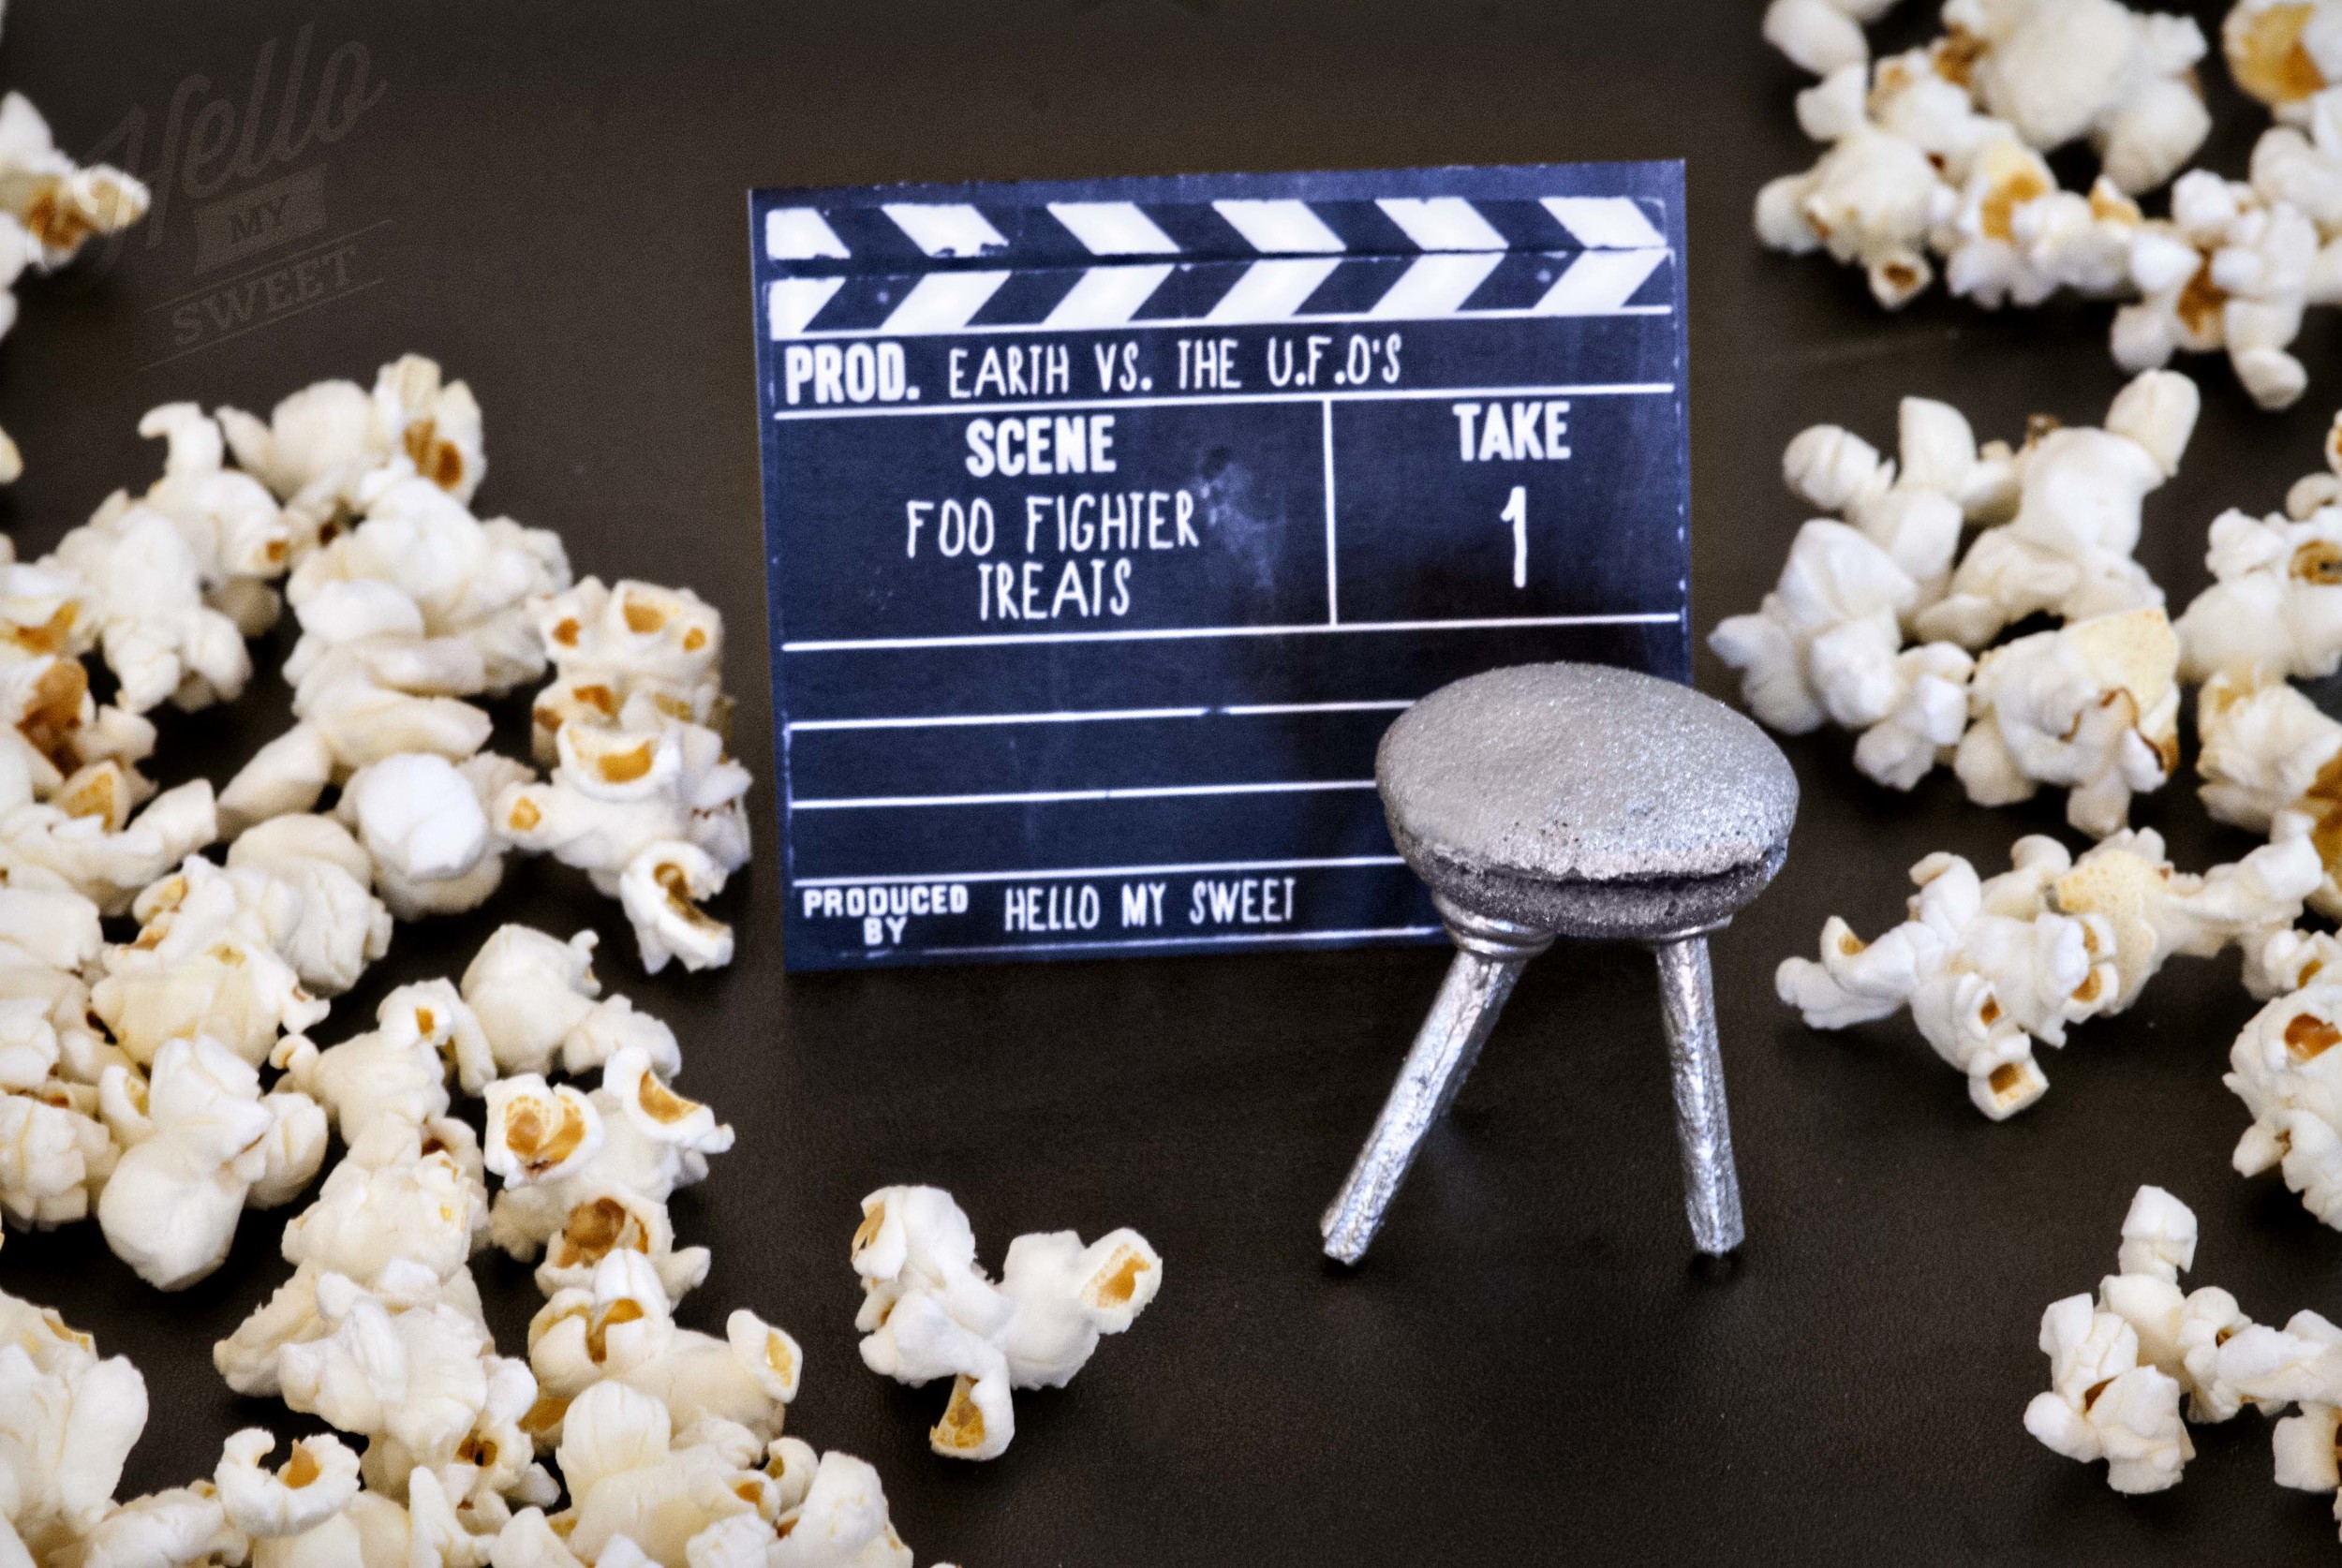
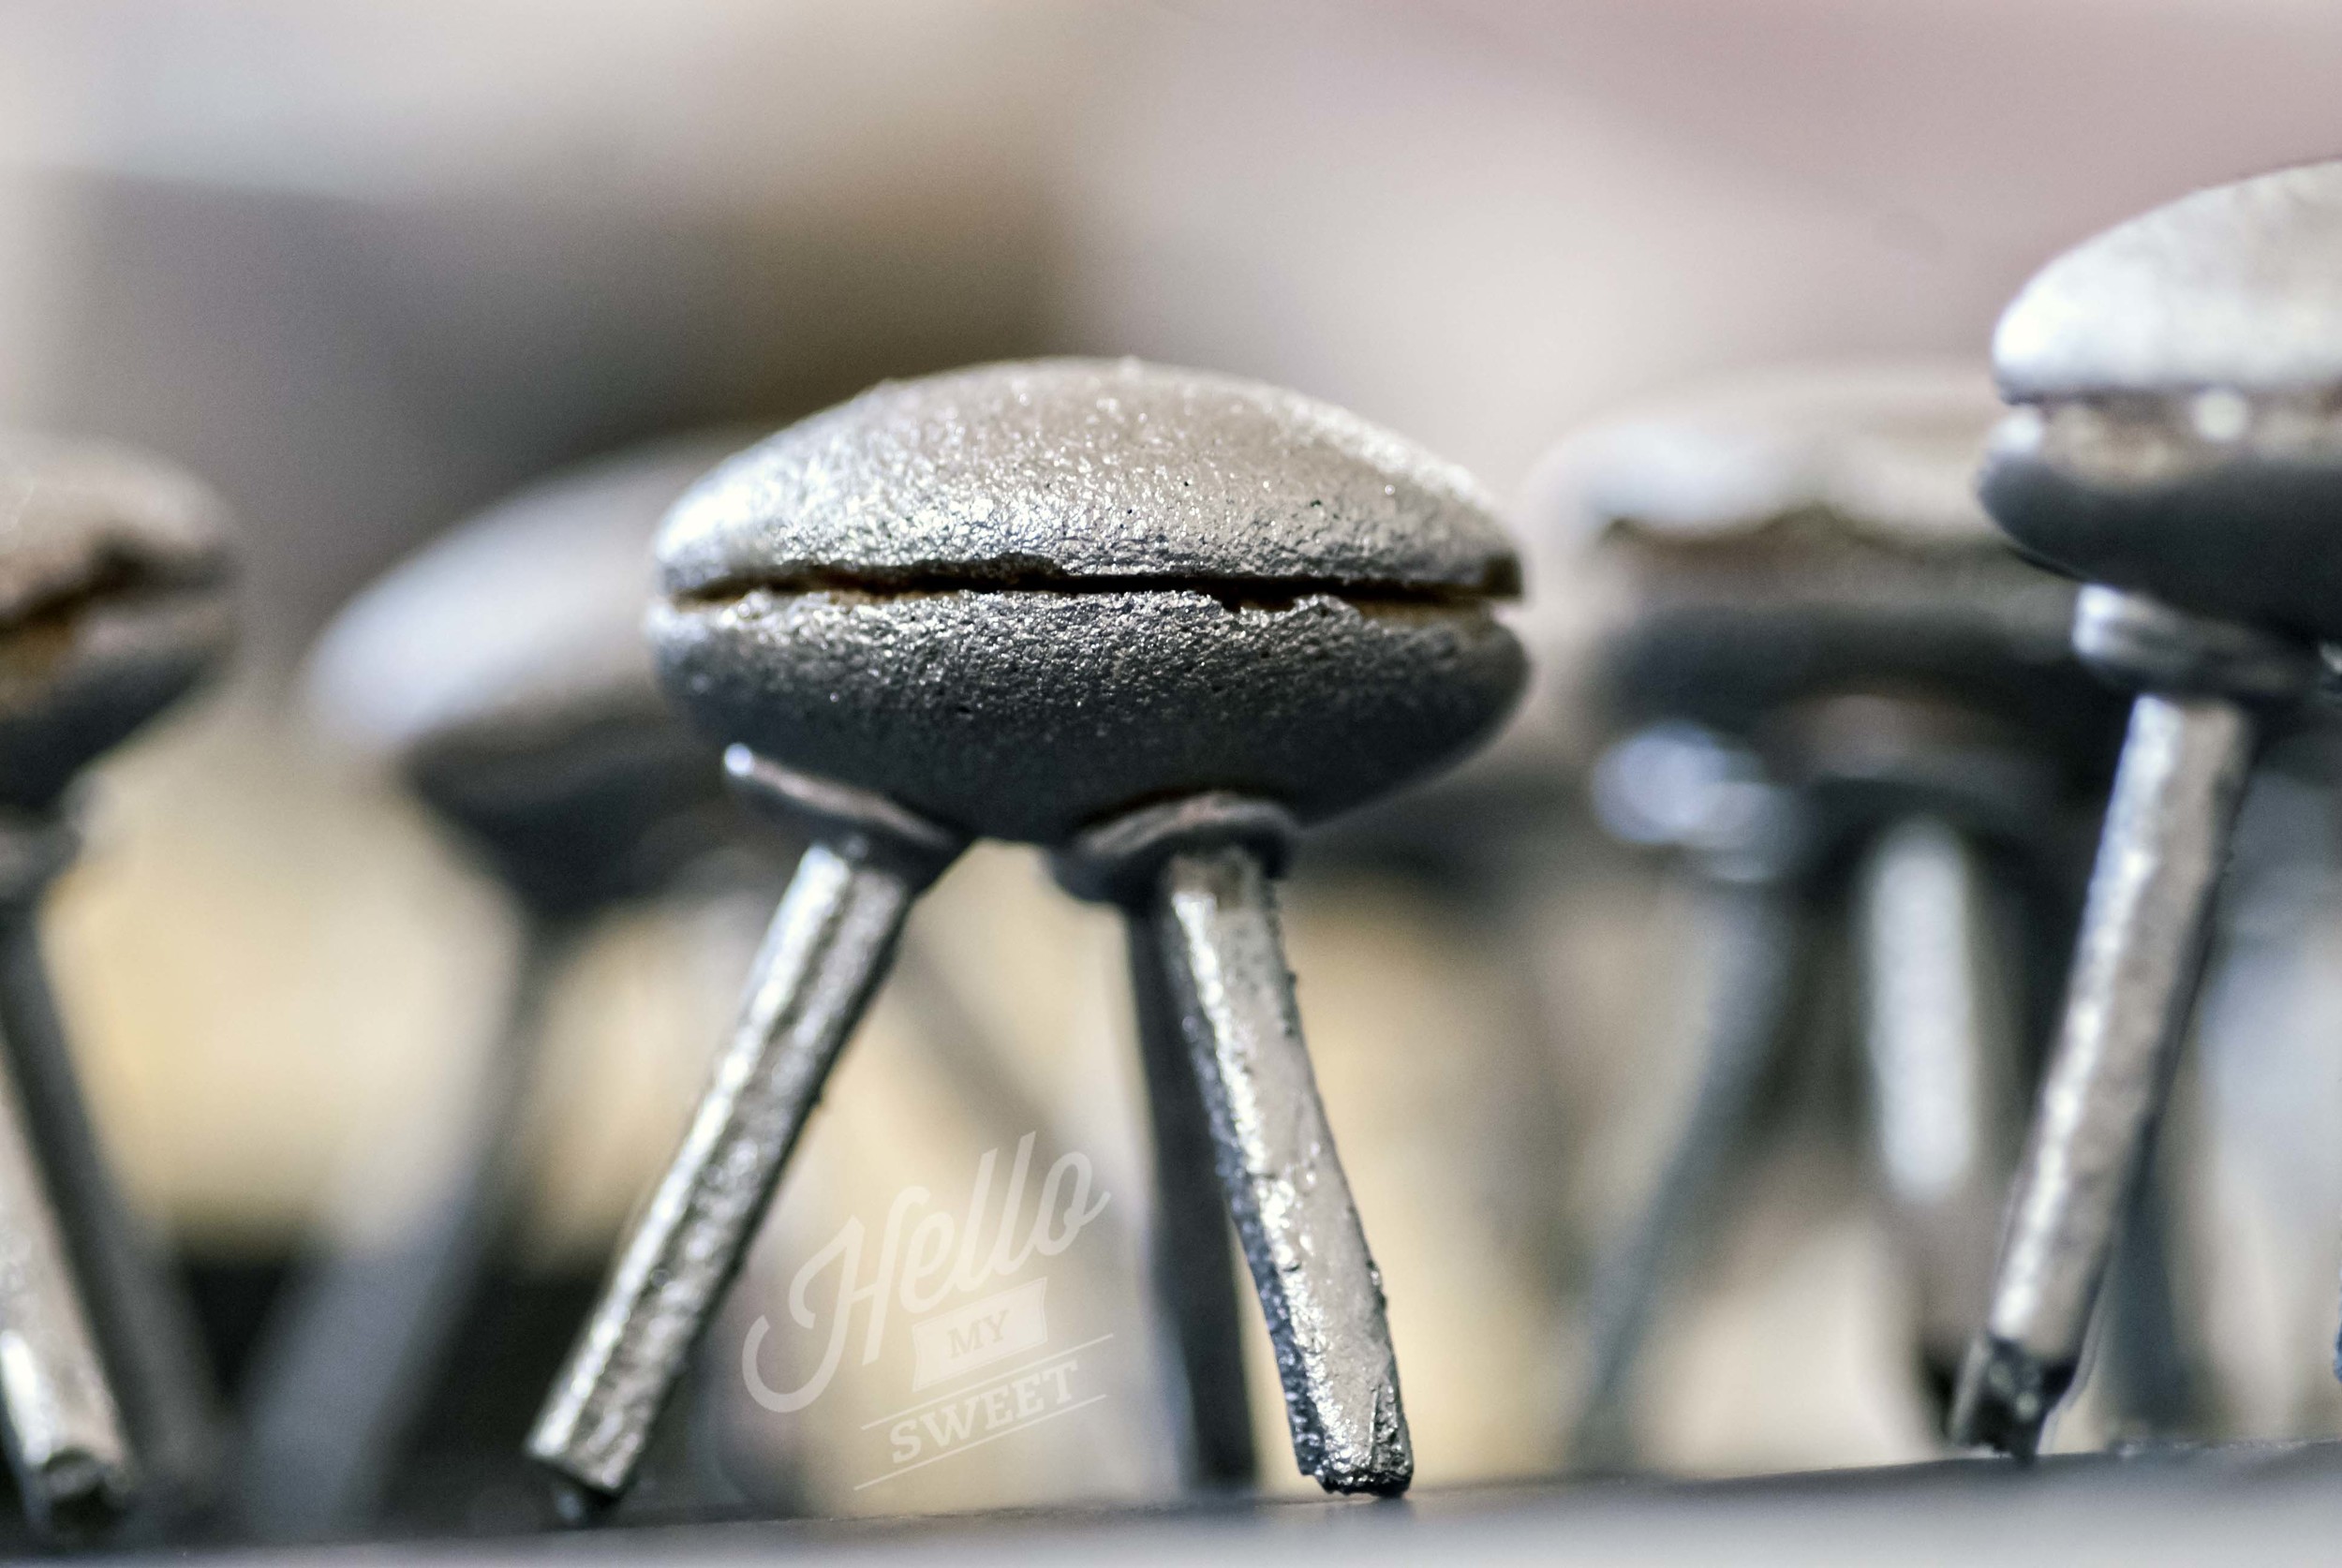
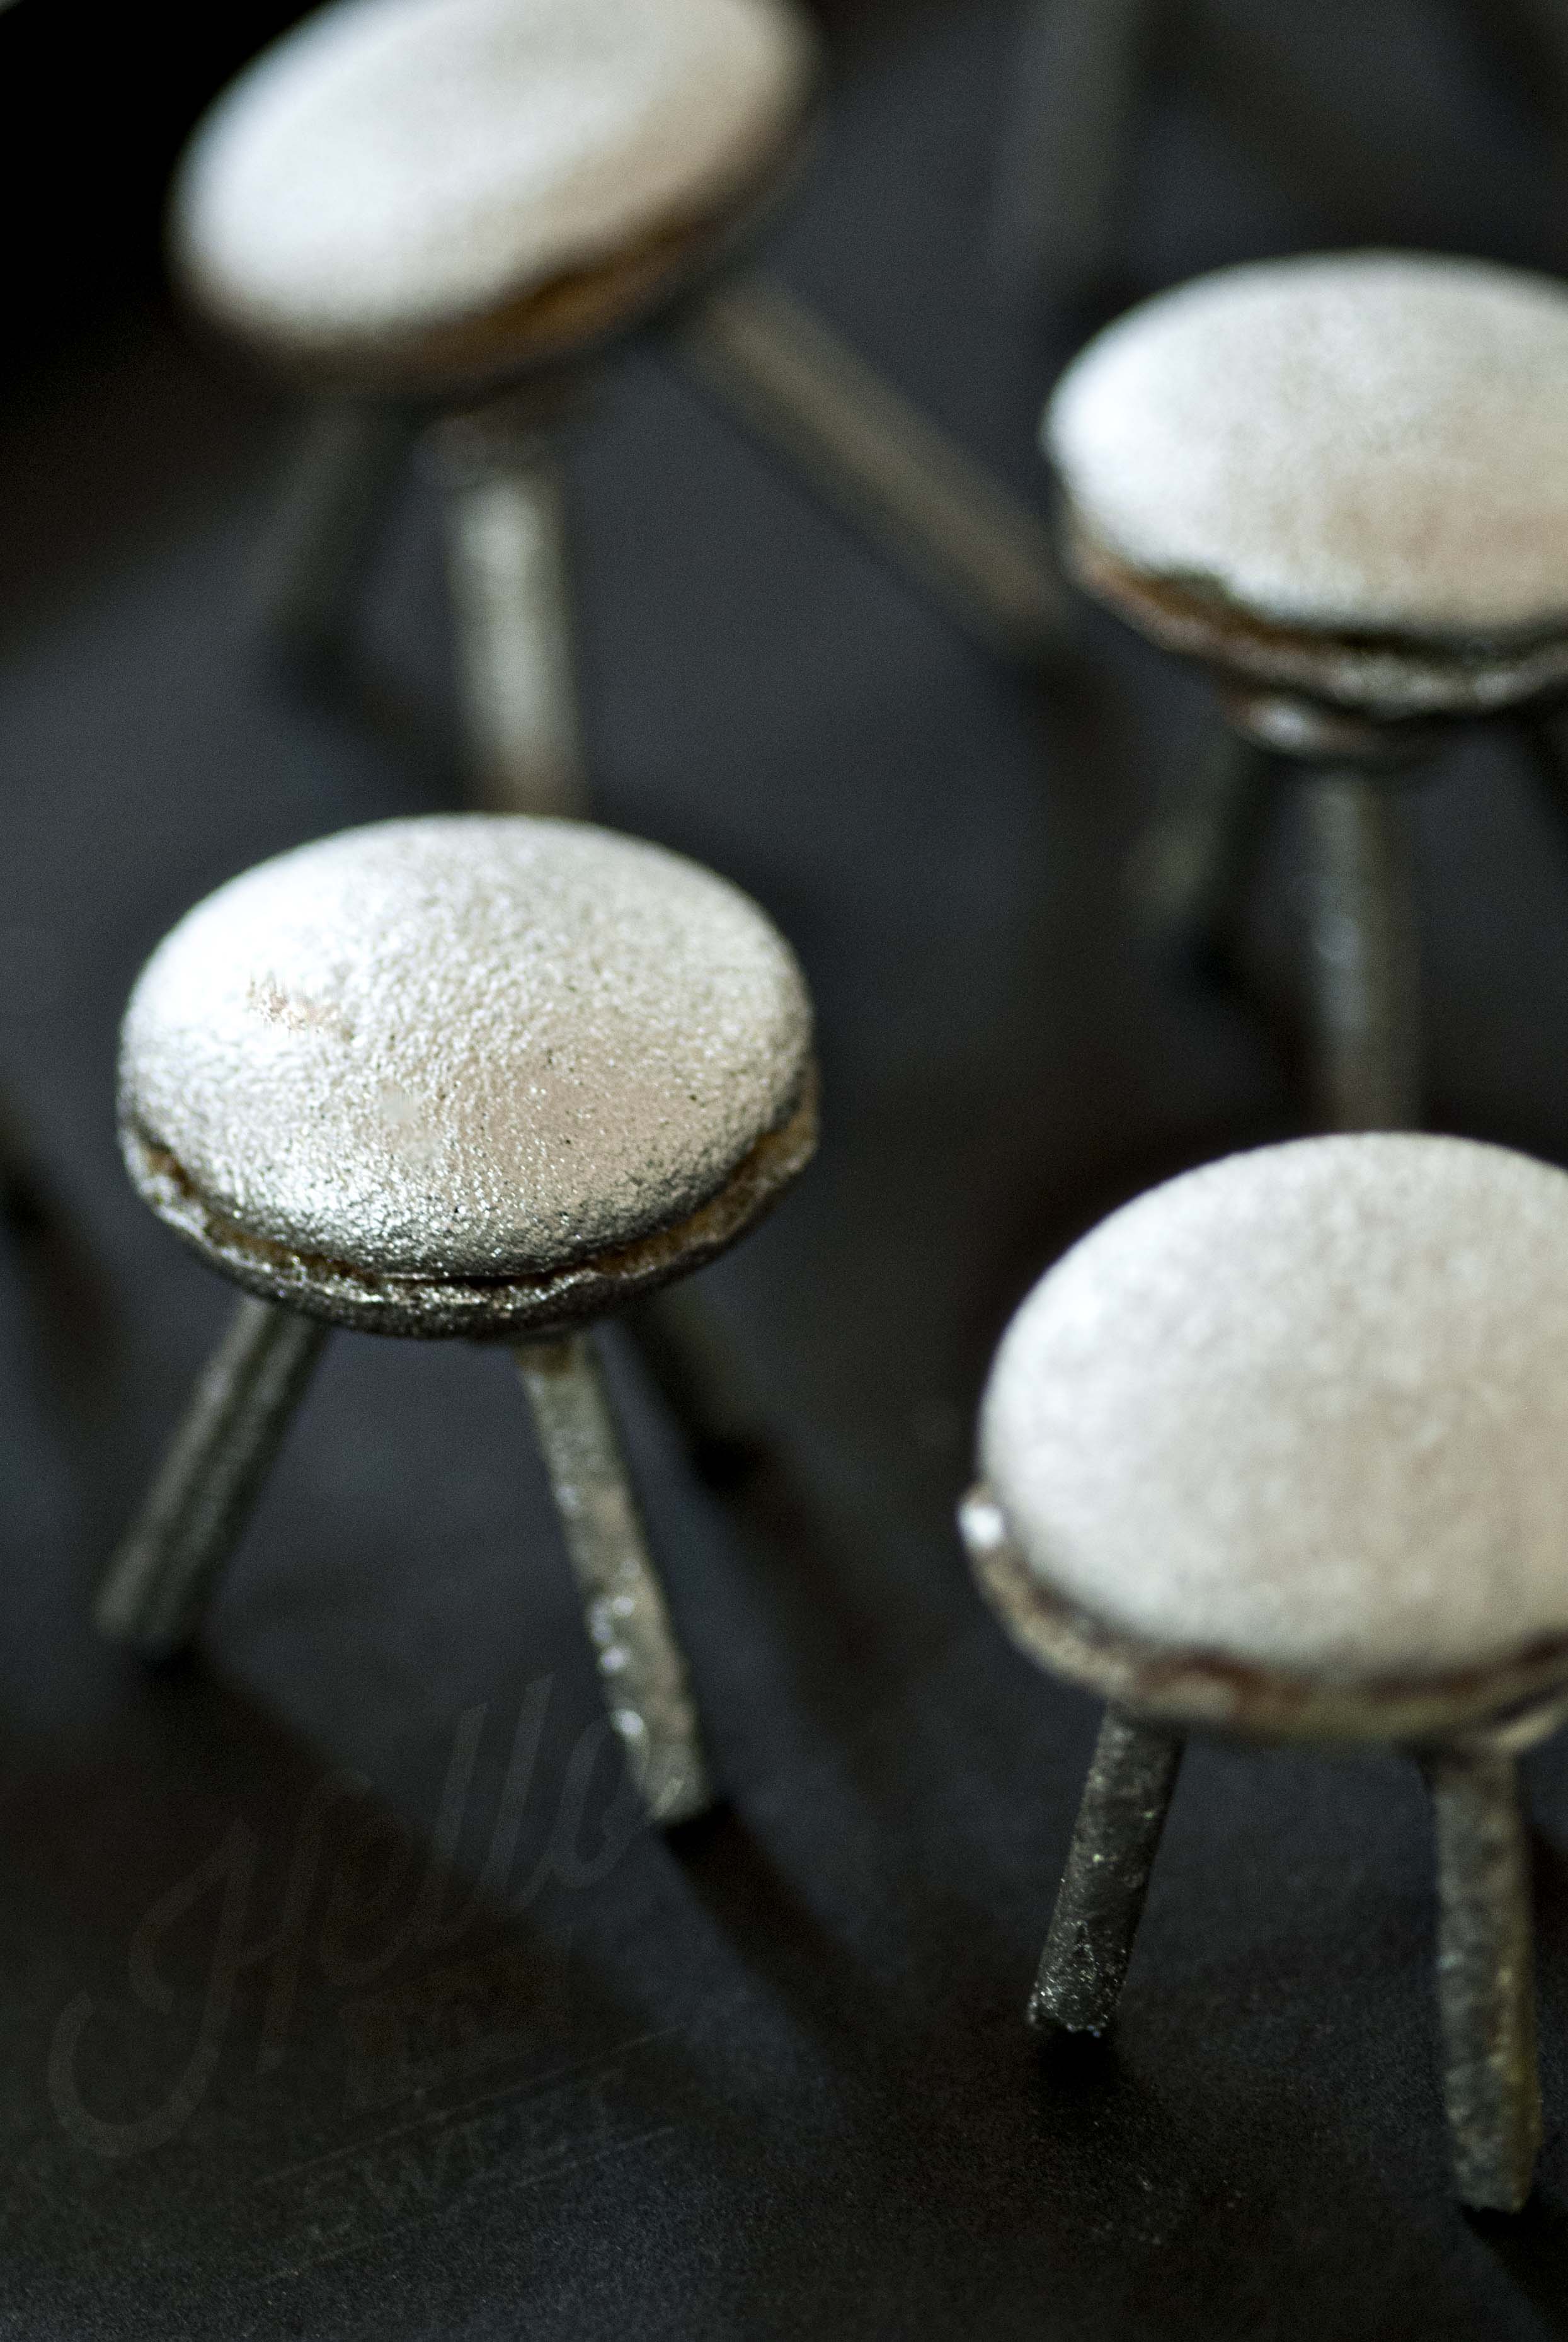
Our UFO cookies were truly a labor of love. These little cookies are a bit hard to construct but completely awesome. We sandwiched together Nilla Wafers with candy melt, then glued on "landing gear" using Pringles Honey Sticks cut to length and more candy melt. After they set we sprayed them with Wilton's Edible Color Spray in Silver. 

How to create UFO Flying Saucer Cookie Treats

Materials Needed:

Nilla Wafers

Pretzel Sticks

Candy Melts

Edible Color Spray - Silver

Freezer Bag

Scissors

Tray lined with wax paper or parchment

Step One: Prepare your materials. Place and handful of candy melt into a quart sized freezer bag and seal, pressing out the air. Break your pretzel sticks to the desired length, usually 1-2 inches. Select your wafers, placing them flat side up on your tray.

Step Two: Microwave your candy melt in 30 second intervals, stopping when they are all soft and starting to melt. Knead the bag to distribute the heat evenly and melt the remainder of the candy. You do not want your candy to be too hot and drippy. This process can be repeated throughout the project to heat more candy or to re-heat candy that is too hard.

Step Three: Snip off a small part of one of the bottom corners of the freezer bag with the candy in it. Squeeze some onto a cookie, then place another cookie on to to sandwich them together, flat sides touching. Repeat this for all of the cookies and allow them to harden on your tray.

Step Four: Prepare more candy melt. Select three sticks and attache them with the candy melt to a cookie. It may be necessary to hold each stick for a few seconds to allow the melt to grab and hold as it cools. Try to use a steady hand and be patient :) Repeat until all of the cookies have pretzels attached.

Step Five:  Allow the cookies to harden completely in a cool dry place. Do not refrigerate as they will become moist and crumble and fall apart. One they are ready, spray each side of each cookie with the color spray until they are shiny and metallic, then allow to dry.

bMovieHelloMySweet_0181.jpg
bMovieHelloMySweet_0255.jpg
bMovieHelloMySweet_0288.jpg
bMovieHelloMySweet_0265.jpg
bMovieHelloMySweet_0246.jpg
bMovieHelloMySweet_Full.png

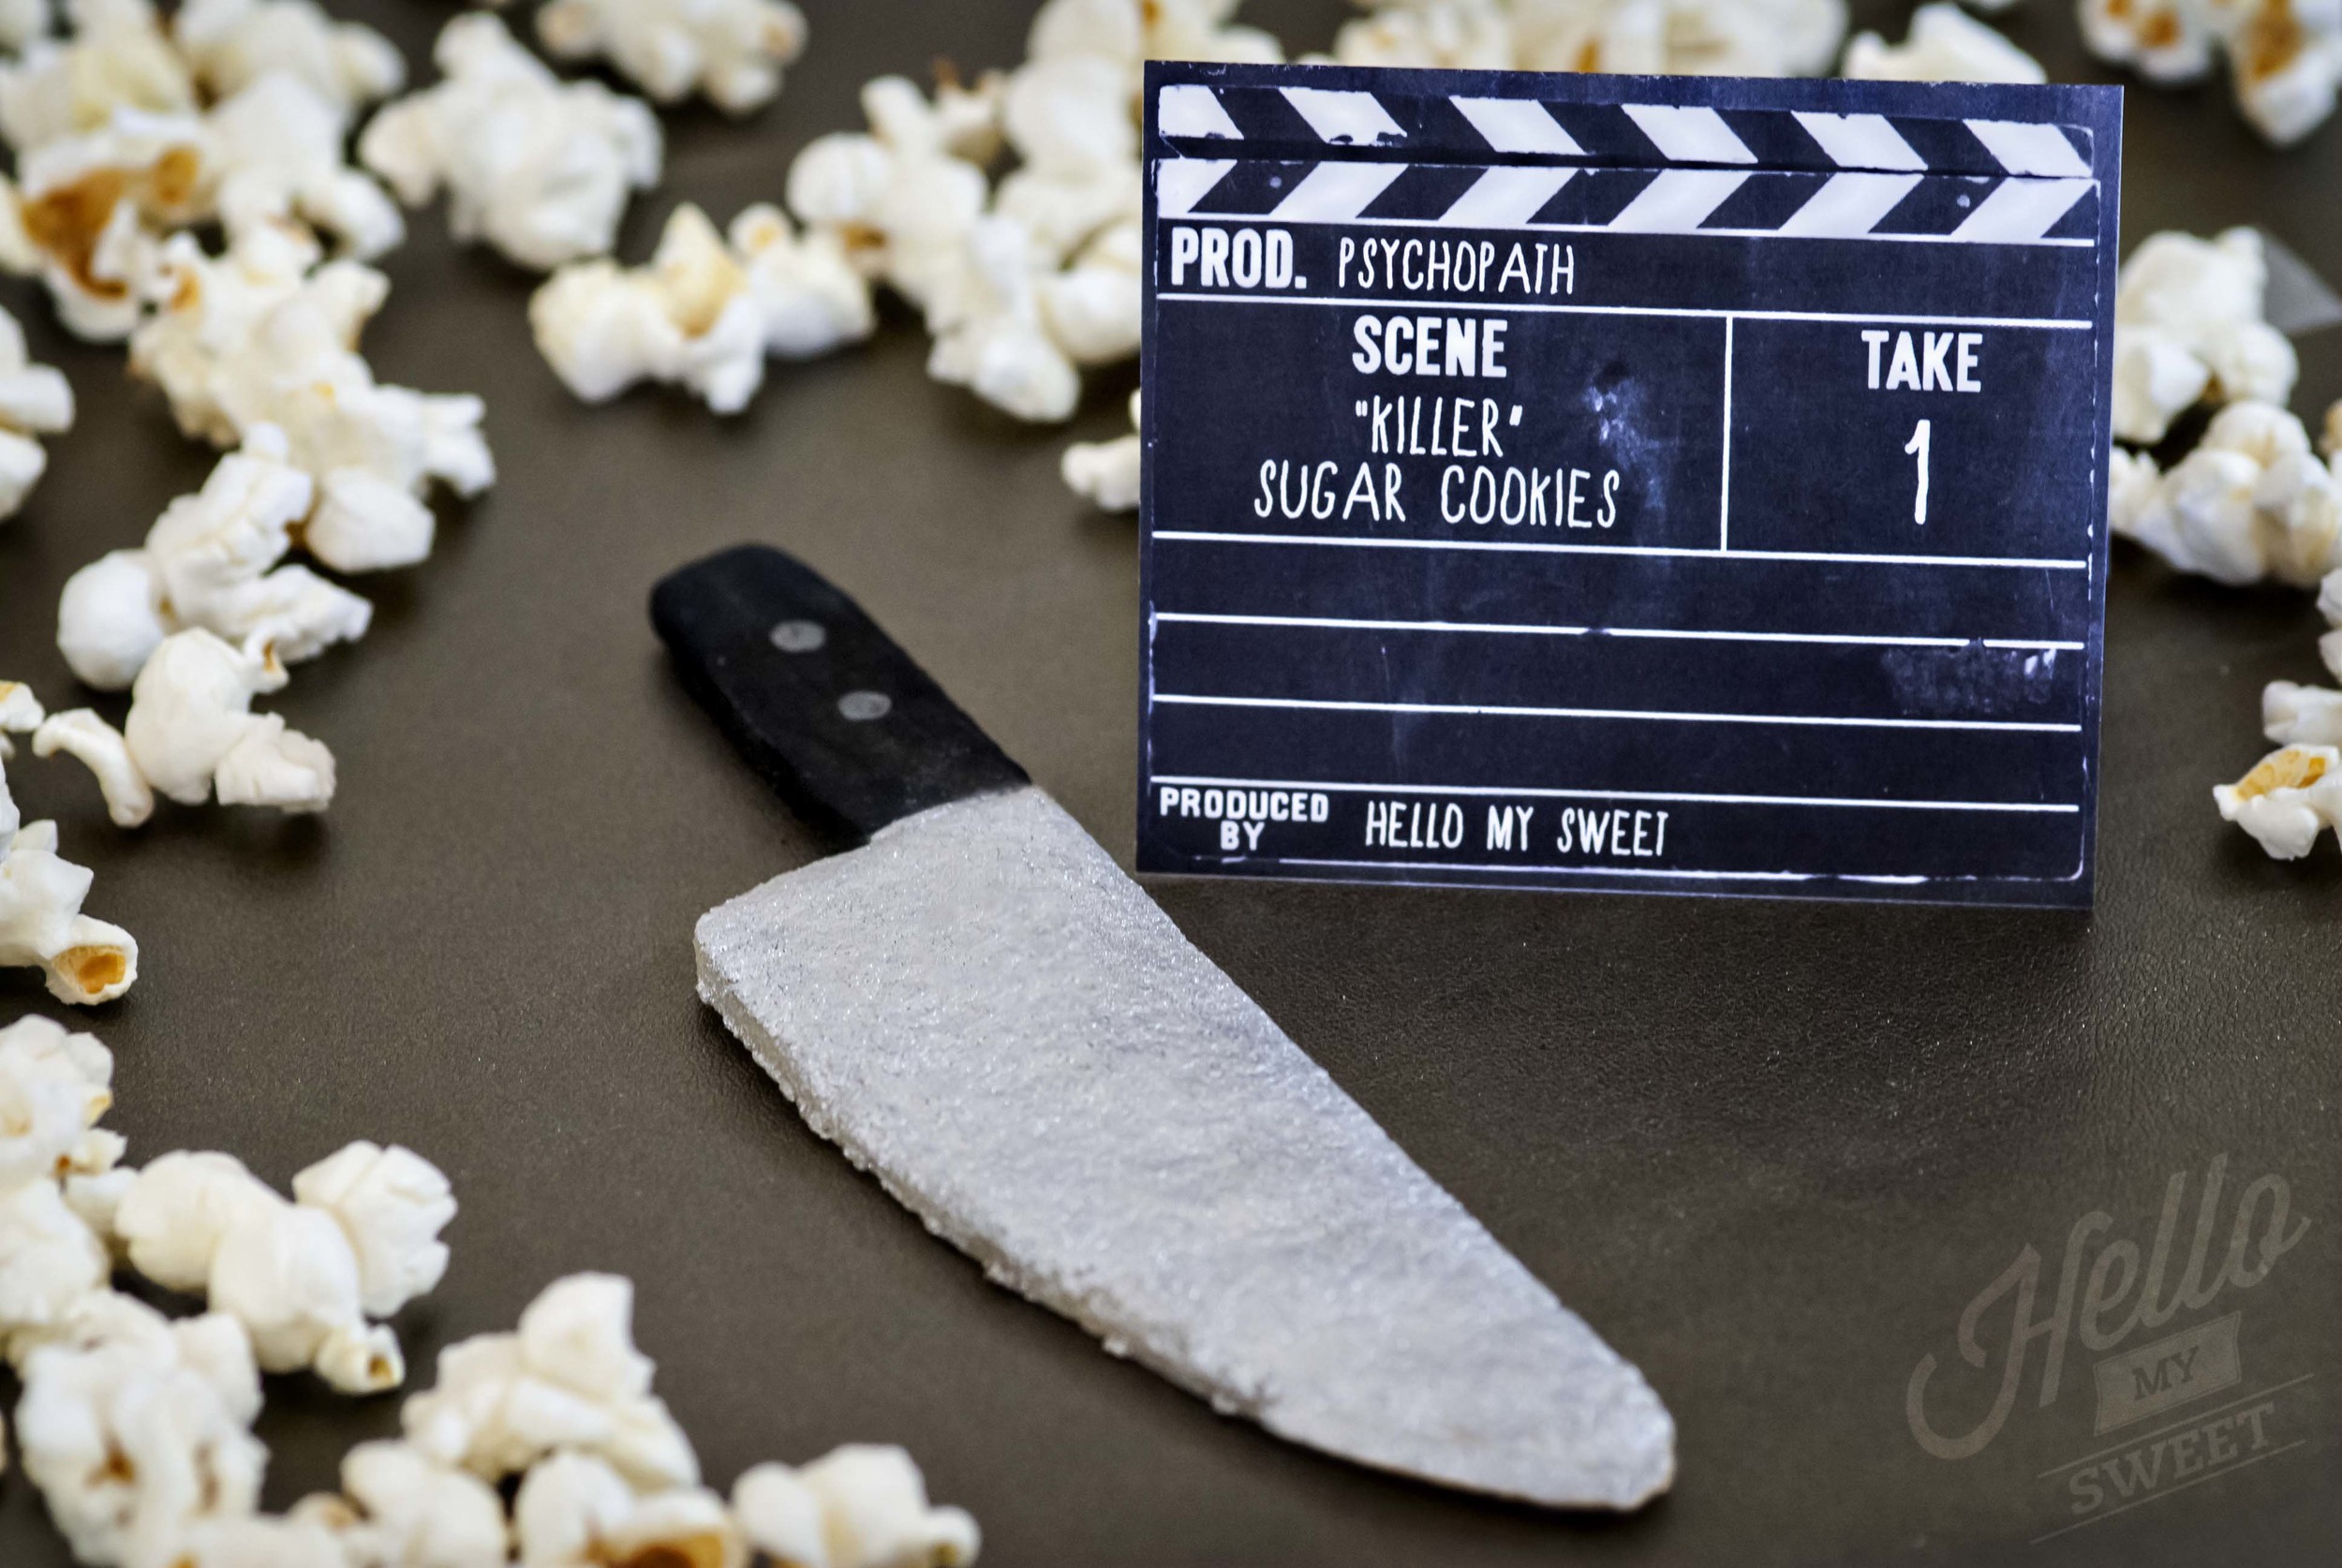
Killer Halloween Sugar Cookies

Killer Sugar Cookies

What Halloween table is complete without a butcher knife shaped cookie? Apparently butcher knife cookie cutters are hard to come by, we had to improvise. We printed out a butcher knife shape and traced it onto stiff card stock and used it to trace around into our cookie dough. Once the cookies were baked we used Wilton Cookie icing in black and Wilton Color Spray in Silver to complete our knives.

For a "Killer" Sugar Cookie follow the recipe below:

SUGAR COOKIE RECIPE

2 cups all-purpose flour

1/4 teaspoon salt

1/2 teaspoon baking powder

1/2 cup (1 stick) unsalted butter

1 cup sugar

1 large egg, lightly beaten

2 tablespoons milk

1/2 teaspoon vanilla extract

Directions:

Whisk together flour, salt, and baking powder in a medium bowl; set aside.

In the bowl of an electric mixer fitted with the paddle attachment, cream butter and sugar; mix until light and fluffy.

With mixer running, add egg, milk, and vanilla; mix until well combined.

With the mixer on low, slowly add the flour mixture. Mix until just combined.

Move dough to a work surface. Shape into 2 discs, cover with plastic wrap, and refrigerate for at least 1 hour.

Preheat oven to 350 degrees. Line baking sheets with nonstick baking mats or parchment paper; set aside.

On a lightly floured work surface, roll out dough to 1/8-inch thickness.Cut with your cookie cutter.

Transfer to prepared baking sheets, leaving an inch in between. Bake until lightly golden, about 10 minutes; do not allow to brown. Transfer to wire racks to cool.


bMovieHelloMySweet_0308.jpg
bMovieHelloMySweet_0175.jpg
bMovieHelloMySweet_Full.png

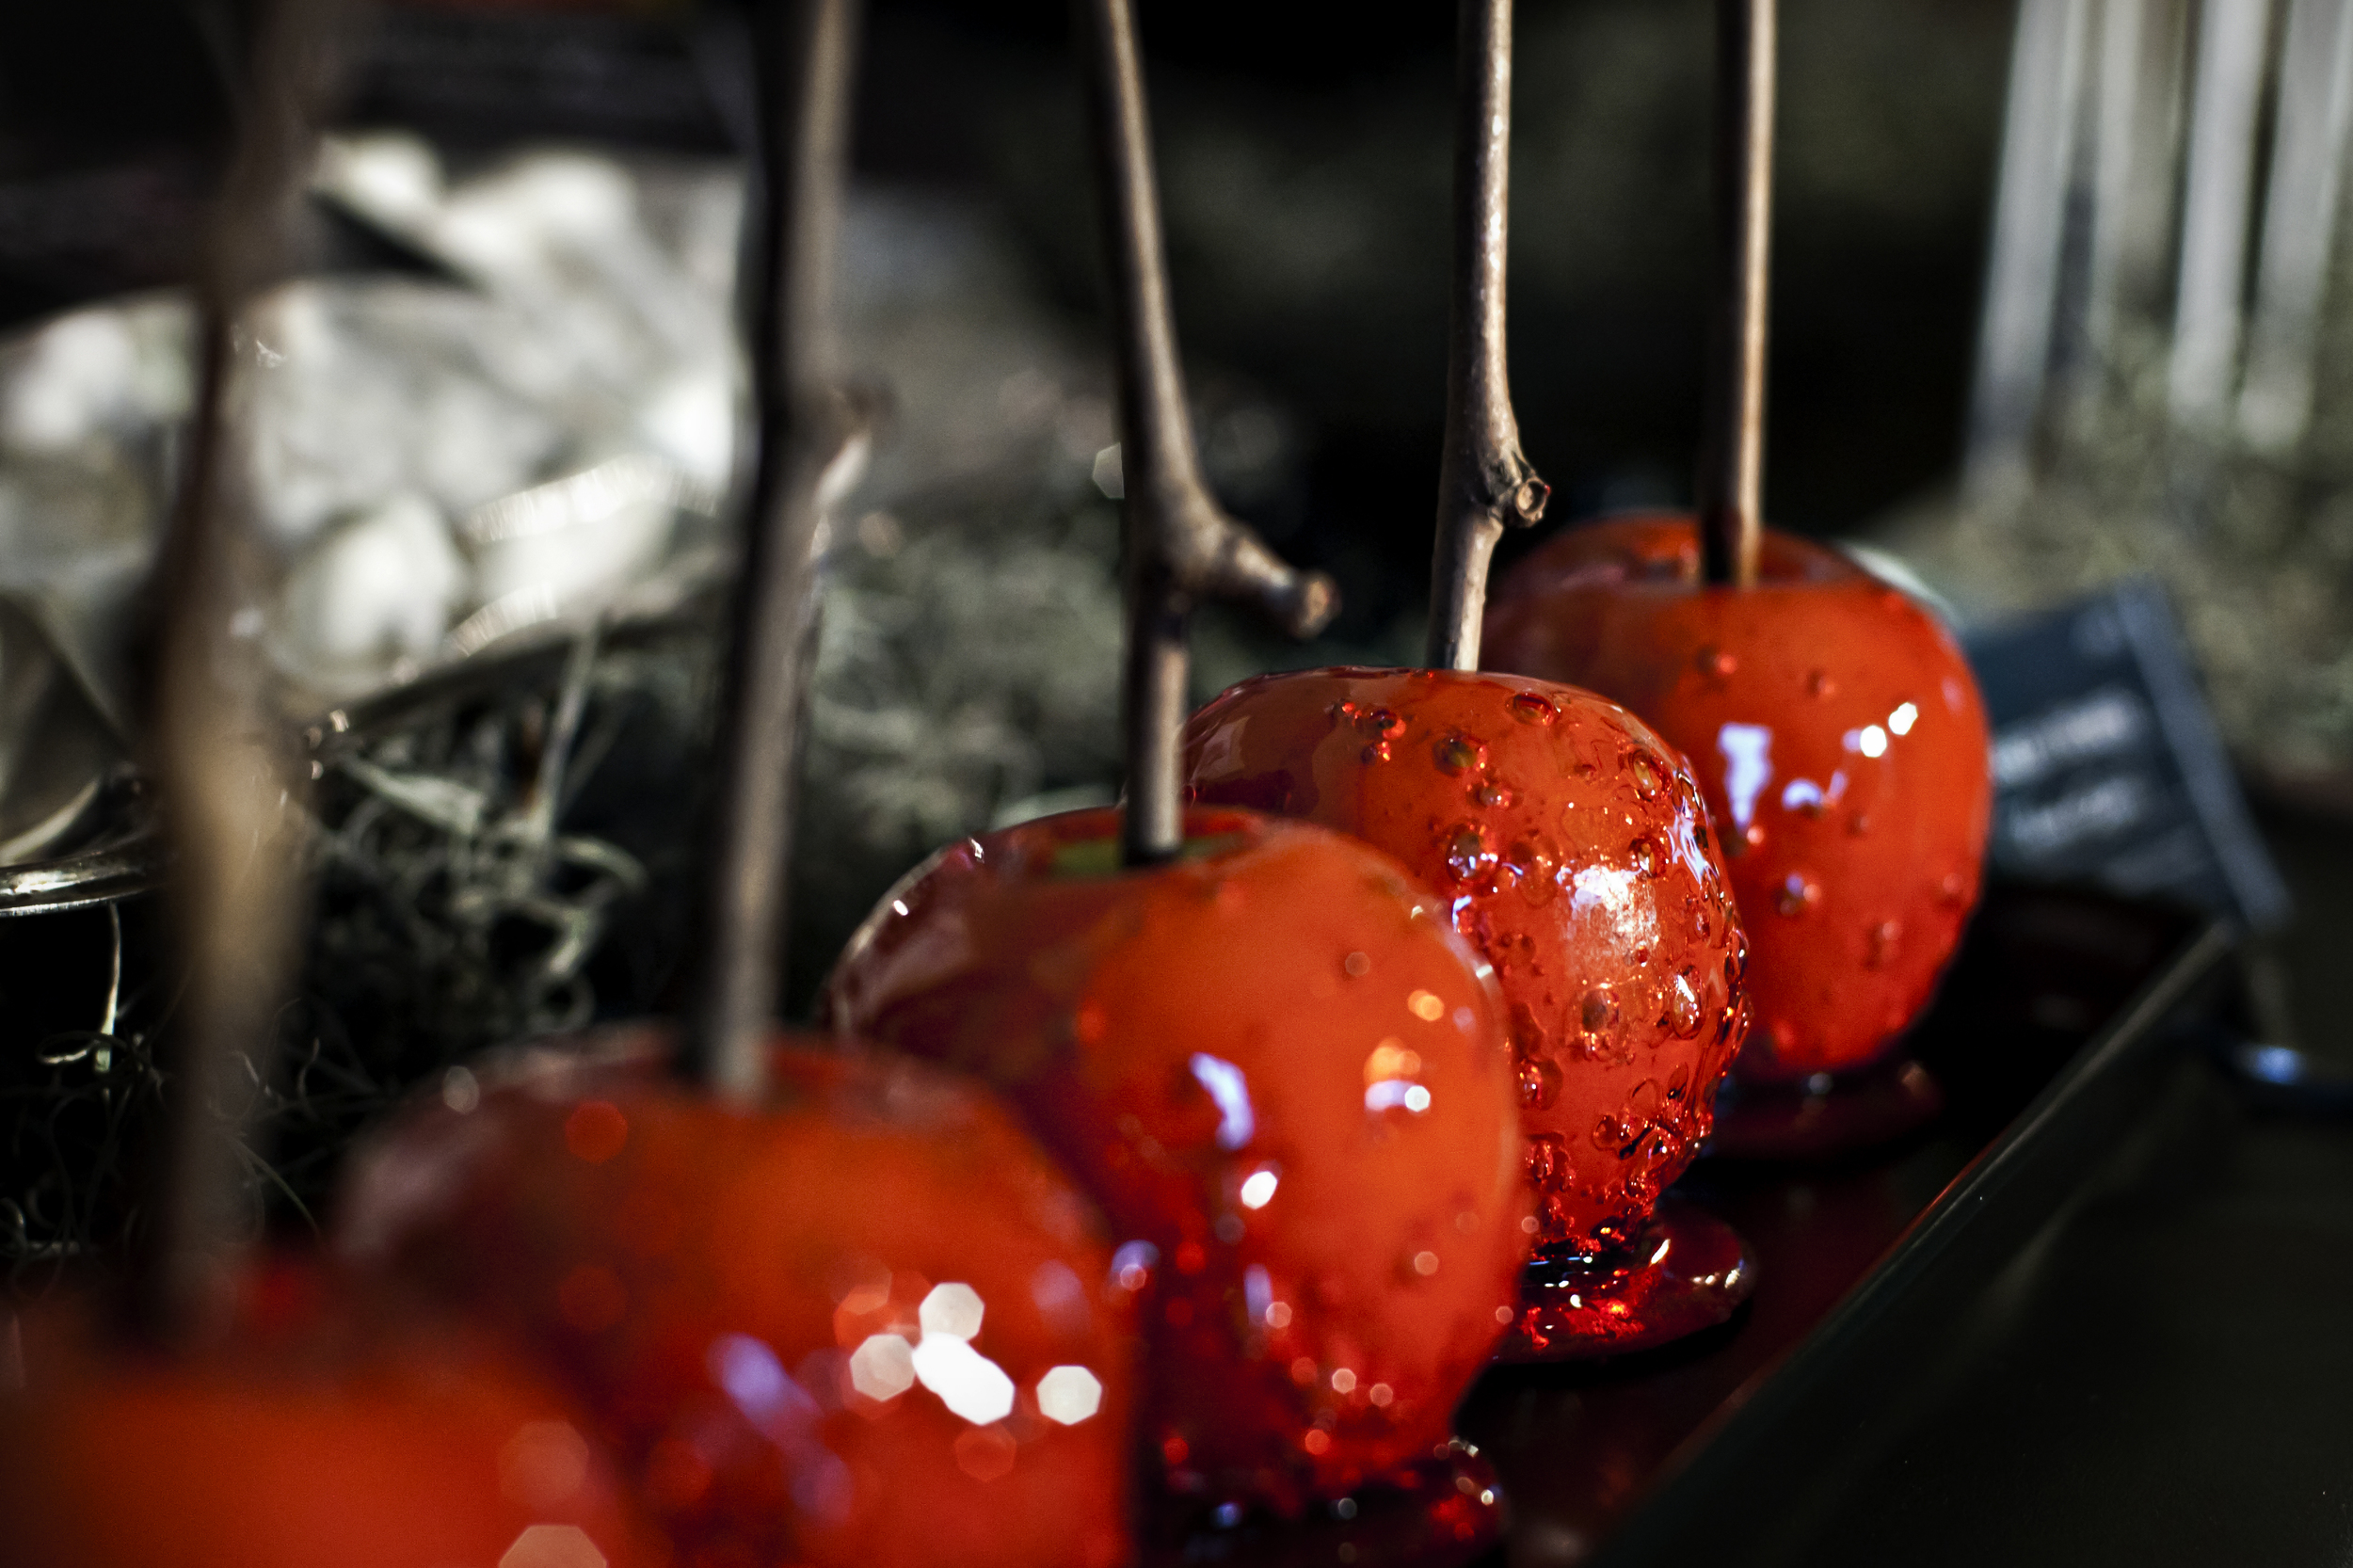
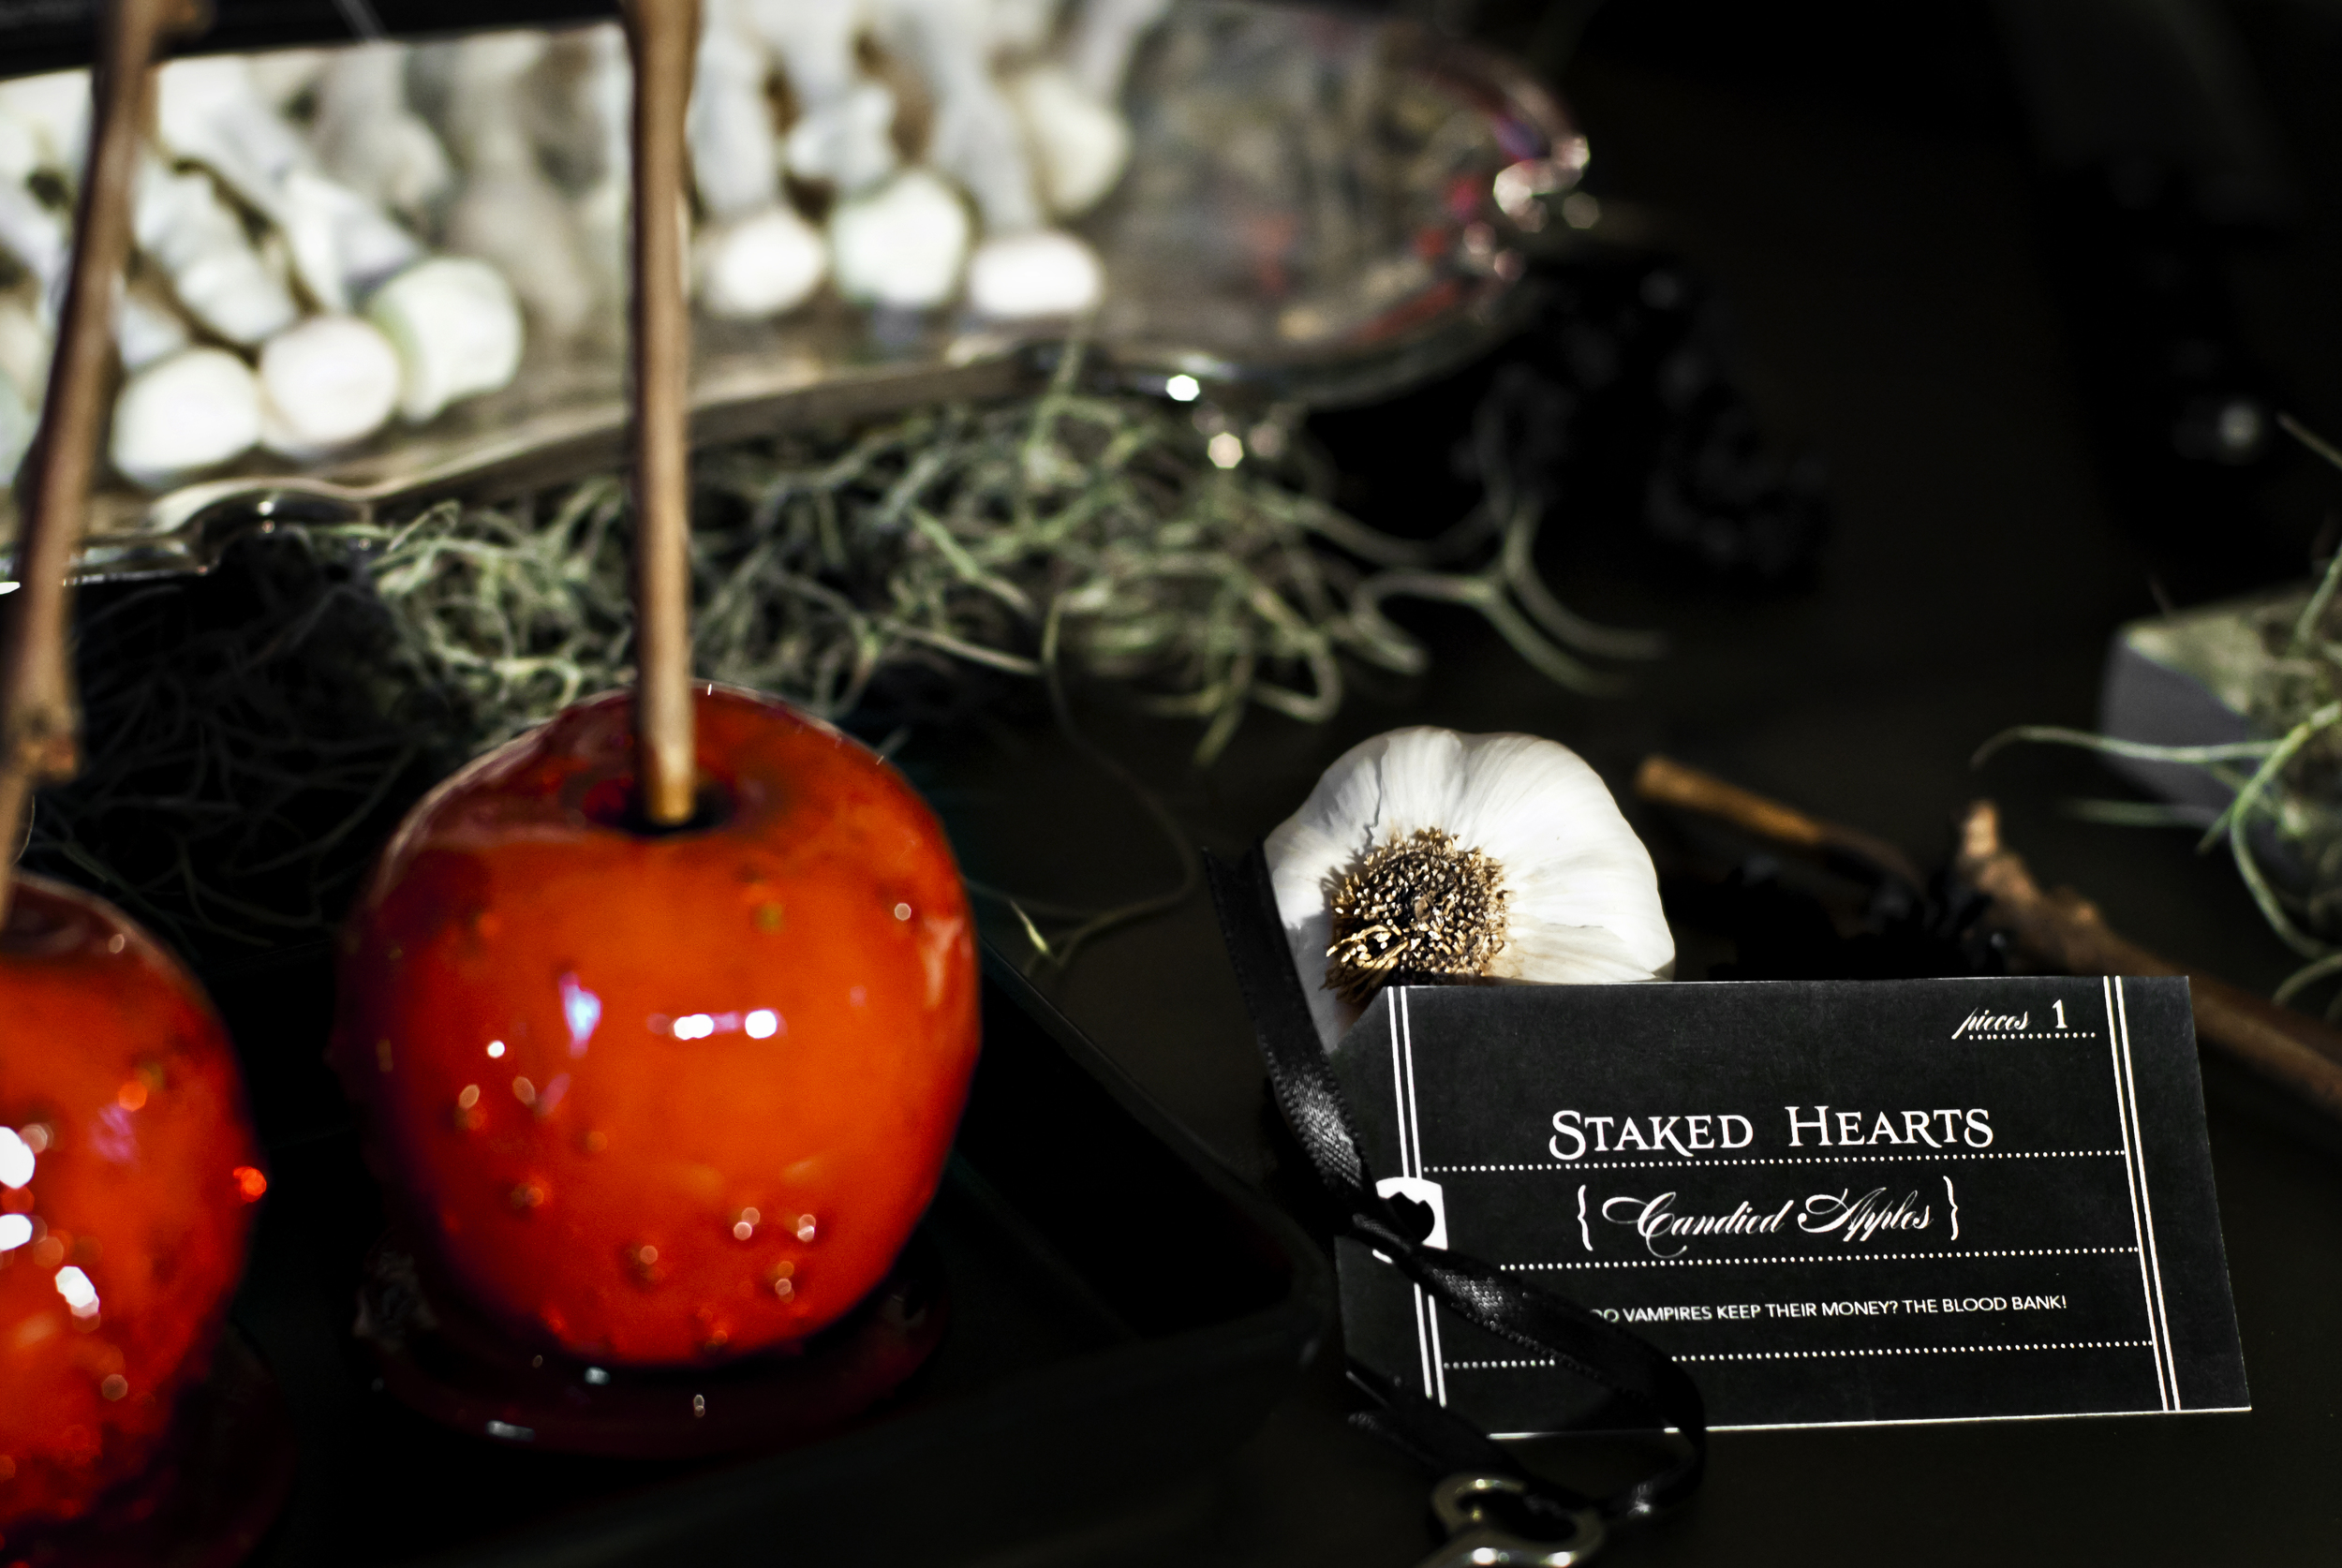
Candy Apple "Staked Hearts"

Candy Apples "Staked Hearts"

Small Apples

Wooden Sticks

White Sugar

Red Food Coloring

Cinnamon or Cherry Flavoring

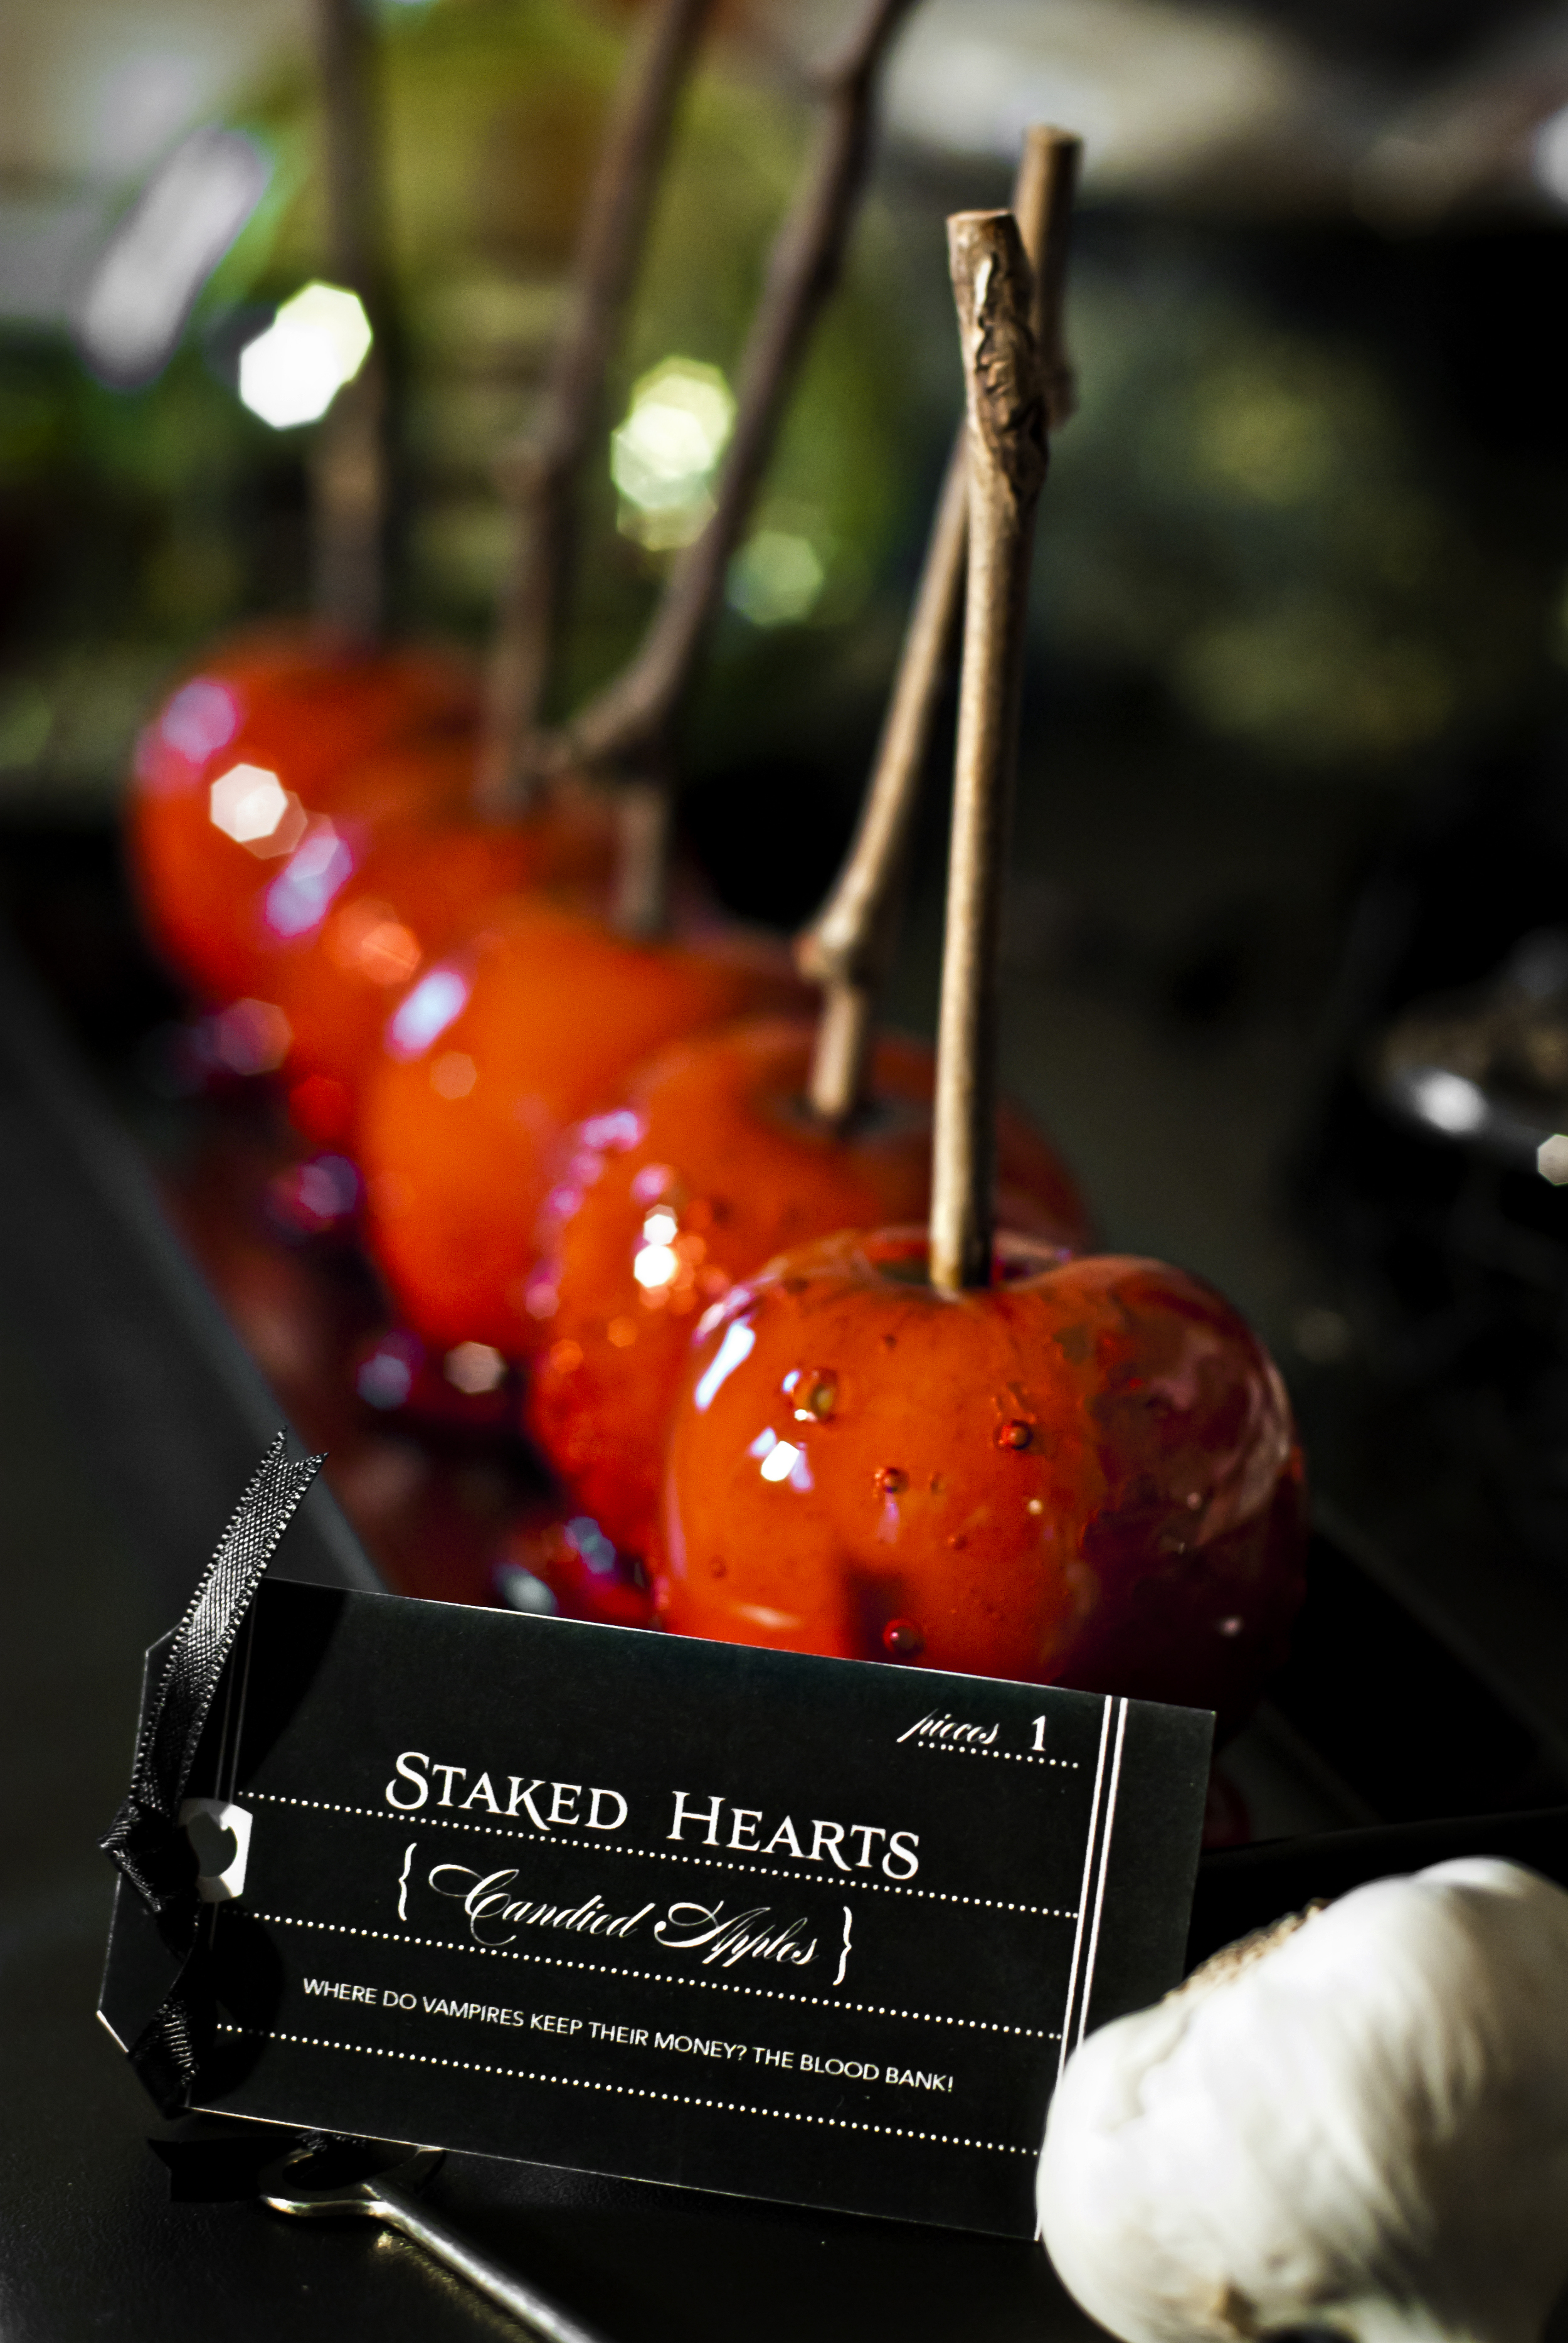
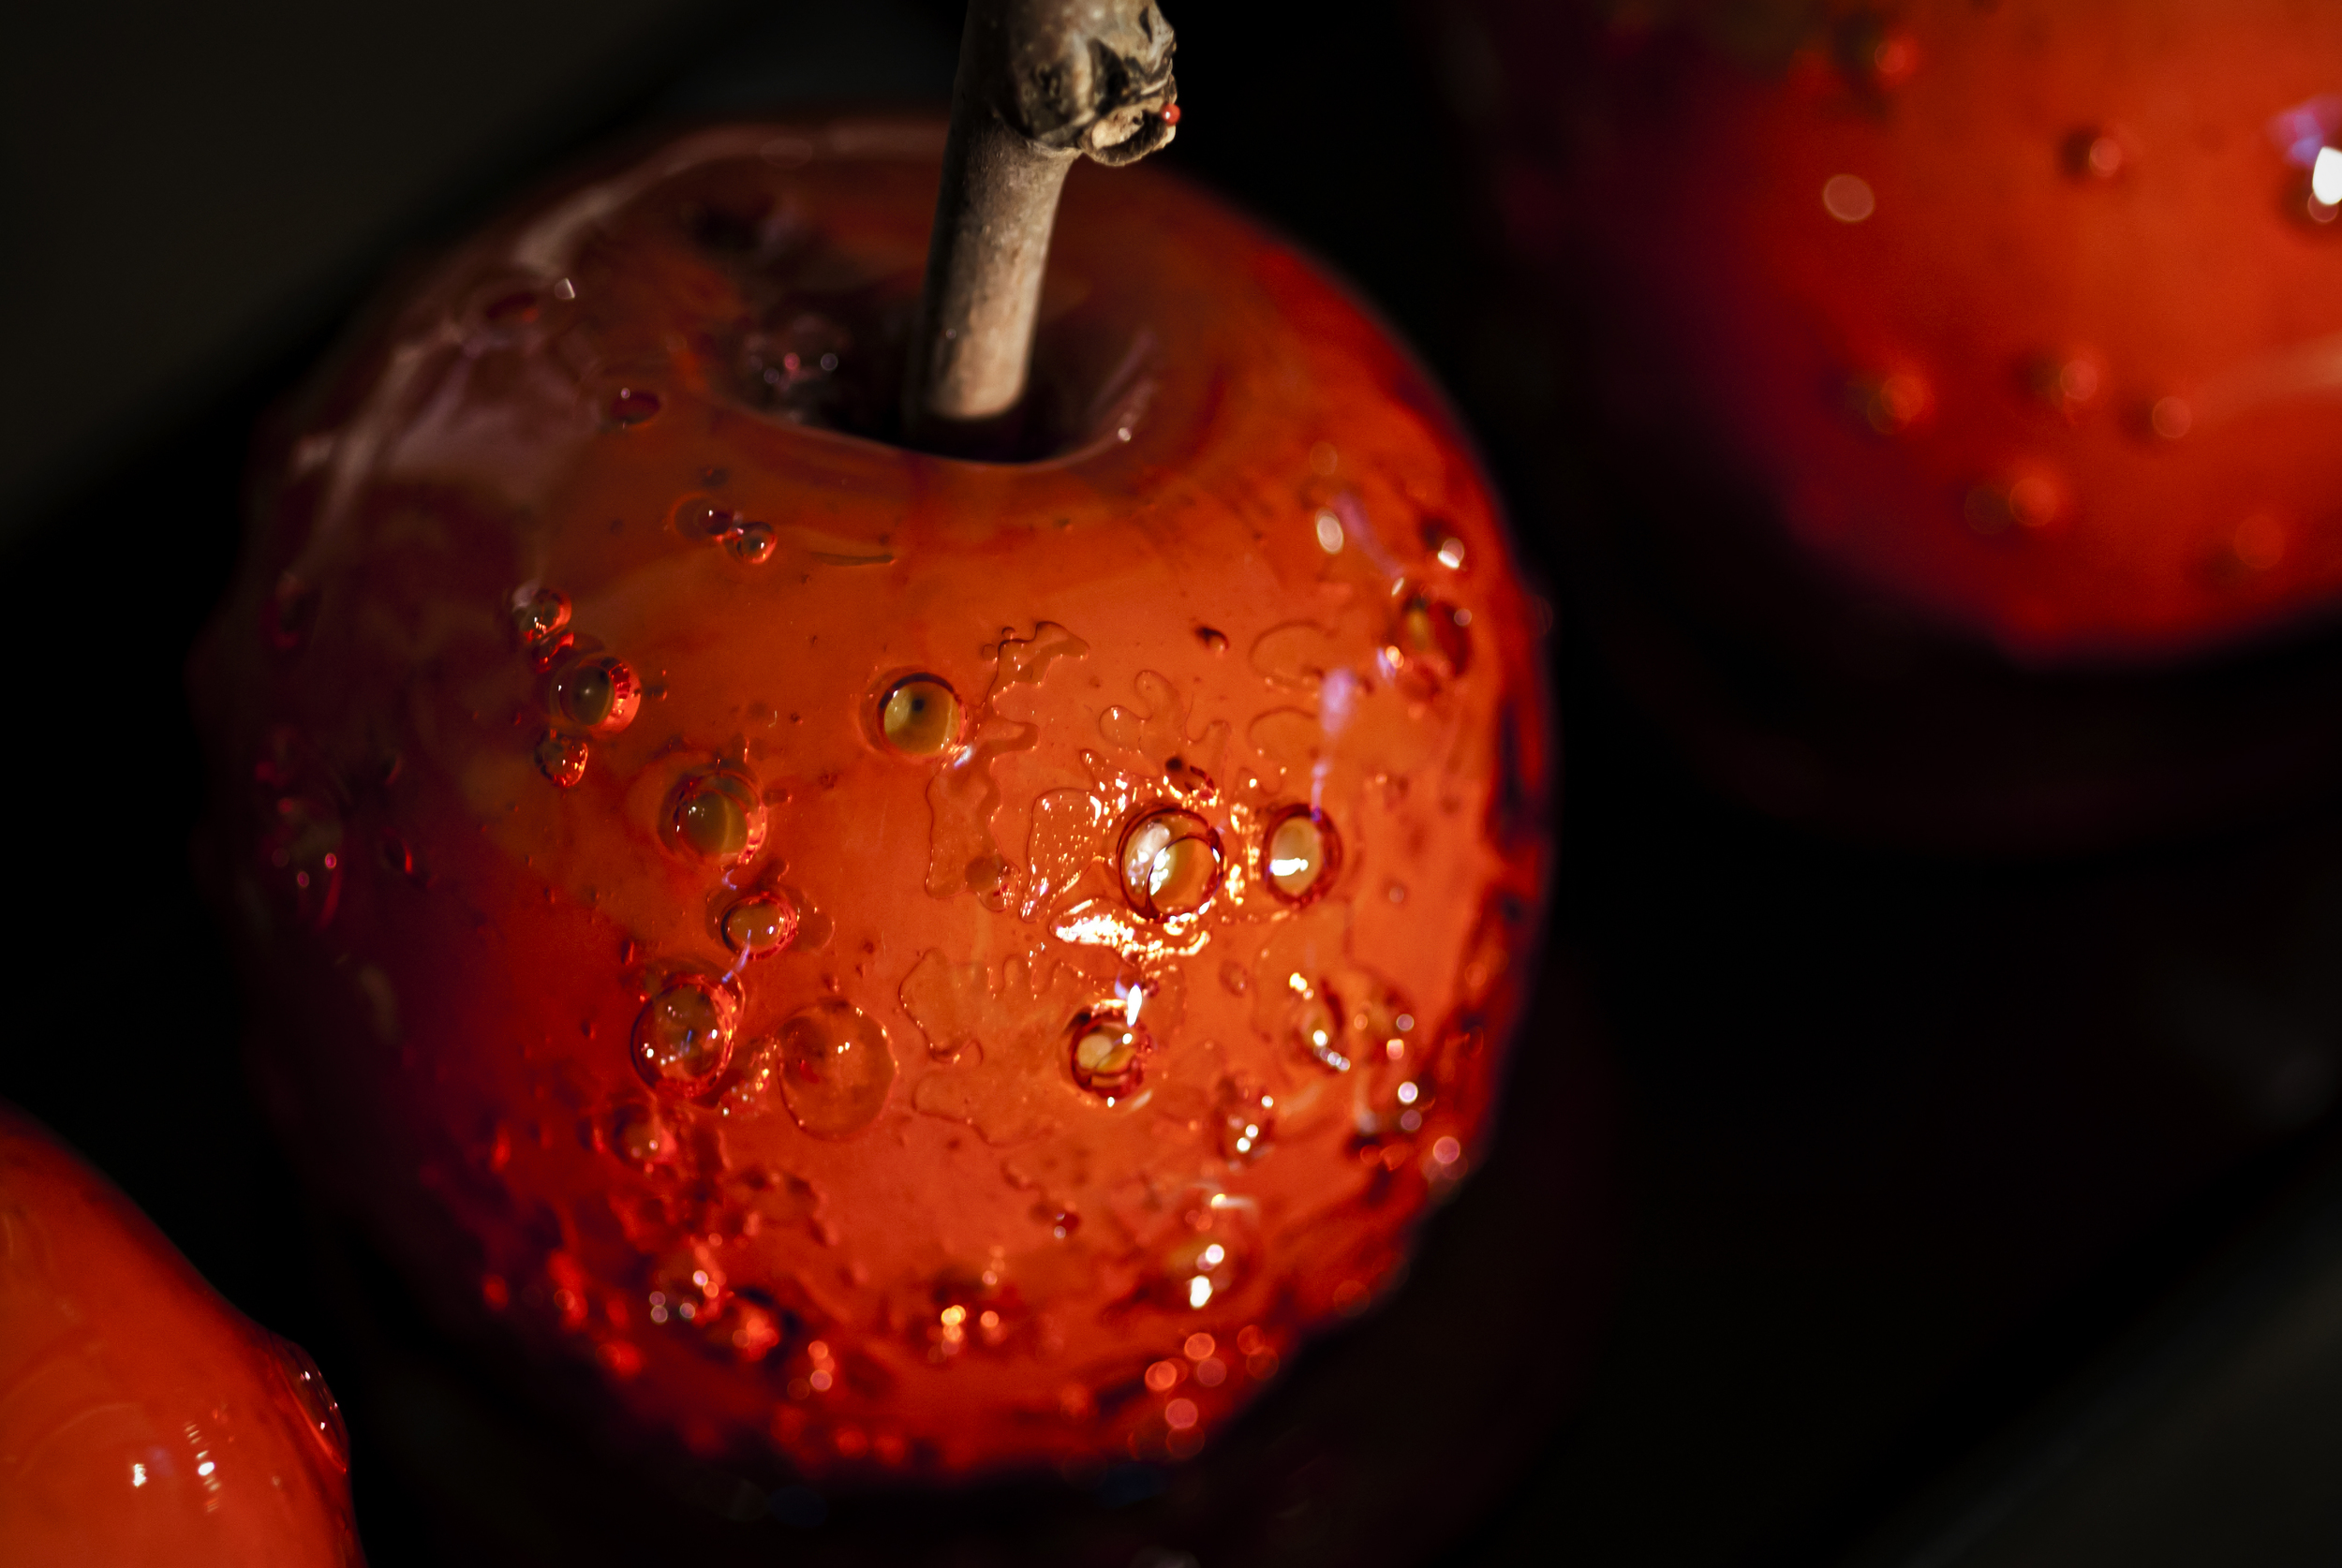
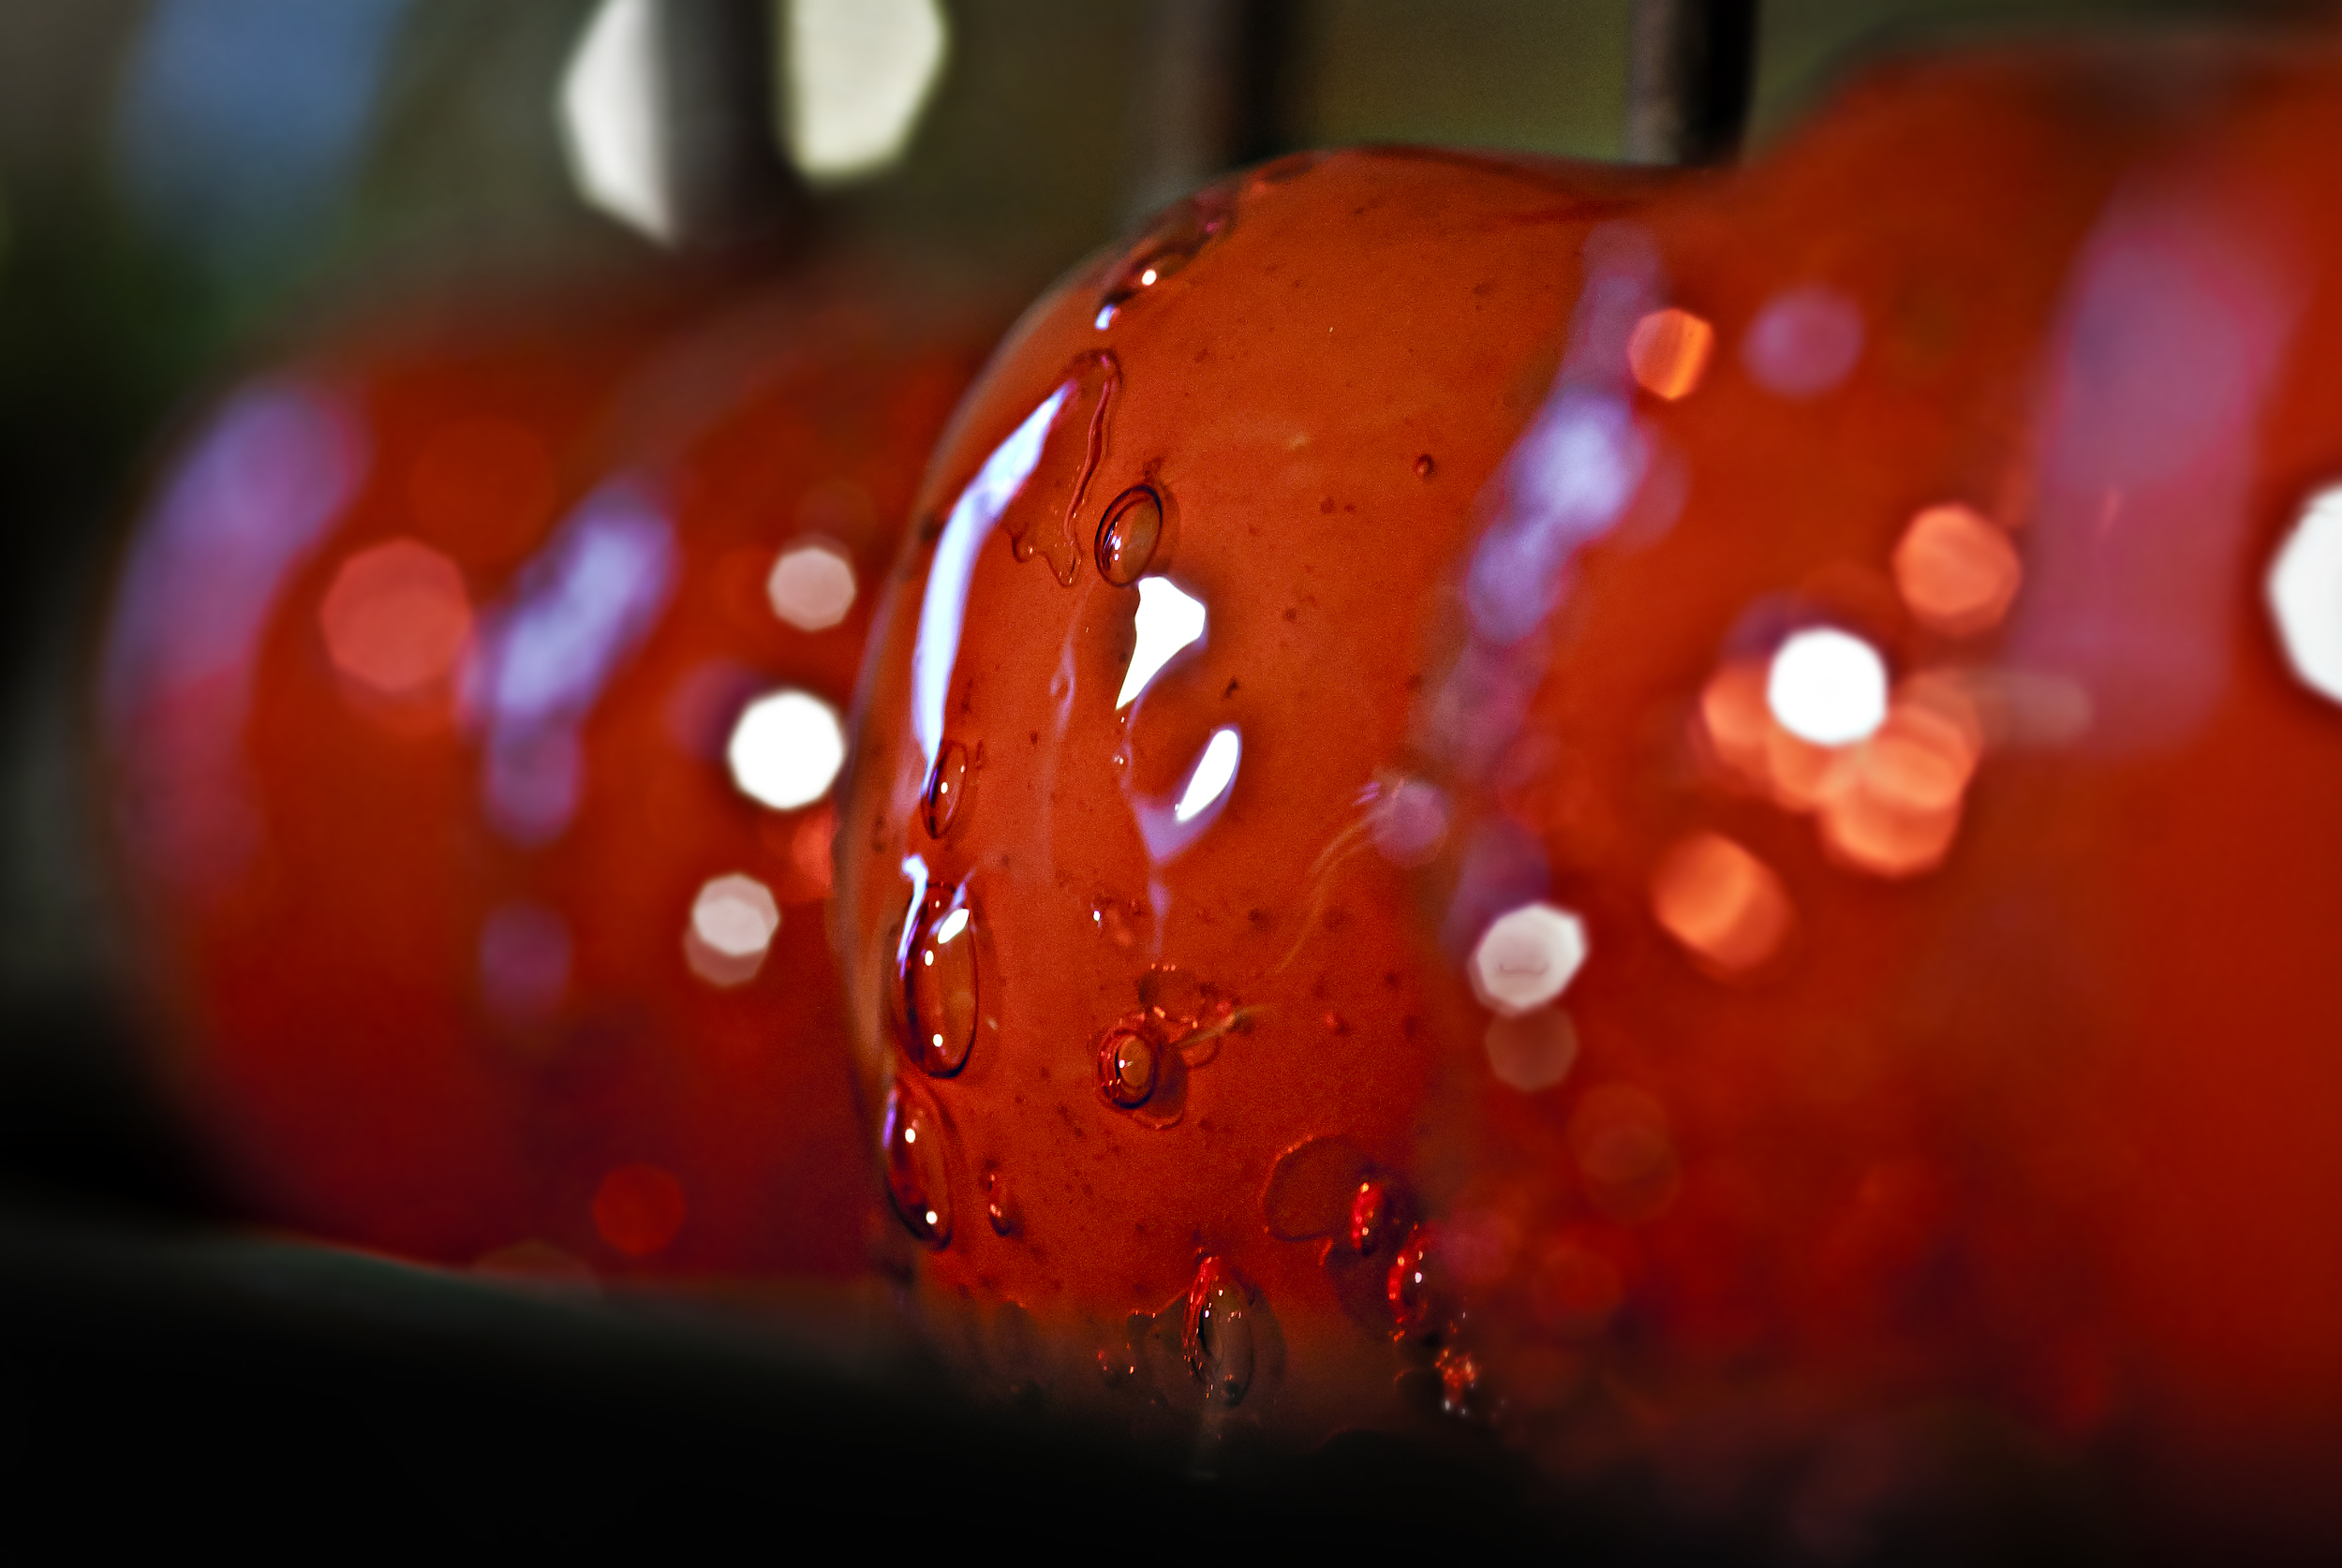
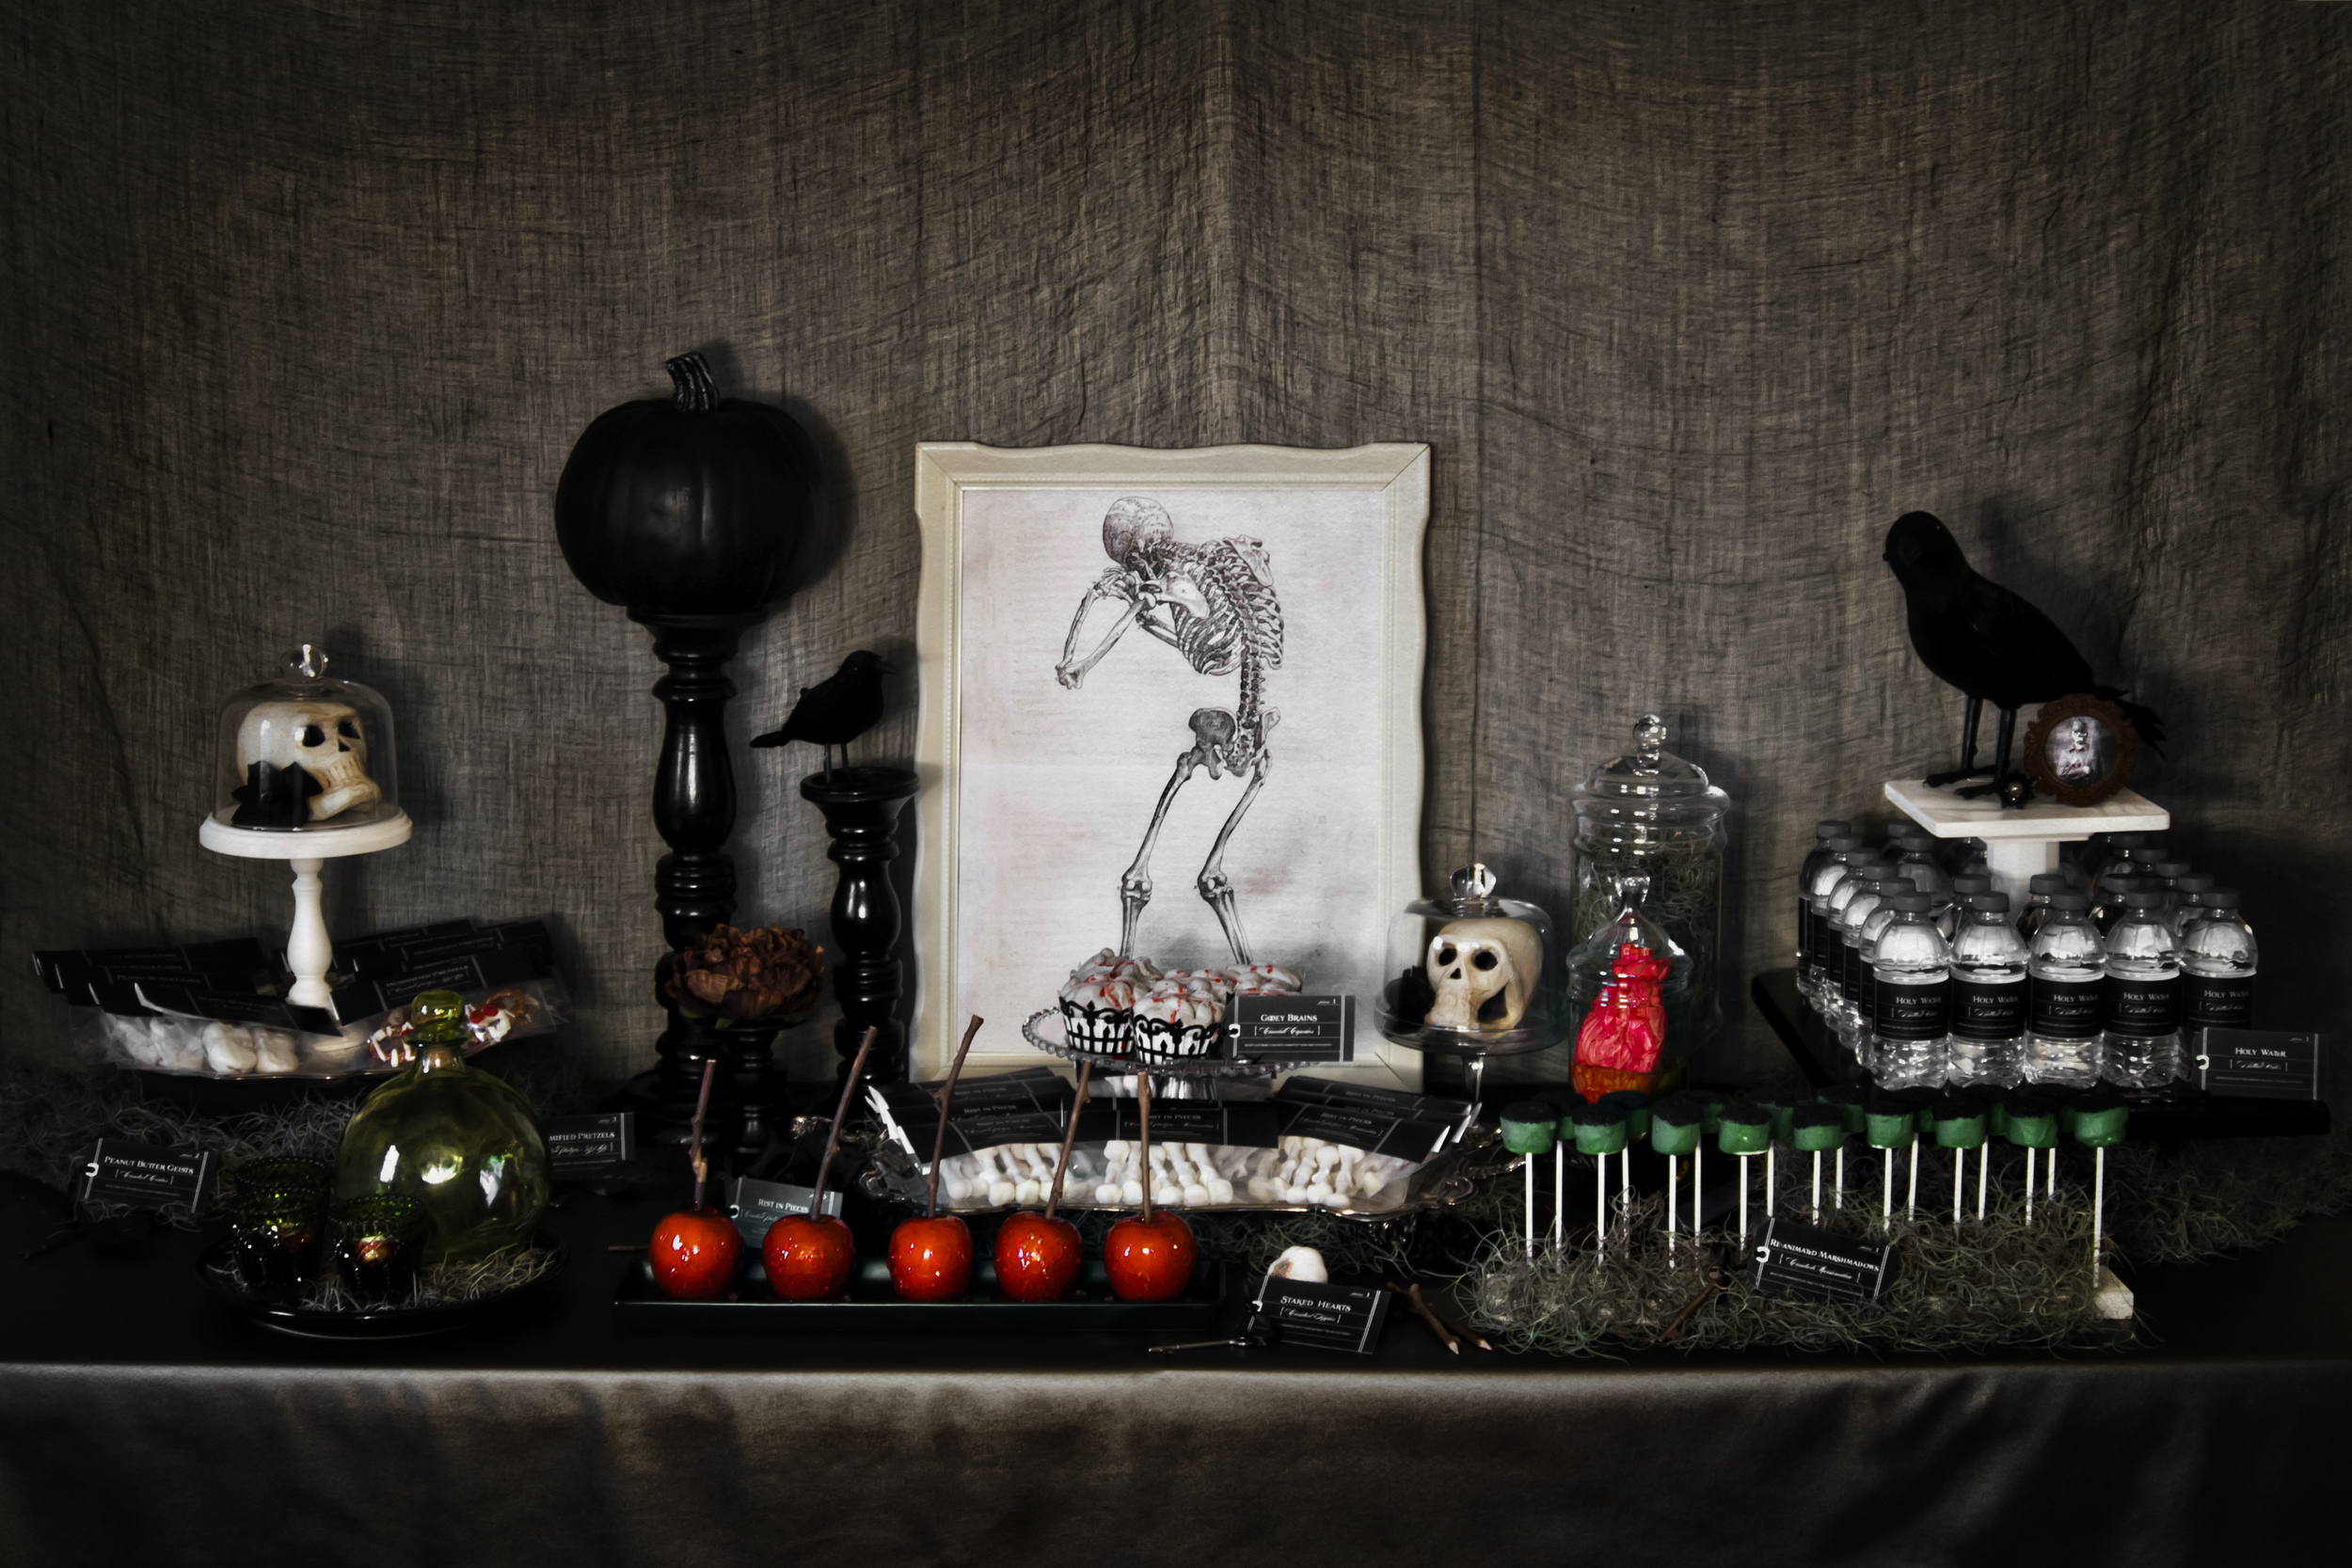
Making Candy Apples looks a bit intimidating to most people, but trust us it is not! We followed some very easy directions right here. This was our first attempt at candying anything, but we made it through with only one batch of burnt sugar. Just be sure to use a candy thermometer and watch it carefully, and you will be ok. These were a HUGE hit with parents and kids alike at ou Halloween Trick-or-Treat table, so shiny and sweet and fun! For an added spook effect we used actual tree branches (scrubbed clean) in our apples instead of Popsicle sticks. 


Halloween2011_Apple2.jpg
Halloween2011_Apple1.jpg
Halloween2011_Apple3.jpg
Halloween2011_Apple4.jpg
Halloween2011_Apple6.jpg

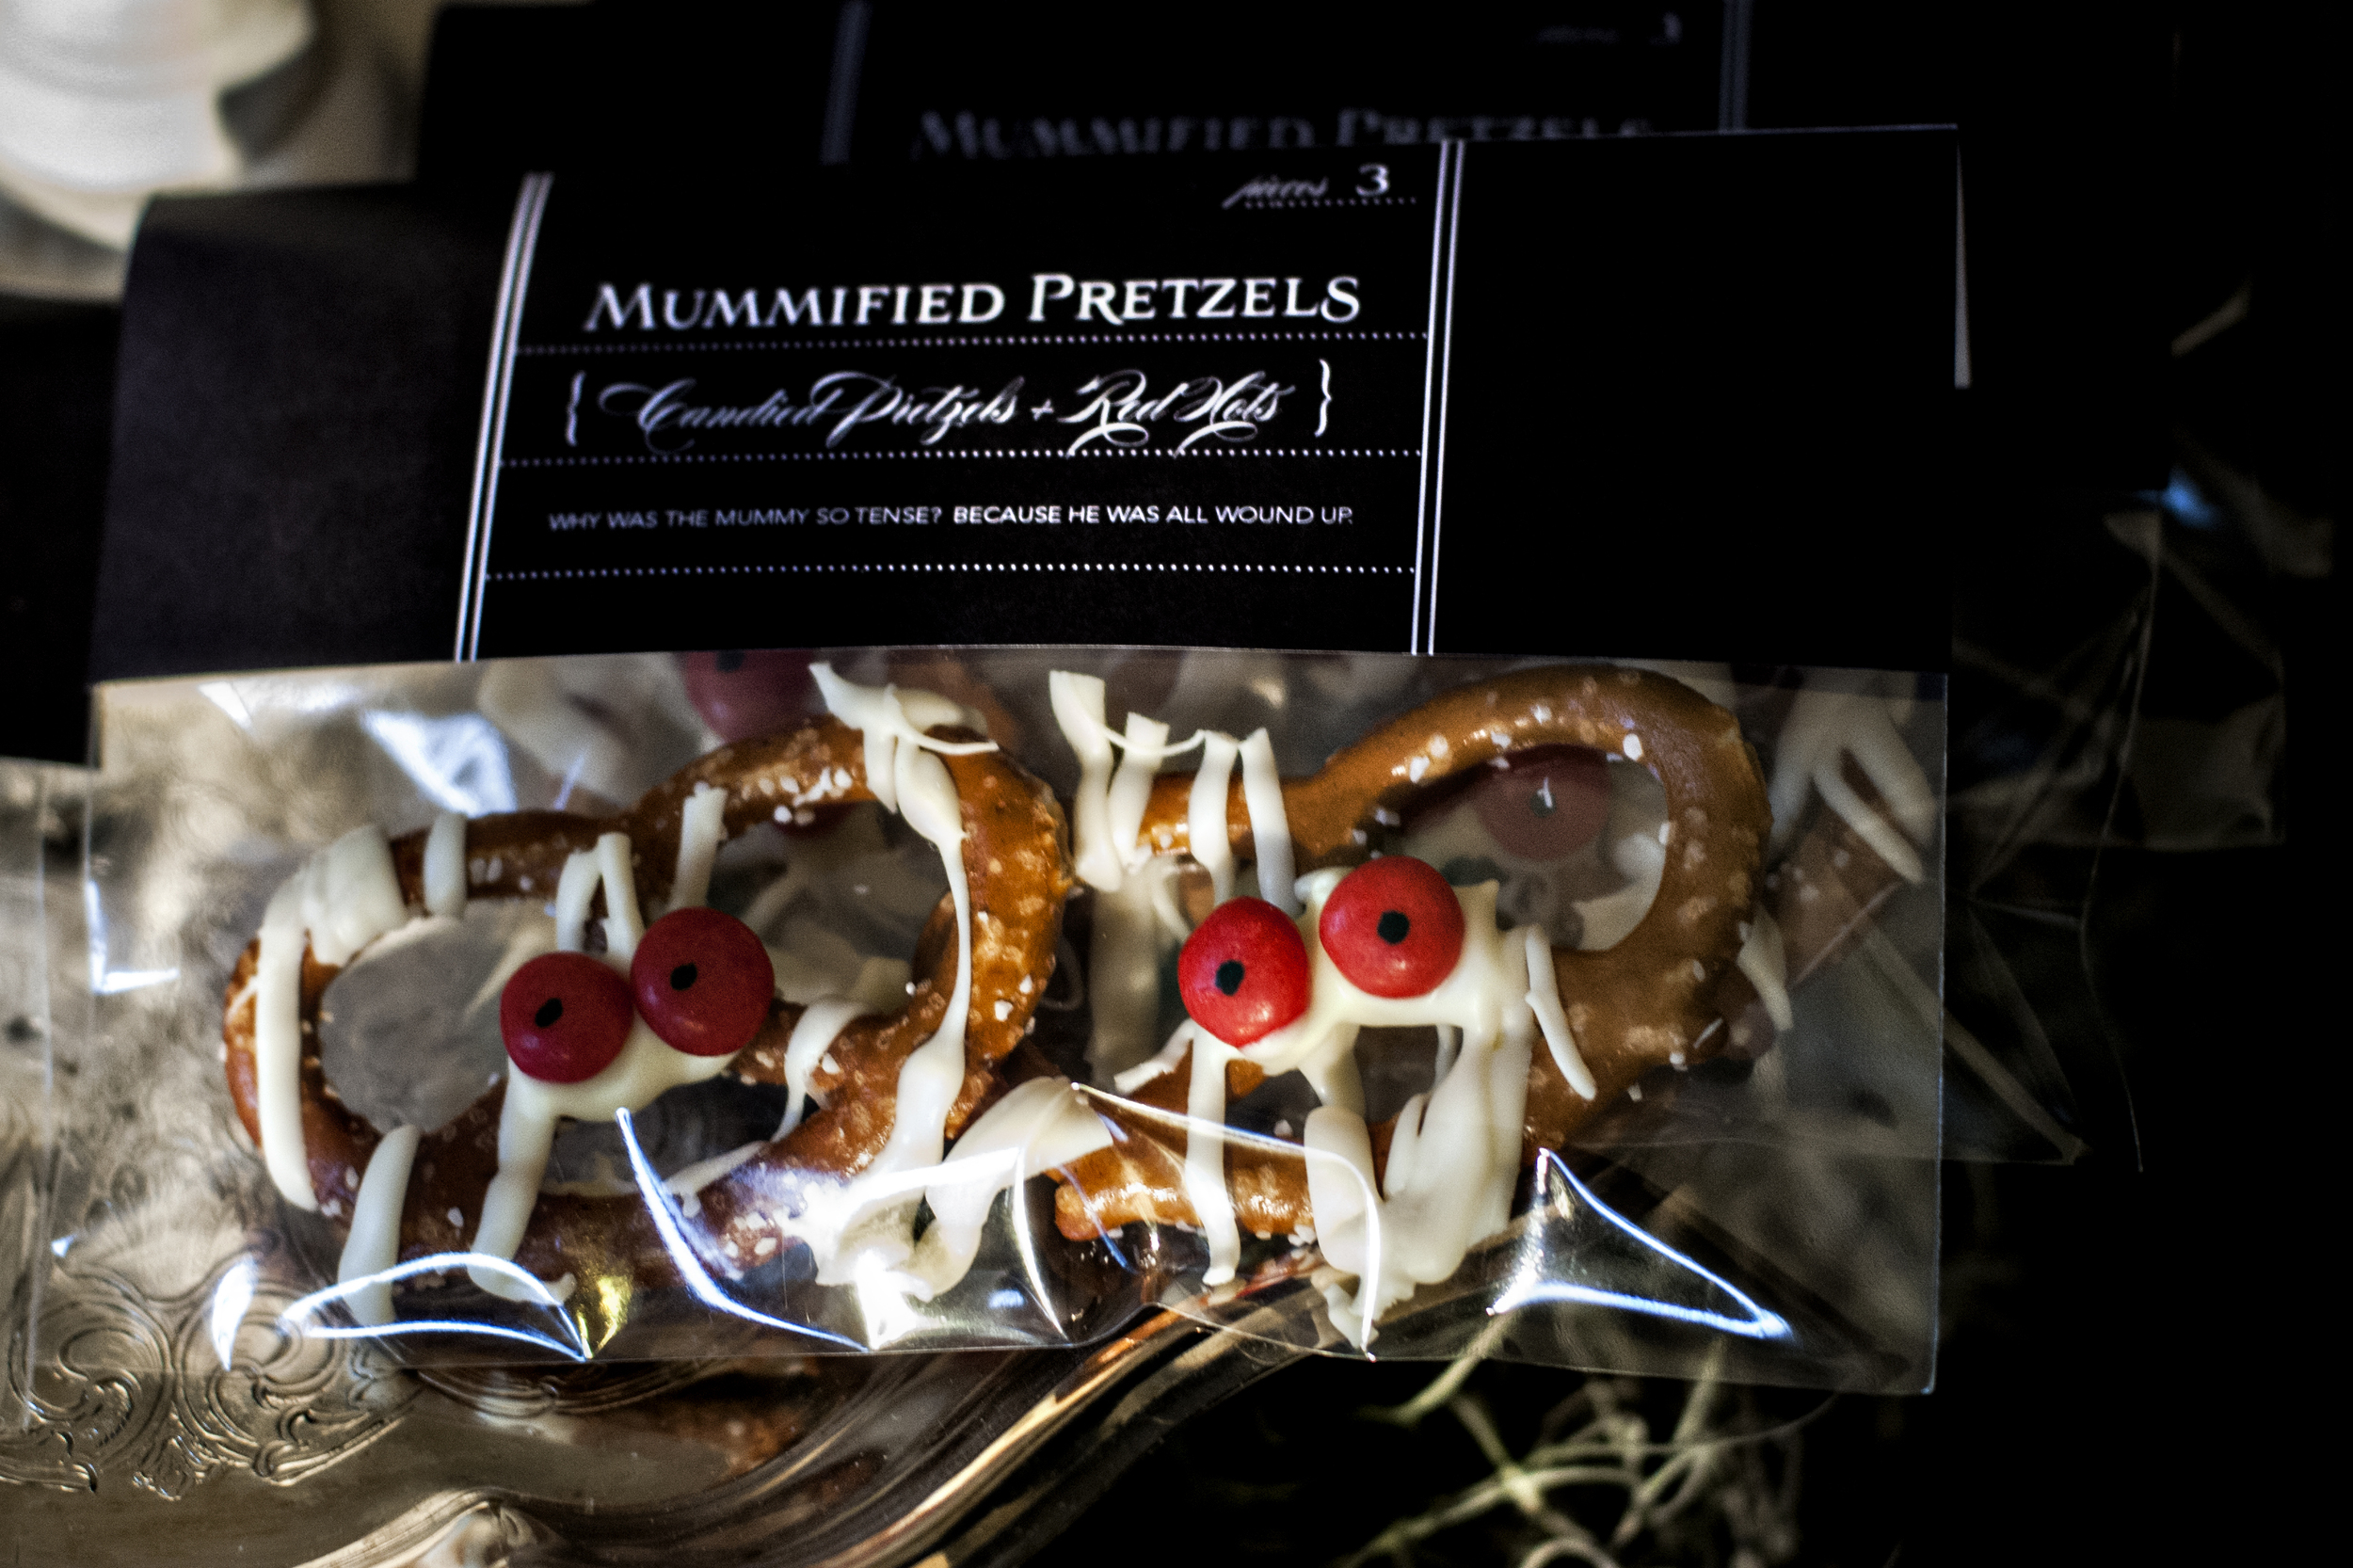
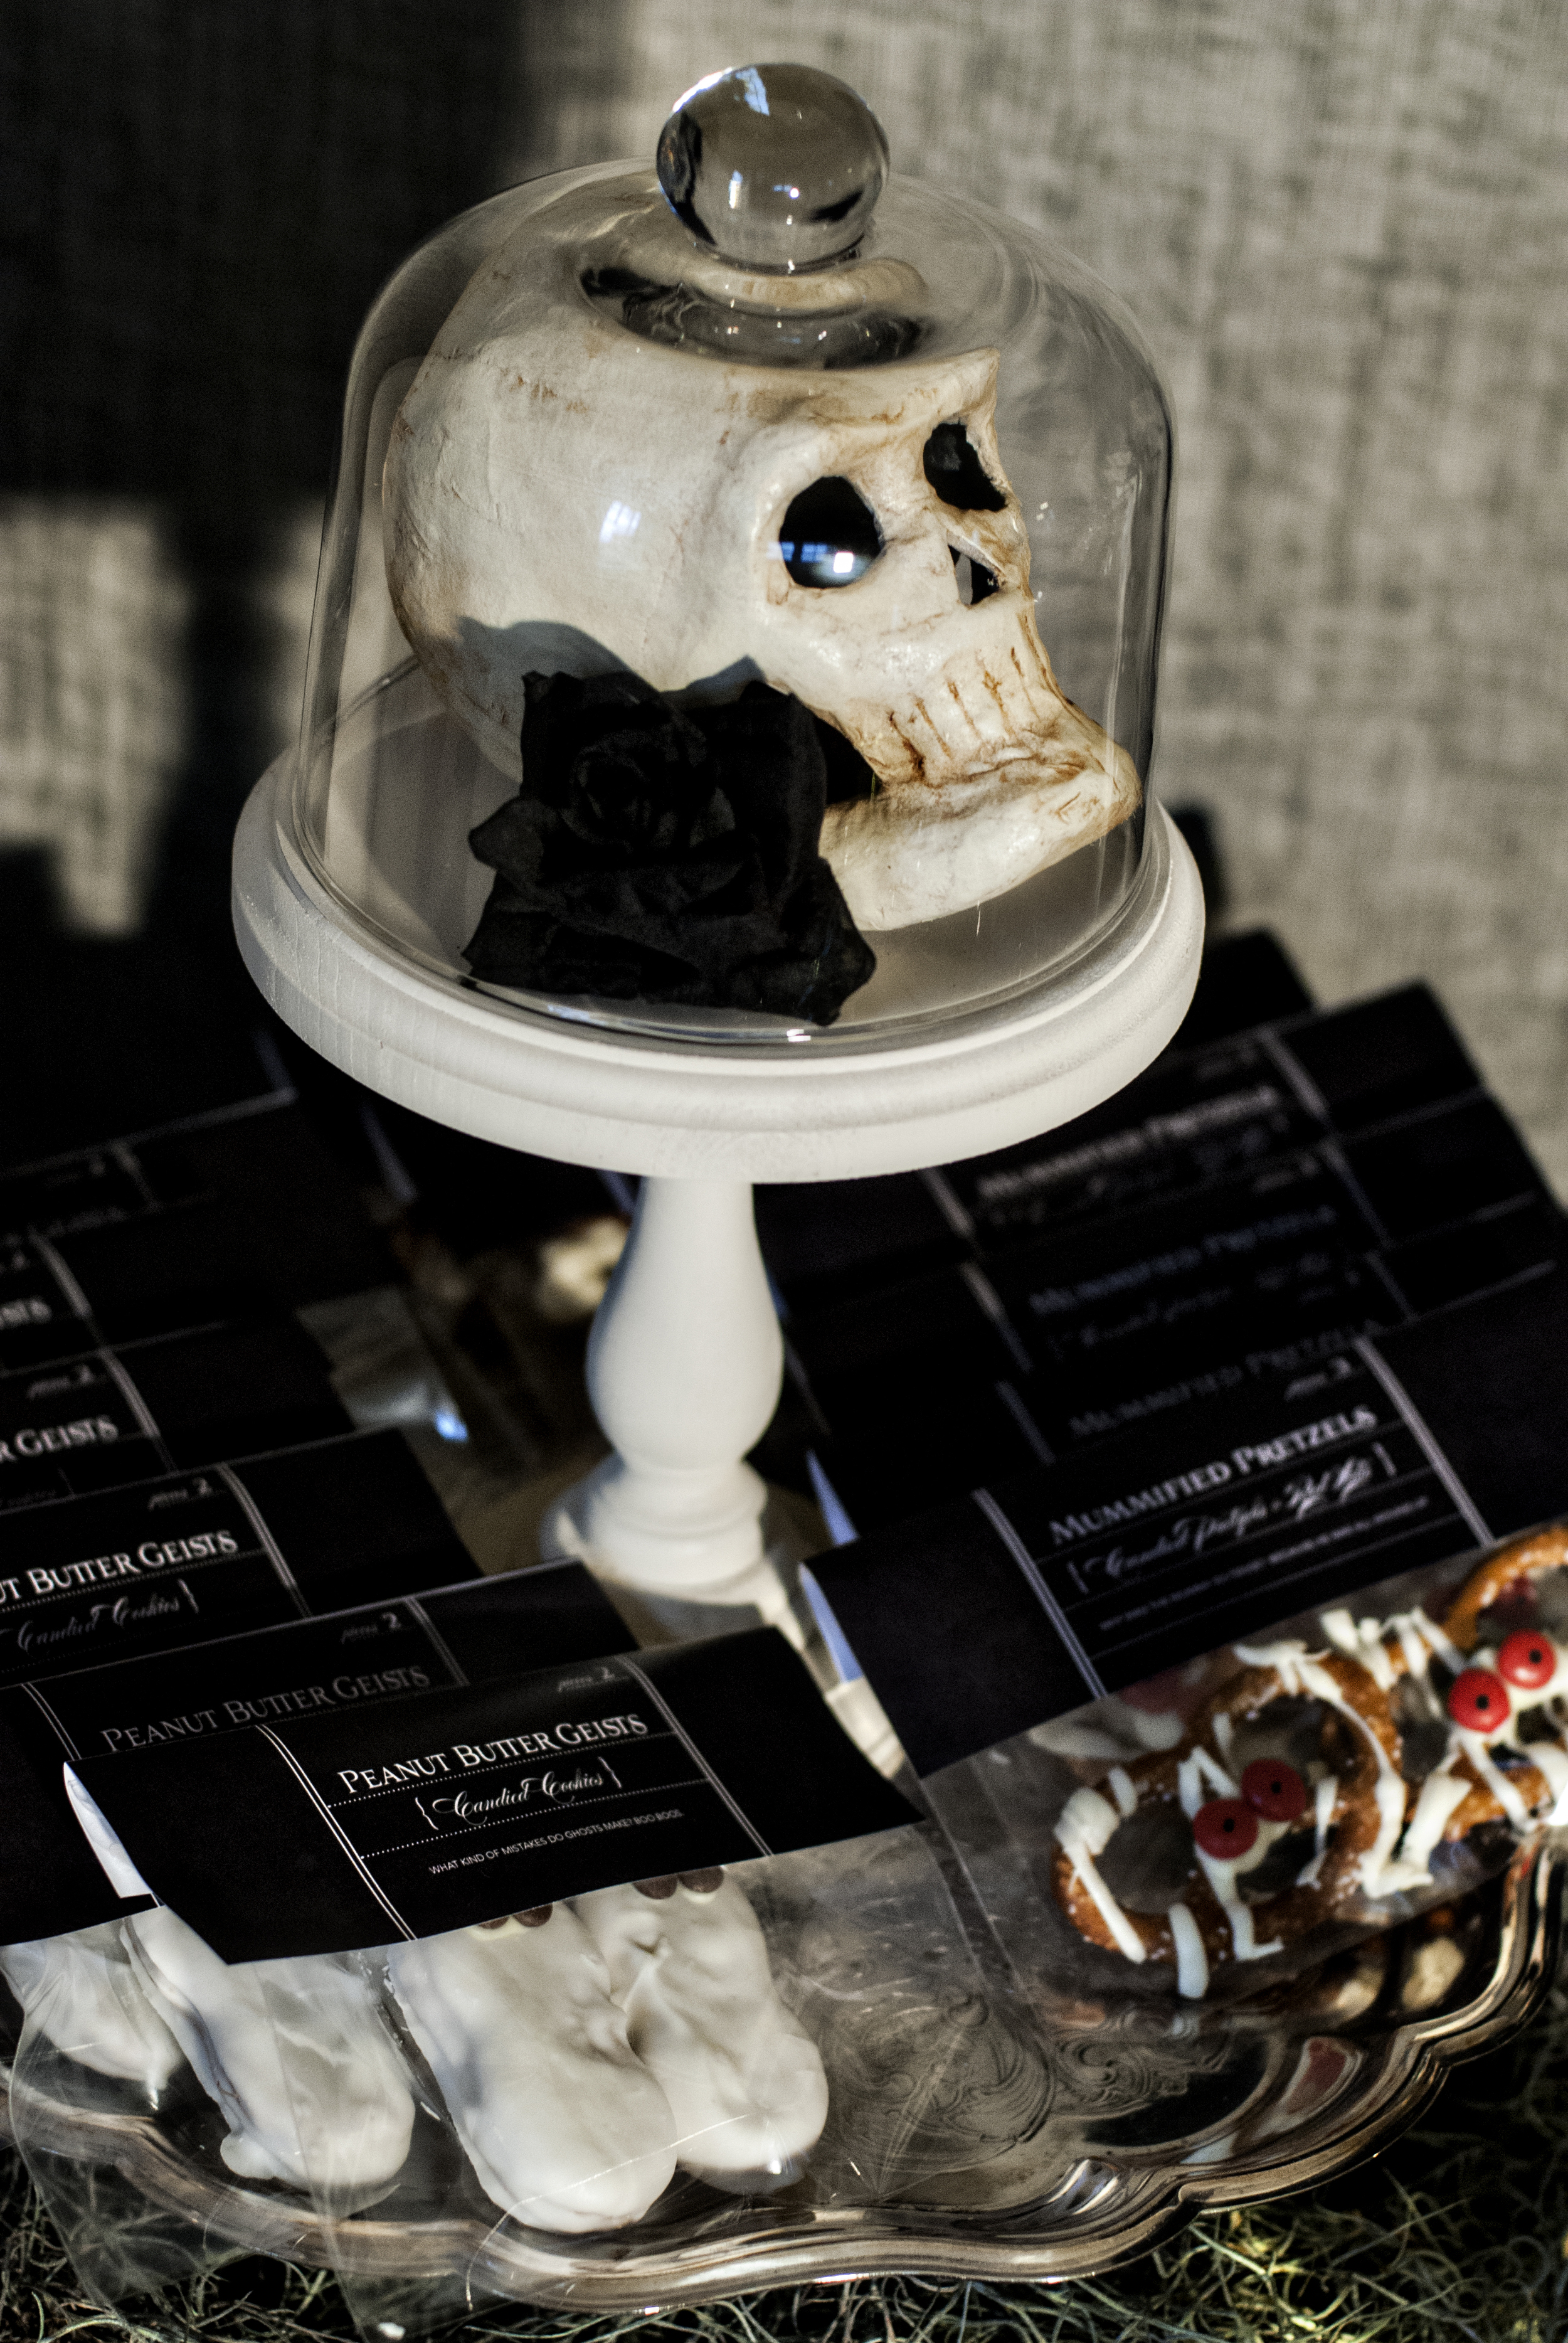
Mummified Pretzel Treats

Mummified Pretzels

Ingredients:

Large Pretzels

Red Hots

White Candy Melt

Black Food Coloring Marker

Freezer Bag

We took traditional pretzels and drizzled on melted candy coating using a freezer bag with a small hole cut in one corner. Before the coating hardened we added two red hot candies for the eyes and then added in a black dot each candy with a food coloring marker.

Halloween2011_8.jpg
Halloween2011_9.jpg
Halloween2011_Main.jpg

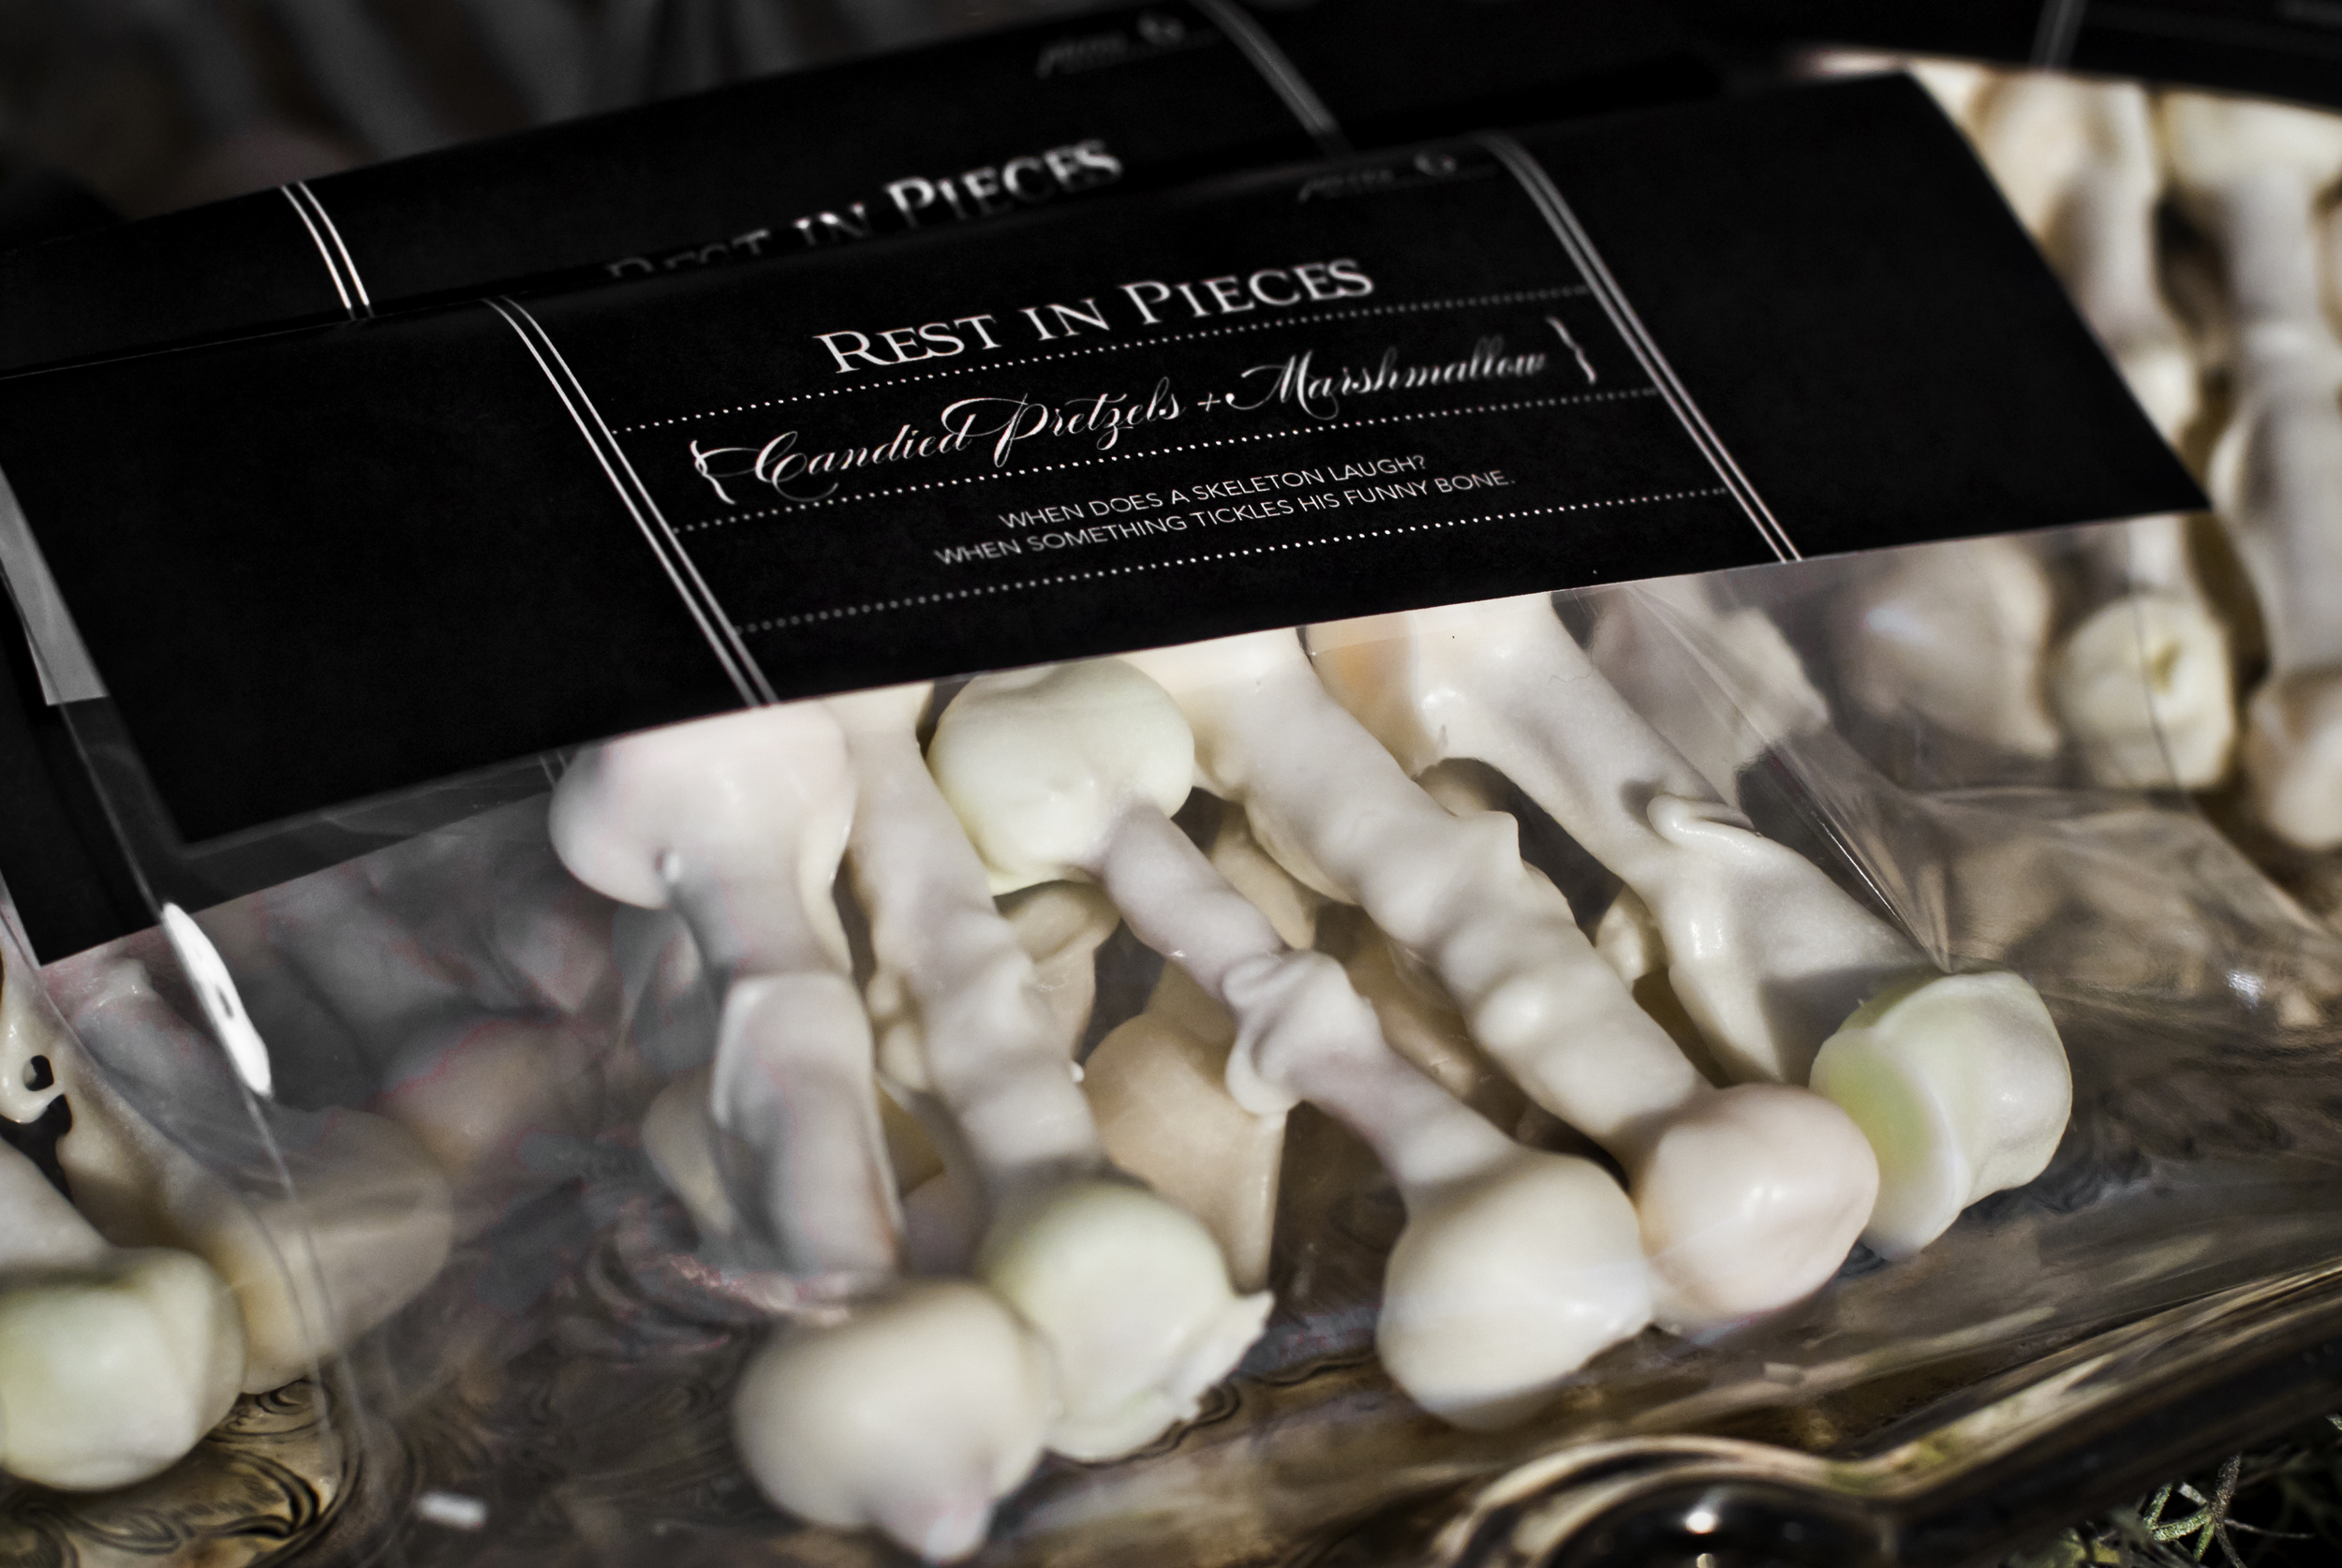
Skeleton Bone Treats

Skeleton Bone Treats "Rest in Pieces"

Pretzel Sticks

White Candy Melt

Mini-Marshmallows

For our “Rest in Pieces” bone treats, we combined pretzel sticks with miniature marshmallows, one at each end, then dipped them into melted white candy coating and placed them on wax paper to dry.

Halloween2011_Bones.jpg
Halloween2011_Main.jpg

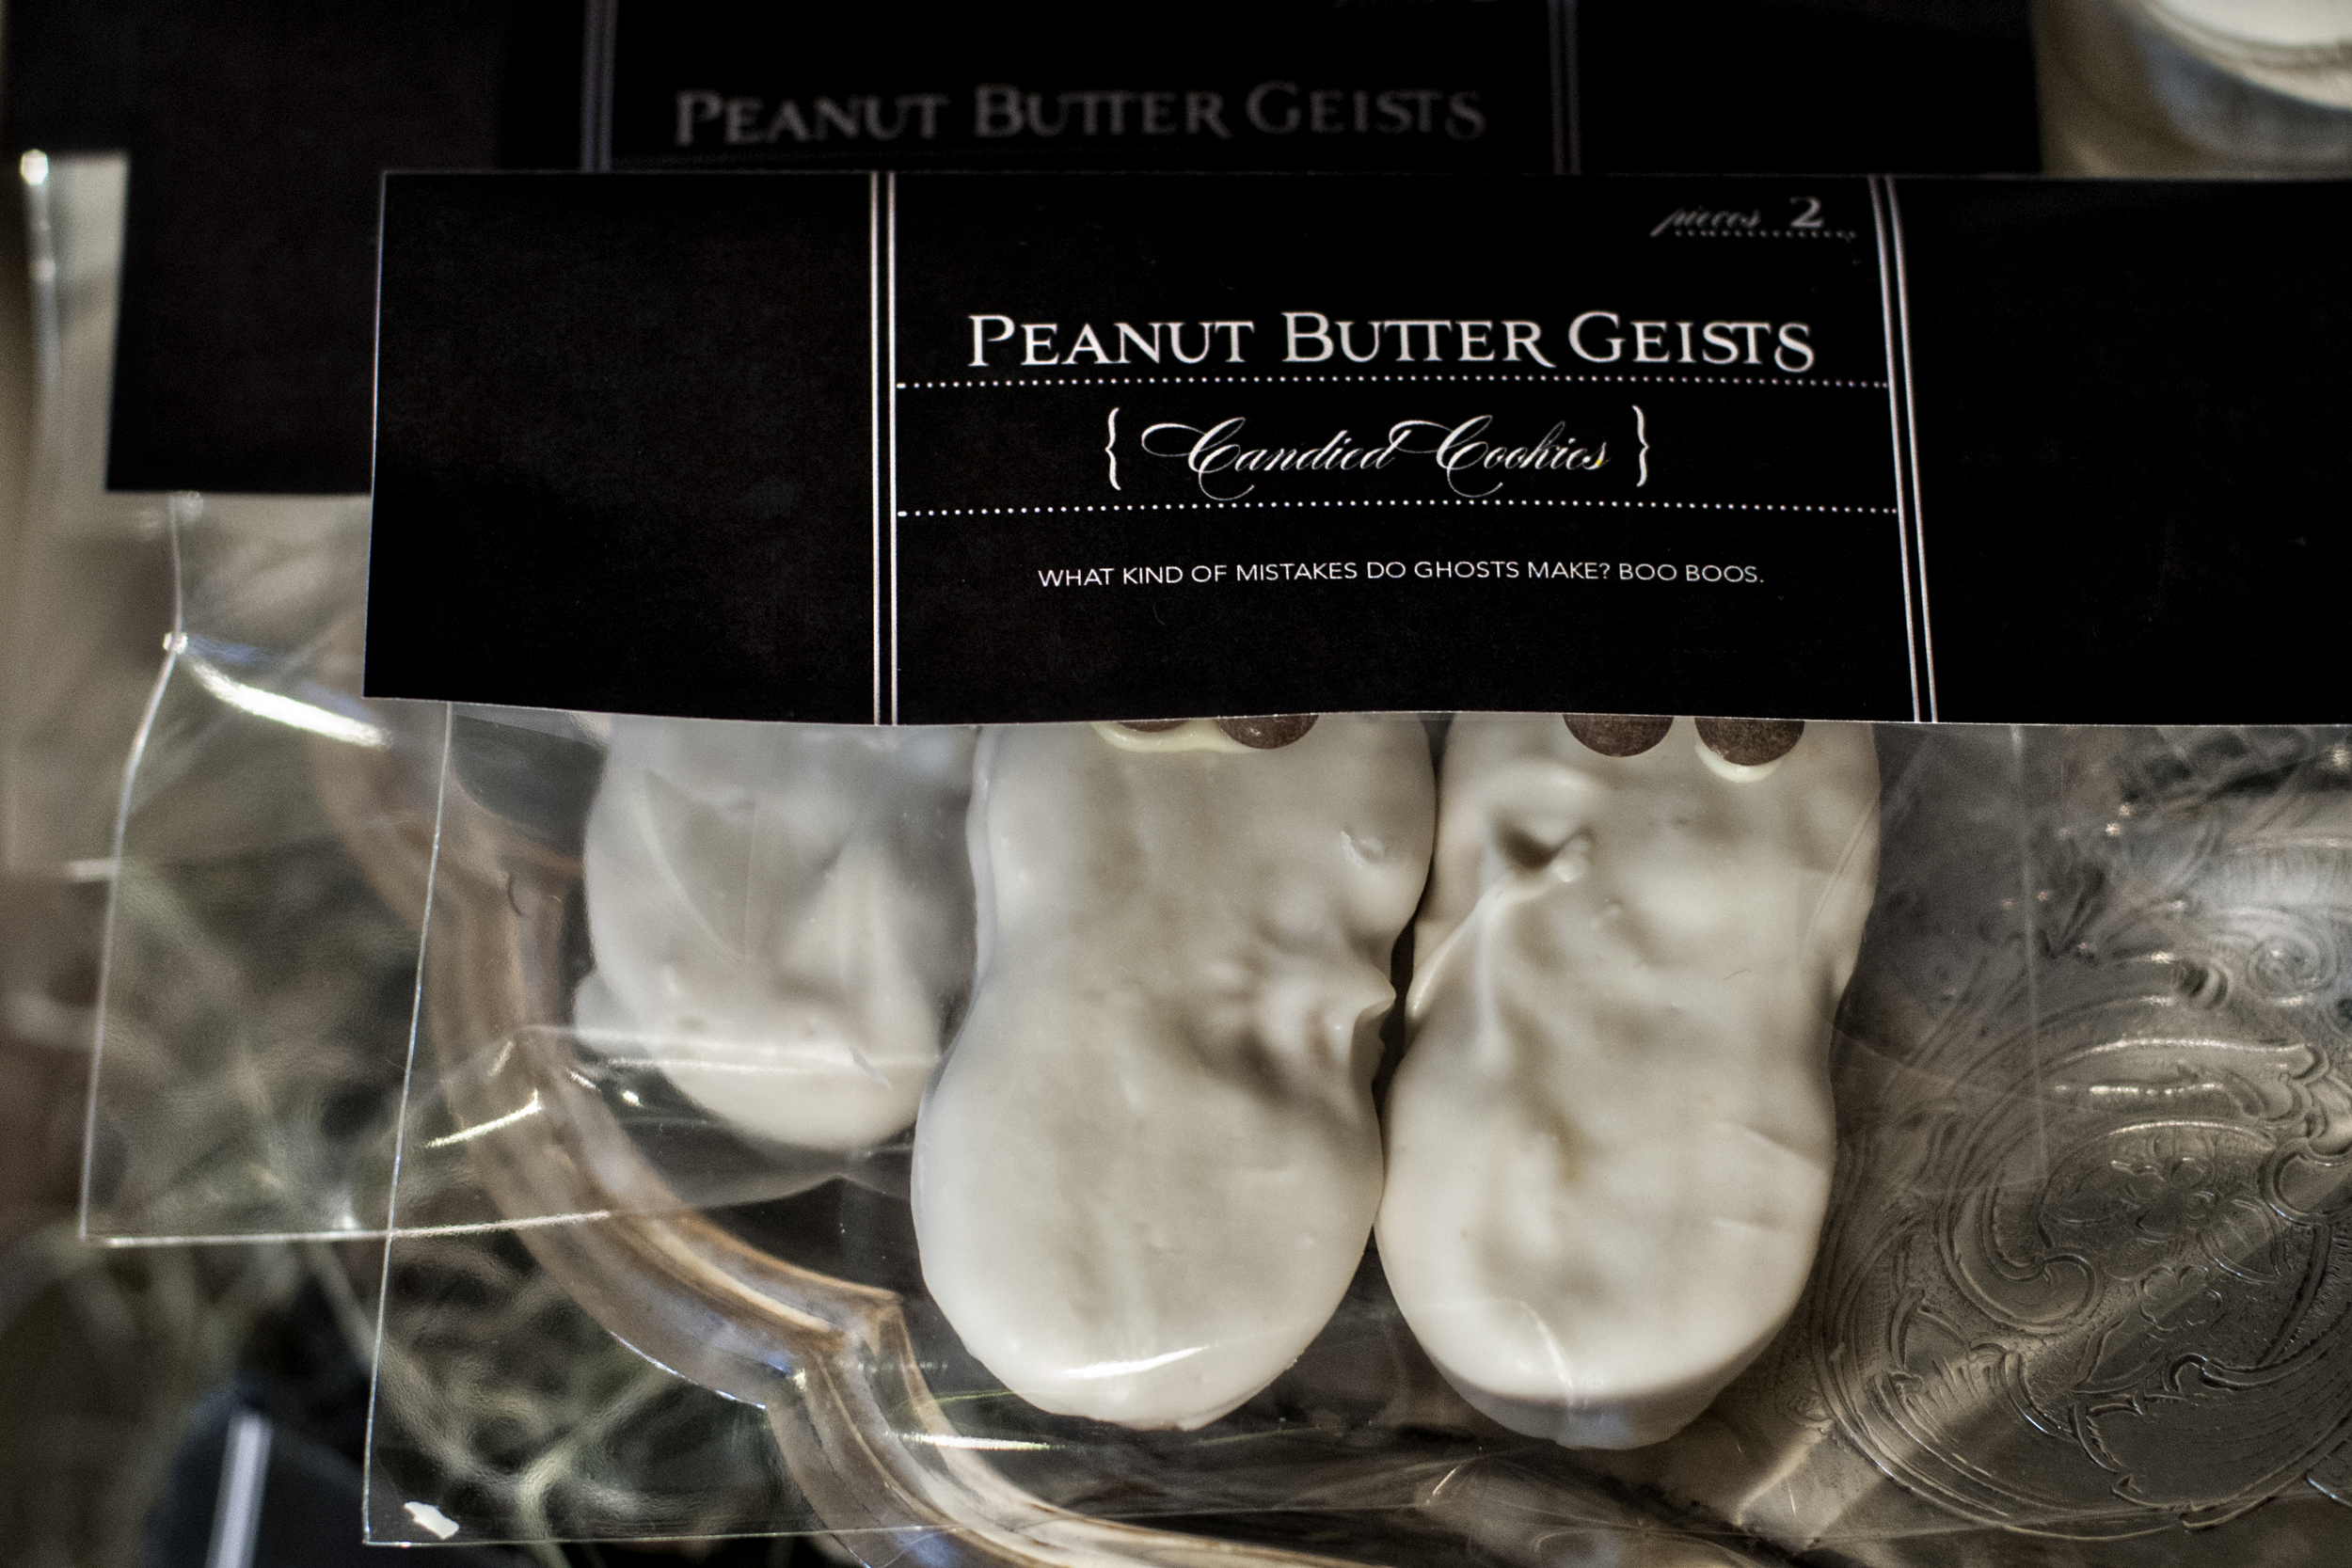
Peanut Butter Ghost Treats

Peanut Butter Ghost Treats

Nutter Butter Cookies

White Candy Melt

Chocolate Chips

We used Nutter Butter cookies (yum!) and dipped them into white candy melt, we then added mini chocolate chips in as eyes before the candy melt dried. The kids at our trick-or-treat table absolutely loved these!

Halloween2011_.jpg
Halloween2011_9.jpg
Halloween2011_Main.jpg

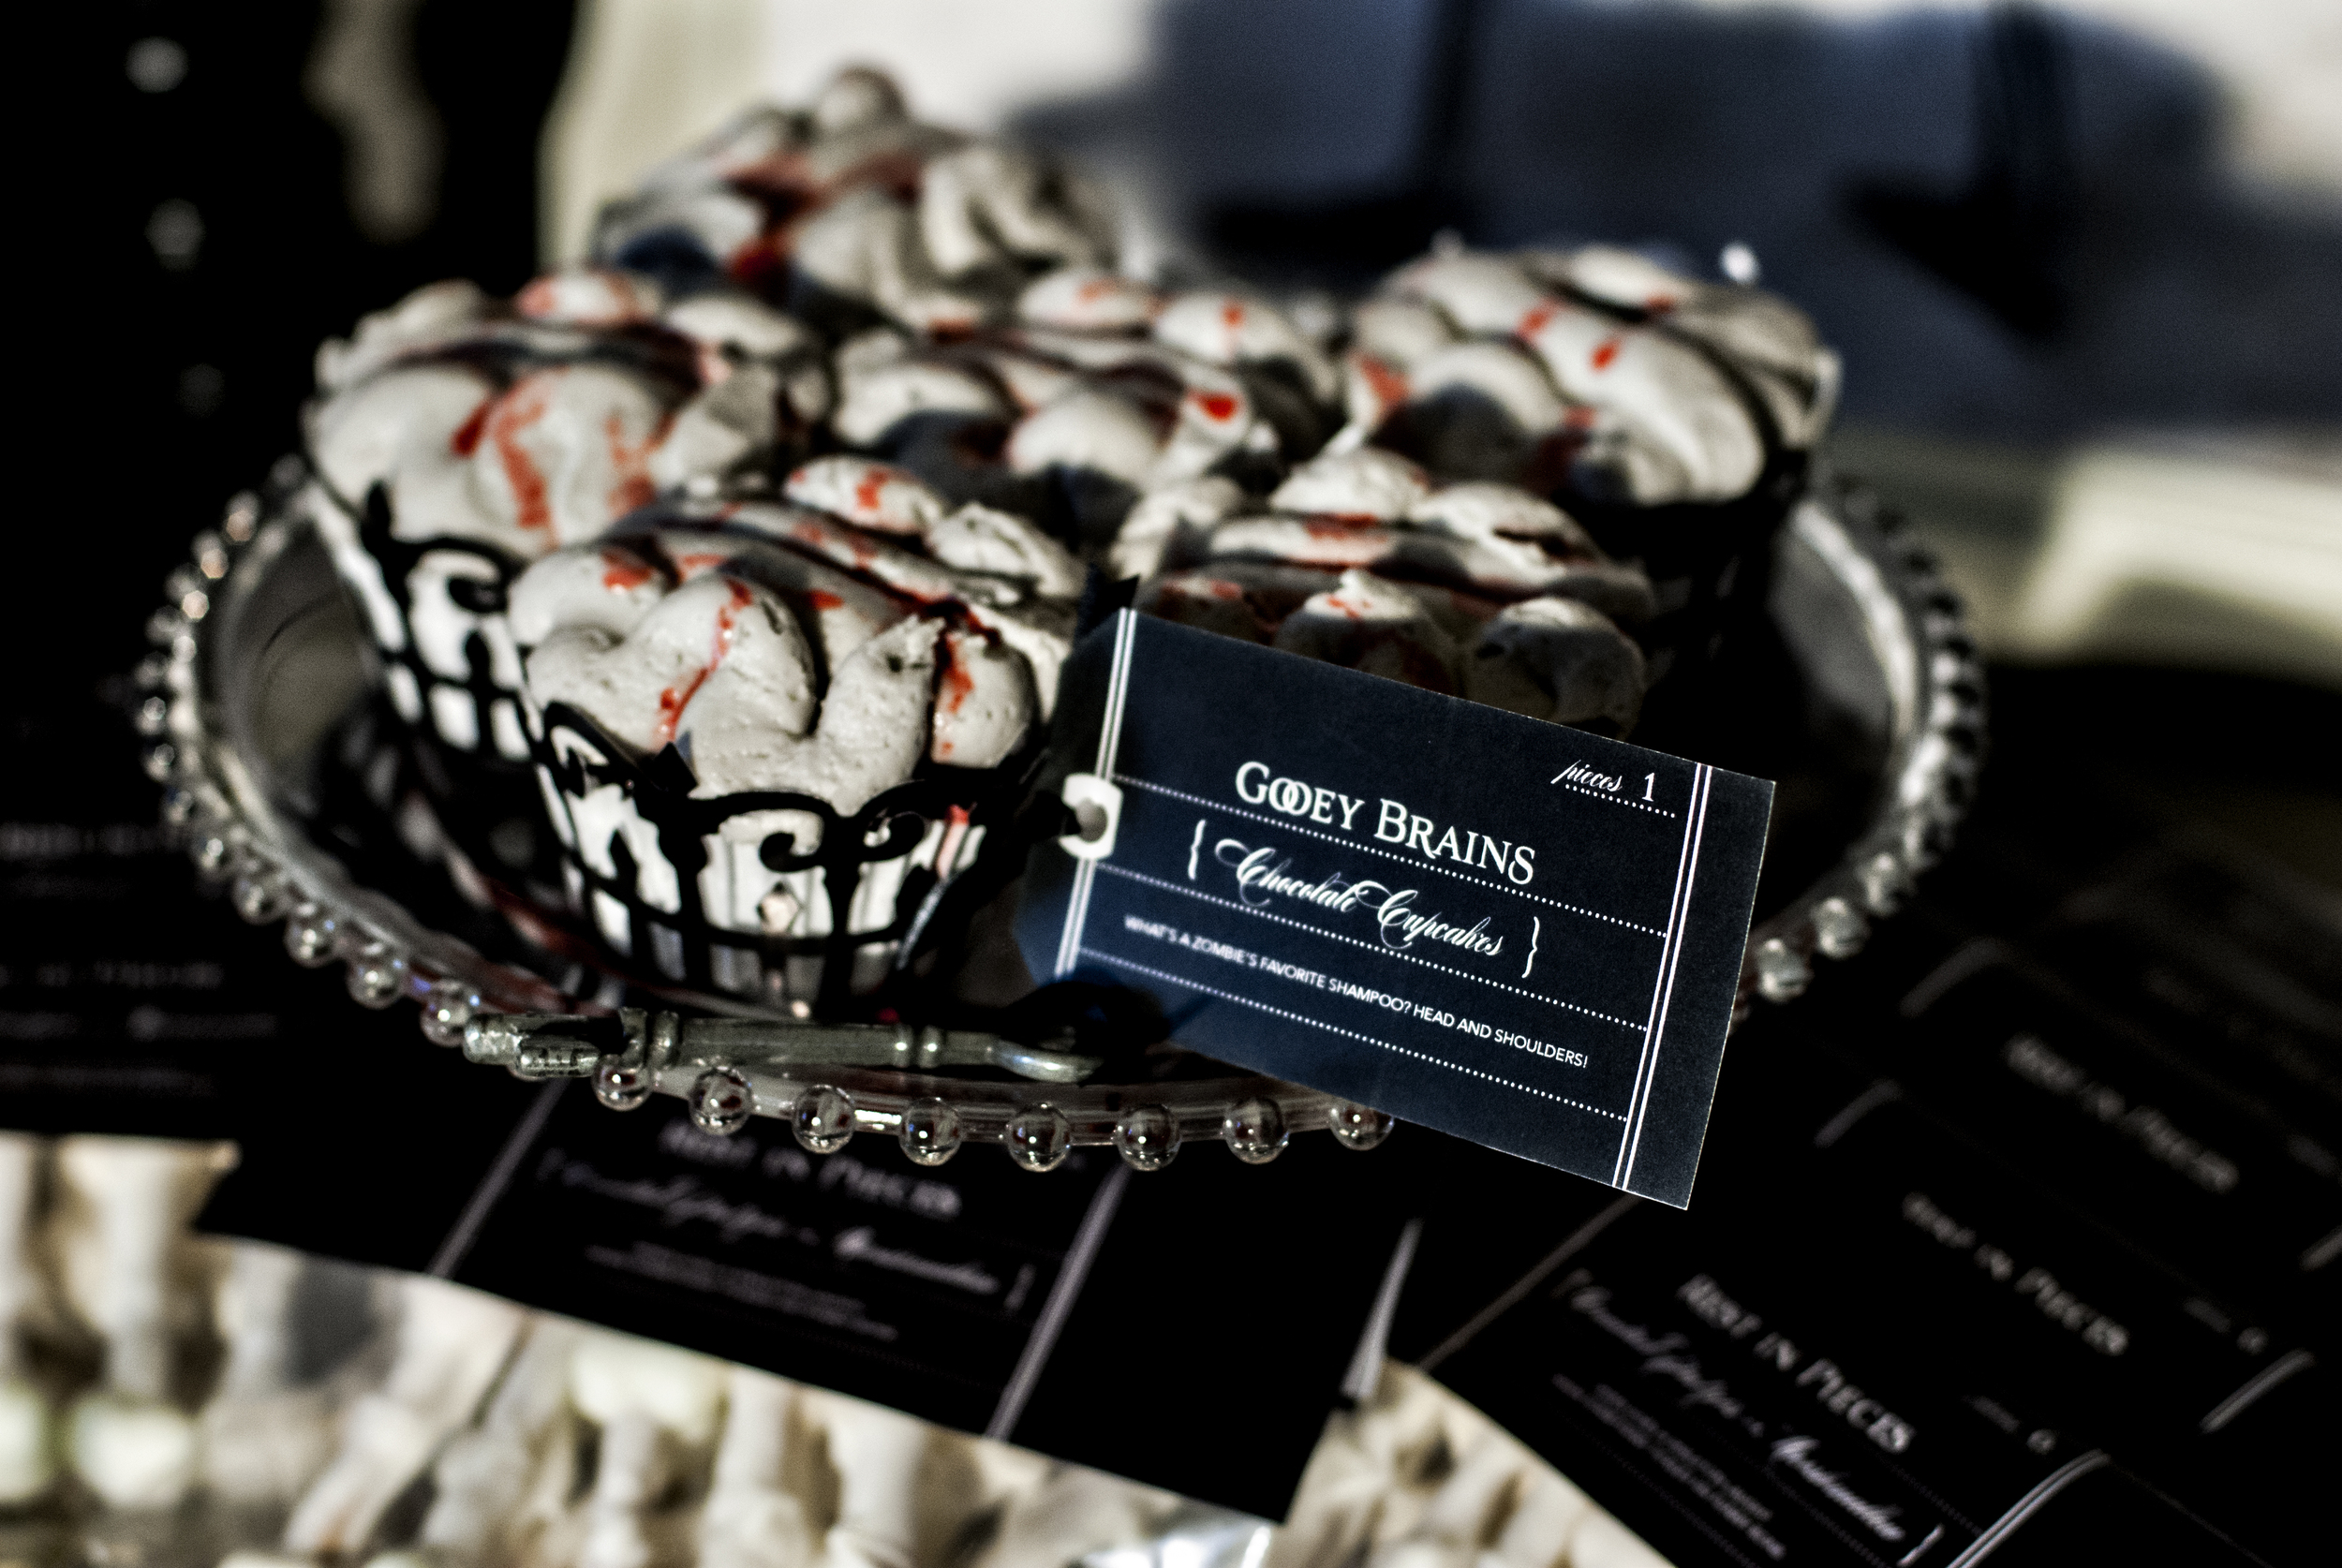
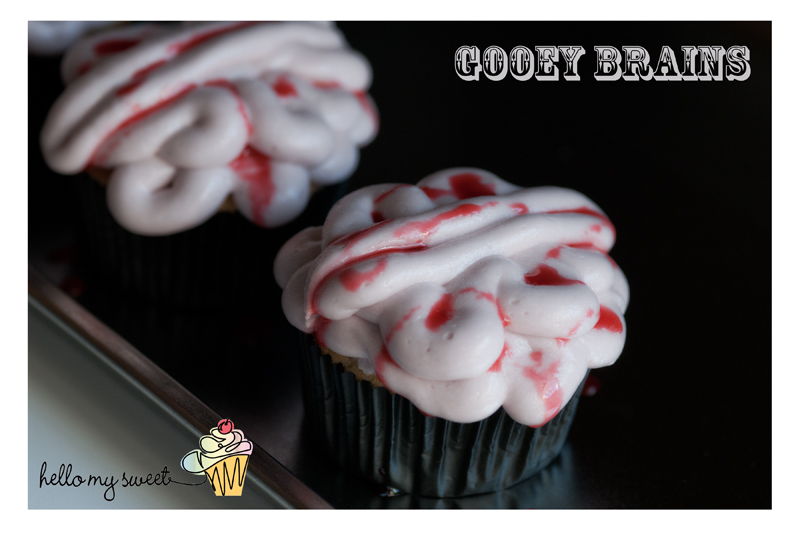
Gooey Zombie Brain Cupcakes

For the “Gooey Brains” cupcake, bake up your favorite cupcake recipe and then mixed up a batch of traditional butter-cream or your favorite store-bought icing with some black food coloring to make it grey. (To make it like “grey matter”) We then piped it on top of the cupcakes using a wide round tip and our pastry decorator. This was no exact science as we were free-handing and looking at a photo for inspiration. Make two lines down the center of the cupcake, then fill in with swirls on either side and top with a little strawberry syrup “blood.”

Halloween2011_6.jpg
Halloween2011_Main.jpg
HMS_Brains_2.jpg

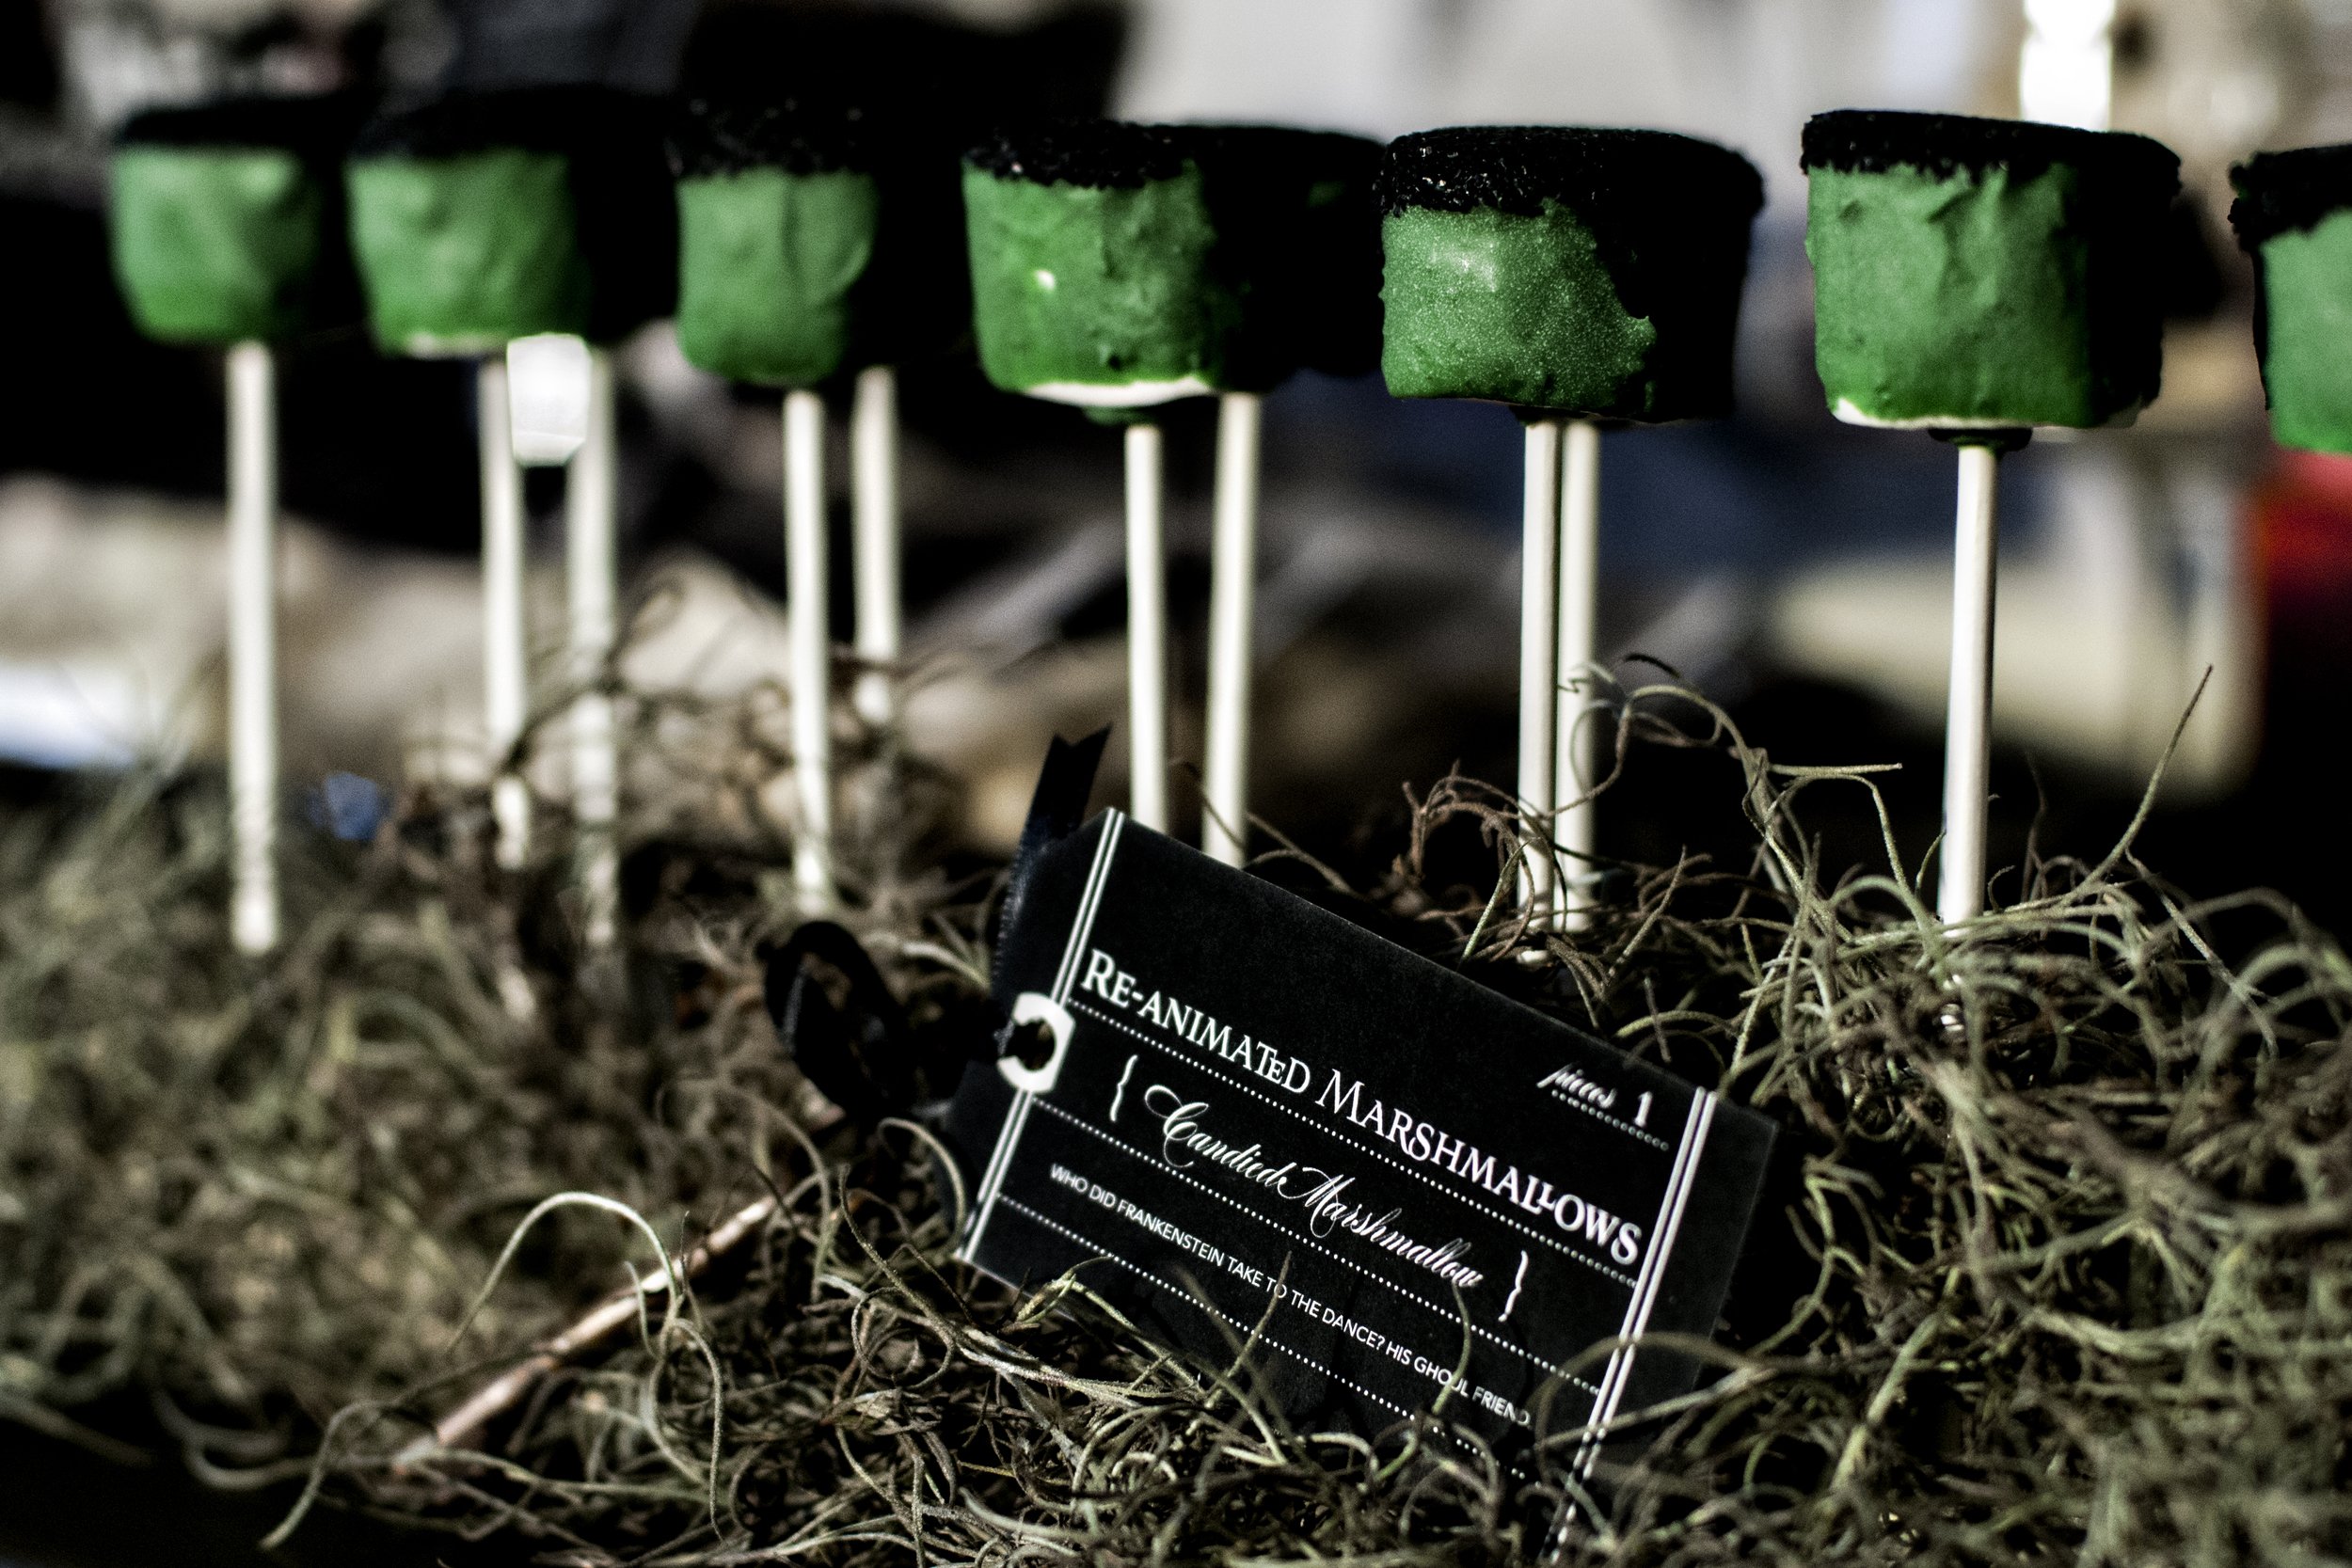
Reanimated Marshmallow Pops

Re-animated Marshmallows

Marshmallows

Green Candy Melt

Black Sanding Sugar

Lollipop Sticks

We coated marshmallows in a green candy melt, then dipped the tops into a bowl of black sanding sugar to create the hair. These didn’t turn out quite as nicely as we had hoped but they still tasted good. They were supposed to resemble Frankenstein. If you have experience doing pops, you will probably get a much smoother result.

Halloween2011_7.jpg
Halloween2011_Main.jpg

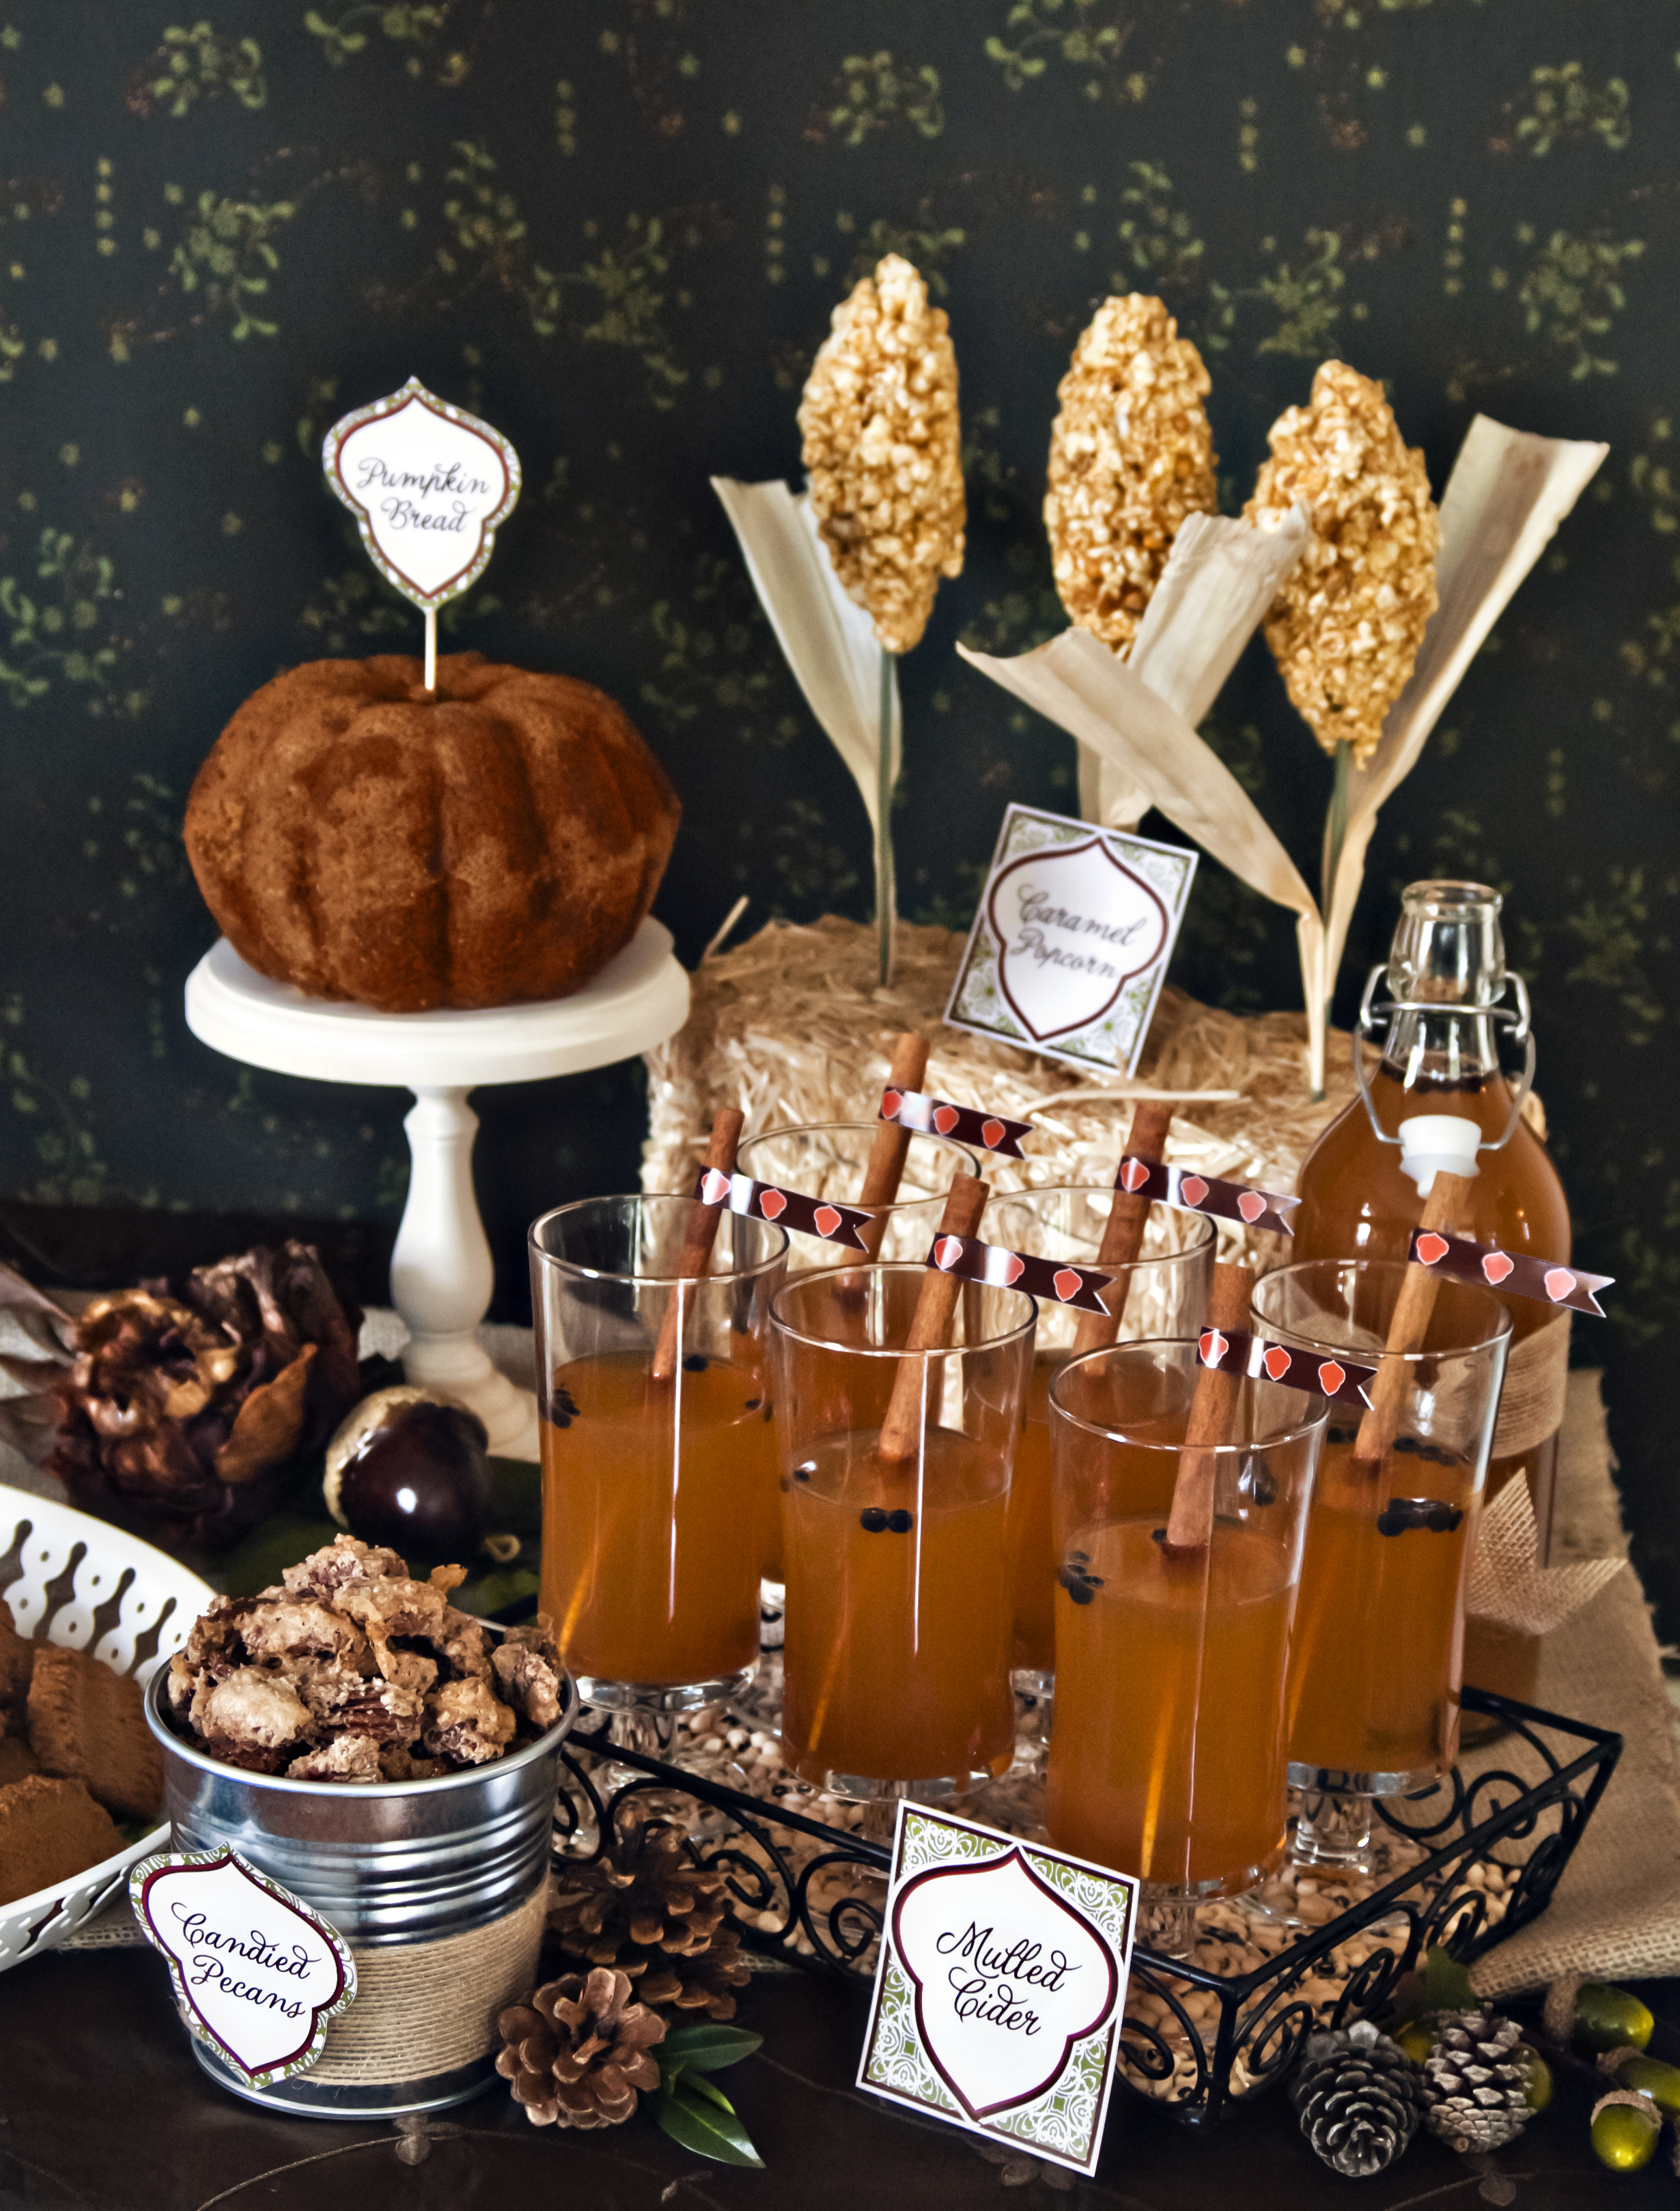
Best Pumpkin Cake Recipe

Pumpkin Cake

adapted from Williams-Sonoma

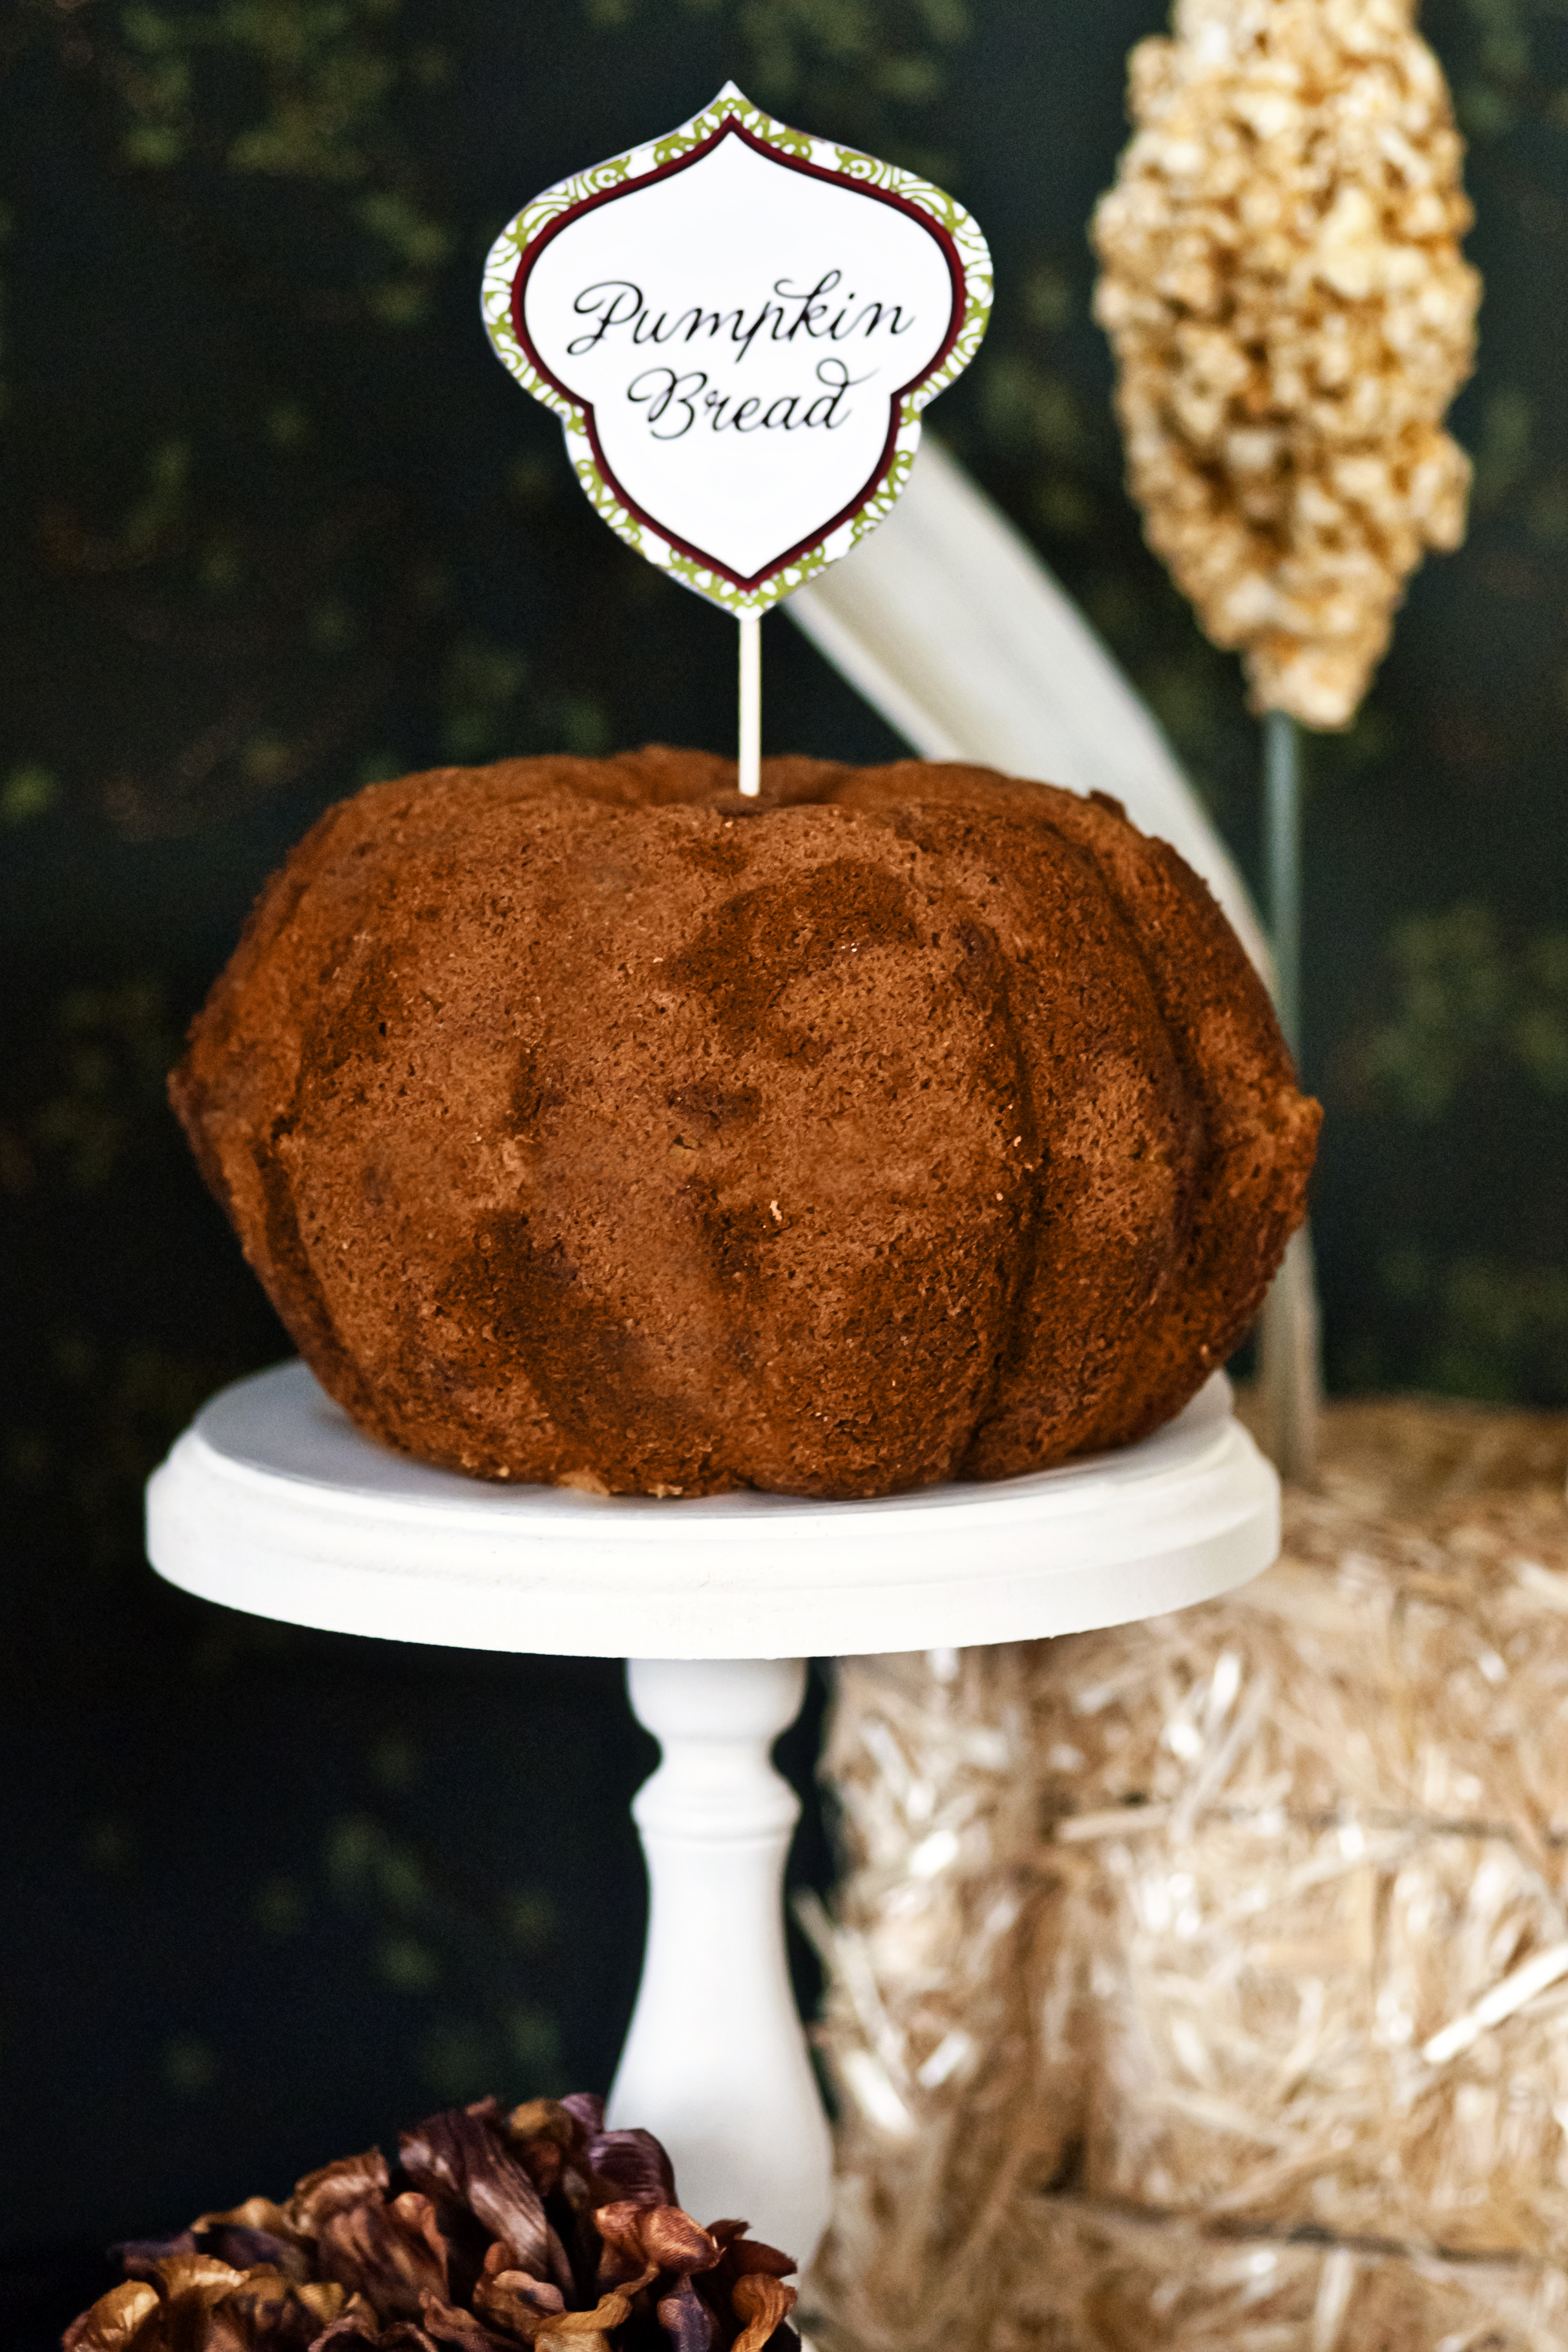
This one never disappoints, in fact my family looks forward to this recipe every fall. I've been baking this recipe for over ten years now and it is still the most deliciously spiced version of pumpkin bread /cake and always super moist. I do not use the frosting, and bake my recipe in loaf pans most of the time.

Ingredients for the cake:
2 1/2 cups all-purpose flour
2 tsp. baking powder
1/2 tsp. baking soda
1 1/4 tsp. salt
2 1/2 tsp. ground cinnamon
1 1/4 tsp. ground ginger
3/4 tsp. freshly grated nutmeg
1/2 tsp. ground allspice
1/8 tsp. ground cloves
10 Tbs. (1 1/4 sticks) unsalted butter room temp.
1 1/4 cups firmly packed light brown sugar
1 1/4 cups granulated sugar
3 eggs, room temp.
2/3 cup milk, room temp.
1 1/4 cups pumpkin puree

For the frosting (optional): 
8 oz. cream cheese, room temp.
8 Tbs. (1 stick) unsalted butter, room temp.
1 cup confectioners’ sugar, sifted
1/2 tsp. vanilla extract
Food coloring as desired

Directions:
Have all the ingredients at room temperature. 

Position a rack in the lower third of an oven and preheat to 325°F. Generously grease and flour the wells of two bundt cake pans; tap out excess flour. This step is important if you do not want your cake to stick and break while removing. You may also use loaf pans.
To make the cake, sift together the flour, baking powder, baking soda, salt, cinnamon, ginger, nutmeg, allspice and cloves; set aside. 
In the bowl of an electric mixer fitted with the flat beater, beat the butter on medium speed until creamy and smooth, 1 to 2 minutes. Add the both sugars and beat until light and fluffy, about 5 minutes. Add the eggs one at a time, beating well after each addition. 
Reduce the speed to low and add the flour mixture in three additions, alternating with the milk and beginning and ending with the flour. Add the pumpkin puree and beat until incorporated.
Divide the batter between the wells of the prepared pans and spread it evenly. Bake until a toothpick inserted near the center of a cake half comes out clean. Usually between 45-60 minutes for loaf pans.
Transfer the pan to a wire rack and let the cake halves cool upright in the pans for 15 minutes.
Gently tap the pans on a work surface to loosen the cake halves. Invert the pans onto the rack and lift off the pan. Let the cake halves cool completely before decorating. 

If you are making the pumpkin shaped cake version with frosting:

Meanwhile, make the frosting: In the bowl of an electric mixer fitted with the flat beater, beat the cream cheese on medium speed until smooth, 2 to 3 minutes. Add the butter and beat until combined, 1 to 2 minutes. Add the confectioners sugar and vanilla and beat until fluffy, 2 to 3 minutes.

Using a bread knife, cut 1/4 inch off the flat side of each cake half. Place one cake half, flat side up, on a cake stand or plate and spread the pumpkin frosting on top. Place the other cake half, flat side down, on top. Refrigerate for 30 minutes. 

Add food coloring as desired to the remaining frosting (green for leaves and tendrils, orange for a jack-o’-lantern). To create leaves and tendrils, using a rubber spatula, transfer the green frosting to a pastry bag fitted with a leaf or medium plain tip. Pipe leaves and tendrils on the top of the cake. To create a jack-o-lantern, using a rubber spatula, transfer the orange frosting to a pastry bag fitted with a medium plain tip. Pipe an outline of the face on the cake, then fill in the design. Serves 12.
AutumnTable_9.jpg
AutumnTable_1.jpg
AutumnTable_7.jpg

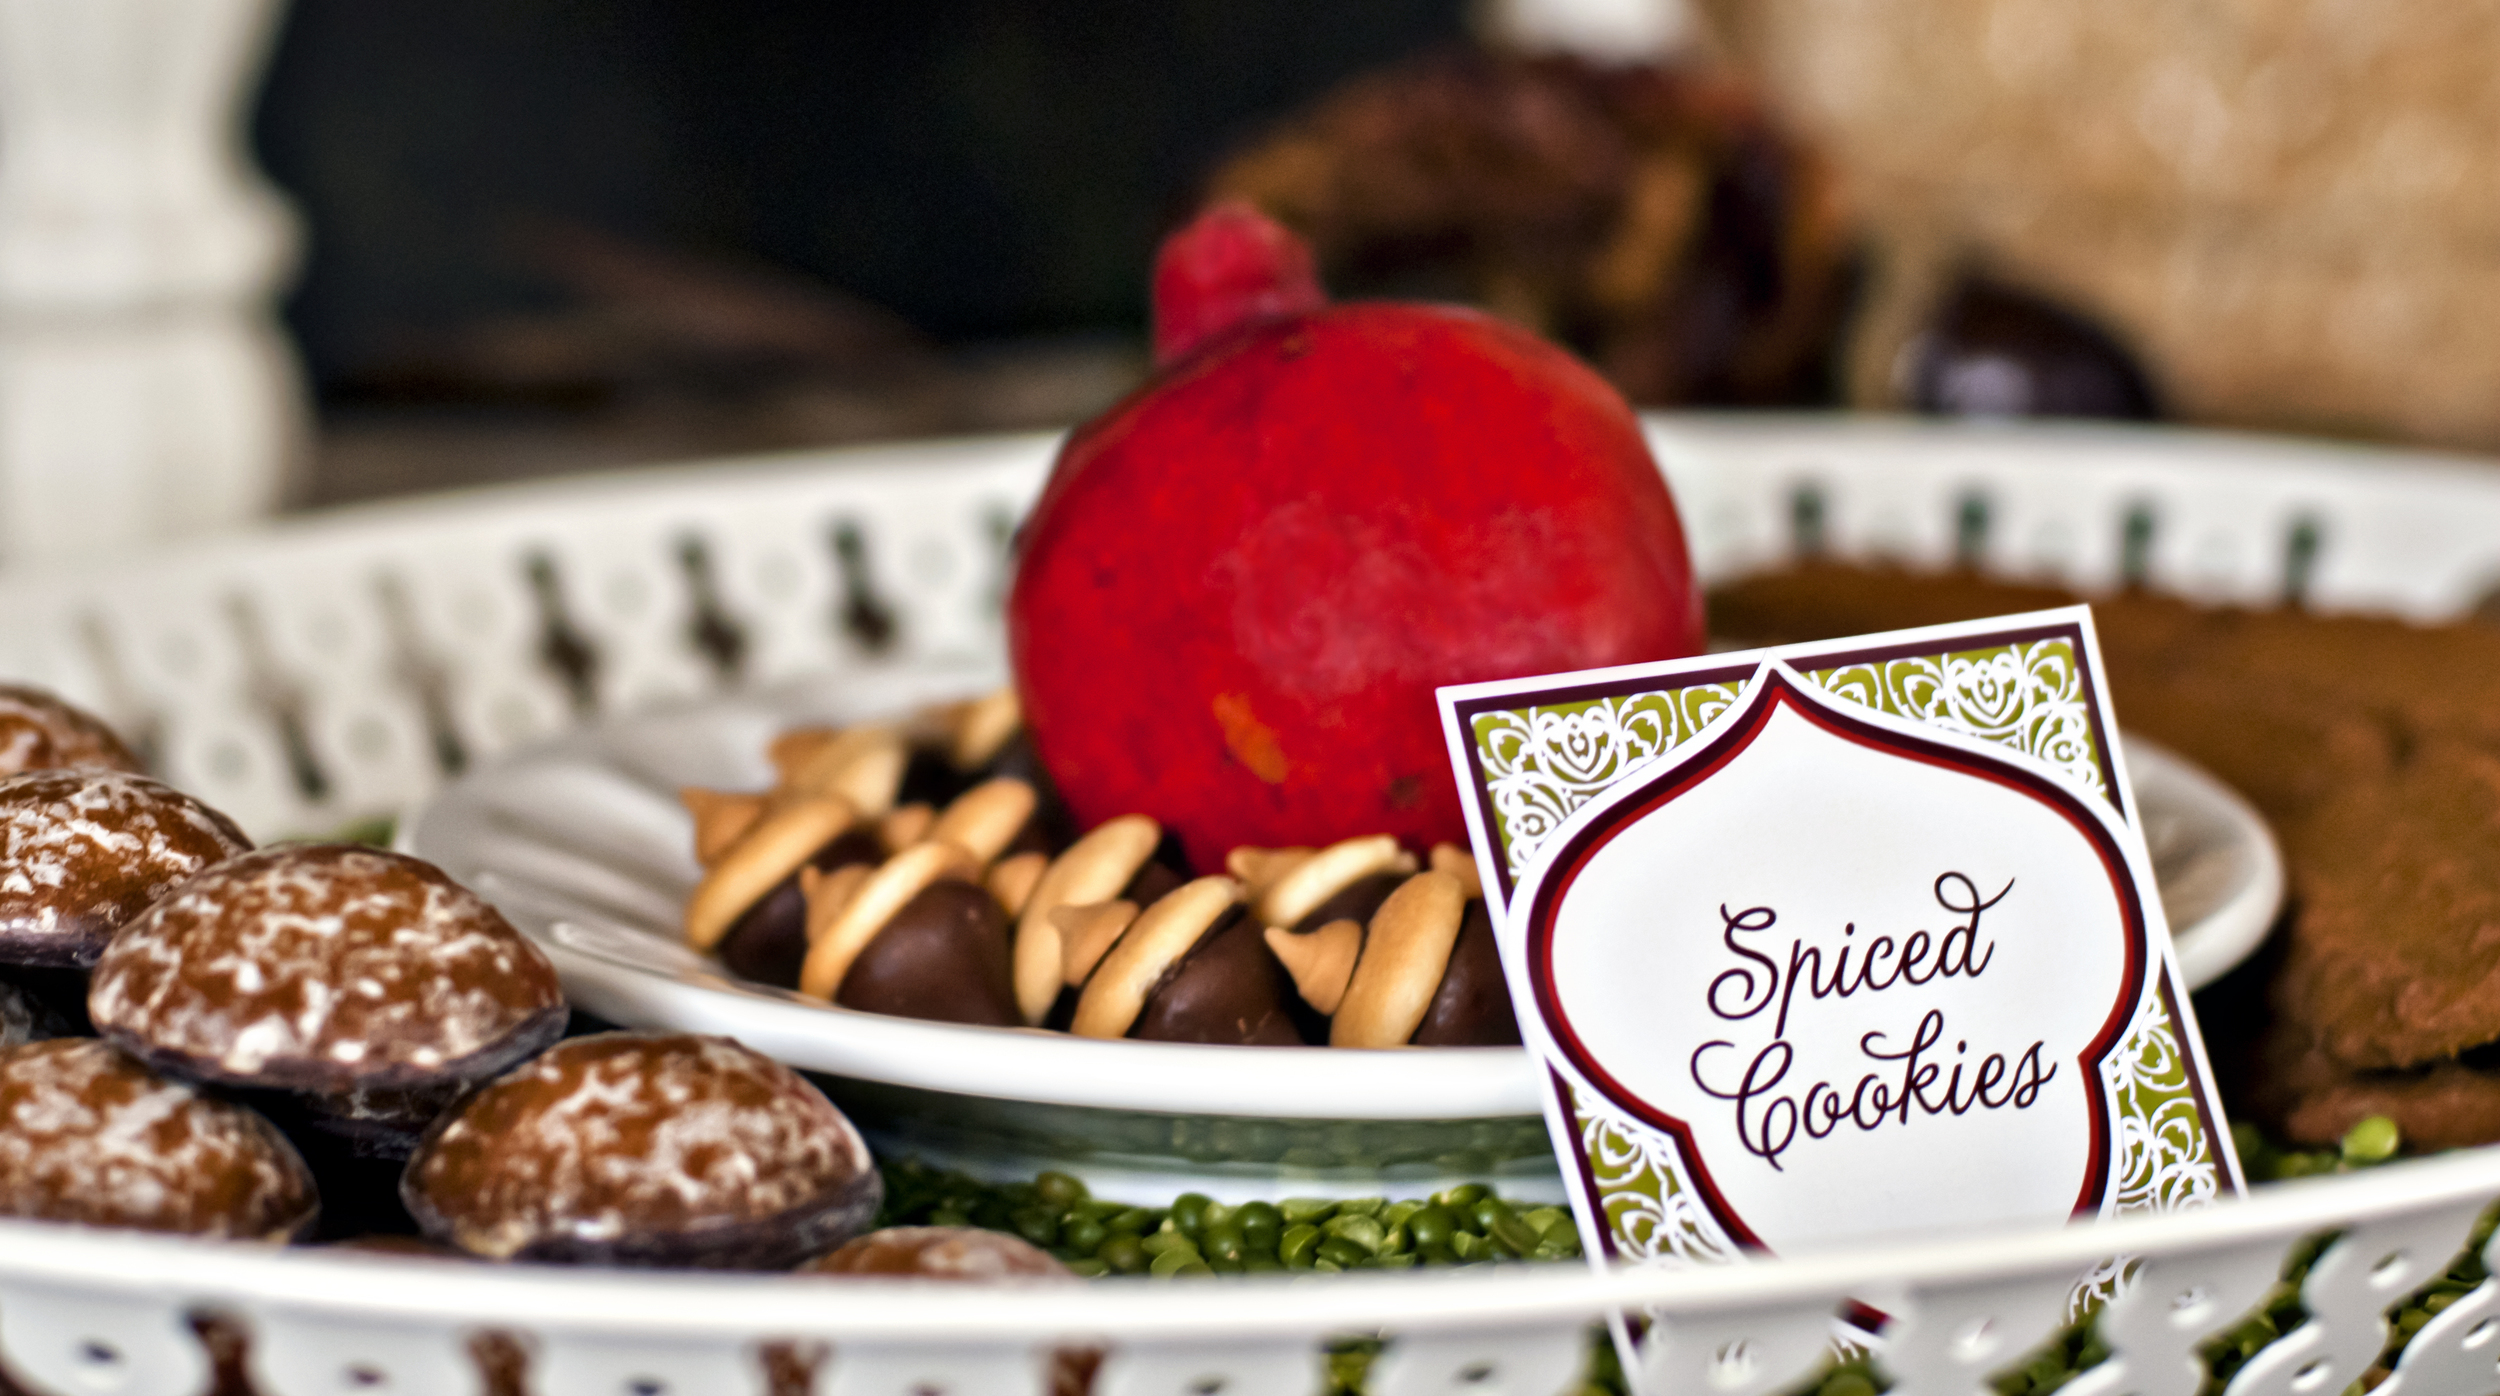
Easy Acorn Cookies

Acorn Cookies

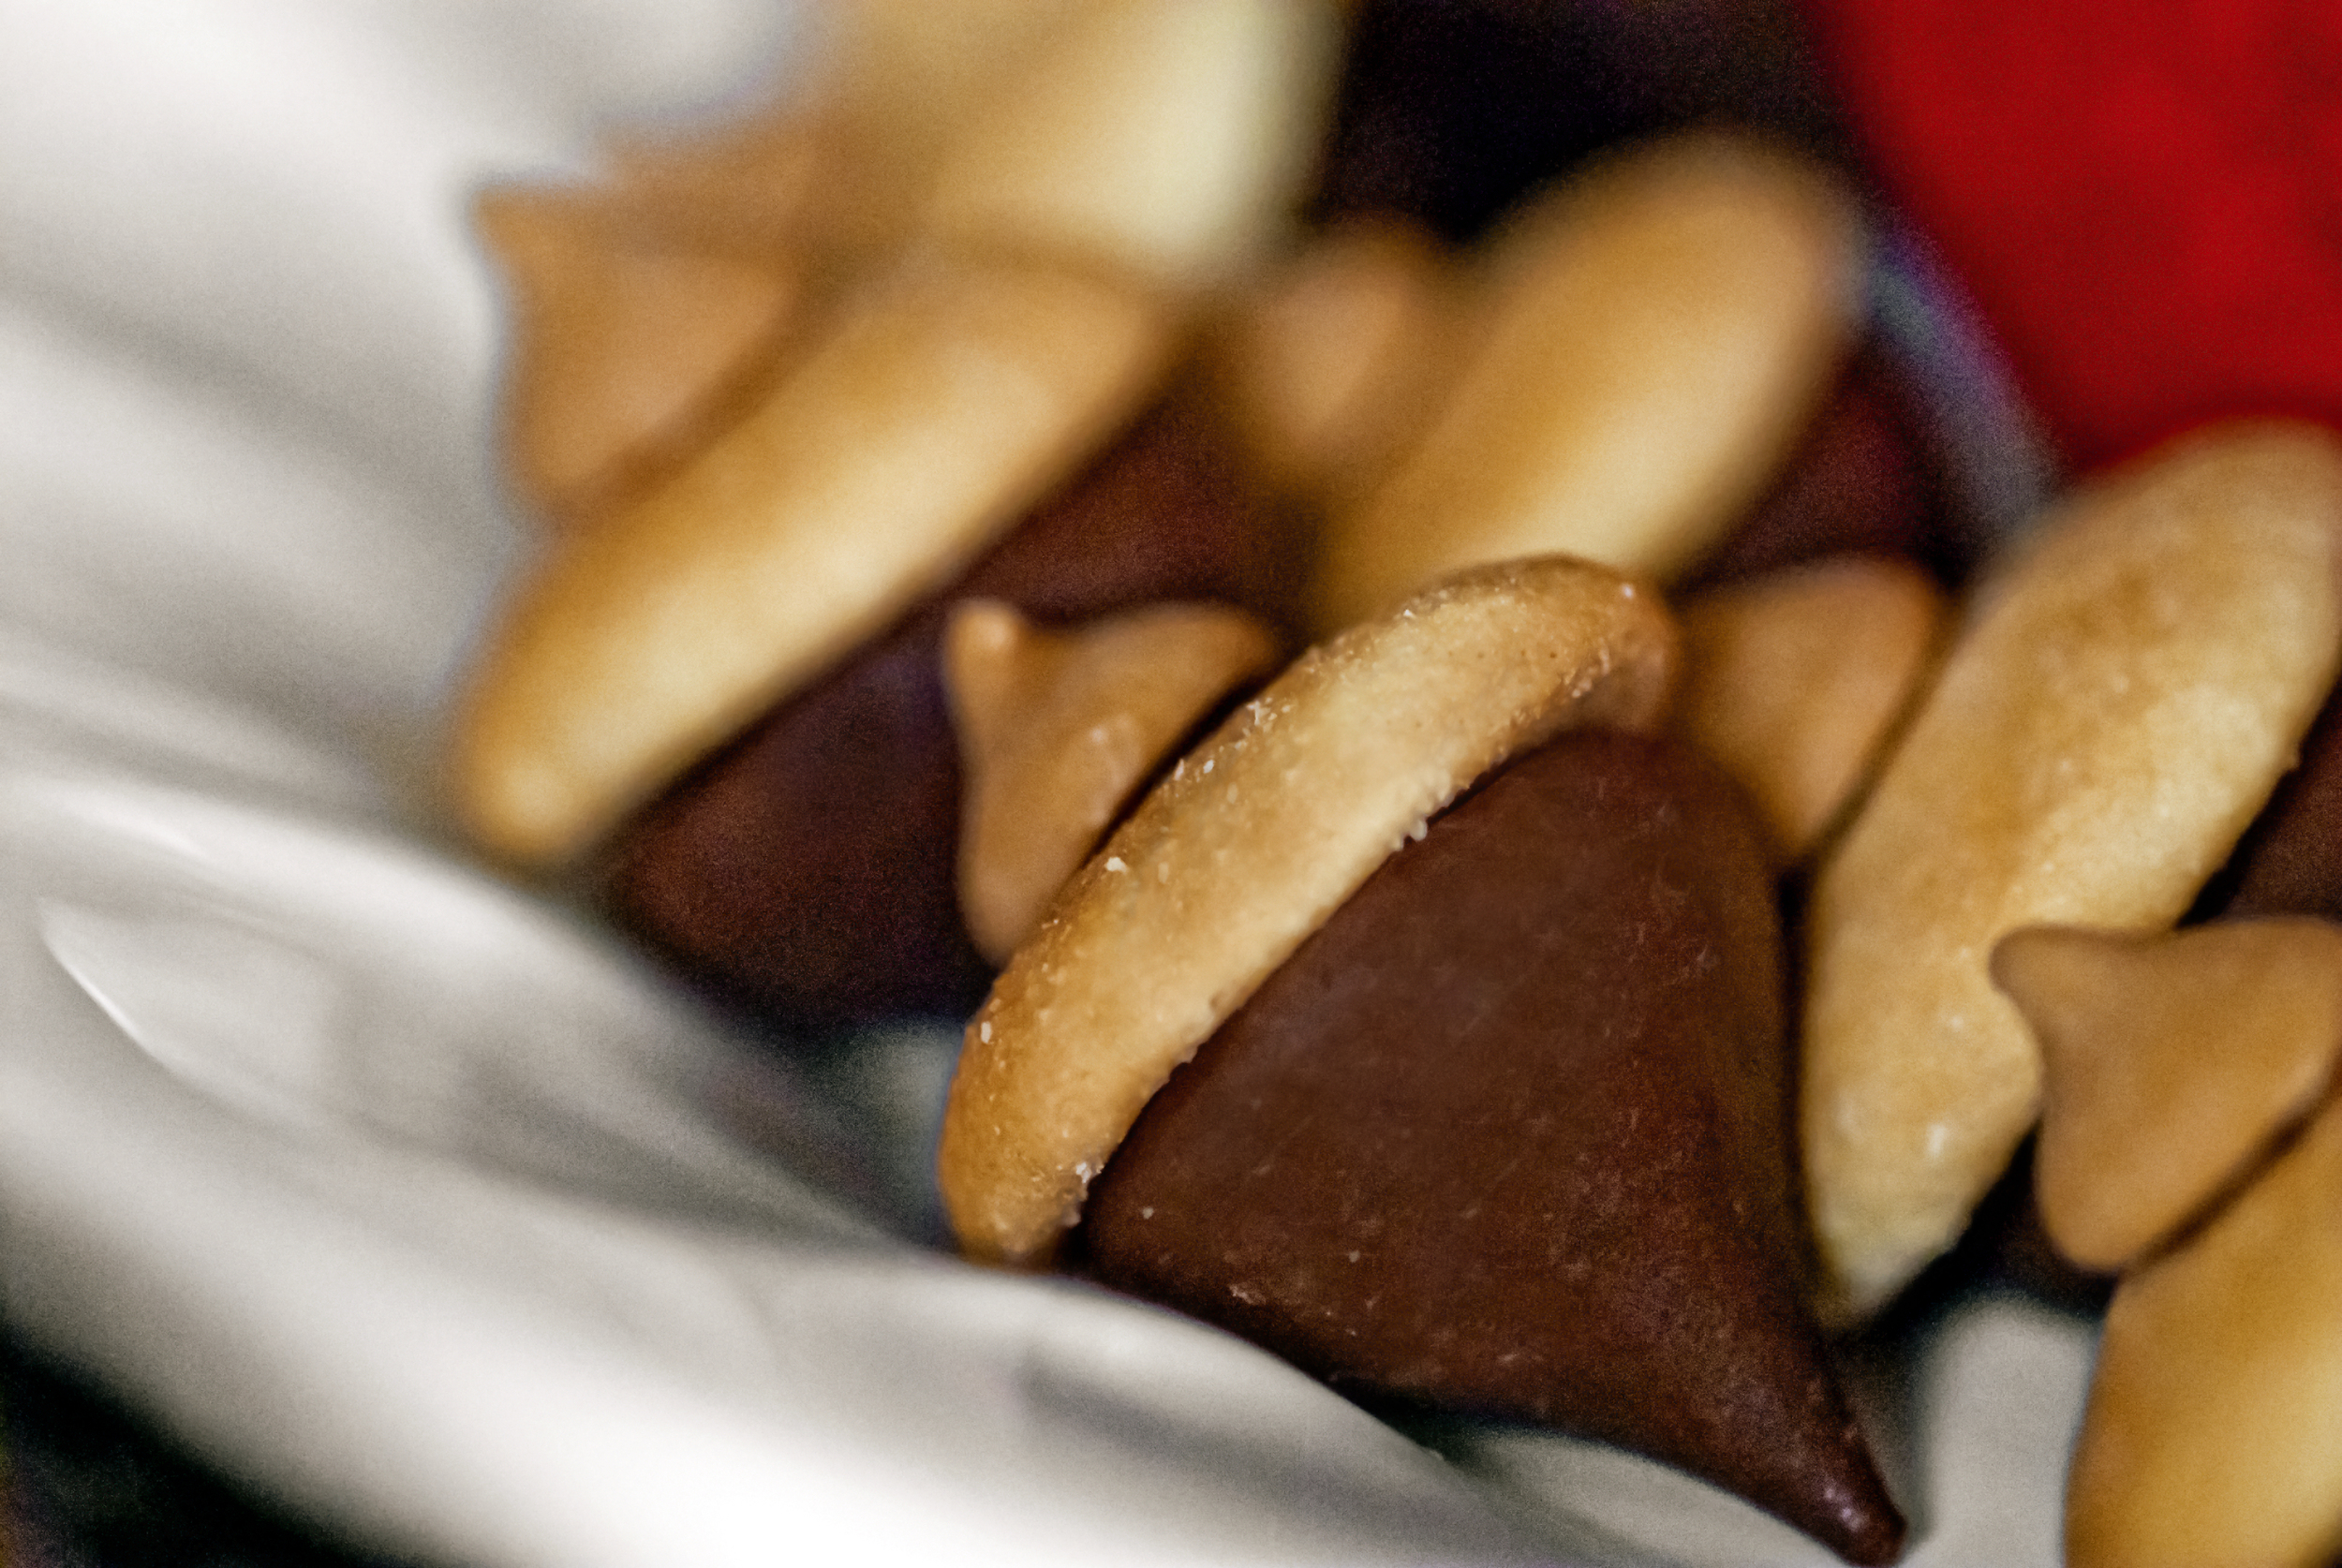
Super simple, super cute and de-lish! It will blow your mind how easy this one is.

Ingredients:
Mini Nilla Wafers
Chocolate Kisses
Peanut Butter Chips
plastic baggie

Directions:
Remove your chocolate kisses from the wrappers, you will need one per acorn. Heat a small amount of peanut butter chips in the microwave until melted, about 30 seconds - 1 minute. Place the melted peanut butter into a plastic baggie and squeeze it down to the corner. Snip off the corner of the baggie. You will use this as your glue. Attach the flat side of one kiss to the flat side of one mini-nilla wafer using the peanut butter glue. A small dot will suffice. Use the glue once more to attach the flat side of a peanut butter chip onto the center of the rounded side of the nilla wafer. Voila, you have an acorn! Continue until you have made as many acorns as desired.

AutumnTable_5.jpg
AutumnTable_2.jpg

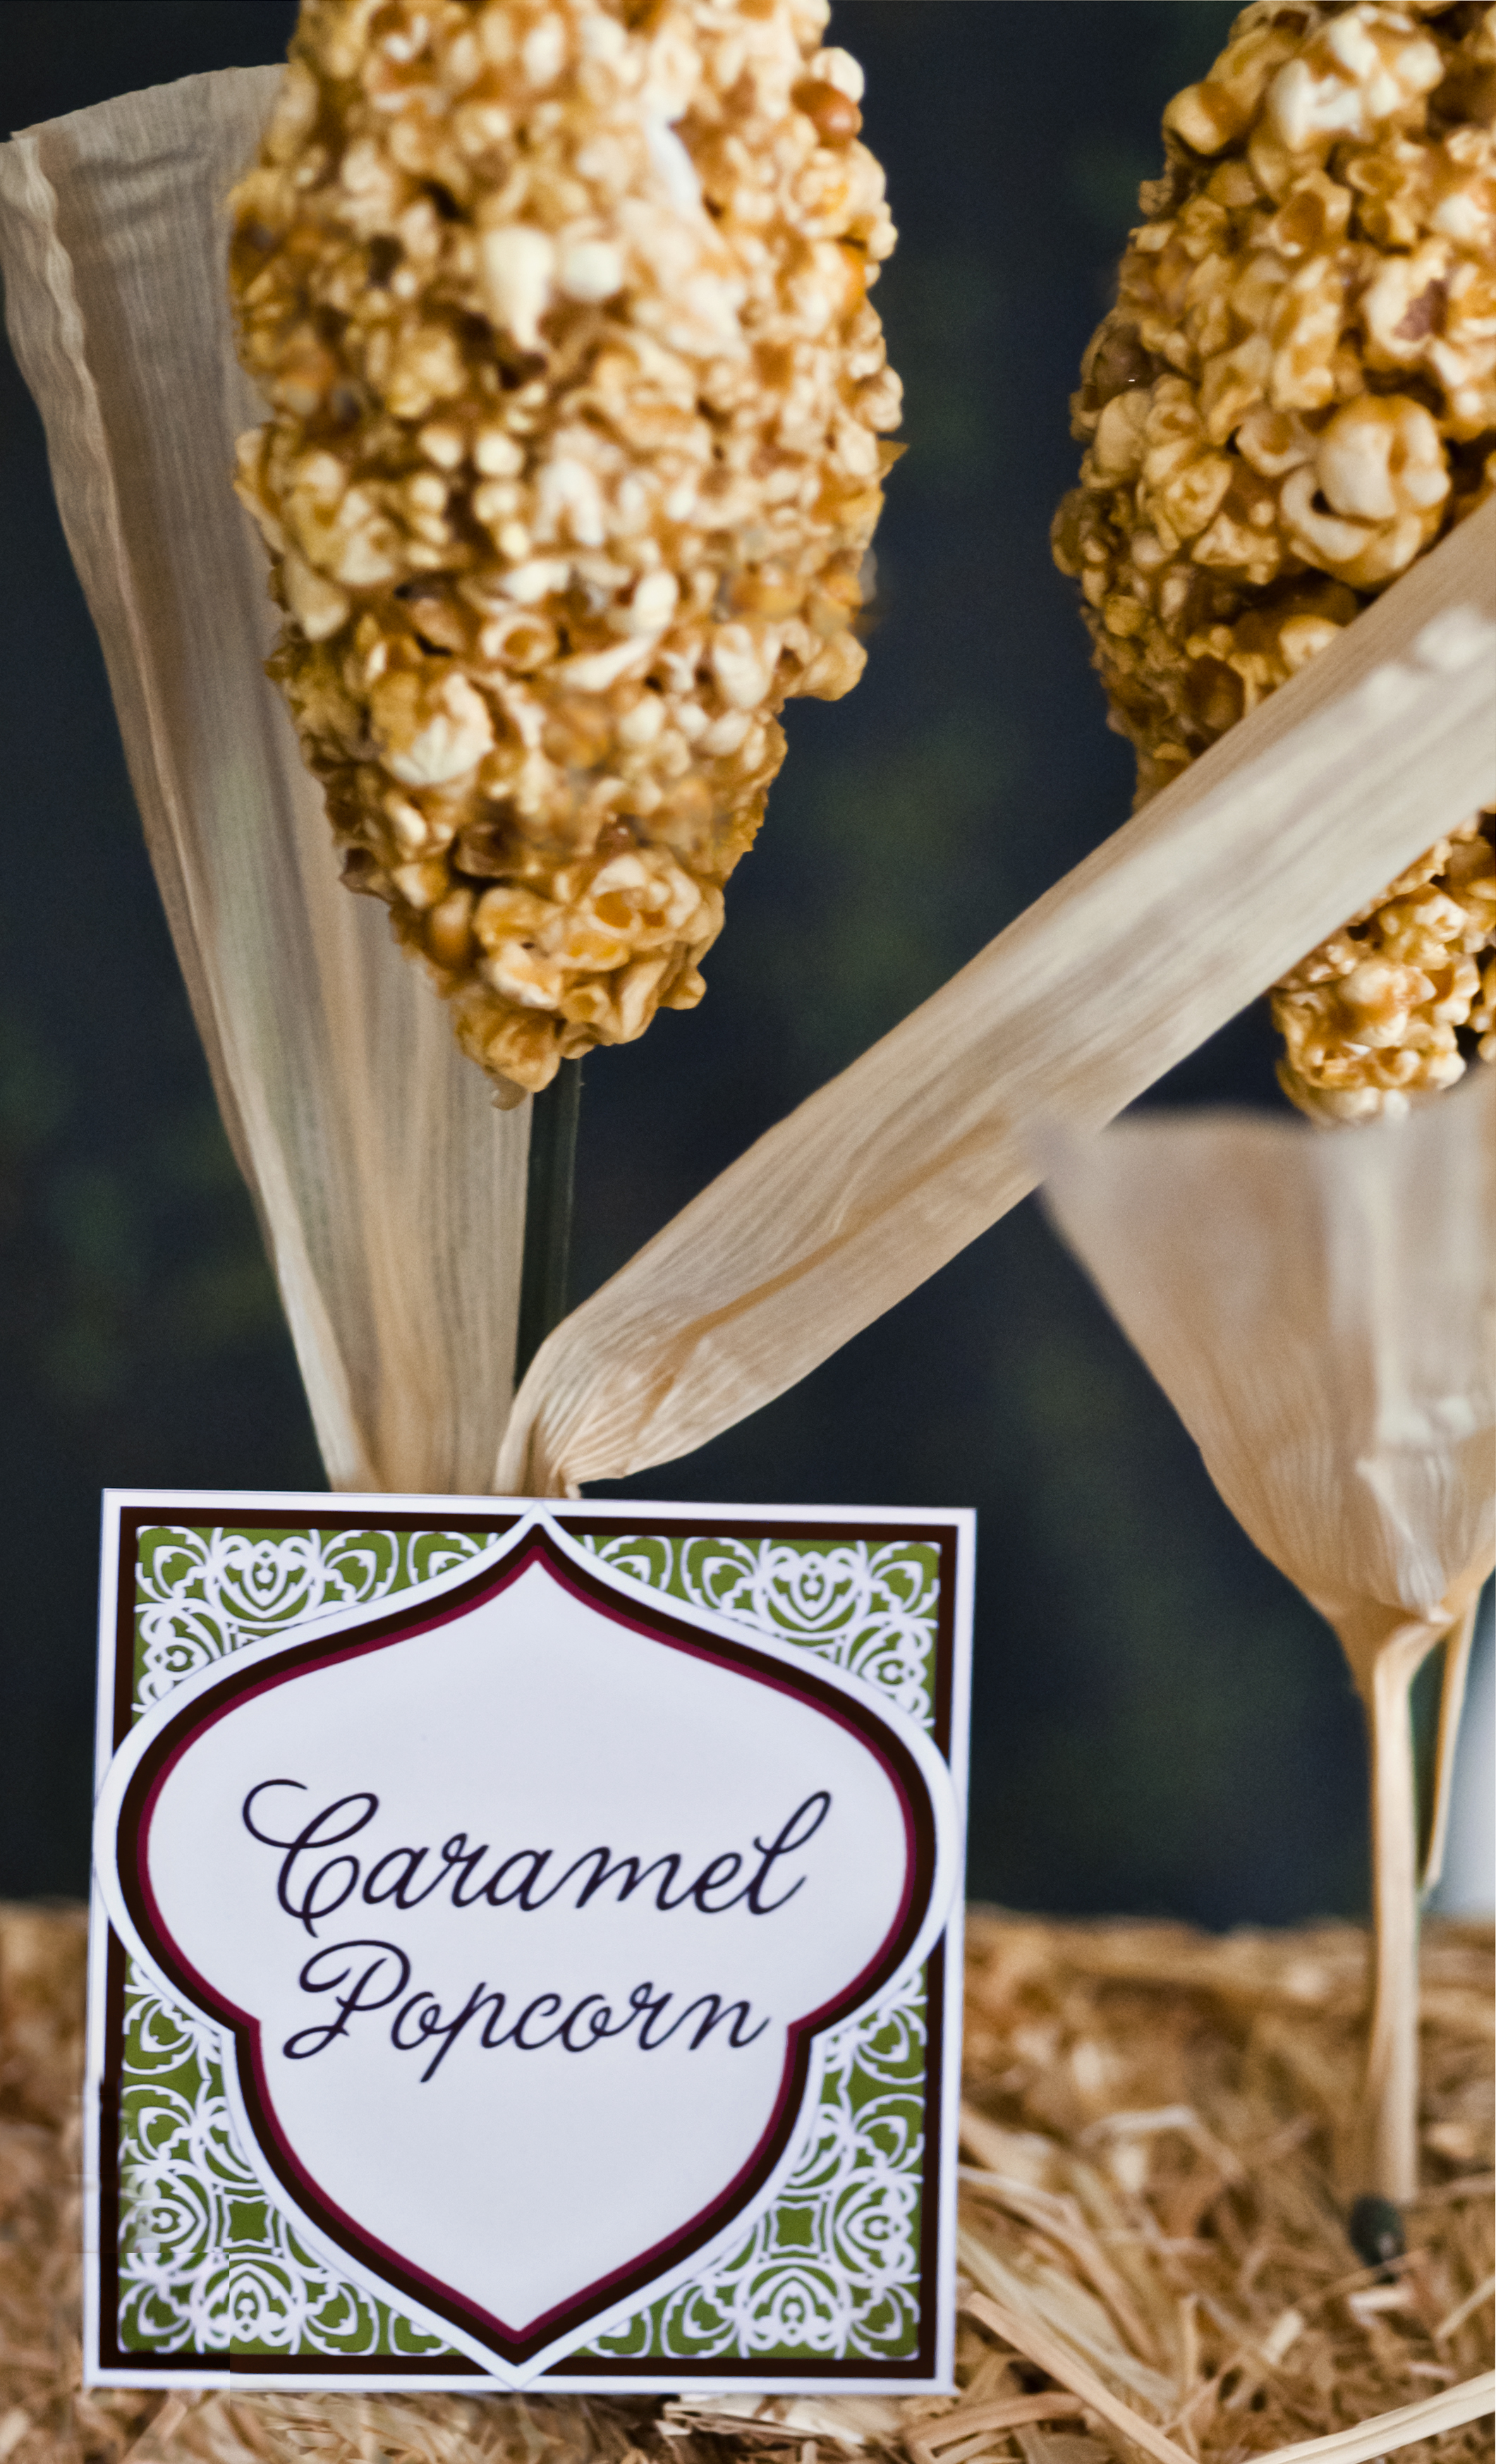
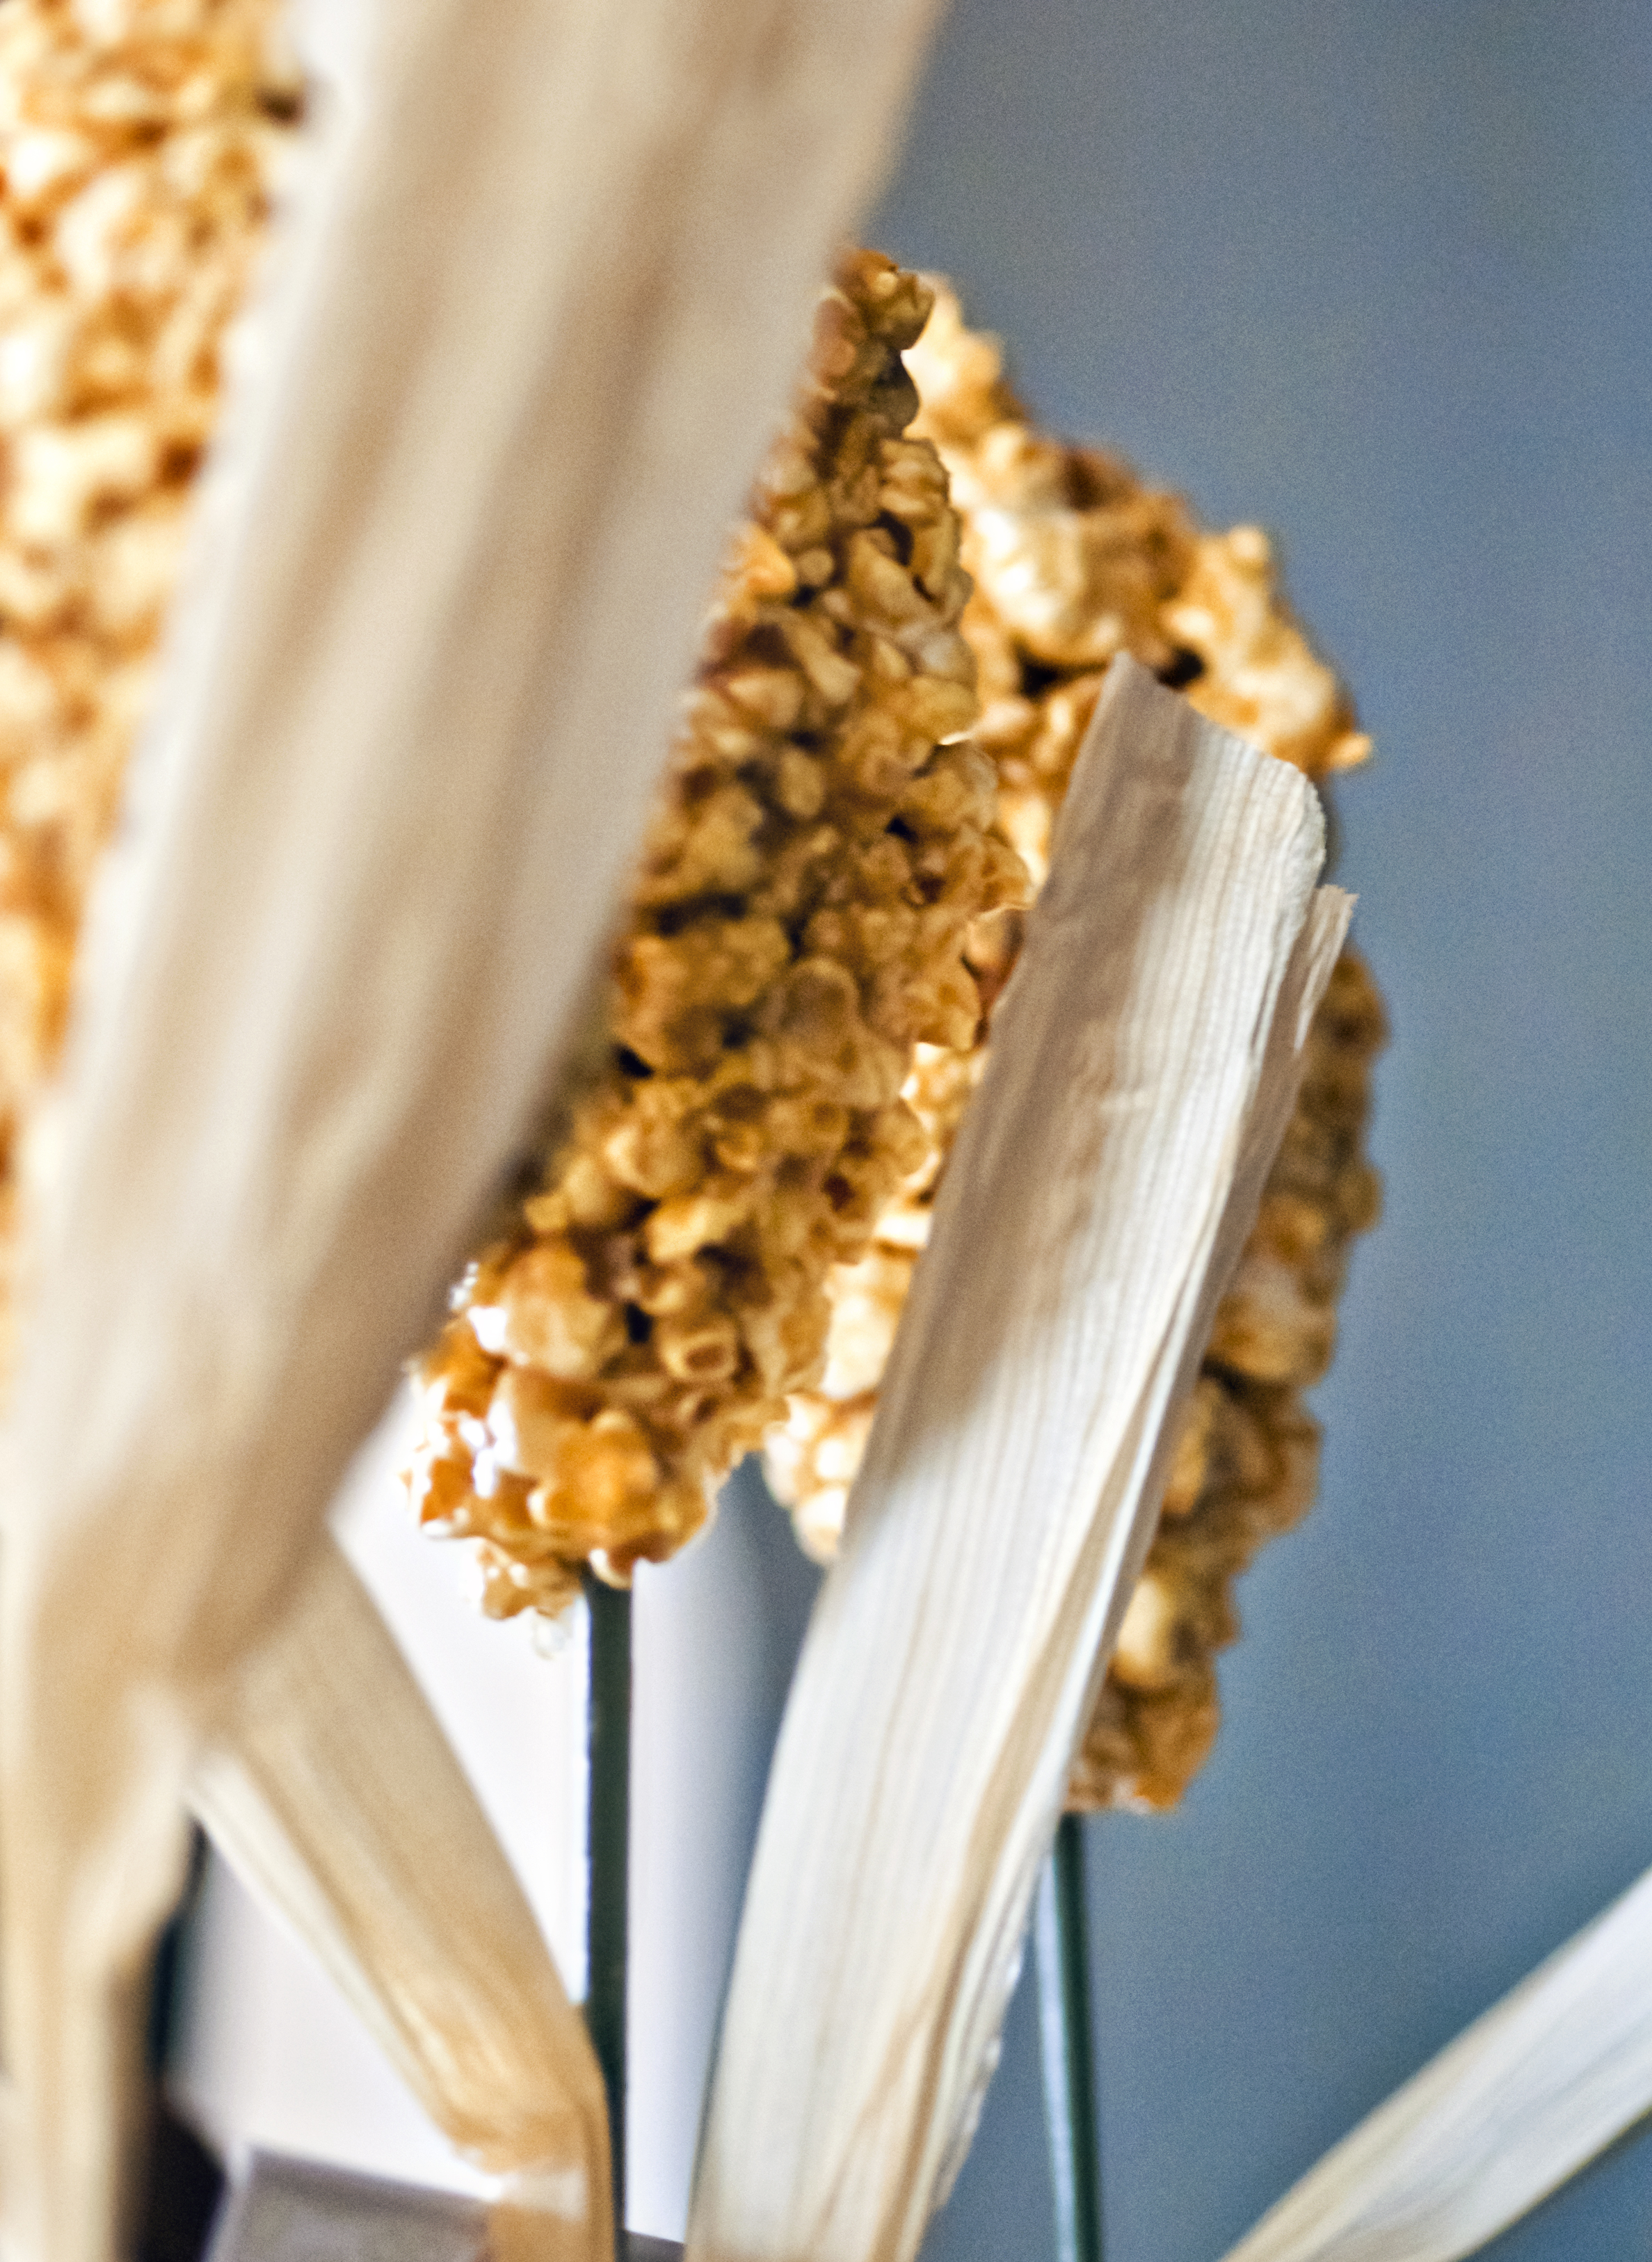
Caramel Corn Stalks

Caramel Corn Stalks 

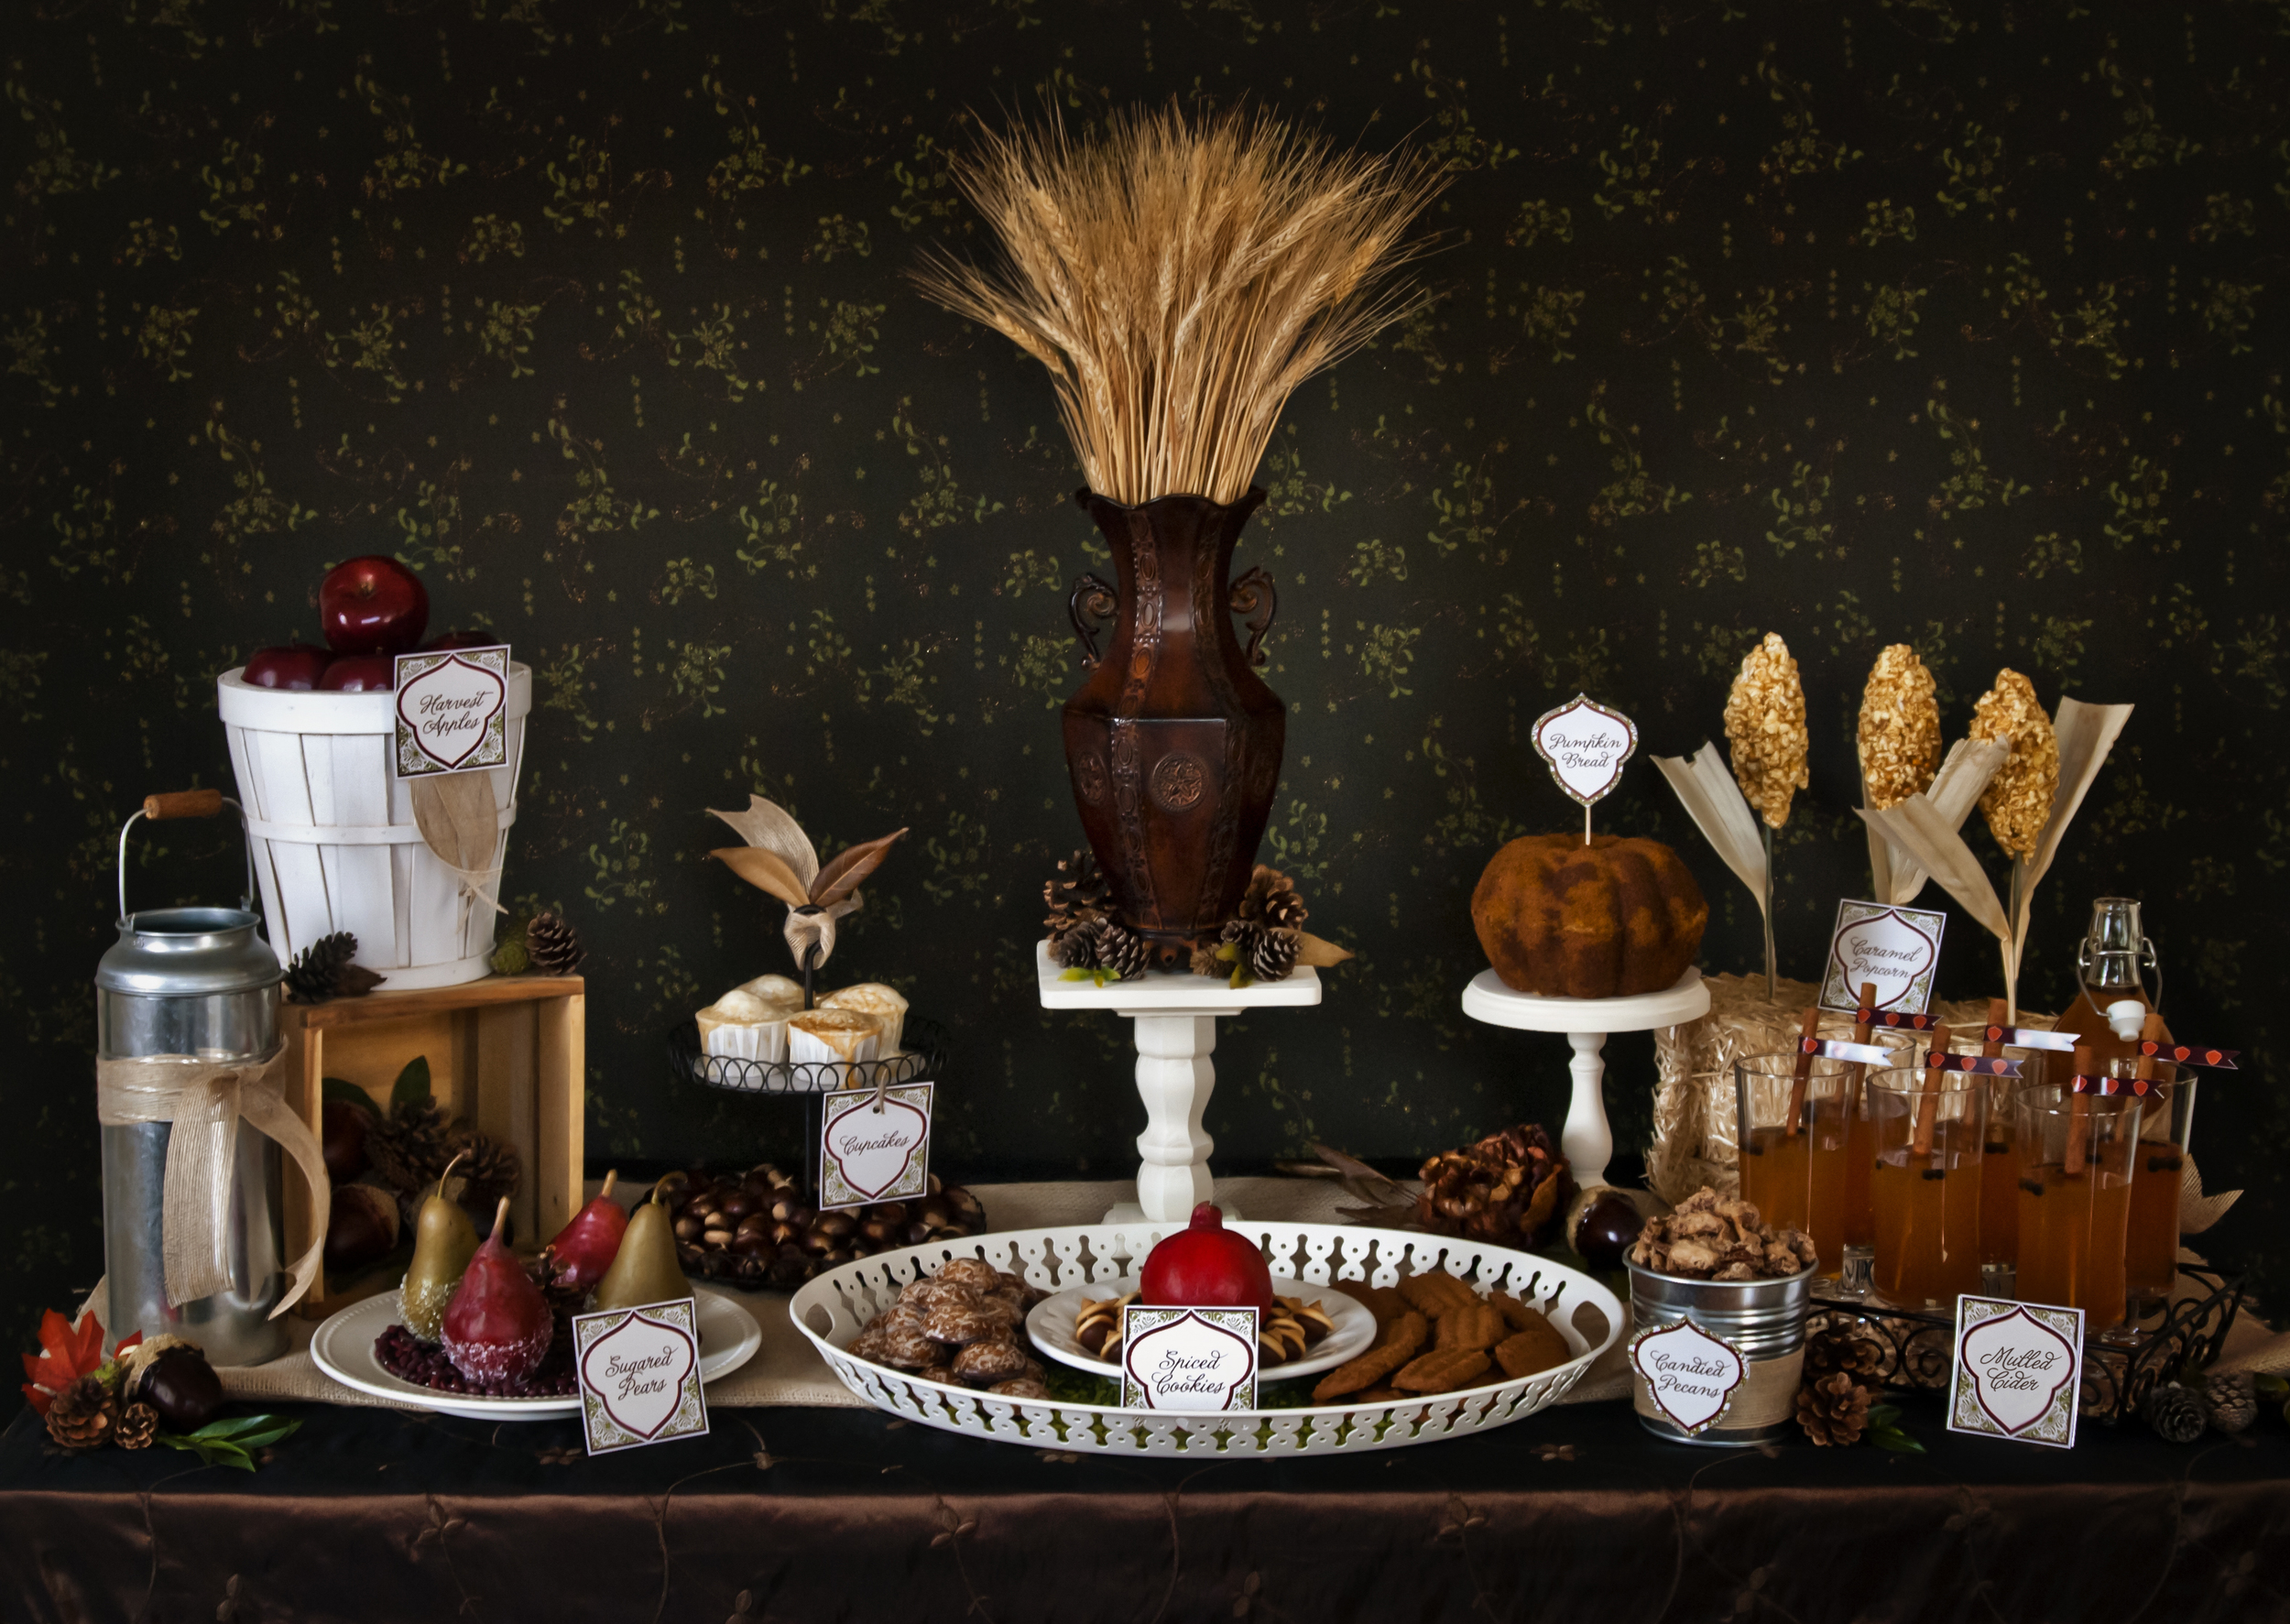
These are the brainchild of Jason. Inspired by a few popcorn balls on sticks and developed into popcorn “corn stalks” complete with husks, they were our favorite feature on our fall dessert table! 

Popcorn Ingredients:
1-1/2 C unpopped popcorn
salt
1/2 C butter (1 stick) + more for non-stick shaping
2 C brown sugar
1/2 C corn syrup
1 15 oz sweetened condensed milk

DIY Ingredients:
wooden skewers
corn husks, hay bale or styrofoam
hot glue gun + glue

candy thermometer

Directions:
Pop your popcorn in whichever method you prefer. You can use microwave popcorn if it is easier. We used brown lunch bags and popped ½ cup at a time in the microwave. Put your popcorn into to large bowls, sprinkle the popcorn with a bit of salt.
In a medium sized sauce pan melt the butter. Add the brown sugar, corn syrup, and sweetened condensed milk. Stir it all around until well blended.
Heat the mixture to boiling. Boil while stirring till it reaches 300 degrees.
Remove from the heat and pour caramel over the top of the popcorn. Stir it up with a large wooden spoon until all of the popcorn is covered.
Allow the popcorn to cool enough to handle comfortably with your hands.
You will need to butter your hands generously in order to shape the popcorn without having a huge sticking issue.
To make the corn shapes, take a handful of popcorn and shape it until it looks like an ear of corn, then insert a skewer in from one end to the other.
Be careful not to make your corns too heavy, we made this mistake and gravity worked against us, sliding our corn off the skewers.
Once you have made them all, place them on a lined baking sheet and set in the fridge until they are firm. The freezer works too if you are in a hurry.
Before serving attach several corn husks to your skewers using a hot glue gun to complete the look. Make sure you attach them far enough down the stick to be out of the safe zone for consumption.
Place your skewers into a hay bail (or Styrofoam block) to serve on your table.

AutumnTable_16.jpg
AutumnTable_9.jpg
AutumnTable_15.jpg

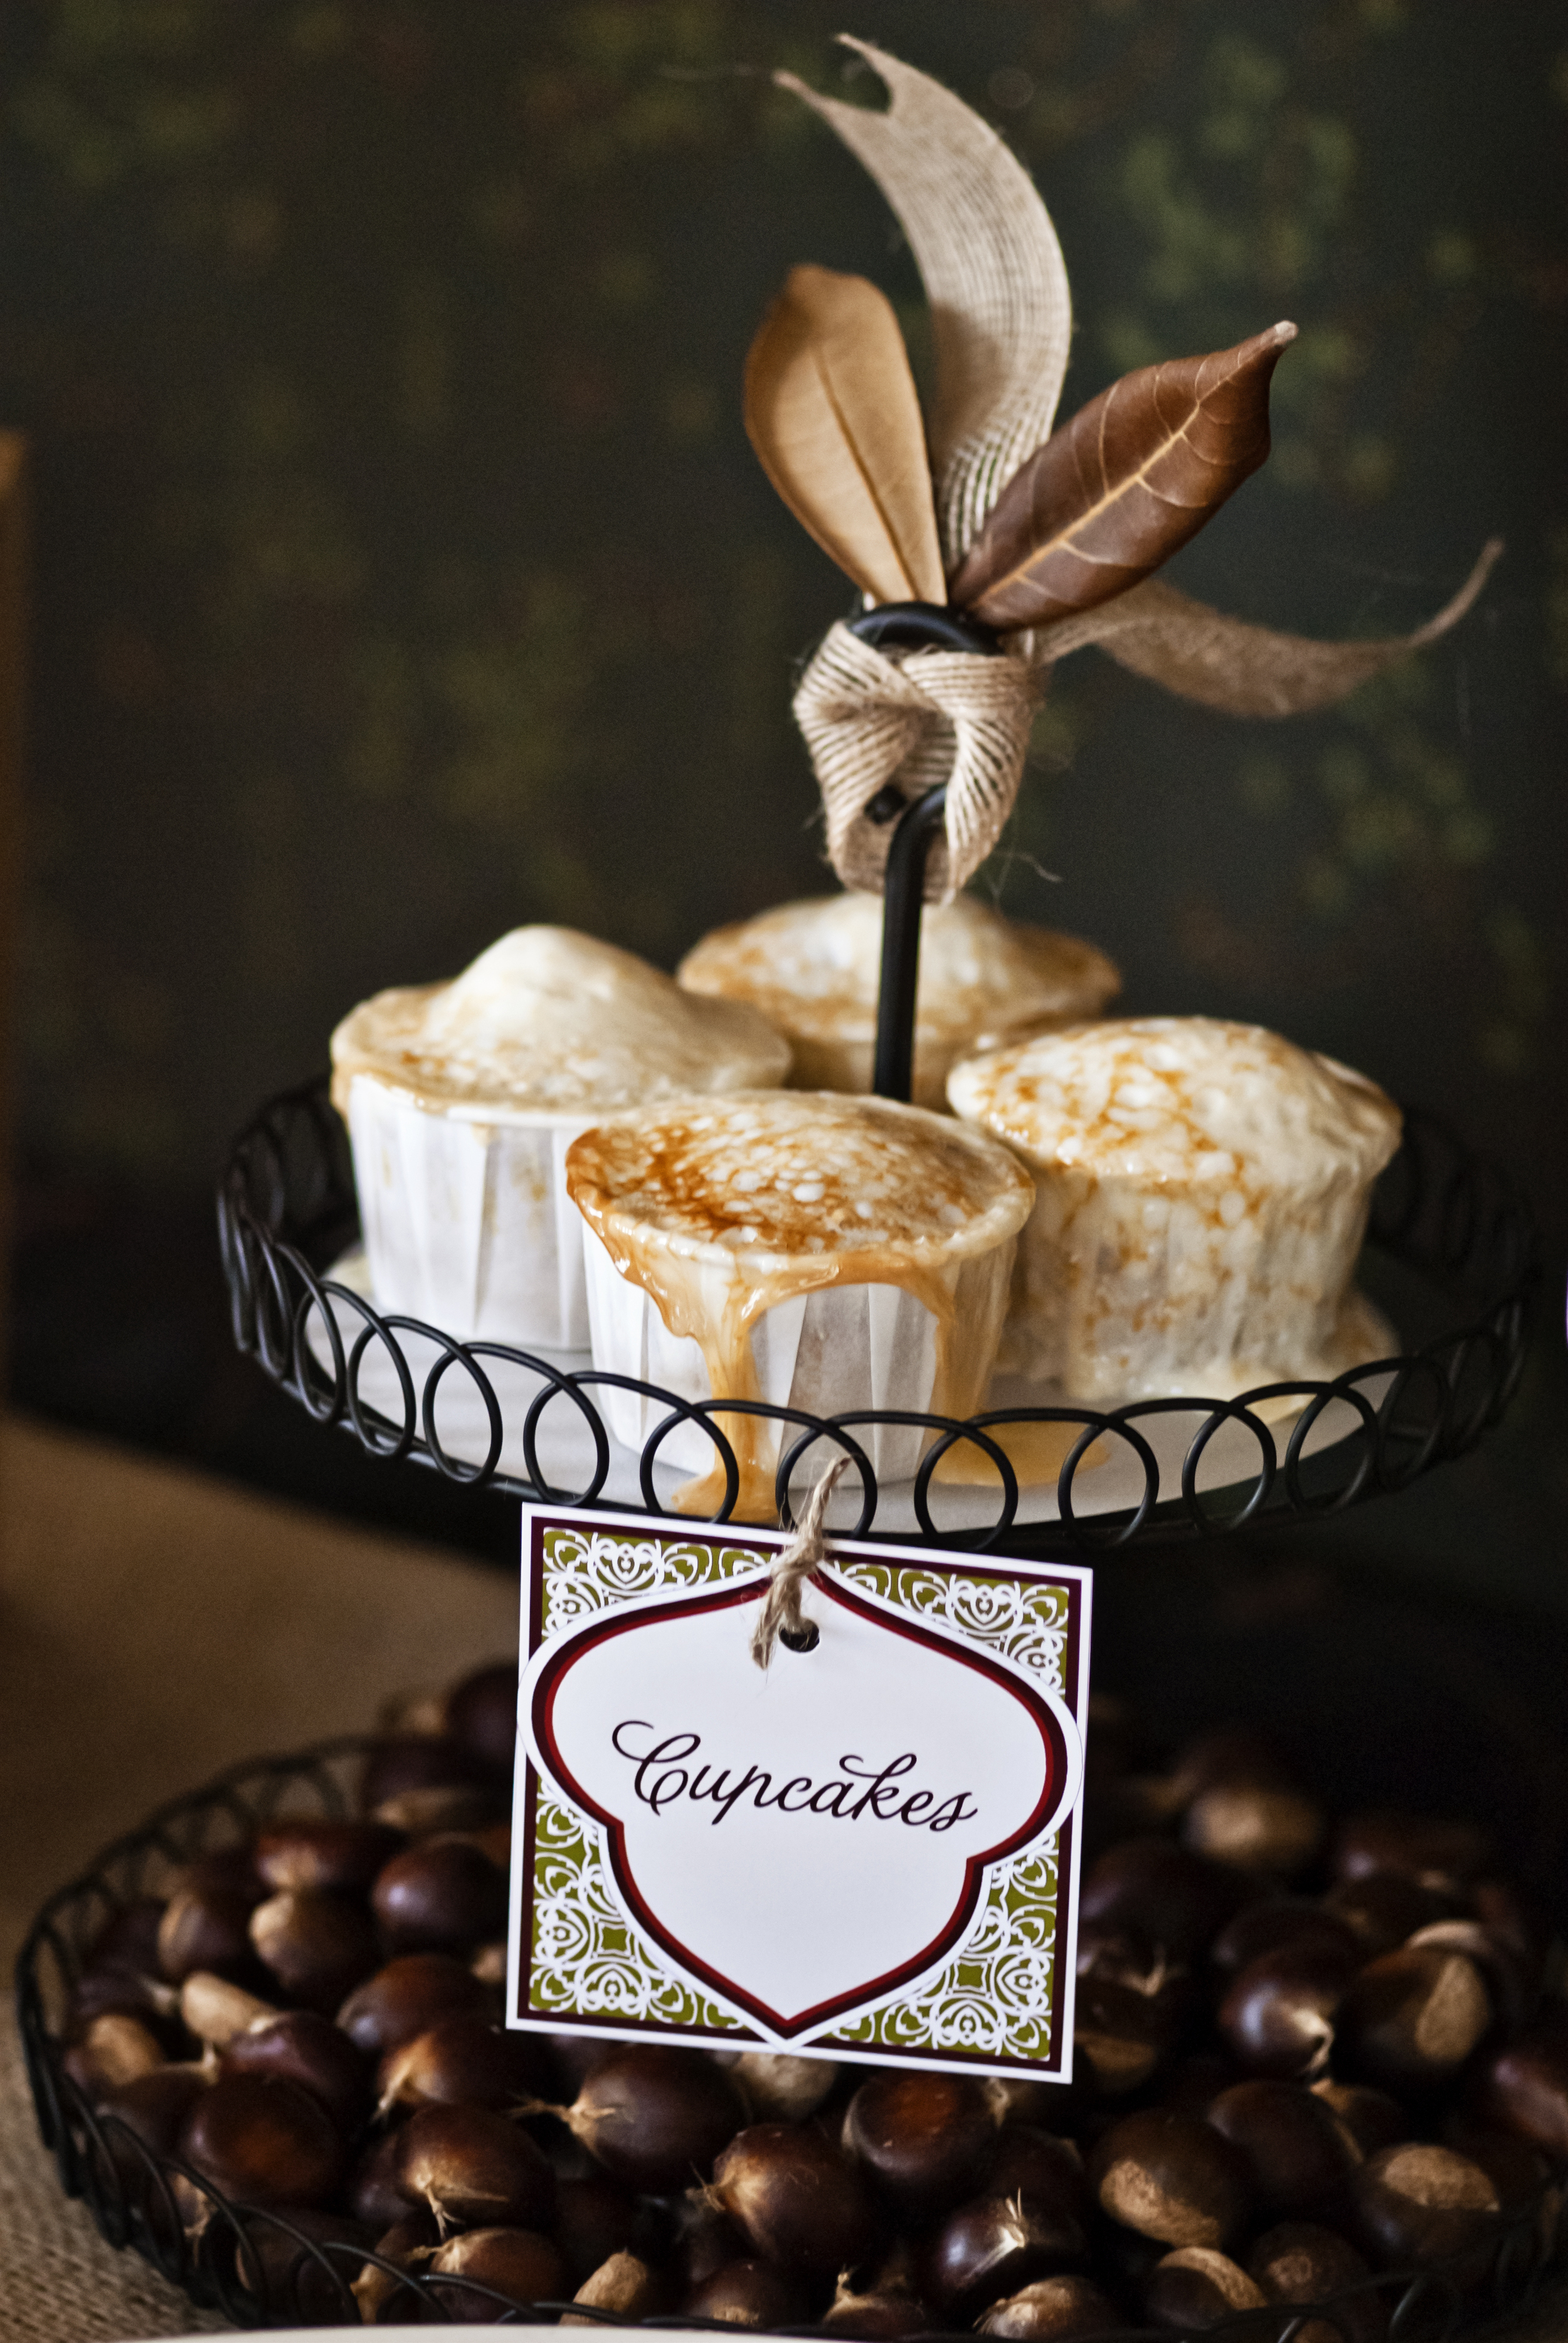
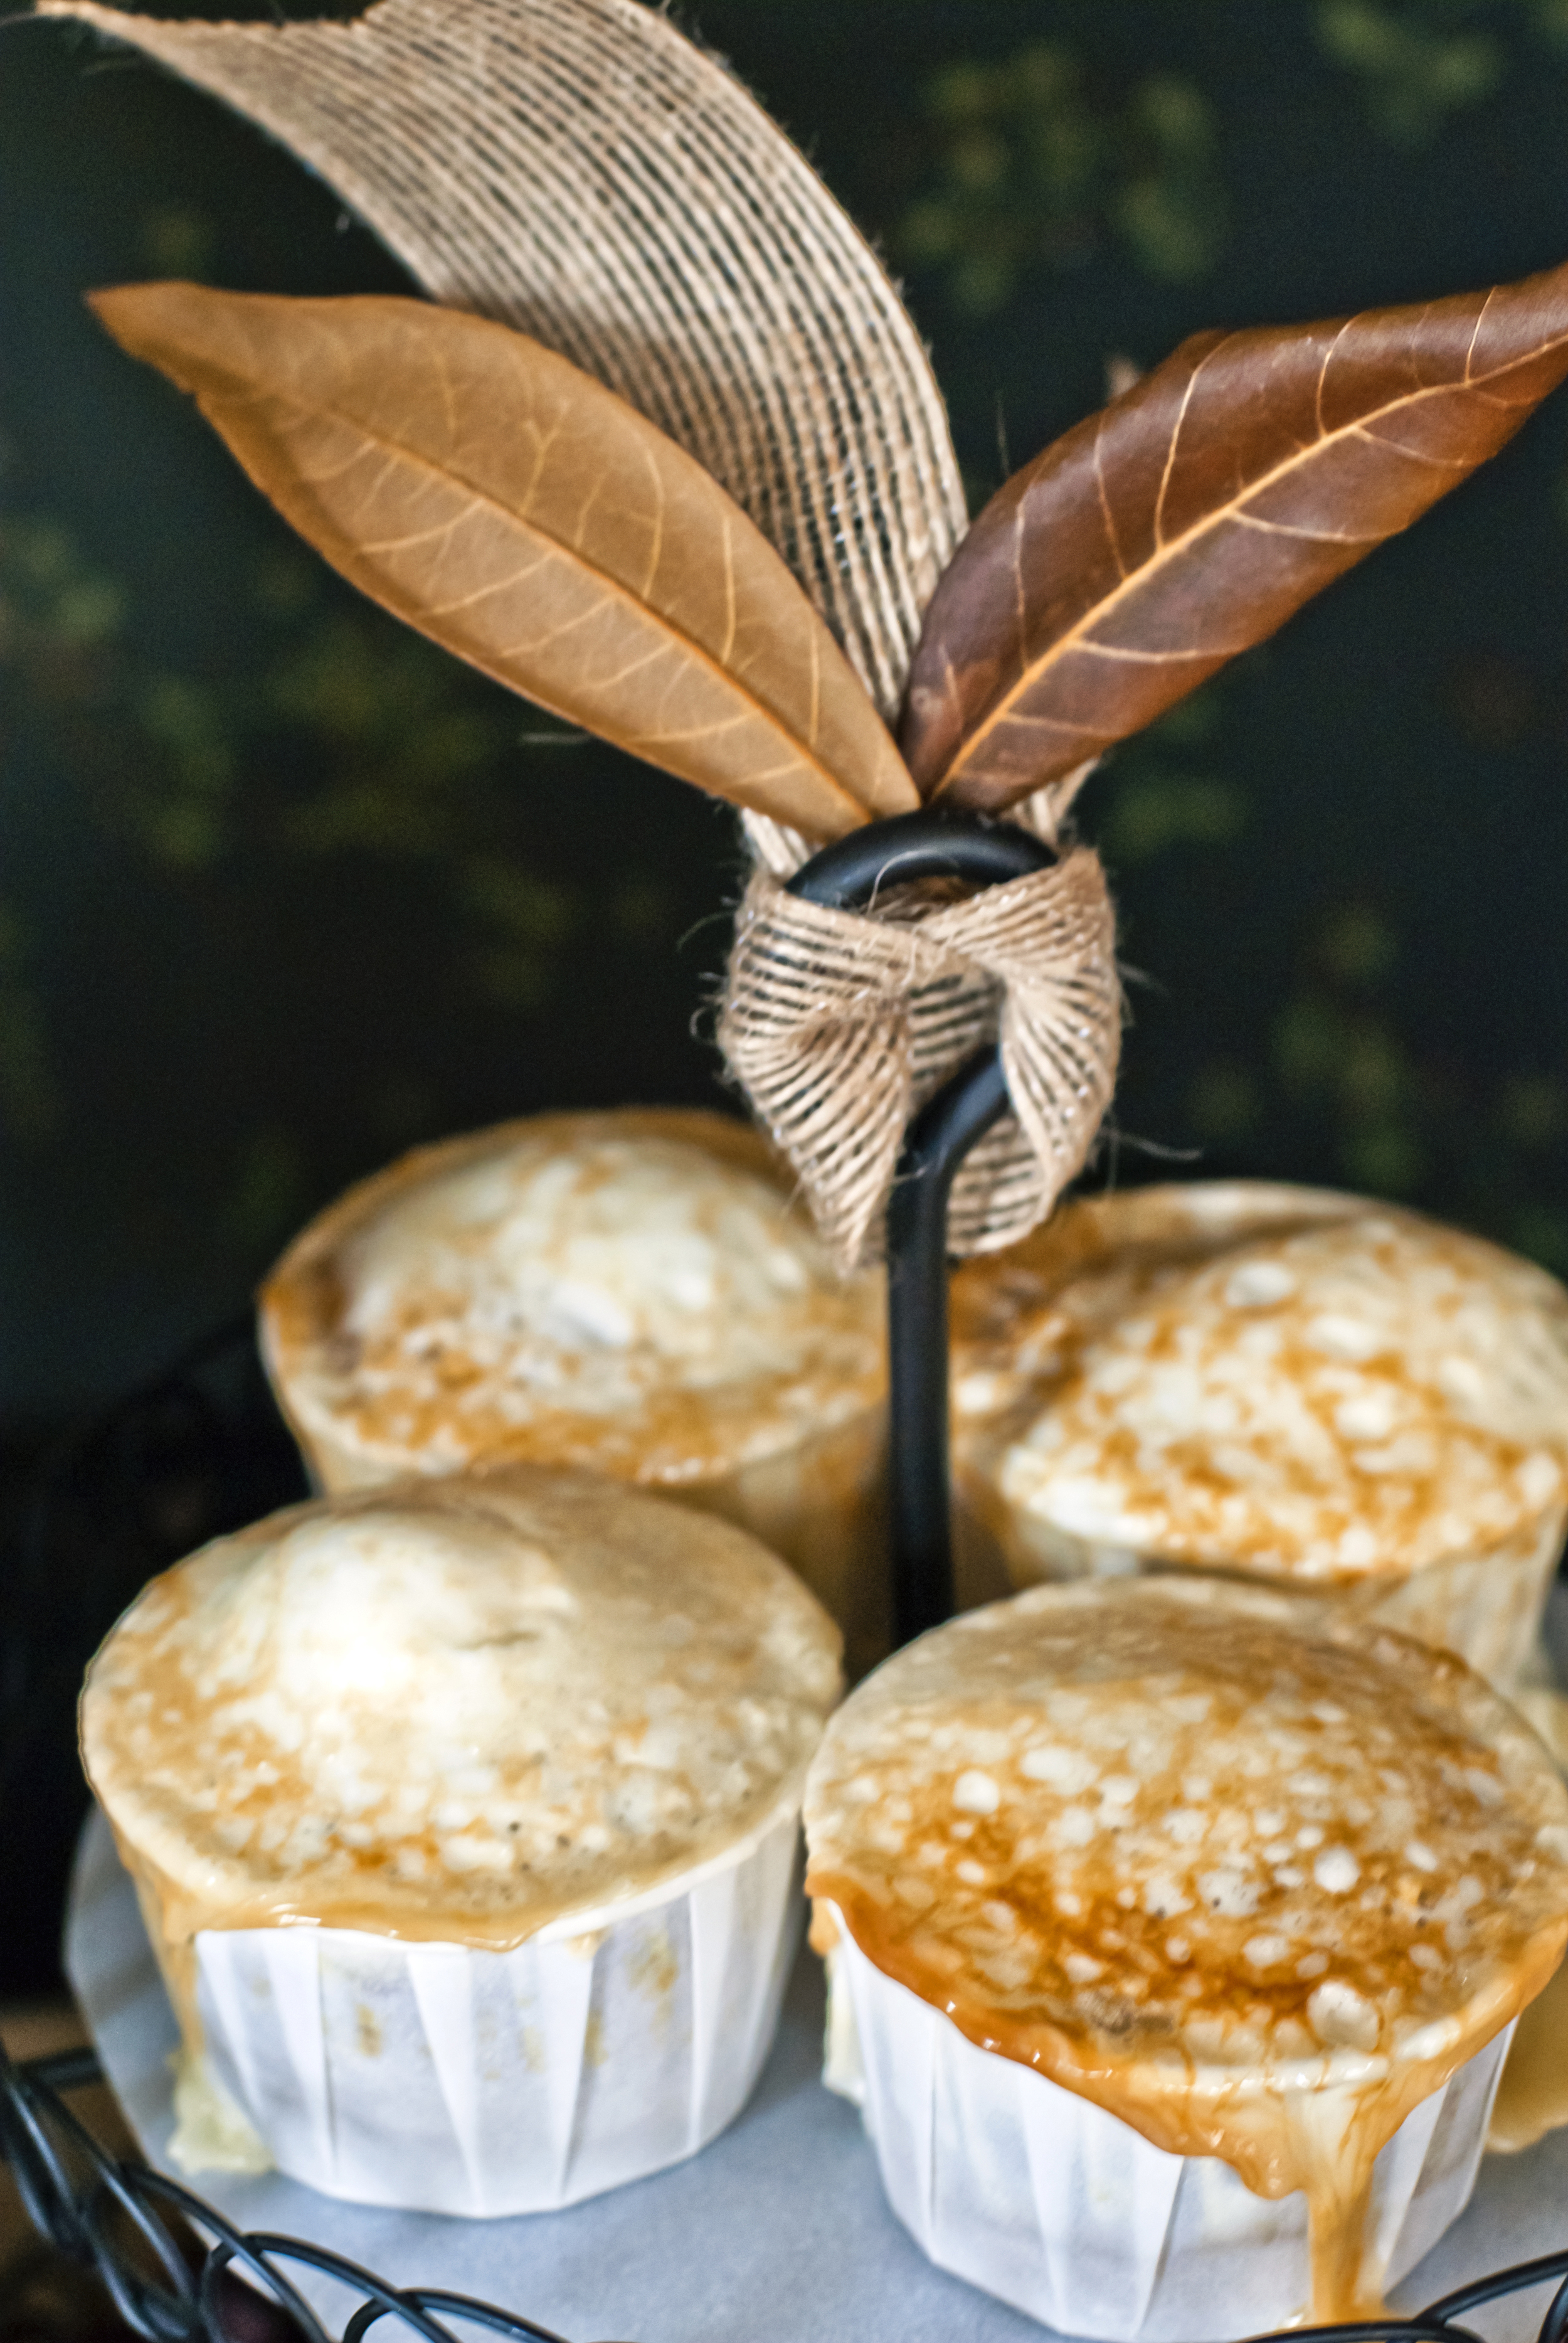
Sweet Potato Cupcakes with Toasted Marshmallow

Sweet Potato Cupcakes with Toasted Marshmallow Topping adapted from Better Homes and Gardens

These are deliciously moist and sticky just like the holiday casserole! Plus there is just something so visually appetizing about toasty marshmallow topping.

Ingredients for the cupcakes:
2 cups all-purpose flour
2 tsp. baking powder
½ tsp. baking soda
¼ tsp. salt
1 tsp. ground cinnamon
16 tbsp. unsalted butter, softened
1½ cups sugar
3 large eggs
17 oz. sweet potato puree
½ tsp. vanilla extract
For the frosting:
8 large egg whites
2 cups sugar
½ tsp. cream of tartar
2 tsp. vanilla extract


Directions:
Preheat the oven to 350° F.  Line two cupcake pans with paper liners.  In a medium bowl combine the flour, baking powder, baking soda, salt and cinnamon; stir together with a fork and set aside.  In the bowl of an electric mixer fitted with the paddle attachment, cream together the butter and sugar on medium-high speed until light and fluffy, about 2 minutes.  Beat in the eggs one at a time, scraping down the bowl after each addition.  Mix in the sweet potatoes and vanilla extract, beating just until combined.  Reduce the mixer speed to low and add the dry ingredients, mixing just until incorporated.
Divide the batter evenly between the prepared cupcake liners.  Bake for about 18-20 minutes, or until a toothpick inserted in the center comes out clean.  Let cool in the pan for 5-10 minutes, then transfer to a wire rack to cool completely.

To make the frosting, combine the egg whites, sugar and cream of tartar in the top of a double boiler. (Note: I just set my clean, dry mixer bowl over simmering water, to avoid dirtying two bowls.) Heat the mixture, whisking frequently, until it reaches 160° F with an instant-read thermometer. Transfer the mixture to the bowl of an electric mixer fitted with the whisk attachment. Whisk starting at low speed and gradually increasing to medium-high speed until stiff, glossy peaks form. Mix in the vanilla until combined. Frost cooled cupcakes as desired. Brown with a kitchen torch and garnish with a sprinkle of brown sugar, if desired.

AutumnTable_6.jpg
AutumnTable_10.jpg

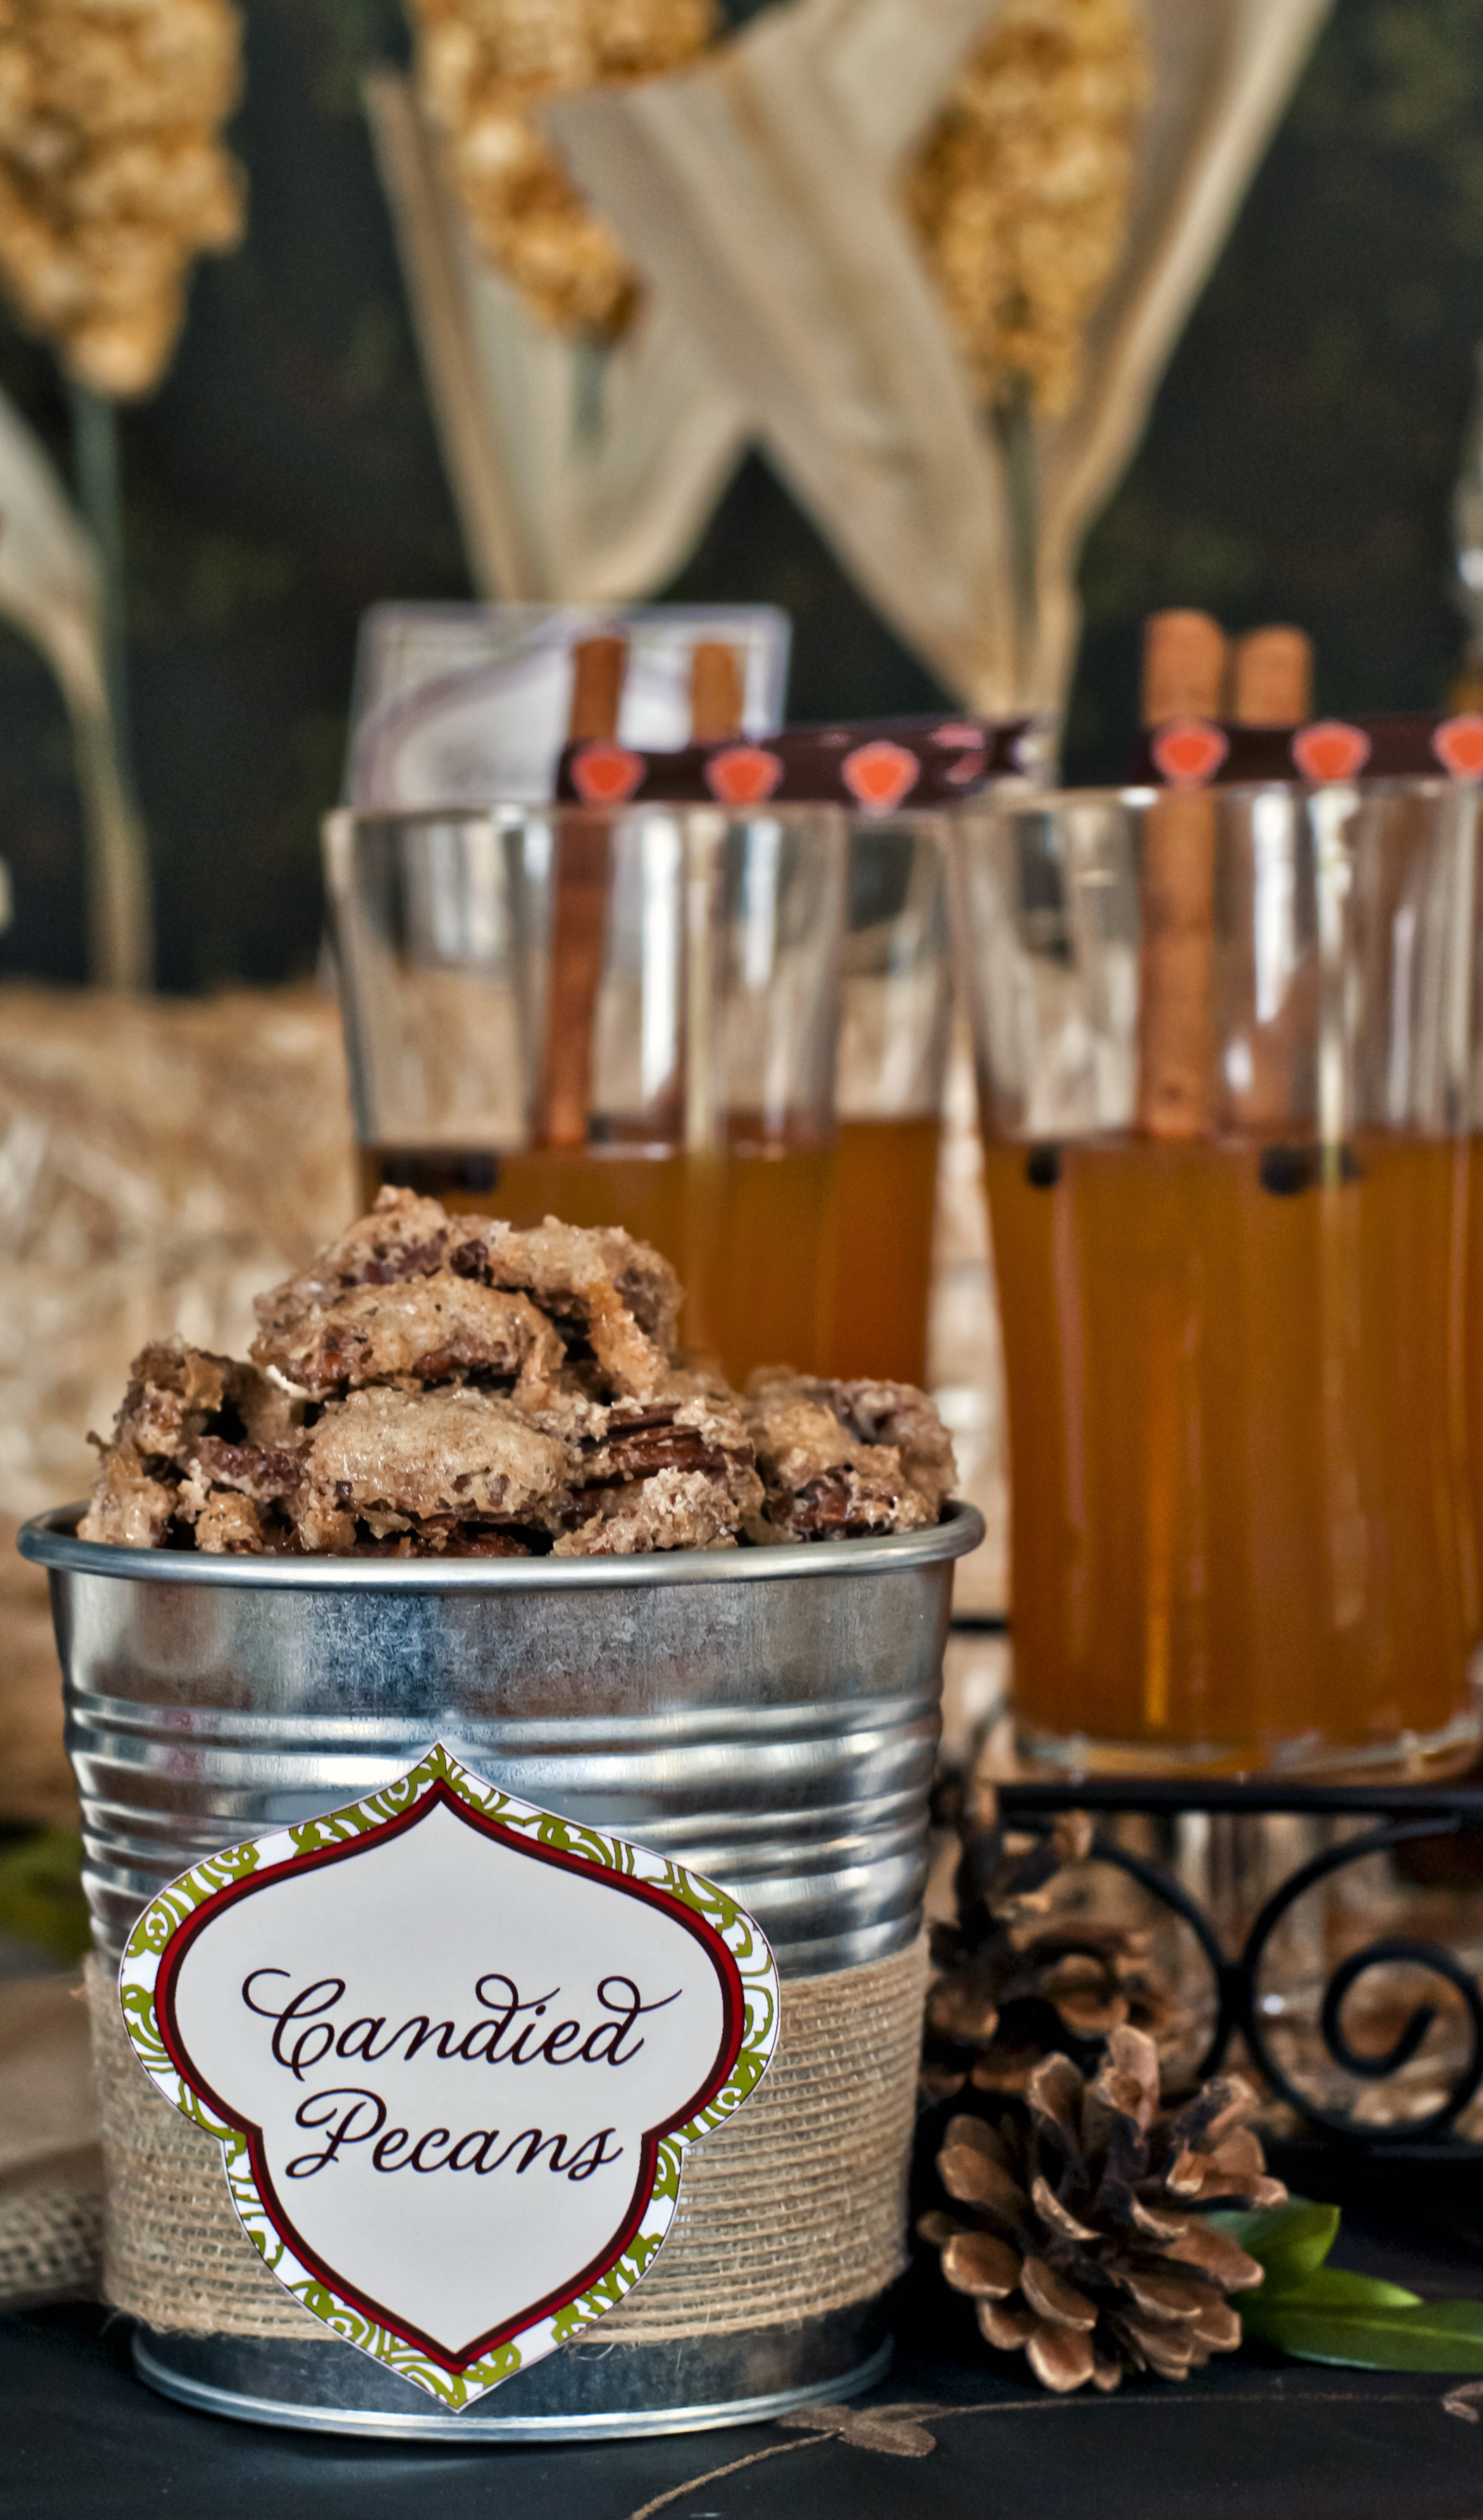
Spiced Candied Nuts

Candied Spiced Nuts

This classic recipe happens to have a bit of sentimental value to me as it was something my grandmother made for our Thanksgiving and Christmas holiday get-together. Often times I would eat so many of these before the meal I ruined my appetite.  Miss you Grandma!

Ingredients:
1 egg white beaten
1 tbsp water
½ cup white sugar
1 tsp cinnamon
½ tsp allspice
16oz. nuts (pecans, walnuts or almonds work best)
parchment paper

Directions:
Pre-heat oven to 350F degrees. In a medium size bowl beat the egg white and water until frothy, toss the nuts in with the mixture and coat thoroughly. In a separate bowl mix the sugar and spices together. Add them to the nut mixture and toss until everything is coated. Spread the mixture onto a parchment lined baking sheet and cook for 15-20 minutes until the sugar has caramelized slightly. Remove from the oven and let cool completely, then break apart and serve. These can be made and stored for up to a week ahead of time.

AutumnTable_3.jpg
AutumnTable_9.jpg

Geometric & Modern Easter Centerpiece

Making your very own Modern Easter Egg display is simple and fun!

For this Modern Easter Centerpiece DIY you will need:

⅜ ” Wooden Dowels

Wooden Skewers (the cheap bamboo kind)

Plastic Easter Eggs

Spray Paint in your desired colors

Spray Primer

Masking Tape

Drill with a ⅜ ” bit

Hand Saw

Fine Grit Sandpaper

View the pictorial then look below for detailed step by step instructions.

Step One and Two: Choose your eggs. We choose the faceted version because we really wanted that geometric element that is super modern. Break the eggs open and place a square of masking tape on the bottom of the eggs both inside and out, centered.

Step Three:  With your drill set to one of the lowest speeds, carefully and slowly drill into the center of the bottom of the eggs to create a hole for the eggs to slide down onto the dowels. Take extra care to be centered and vertical, as a slanted hole will result in your egg resting diagonally on its dowel. Remove the masking tape once this step is complete and reassemble the eggs.

Step Four: Place your wooden skewers into the ground outdoors where you wouldn’t mind if your grass or dirt were spray painted for a little while. Place your eggs on top of the skewers. (Also you are going to want to make sure it isn’t below 50 degrees outside, spray paint doesn’t like cold weather) Spray paint the eggs as uniformly as possible using your white primer. Balancing them on the skewers was the simplest way we found to make sure we could access the entire egg with the paint without having to touch it. Allow your eggs to stay on the skewers outside in the sun to dry, then paint again with your colored spray paints.

Step Five: While your eggs are drying, you can assemble your centerpiece base. Start by selecting a rectangular piece of wood for the base, marking off where you want your dowels to sit, and carefully drill your holes using the ⅜” bit. A few things to notate here: Do not drill completely through the wood, make sure your bit is perfectly vertical and you are drilling straight. Use your sandpaper to smooth the wood and prep it for spray painting. Using your handsaw, cut your wooden dowels into varying lengths, then sand them as well.

Step Six: Once you have your pieces cut and ready for paint, place your dowels into the holes pre-drilled onto the base. Give the entire assembled piece a coat of spray primer and let dry. Then remove the dowels and paint your base piece again in the color you desire. We made our dowels primer white and the base a light tan, but leaving it all white is also a nice option. Allow everything to dry properly before handling.

Step Seven: Reassemble your base piece, arranging your wooden dowels as desired. Then carefully slide an egg onto each dowel. You now have your very own Modern Easter Centerpiece.

Modern Easter Centerpiece.jpg
GeoEggDIY_0395.jpg

Ruffled Crepe Paper Garland

For this project you will need several items all purchaseable at AC Moore, or even Wal-mart. All in all this project costs less than five dollars, if you already own a sewing machine :)

2 rolls of crepe paper

1 spool of thread

1 sewing machine

scissors

Step One: Prep Work

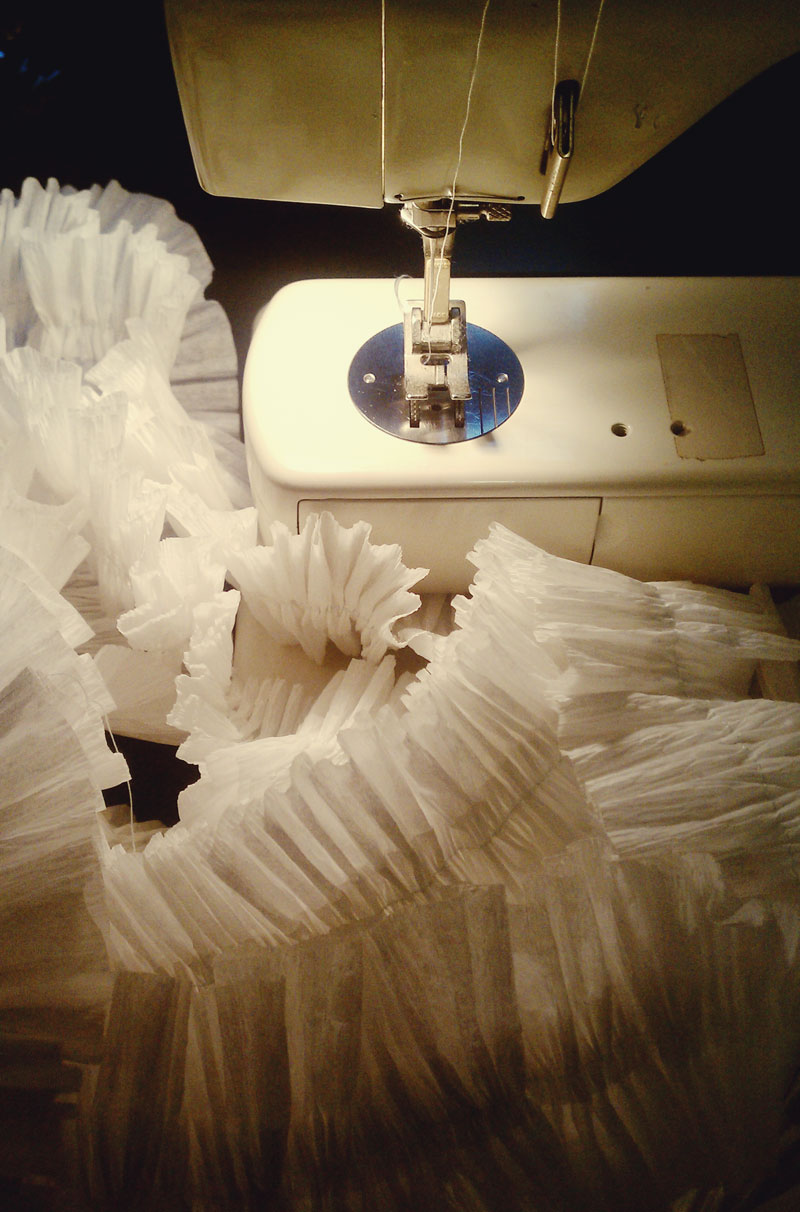
Prepare your sewing machine by threading your bobbin and needle and set your stitch length to it's longest setting, which is usually a five. You will also need to adjust the tension setting to it's highest, usually a 10. If you have an older sewing machine, you may not have the tension setting, don't sweat it. Then take your two rolls of crepe and set them side by side in your lap or where ever you prefer. Make sure you can keep the rolls at a steady unravel. You do not want them to spiral (as crepe paper so loves to do) while you are sewing. 

Step Two: Get Your Sew On

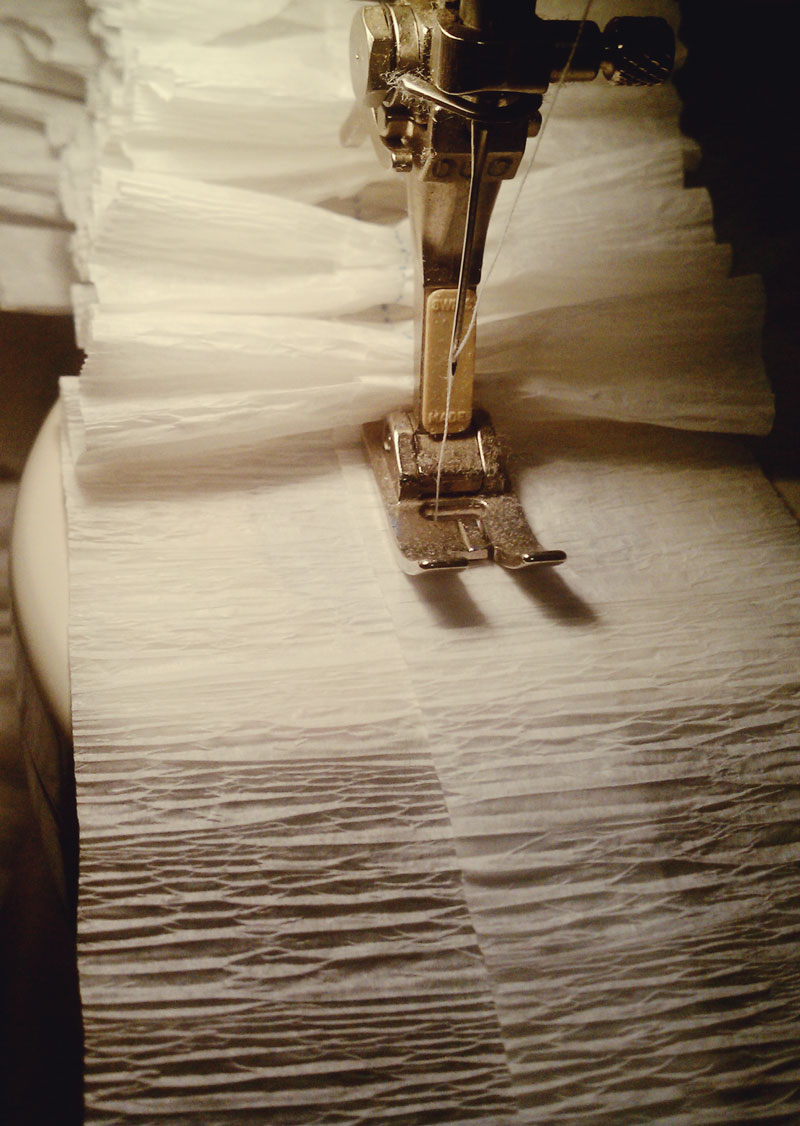
Ok so now that you are all set up and ready, take both ends of the crepe paper roll and overlap them slightly. Place them under the foot of the machine and drop the foot down to prepare to sew. Sew a few stiches slowly down the center of the overlapping papers then stop. DO NOT LIFT THE FOOT OR BACKSTITCH. Gently tie the strings at the end of your streamer so that they will not unravel as you continue. 

Step Three: Kick It Up A Notch

After you have secured the strings on the end of the streamer, it's time to get down to business. Holding your paper in the overlapping position, guide it through the machine at a quick pace. I found that the quicker I went, the more my paper ruffled.  Depending on your machine, you may want to control the thread slightly for more ruffled effect. Do this by holding the thread spool lightly to slow it down while it feeds through the machine. Watch this step here!

Step Four: Fit to Be Tied

Once you have fed all of your crepe through the machine and reach the end, you will need to break your strings and tie them gently just as you did at the beginning of the streamer. That's all folks! You now have a frilly fun ruffled streamer to use as you like!

We used white on white for our streamer garland, but feel free to experiment and use as many colors as you like. This garland can be soft and feminine or loudly screaming paaartay, depending on the colors you chose! Happy sewing!

IMAG0158.jpg
IMAG0159.jpg

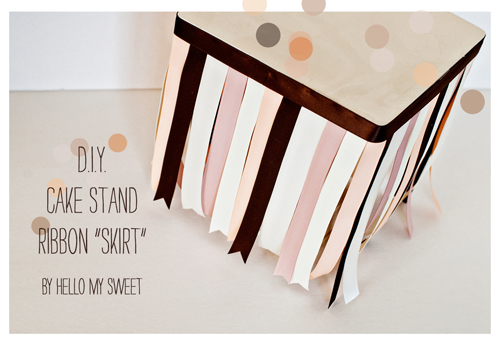
Cake Stand Ribbon Skirt

We recently threw a party where we made great use of some ribbon we already had and a cake stand we made last year. The result was a super cute Ribbon Skirt that fit around the stand. This skirt is simple to make and VERY inexpensive. It completely transformed our cake stand, and was removable, so we can use our stand again without the skirt. Since we already had the materials to make it, it cost us nothing but a couple hours! However if you did need to buy everything to make this (assuming you already have your cake stand) it would cost you about $10, and most likely less if you bargain hunt.

So let’s get right down to it.

Here is a list of the materials that you will need to make your own “Ribbon Skirt”:

Double Sided Tape or Hot Glue (depending on how you want to attach your skirt to your stand)

Scotch Tape or Masking Tape (either will work well)

Scissors

Satin or Grosgrain Ribbon (⅝” to 1” widths work best, several different coordinating colors)

Cake Stand

Step One: Choose several colors of ribbon you think will work well together as well as your cake stand in need of a temporary makeover. You’ll want to make sure that whatever ribbon you use as your “base” (the part that goes all the way around the edge) is at least as wide as the edge of your cake stand so that it covers nicely.

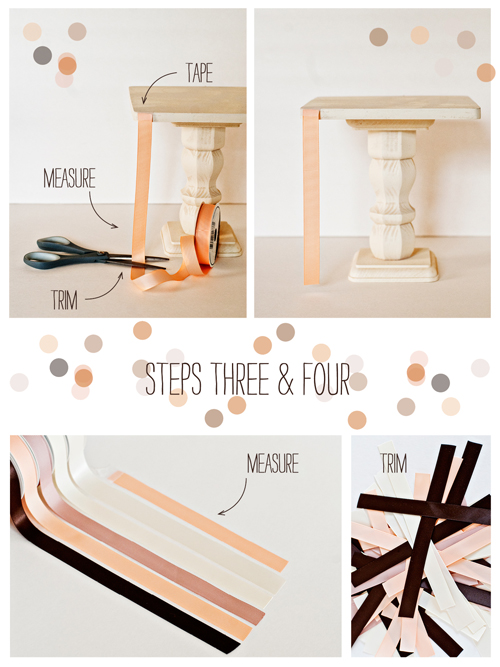
 Step Two: Take your base ribbon and tape one end to the edge of your cake stand horizontally. Wrap it around the edge staying taught and finish where you started with a bit of overlap, then trim. You should have one long piece of ribbon which you will be using to attach all of your other ribbons to. Go ahead and set it aside for now and move on to the next step.

Step Three: Choose any of your other ribbon colors and tape one end to the edge of your cake stand vertically. Let the ribbon fall down and pull it slightly taught so that there is no slack. Trim the ribbon where it meets the surface of the table or counter where you are working. You should now have one piece of ribbon that is the exact height of your cake stand. (Alternately you can make your ribbon as long or short as you want, we chose to make our the entire height of our cake stand.) Remove the tape from the piece of ribbon.

Step Four: Place your ribbon down flat onto your work surface and use it to measure out the lengths of your other ribbon pieces in each color and cut them. You will need to estimate how many pieces of ribbon it will take to build your entire skirt. This will depend on how large or small your stand is so we won’t be able to tell you an exact amount. (We started with 10 of each of our 5 colors, for a total of 50 pieces, and ended up with just a few left over.)

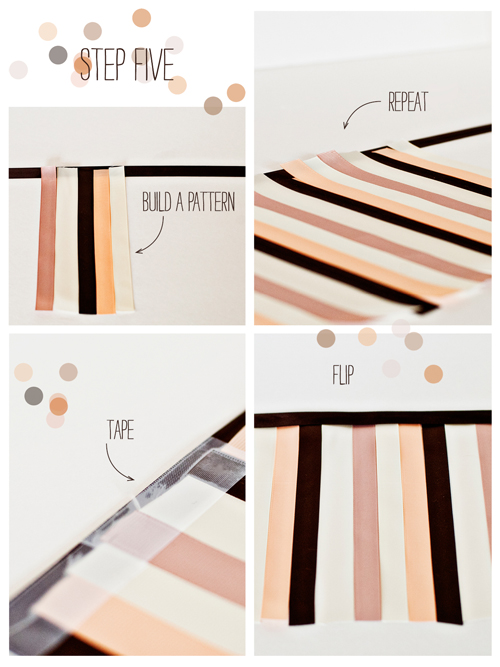
Step Five: Place your “base” ribbon from Step Two face down on your work surface. Using your cut ribbon pieces, define a pattern for your skirt. Feel free to play around with combinations, or you could simply make it random if that is how you like to roll! Remember to keep your ribbons face down if the sides differ. Once you are satisfied with your look, go ahead and layout all of your ribbon pieces from one end of the “base” ribbon to the other, keeping your ribbons touching edge to edge so that there are no gaps in between them. Starting with one end of the “base” ribbon and using your scotch or masking tape, lay down a section of tape about 4-5” long across the tops of your ribbons so that they are attaching to the base ribbon. You will want to work in sections, a little at a time, overlapping your tape as you go, until you reach the end. Your tape should be concealed and not reach over any edges of the “base” ribbon. Once you have secured all the pieces with tape you are ready to flip your completed skirt over and admire your handiwork! 
(You may be wondering “why not use glue for this process?” Glue tends to bleed through a lot of ribbons and can ruin the look of the ribbon. It is also hard to control and super messy. Tape also helps to stiffen the ribbon and make it a little sturdier and easier to handle.)

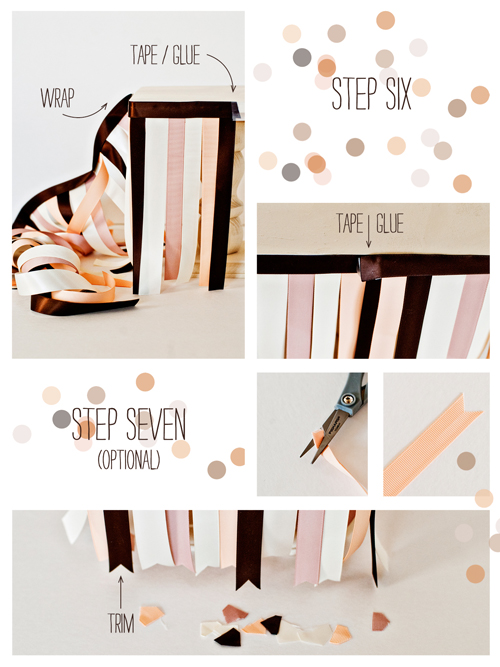
Step Six: It is now time to secure your skirt to your cake stand. When we listed the materials we mentioned two ways to do this, Hot Glue or Double Sided Tape. It will be up to you to determine which you would prefer to use for this step. (We chose tape for our because we wanted to be able to remove the skirt easily without damaging our stand. Plus it is less messy and hot glue can be unpredictable and stringy.) If you chose to tape your skirt on, you will want to work in small sections again, applying the tape to the skirt on top of the tape already there, then sticking it to the edge of your stand. If you use hot glue, you will want to work in small sections again, applying the glue in thin line on top of the tape already there, then sticking it to the edge of your stand. You’ll want to be careful that you align the edge of your ribbon skirt to the top edge of your stand all the way around.

Step Seven: (Optional Step) We wanted to jazz up the bottom edges of our ribbon strands hanging on the skirt so we chose to do a simple V cut to each piece all the way around. We just really like the way it looks and tend to do this to all of our ribbon projects. This is an optional step, and you may prefer another technique or to just leave your ribbon with a straight cut. Totally up to you!

Congratulations!

You now have your very own Cake Stand Ribbon Skirt.

Now bask in your crafting glory and enjoy your new (old) cake stand all over again!


Flair-DIY Ribbon Skirt-Header.jpg
Flair-DIY Ribbon Skirt.jpg
Flair-DIY Ribbon Skirt2.jpg
Flair-DIY Ribbon Skirt3.jpg
Flair-DIY Ribbon Skirt4.jpg
Flair-DIY Ribbon Skirt5.jpg
Flair-DIY Ribbon Skirt6.jpg

Wooden Dessert Stand

For this project you will need several common tools and several items all purchasable at most craft stores.

1 clean cloth

ruler

pencil

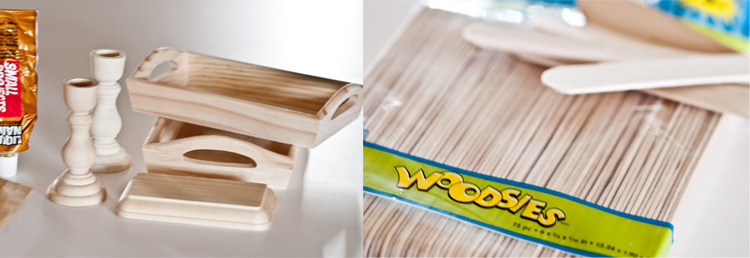
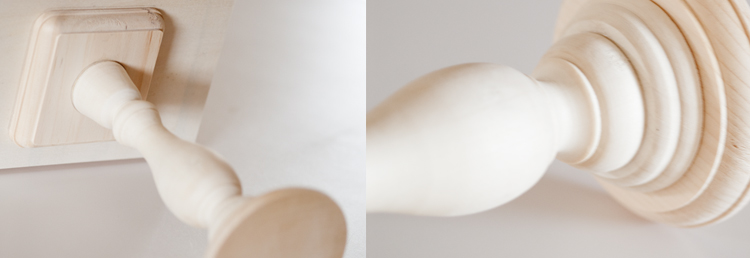
1 wooden candlestick

1 rectangular wood block

1 circular wood block

1 small wooden tray

1 pack of woodsies craft sticks

1 tube of liquid nails

1 small square of fine grit sandpaper

1 utility knife + a safe cutting surface

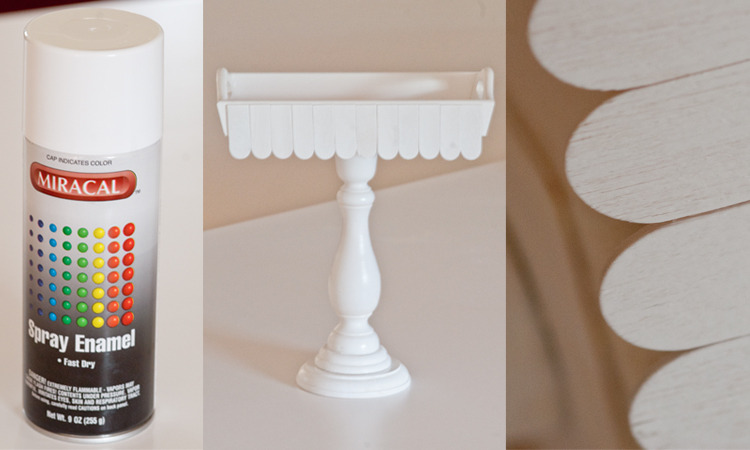
1 can of spray paint (we chose white)

empty cardboard box or safe painting area in a well ventilated space

Step One: 

Take your wooden components and lightly sand them all over to get rid of any imperfections or splintering. You want a nice smooth even surface for your glue and paint to adhere to. After sanding, wipe of any fine dust with a damp cloth, then let your pieces air dry for a few minutes.

Step Two: 

Select the circular piece of wood to be your base. Find the center of your base piece of wood and mark it by drawing on line horizontally and one line vertically meeting in the middle. Grab the candlestick and find the center of the base of it and mark it the same way. Draw your mark lines slightly up the side of the base of the candlestick about 1/8" in. Take your candlestick and apply a dab of liquid nails to the base then using the marks you made, line it up to match the center of the circular base. Do the same center marking to the rectangular wood block and the top of the candlestick, then line them up and glue together as well. You should now have a candlestick with a wooden block attached at each end. Let the piece dry for about an hour to ensure that it is secure before moving on to step three.

Step Three: 

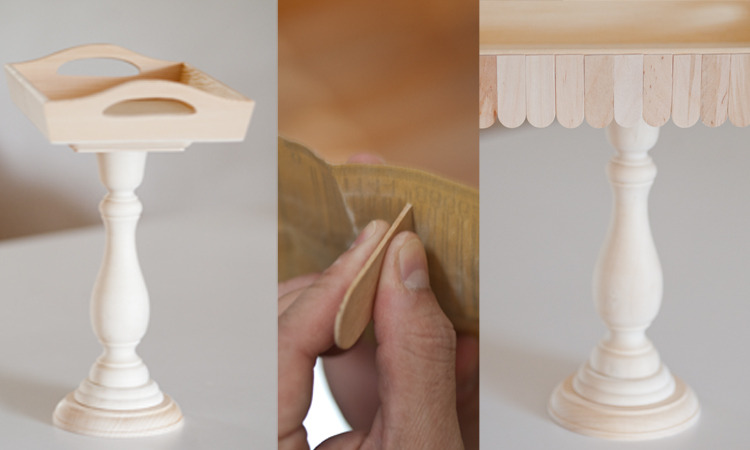
Turn your small wooden tray upside down and then find the center in the same method we did in Step Two. Do the same to the rectangular wooden block on the side that will attach to the bottom of the tray. Line 'em up and glue 'em. Let it dry an hour. Just like before. 

Alternative to Step Two/Three:

If you aren't a fan of measuring stuff, walk on the wild side and eyeball that mess. Find what looks to be the center of everything, glue them to each other. Done. 

Step Four:

Take out one of your craft sticks and hold it up to the outer edge of the tray. Decide how long you want your scalloped edge to hang down and hold it in place to mark a cut line. Take the stick and place it onto your safe cutting surface, then use the utility knife to cut on the line you marked. Use your first stick as a guide to cut all the rest to the same length. You will need approximately two dozen cut pieces to cover each long side of the tray. Lightly sand the cut edges to smooth them out. 

Step Five: 

Lay your sticks out side by side. Measure the length of about 12 sticks together, then mark that measurement on both sides of your tray, making sure to keep things centered. You want to avoid having a gap at one end with no edging. Use your guides to glue the cut sticks on to the tray sides, lining them up evenly at the top and bottom and keeping the edges flush with one another. Let dry one hour.

Spray painting can come off beautifully or badly. Its all in the...finger. And the wrist. Basically your technique is key. If you aren't already a pro at spray painting we recommend a great tutorial courtesy of Becky Higgins which you can find here.

Step Six: 

Whew, it's time to paint! So don't sweat all those pesky little marks we made you draw cause they are all about to disappear. We recommend you spray two to three coats of your paint. The wood is going to soak it up a bit at first, so if you prefer you can apply a light base coat of primer beforehand. If you are an old hat at this stuff, you don't need us to tell you anymore. But if you are a newbie to spraying paint then we do recommend you read the tutorial on spray painting. Allow your paint to dry according to the manufactuer's recommendations. You are done!

Note: If you plan to serve food that is not wrapped on your dessert pedestal you will need to do one of two things beforehand. You can either make an insert to put onto the bottom of the tray area to serve as a barrier between the painted surface and the food or you can apply a foodsafe top coat to the inside area of the tray where the food will touch. We chose the first option. 

DIY-TrayStand-1.jpg
DIY-TrayStand-2.jpg
DIY-TrayStand-3.jpg
DIY-TrayStand-4.jpg
DIY-TrayStand-5.jpg

Red Velvet Cake

The Best Red Velvet Cake Recipe (adapted from Saveur)

Cake Ingredients & Instruction

2 1/2 cups cake flour

1 1/2 cups sugar

1 tsp. baking soda

1 tsp. cocoa powder

1 tsp. salt

2 eggs

1 1/2 cups vegetable oil

1 cup buttermilk

1 oz. red food coloring

1 tsp. vanilla extract

1 tsp. white distilled vinegar

Preheat oven to 350°. Grease three 6” or 8” round cake pans with butter. Add a round of parchment paper to the bottom of the pan, then butter again. Dust lightly with flour and set aside.

Combine flour, sugar, baking soda, cocoa, and salt into a bowl.

Beat eggs, oil, buttermilk, food coloring, vanilla, and vinegar in a separate bowl with an electric mixer until combined.

Incorporate the dry ingredients gradually into the wet and beat until smooth, 1-2 minutes. Divide batter evenly between pans.

Bake cakes, rotating halfway through, until a toothpick inserted in the center of each cake comes out clean, 25–30 minutes for 8” pans, 35-45 minutes for 6” pans.

Let cakes cool for 5 minutes, then invert each onto a plate, then invert again onto a rack. Let cakes cool completely before frosting.

Use a cake leveler or a serrated knife to level off the tops of your cakes so that you are left with flat even tops. Save the tops for garnish.

Frosting Ingredients & Instruction

12 oz. cream cheese, softened

12 oz. butter, softened

1 tsp. vanilla extract

3-4 cups confectioners’ sugar

Chopped pecans or walnuts to garnish (optional)

Beat cream cheese, butter, and vanilla in a bowl with an electric mixer until well combined.

Add sugar gradually and beat until frosting is smooth.

Cake Assembly & Decorating

Put one cake layer on a cake plate or stand then spread one-quarter of the frosting on top.

Set another layer on top and repeat frosting.

Set remaining layer on top and sides first, then the top with the remaining frosting.

If you planned to use pecans or walnuts, press them into the sides of the cake.
If you planned to use cake crumb for garnish, put your extra cake tops from step 7 above into a processor until you have crumbs. 

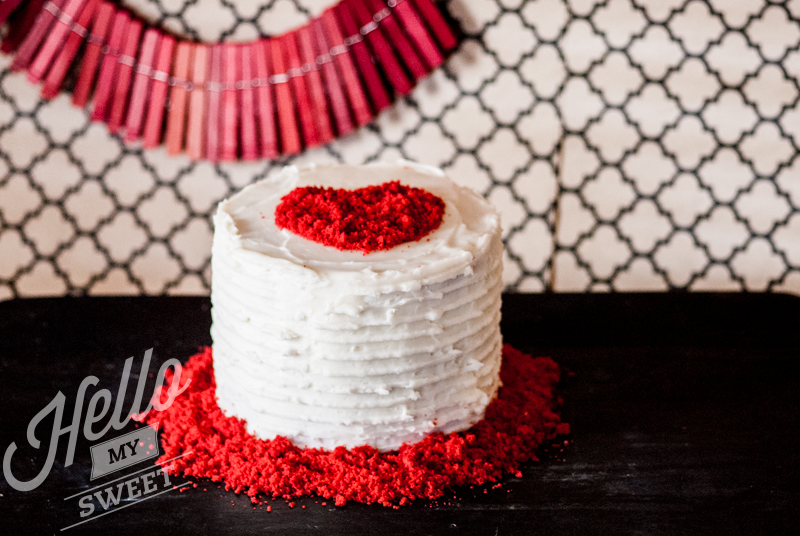
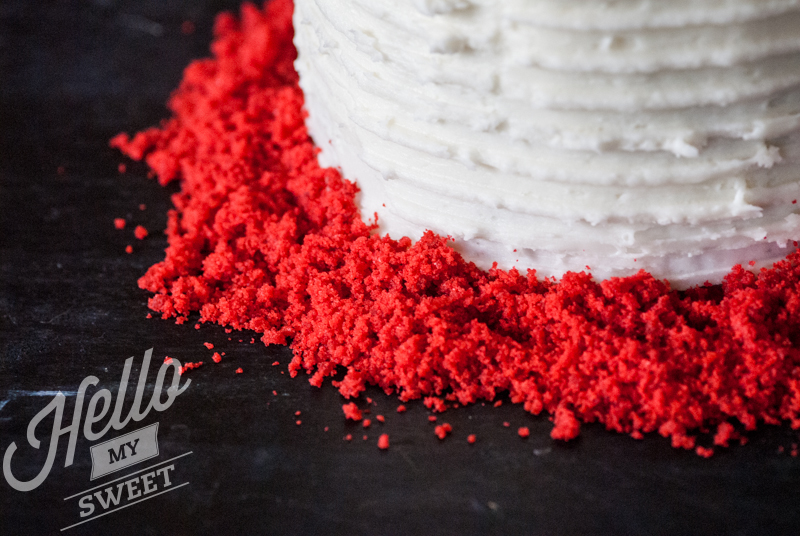
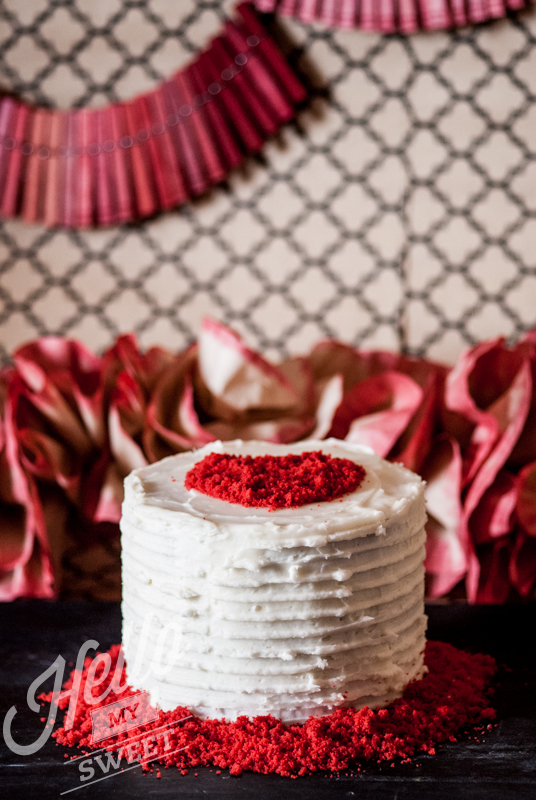
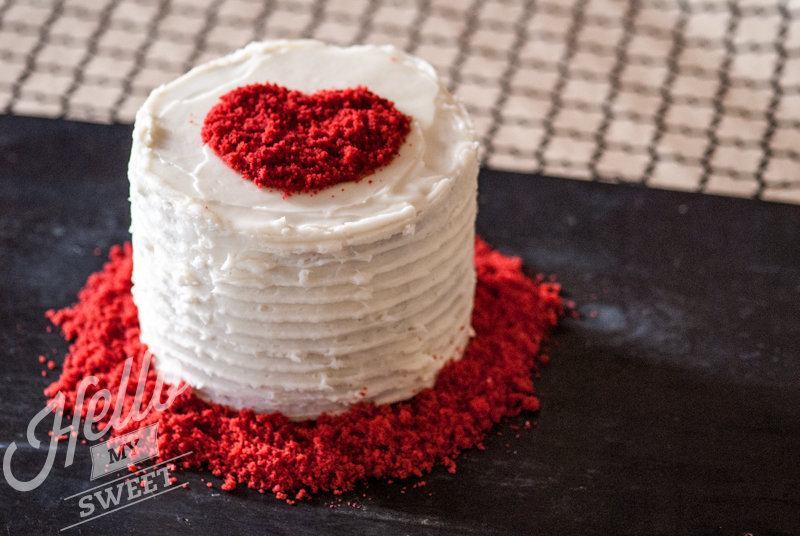
Sprinkle the crumb to add garnish around the base of your cake or onto the top for a bright flash of red!

wValentine2013-14.jpg
wValentine2013-4.jpg
wValentine2013-19.jpg
wValentine2013-1.jpg
wValentine2013-11.jpg

Ombre Clothespin Garland

This DIY Ombre Clothespin Garland is super easy and inexpensive to make. It just requires a bit of time and patience, and clothes you don’t mind dying a different color. I made the mistake of wearing a new mint green cowl neck sweater I was especially proud of since I found it on clearance at Target for less that $8. Since it quickly became mint green with bright red spots, I went ahead and dyed it too once my clothespins were finished. Still kind of sore about that one. I really liked the green.
For this project you will need:

Wooden Clothespins (We prefer the kind they sell at Dollar General, Wal-Mart pins are stain resistant and do not dye as well.)

String, Clothesline or Twine for hanging

Rit Dye, Plastic Containers, Hot Water, Newsprint or Paper for drying.

Patience and Old Clothes

Warm Sunshine or an Oven that reaches at least 250 degrees

About $7 for materials

Step-by-step pictorial shown first, then see below it for the directions that follow.

Step One: Remove nice clothing and replace it with clothing you don’t mind getting messy. This is really just a precaution, but if the dye splashes unexpectedly, you will instantly regret skipping this step. Trust me.
Step Two: Prepare hot water (almost boiling) and fill several plastic containers. Immediately add as much or as little dye to each container as you want. We used two containers, and gradually increased the amount of dye in each one with each new batch of pins we added. The more dye you add, the darker the color of course. We started ours with just a few teaspoons for the lightest shade of our ombre.
Step Three: Turn on your patience. Add as many pins as you want to each of your containers and move them around and dunk them so that they are fully covered. You will want to turn them over and move them around several times while you wait to make sure each side gets dyed evenly. We used another clothespin to do our adjusting so that we weren’t coloring our hands. You will need to wait a minimum of 10 minutes for each batch to absorb the dye.

Step Four: Carefully remove the pins using tongs or another clothespin, one at a time and place them onto your drying surface. Try to keep your groups together as this will make assembly easier in the end, rather than mixing your color shades all together.

Step Five: Once you have all of your pins dyed, place them in a warm dry sunny spot outside to dry. Alternatively you can place them on lined baking sheets in the oven at 250 degrees for about 30-45 minutes also. (This is what we did.) 

Step Six: Once your pins are dry it is time to assemble your garland. Your options here are totally up to your creativity. You could hang your pins onto your garland string going from light to dark, or you could place your lightest pins in the middle and go darker on each side working outwardly.

Get creative with your garland. Fancy things up by adding a transparent glitter for shimmer or even painting the tips a metallic color to add contrast! If I had it to do over again, I would have added a nice punch of Silver to the tops of each of my pins above the metal hinge. You can use this in a child’s room to hang artwork, as a backdrop for party decor, a fun photo booth prop or wedding decor. Use multiple colors and even create a rainbow spectrum by combining dyes.

We hope you enjoyed this easy on the eyes, wallet and skill level DIY Ombre Clothespin Garland.

OmbreClothespinDIY.jpg

Flamingo Sugar Cookies

Follow along with our step by step pictorial to make the most delicious and beautiful Pink Flamingo Sugar Cookies!

Decorated Flamingo Cookies - Sugar Cookies with Royal Icing

You will need:

One recipe Sugar Cookies, baked.

One recipe of Royal Icing, tinted in pink, yellow.

Black sanding sugar & Black non-pareils for decoration.

Flamingo Cookie Cutter

Baking supplies including a cookie sheet, rolling pin, sil-pat or parchment paper & spatula.

SUGAR COOKIE RECIPE

2 cups all-purpose flour

1/4 teaspoon salt

1/2 teaspoon baking powder

1/2 cup (1 stick) unsalted butter

1 cup sugar

1 large egg, lightly beaten

2 tablespoons milk

1/2 teaspoon vanilla extract

Directions:

Whisk together flour, salt, and baking powder in a medium bowl; set aside.

In the bowl of an electric mixer fitted with the paddle attachment, cream butter and sugar; mix until light and fluffy.

With mixer running, add egg, milk, and vanilla; mix until well combined.

With the mixer on low, slowly add the flour mixture. Mix until just combined.

Move dough to a work surface. Shape into 2 discs, cover with plastic wrap, and refrigerate for at least 1 hour.

Preheat oven to 350 degrees. Line baking sheets with nonstick baking mats or parchment paper; set aside.

On a lightly floured work surface, roll out dough to 1/8-inch thickness.Cut with your cookie cutter.

Transfer to prepared baking sheets, leaving an inch in between. Bake until lightly golden, about 10 minutes; do not allow to brown. Transfer to wire racks to cool.

ROYAL ICING RECIPE

1 lb powdered sugar

5 tablespoons meringue powder or 2 large egg whites

food coloring

water

Directions:

In the bowl of an electric mixer fitted with the paddle attachment, combine sugar and meringue powder. Mix on low speed, add a 1/2 cup water. For flooding, gradually add more water a tablespoon at a time until you reach a consistency where the icing is ribbon-ing. Mix until icing holds a ribbon like trail on the surface of the mixture for 5 seconds when you raise the paddle.

Separate and divide the icing into bowls and tint each, one with pink and the other with yellow food coloring.

ICING THE DECORATED FLAMINGO COOKIES

Fill squeeze bottles with the icing (see this video for tips on how to do this) and decorate cookies using the technique shown here. Only not bunnies 

Use the icing to decorate the cookie as shown in the photos, use sanding sugar to define the tip of the flamingo nose and a nonpareil for his eye.

Allow to dry for at least 12 hours before handling.

We wish you great success with your decorated flamingo cookies! Remember, if you run into a snag, Martha always knows the answer. (Not to leave you hanging or anything but she is the master cookie maker!)

Visit us at Hello My Sweet for more Festive Flamingo Christmas decor, if you are really into pink and feathery for the holidays!


Flamingo Cookie Recipe.jpg

Painted Tree Ornaments

For this particular DIY, we were aiming for Christmas tree ornaments that matched the theme of our Festive Flamingo party decorations. You would not believe how hard it is to find pink glass ball ornaments here locally. So hard in fact, we couldn’t find any. Instead we bought what we could find, white ornaments. We live in a pretty small town where our only shopping options are Wal-mart, K-Mart, Dollar General, Family Dollar, Joann Fabrics and Dollar Tree. Jason is very resourceful however, and most of the time he still manages to find what he is looking for. However when he doesn’t, we end up with a DIY project such as paint your own ornaments.

For this project you will need:

Wooden Dowels

Glass or Shatterproof Plastic Ornaments

Spray Paint in your desired color

Painter’s Tape or Stickers (optional for creating patterns)

Step One: Remove the ornament tops/hangers carefully and set them aside.

Step Two: Place your wooden dowels into the ground outdoor where you wouldn’t mind if your grass or dirt were spray painted for a little while. Place your ornaments upside down on top of the dowels. (Also you are going to want to make sure it isn’t below 50 degrees outside, spray paint doesn’t like cold weather)

Step Three: (Optional: Place your tape or your stickers onto the ornaments in whatever pattern you desire, this will hide the original color during painting and reveal a pattern or image afterwards once the paint is dry and you remove it.) Spray paint the ornaments as uniformly as possible. Balancing them on the dowels was the simplest way we found to make sure we could access the entire ornament with the paint without having to touch it. Allow your ornaments to stay on the dowels outside in the sun to dry for at least an hour before removing them.

Step Four: Replacing the ornament hangers. (Optional: If you chose to mask off a pattern with tape or stickers, carefully remove this at this time.)

Step Five: Decorate! Use your newly customized ornaments on your tree, on a wreath or on your garland and reveal your spray painting resourcefulness!


Flamingo DIYs2.jpg

Patriotic Cupcake Wraps

Patriotic Cupcake Wraps

Jason came up with the most genius idea for our Stars and Stripes product photos. I planned to showcase our latest cupcake stand design with pretty cupcakes and sparklers, but that was the extent of my thought process. This is why we work well together, Jason swoops in with an idea to make it go from "meh" to fab! We're using a small print copy of the constitution and our cupcake template to make these fabulous patriotic cupcake wraps. If you've never used our cupcake wrap template, you are missing out. We try to keep costs down wherever possible, and using your own paper printing out template onto it, and the cutting them out costs next to nothing. Packs of decorative cupcake wraps can cost $1 per wrap! That adds up quickly. If you have a get together planned with cupcakes, this is a perfect and simple way to jazz up the dessert table.

image.jpg
prev / next
Back to DIYs & Recipes
CitrusBrunch_0331.jpg
2
Citrus Cake Recipe
CitrusBrunch_0143.jpg
5
Easy Canvas Art
HLH_1488_0399.jpg
6
Clay Pot Cake Stand
VinFoot_34.jpg
5
Beer, Bacon & Cheddar Cupcakes
FlairXchnge_7.jpg
7
Football Field Table Cover
Jaws_21.jpg
3
Life Preserver Donuts
HLH_1586_0521.jpg
3
Retro Ray Guns
RRR_21.jpg
5
Astronaut Helmet Candy Dish
bMovieHelloMySweet_0194.jpg
5
Mummified Candy Bars
bMovieHelloMySweet_0246.jpg
6
Foo Fighter Treats
bMovieHelloMySweet_0308.jpg
3
Killer Halloween Sugar Cookies
Halloween2011_Apple2.jpg
5
Candy Apple "Staked Hearts"
Halloween2011_8.jpg
3
Mummified Pretzel Treats
Halloween2011_.jpg
3
Peanut Butter Ghost Treats
Halloween2011_6.jpg
3
Gooey Zombie Brain Cupcakes
Halloween2011_7.jpg
2
Reanimated Marshmallow Pops
AutumnTable_Pumpkinweb.jpg
3
Best Pumpkin Cake Recipe
AutumnTable_2.jpg
2
Easy Acorn Cookies
AutumnTable_caramelcorn.jpg
3
Caramel Corn Stalks
AutumnTable_Marshweb.jpg
2
Sweet Potato Cupcakes with Toasted Marshmallow
AutumnTable_nutsweb.jpg
2
Spiced Candied Nuts
GeoEggDIY_0420.jpg
1
Geometric & Modern Easter Centerpiece
RuffledCrepe_3.png
2
Ruffled Crepe Paper Garland
Ribbon-Skirt.png
7
Cake Stand Ribbon Skirt
wooden-dessert-stand.png
5
Wooden Dessert Stand
wValentine2013-11.jpg
5
Red Velvet Cake
wValentine2013-5.jpg
1
Ombre Clothespin Garland
Holiday2012DIYs-0197.jpg
1
Flamingo Sugar Cookies
Holiday2012DIYs-3247.png
1
Painted Tree Ornaments
image.jpg
1
Patriotic Cupcake Wraps